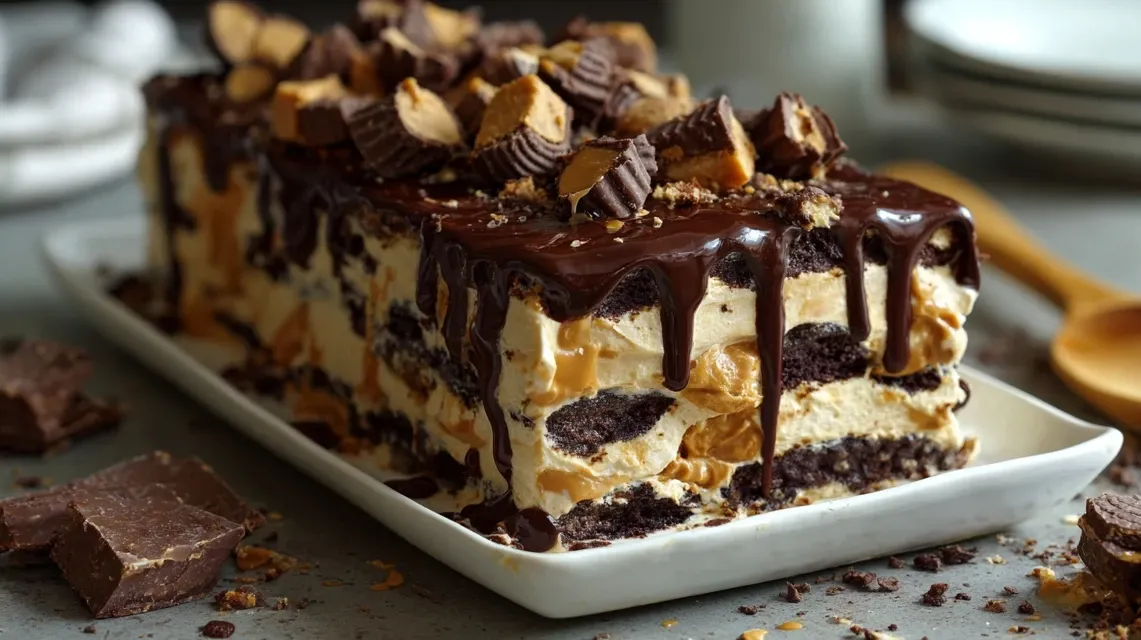
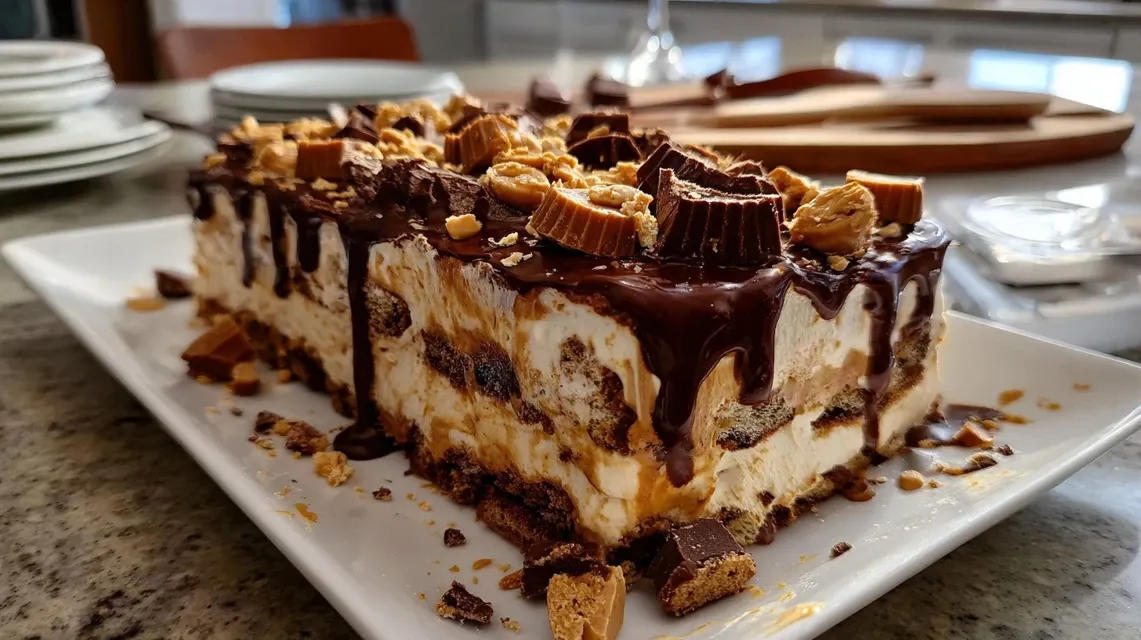
I first made this Peanut Butter Cup Icebox Cake for my grandson’s birthday, and it’s been a family favorite ever since. It’s the easiest way I know to get that rich, creamy peanut butter and chocolate flavor without ever turning on the oven.
There’s a certain magic to no-bake desserts, especially when the weather gets warm or life gets busy. I remember one particular summer afternoon when the grandkids were craving a special treat, but it was just too hot to even think about preheating the oven. That’s when I turned to this family-favorite Peanut Butter Cup Icebox Cake. The recipe came together so quickly, layering the rich, fluffy peanut butter filling between crisp chocolate wafers. Seeing their eyes light up as they took that first bite of the chilled, creamy dessert was priceless. It’s more than just a cake; it’s a simple, stress-free way to create sweet memories. Ready to make your own?
Why You’ll Love This No-Bake Peanut Butter Dessert
This no-bake peanut butter dessert is a lifesaver for anyone who needs a stunning treat without the fuss—just like our rich Salted Caramel Chocolate Fudge Cake. It’s a modern, indulgent twist on the classic icebox cakes my own mother used to make, combining the timeless duo of chocolate and peanut butter into one unforgettable dish.
- Absolutely No Baking Required: You can make this entire dessert without ever turning on your oven, which makes it perfect for hot summer days or when you need your oven for other dishes.
- Uses Simple, Everyday Ingredients: You only need seven common ingredients that are easy to find at any grocery store.
- Perfect for Making Ahead: This cake is actually better when made the day before, as it gives the cookies time to soften and the flavors time to meld together perfectly.
- A Guaranteed Crowd-Pleaser: The rich, creamy texture and classic flavor combination are loved by kids and adults alike. It’s my go-to for potlucks and family gatherings, along with desserts like our crowd-pleasing Reese’s Caramel Cheesecake.
- Incredibly Rich and Creamy: The whipped cream and peanut butter filling creates a light yet decadent texture that melts in your mouth.
“This Peanut Butter Cup Icebox Cake is more than a recipe—it’s a celebration in a dish.”
Ingredient Note List
Creamy Peanut Butter: In my kitchen, I prefer using a standard processed creamy peanut butter because it combines smoothly and won’t separate in the filling.
Powdered Sugar: This ingredient dissolves instantly into the peanut butter, ensuring a smooth, grit-free texture for the filling.
Heavy Whipping Cream: This is essential for creating the light, airy, and mousse-like consistency of the peanut butter layer.
Vanilla Extract: A little bit of vanilla extract enhances the other flavors in the dessert, adding a touch of warmth and depth.
Chocolate Wafer Cookies: These form the structure of the cake, softening into tender, cake-like layers as the dessert chills.
Mini Peanut Butter Cups: Using chopped mini peanut butter cups distributes that iconic chocolate and peanut butter flavor in every single bite.
Chocolate Syrup: This adds a final decorative touch and an extra layer of chocolatey goodness right before serving your Peanut Butter Cup Icebox Cake.
How to Make Peanut Butter Cup Icebox Cake
Step 1. I always start by combining the peanut butter and powdered sugar in a medium bowl. You’ll want to mix it until it’s perfectly smooth and creamy, with no lumps remaining.
Step 2. In a separate, chilled bowl, I whip the heavy cream and vanilla extract together. I’ve found that using a cold bowl helps the cream form stiff peaks much faster.
Step 3. Next, gently fold the whipped cream into the peanut butter mixture. Be careful not to overmix; you want to keep the filling light and airy.
Step 4. Now, begin assembling the cake by placing a single layer of chocolate wafer cookies at the bottom of your dish.
Step 5. Spread about a third of the peanut butter filling over the cookies, then sprinkle a third of the chopped peanut butter cups on top.
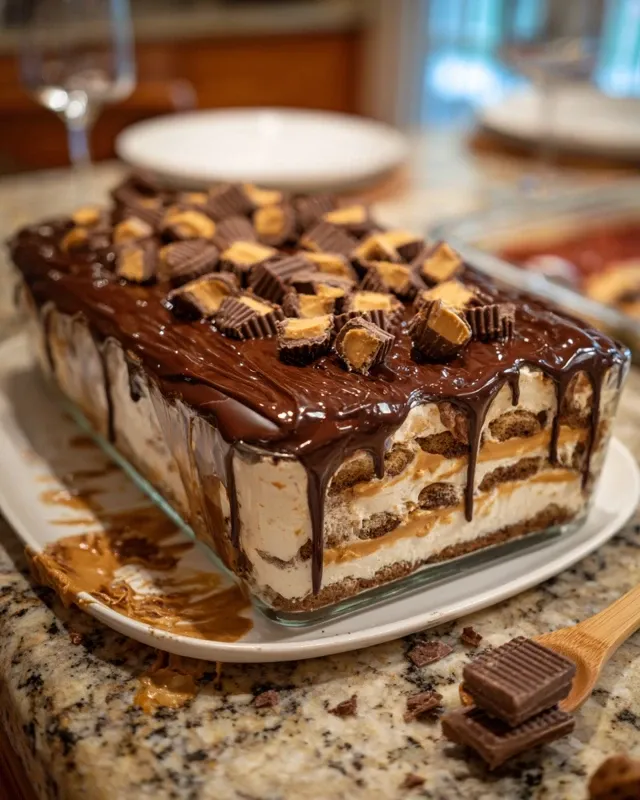
Step 6. Continue this process, repeating the layers of cookies, filling, and chopped candies until you’ve used all your ingredients, finishing with a final layer of the peanut butter filling.
Step 7. Finally, cover the dish and let it chill in the refrigerator for at least 4 hours, though overnight is even better. Just before you’re ready to serve, drizzle it with chocolate syrup.
How to Store Your Icebox Cake
I usually store any leftovers in an airtight container in the fridge, where this Peanut Butter Cup Icebox Cake stays fresh for up to 4 days. It’s important to keep it covered so it doesn’t absorb any other odors from the refrigerator.
If you’d like to freeze it, this cake works wonderfully! For best results, I recommend wrapping the entire dish tightly in a layer of plastic wrap and then a layer of aluminum foil. It will keep well in the freezer for up to 1 month, similar to other freezer-friendly treats like our Easy No-Bake Salted Caramel Oreo Icebox Cake. You can let it thaw in the refrigerator for a few hours before serving.
What to Serve With This Dessert
While this cake is a complete showstopper on its own, my family sometimes loves adding a little something extra.Here are a few pairings that work beautifully, like a slice of our Vanilla Sponge Cake, fruity Berry Crumble Bars, or a nostalgic Banana Cream Cake to complement the rich flavors of this dessert.
A Scoop of Vanilla Ice Cream: The simple, creamy flavor of vanilla ice cream is a perfect contrast to the rich peanut butter and chocolate.
Fresh Berries: A handful of fresh raspberries or sliced strawberries on the side can cut through the richness of the cake with a bit of tartness.
A Tall Glass of Cold Milk: This is a classic pairing for a reason! It’s the perfect, simple drink to wash down this decadent dessert.
Hot Coffee or Espresso: For the adults, a cup of hot coffee or a shot of espresso balances the sweetness of the cake wonderfully.
Homemade Whipped Cream: If you want to take it over the top, a dollop of fresh whipped cream is always a welcome addition. [Link to your homemade whipped cream recipe].
FAQs
Can I use crunchy peanut butter for this icebox cake? You can, but I find that creamy peanut butter provides the best smooth, mousse-like texture for the filling.
What can I use instead of chocolate wafer cookies? If you can’t find chocolate wafers, you can substitute them with chocolate graham crackers or even whole Oreos (with the filling).
Why is my peanut butter filling not getting thick? Make sure you whip the heavy cream until stiff peaks form; this is what gives the filling its structure and stability.
How long does the Peanut Butter Cup Icebox Cake need to chill? I recommend chilling it for at least 4 hours, but for the best texture where the cookies soften perfectly, chilling it overnight is ideal.
Can I make this recipe ahead of an event? Absolutely! This is the perfect make-ahead dessert since it needs to chill anyway. You can assemble it a full day in advance.
Peanut Butter Cup Icebox Cake
Ingredients
Equipment
Method
-
In a medium bowl, combine the creamy peanut butter and powdered sugar. Mix until well blended and smooth.
-
In a separate bowl, whip the heavy cream and vanilla extract until stiff peaks form. Gently fold the whipped cream into the peanut butter mixture until fully combined.
-
Begin layering the cake by placing a layer of chocolate wafer cookies at the bottom of a rectangular dish.
-
Spread a layer of the peanut butter filling over the cookies, then sprinkle some chopped mini peanut butter cups on top.
-
Repeat the layers, alternating between the cookies, peanut butter filling, and chopped peanut butter cups until you reach the top of the dish, finishing with a layer of the peanut butter filling.
-
Cover the dish with plastic wrap and refrigerate for at least 4 hours or overnight to allow the flavors to meld and the cookies to soften.
-
Before serving, drizzle chocolate syrup over the top for added sweetness and decoration.