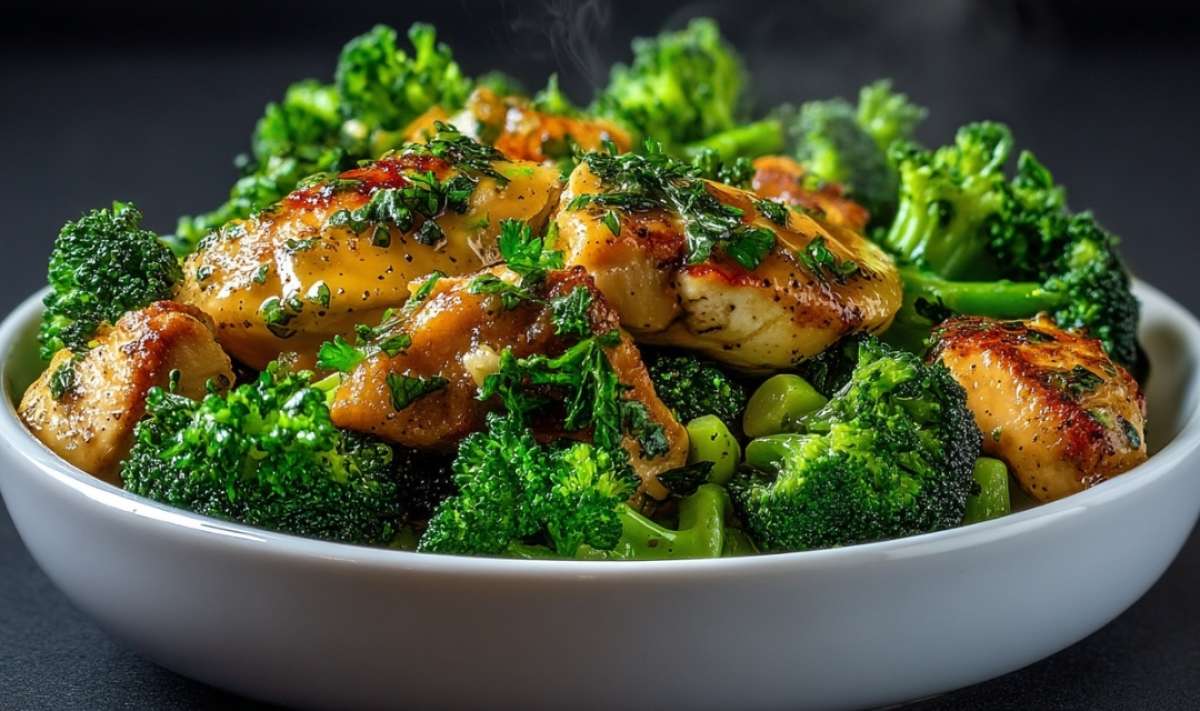
Garlic Butter Chicken with Broccoli is one of those recipes that makes you look like a culinary genius without the fuss. I learned this technique from my grandmother on her Midwest farm, where simple ingredients and smart cooking methods were the keys to feeding a hungry family without spending all day in the kitchen.
I still remember standing at Grandma’s old gas stove, watching her sear chicken breasts in that well-seasoned cast iron skillet. The sizzle when the meat hit the pan, the way garlic perfumed the entire farmhouse, and how she’d add just enough butter to make everything golden and glossy – those are the memories that shaped how I cook today. She’d always say, “Betty, if you can make chicken and vegetables taste this good in one pan, you’ve mastered the art of weeknight cooking.” This Garlic Butter Chicken with Broccoli carries that same philosophy: maximum flavor with minimal cleanup, and a dinner that brings everyone to the table with smiles on their faces. Time to get your skillet ready.
What Makes This Garlic Butter Chicken Recipe So Special
After decades of making weeknight dinners for my family and now my grandchildren, I’ve come to appreciate recipes that deliver restaurant-quality results without the restaurant-level effort. This garlic butter chicken with broccoli checks every box for what I call “smart home cooking” – the kind my grandmother would approve of and my busy kids actually have time to make.
Here’s why this recipe belongs in your weekly rotation:
- One-pan simplicity means you’ll spend more time enjoying dinner and less time scrubbing dishes – I’ve timed it, and cleanup takes under 5 minutes
- Naturally fits multiple diets including keto, paleo, Whole30, and gluten-free without any recipe modifications or specialty ingredients
- Ready in 35 minutes from the moment you pull out your skillet to when you’re serving plates at the table
- Uses everyday ingredients that you likely have in your pantry and refrigerator right now – no specialty store trips required
- Delivers consistent results with foolproof techniques that work whether you’re cooking at sea level or in the mountains
- Perfect for meal prep since the flavors actually improve overnight, making your Tuesday lunch something to look forward to
I’ve watched three generations of my family gather around this dish, and what I love most is how it adapts to everyone’s needs. My daughter makes it after her kids’ soccer practice, my son doubles the recipe for his meal prep Sundays, and I still turn to it when I want something comforting but don’t want to heat up the whole kitchen.
Ingredient Spotlight
Boneless, skinless chicken breasts form the protein foundation of this dish, and I always choose breasts that are similar in size so they cook evenly – if one is noticeably thicker, I’ll pound it out to match the others.
Broccoli florets bring vibrant color, satisfying crunch, and a nutritional powerhouse to the plate; I prefer buying whole broccoli heads and cutting my own florets since they’re fresher and more affordable than pre-cut versions.
Unsalted butter creates the rich, velvety sauce that makes this garlic butter chicken so irresistible, and using unsalted allows you to control the exact salt level in your final dish.
Fresh garlic cloves deliver that unmistakable aromatic punch that fills your kitchen with the most welcoming smell – I always mince mine finely so it distributes evenly throughout the butter sauce.
Chicken broth serves double duty by deglazing all those flavorful brown bits from the pan and providing the liquid needed to steam the broccoli to tender perfection.
Dried thyme adds an earthy, slightly floral note that complements both the chicken and broccoli beautifully; in my kitchen, I prefer using whole dried thyme leaves rather than ground for better texture.
Paprika contributes a subtle sweetness and gorgeous golden-red color to the chicken’s crust without adding any heat.
Olive oil helps achieve that restaurant-quality sear on the chicken while preventing the butter from burning during the initial high-heat cooking.
Fresh parsley provides a bright, fresh finish that cuts through the richness of the butter sauce and makes the whole dish look like it came from a professional kitchen.
How to Make Garlic Butter Chicken with Broccoli
Step 1. I’ve learned that seasoning the chicken breasts generously on both sides with salt, pepper, paprika, and thyme before they hit the pan creates a flavorful crust that keeps the meat juicy – don’t be shy with the seasonings.
Step 2. Betty always starts by heating the olive oil and 2 tablespoons of butter together over medium-high heat until the butter foams slightly, which tells you the pan is at the perfect temperature for searing.
Step 3. Add the seasoned chicken breasts to the hot skillet and resist the urge to move them around – let them cook undisturbed for 6-7 minutes per side until they develop a beautiful golden-brown crust and reach an internal temperature of 165°F, then remove to a clean plate and set aside.
Step 4. After years of making this garlic butter chicken, I discovered that sautéing the minced garlic in the remaining butter for just about 1 minute – until fragrant but not browned – creates the most aromatic base for the sauce.
Step 5. Toss the broccoli florets into the garlicky butter, stirring to coat every piece, then pour in the chicken broth and immediately cover the skillet to let the broccoli steam for 4-5 minutes until it’s tender but still has that satisfying crisp bite.
Step 6. The key I discovered is returning the chicken breasts to the skillet with the broccoli and spooning that gorgeous garlic butter sauce over the top, letting everything mingle together for another 2 minutes so the flavors marry beautifully.
Step 7. My family prefers when I finish with a generous sprinkle of fresh chopped parsley right before serving – it adds a pop of color and fresh flavor that makes this simple dish feel special.
Keeping This Garlic Butter Chicken Fresh
I typically store leftovers in airtight containers in the refrigerator for up to 4 days, and I’ve found that separating the chicken and broccoli into individual portions makes reheating for lunches much easier. The garlic butter sauce actually penetrates the chicken more deeply overnight, so day-two servings often taste even better than the original meal. If you’re planning to enjoy this later in the week, make sure to let everything cool completely before sealing the containers – this prevents condensation that can make the chicken soggy.
Betty’s freezing method works well for this recipe if you want to make a double batch – cool the chicken and broccoli completely, then freeze in freezer-safe containers or heavy-duty freezer bags for up to 3 months. I’ve learned through trial and error that pressing out as much air as possible before sealing prevents freezer burn and keeps the flavors fresh. When you’re ready to enjoy, thaw overnight in the refrigerator rather than at room temperature for food safety.
For the best texture, I reheat individual portions in a covered skillet over medium-low heat with a splash of chicken broth to restore moisture, stirring occasionally until heated through – this takes about 5-7 minutes and keeps the broccoli from turning mushy. The microwave works in a pinch (use 50% power for 2-3 minutes), but the stovetop method truly brings back that just-cooked quality that makes this garlic butter chicken with broccoli so satisfying.

Garlic Butter Chicken with Broccoli
Ingredients
Equipment
Method
-
Season chicken breasts generously on both sides with salt, pepper, paprika, and thyme.
-
Heat olive oil and 2 tablespoons butter in a large skillet over medium-high heat until butter foams.
-
Add chicken breasts and cook undisturbed for 6-7 minutes per side until golden brown and internal temperature reaches 165°F. Remove from skillet to a clean plate and set aside.
-
In the same skillet, add remaining 2 tablespoons butter and minced garlic. Sauté for about 1 minute until fragrant but not browned.
-
Add broccoli florets and stir to coat in garlic butter. Pour in chicken broth and cover the skillet. Let steam for 4-5 minutes until tender but still crisp.
-
Return chicken breasts to the skillet, spoon garlic butter sauce over the top, and cook together for another 2 minutes.
-
Garnish with fresh chopped parsley and serve hot.
Notes
Perfect Partners for Garlic Butter Chicken
Cauliflower rice or mashed cauliflower makes an excellent low-carb base that soaks up all that delicious garlic butter sauce while keeping the meal light and keto-friendly – the mild flavor lets the chicken and sauce shine.
Steamed jasmine or brown rice creates a heartier, more traditional dinner that’s perfect when you need something filling after a long day; the fluffy grains catch every drop of that buttery goodness.
Roasted potatoes or sweet potatoes add a comforting, rustic element with crispy edges that contrast beautifully with the tender chicken and broccoli – my grandchildren always request the sweet potato version.
Garlic bread or crusty sourdough turns this into a complete feast where everyone fights over who gets to mop up the last bits of sauce from their plate; it’s messy but absolutely worth it.
Light salad with vinaigrette provides a refreshing counterpoint to the rich butter sauce – I especially love a simple arugula salad with lemon dressing to cut through the richness.
Tangy coleslaw brings a crunchy, acidic element that balances the savory garlic butter chicken perfectly, and it’s a pairing I learned from Sunday dinners on Grandma’s farm where we always served something fresh and crisp alongside warm main dishes.
FAQs
Can I substitute chicken thighs for chicken breasts in this garlic butter chicken recipe? I recommend using boneless, skinless chicken thighs if you prefer darker meat – they’re more forgiving and stay juicier, though they’ll need about 8-9 minutes per side to cook through completely.
How do I prevent the garlic from burning while making garlic butter chicken? The best approach I’ve tested is adding the garlic after removing the chicken from the pan and reducing the heat to medium, then cooking for just 60 seconds until fragrant – any longer and it turns bitter.
Can I make this garlic butter chicken with broccoli ahead of time? Many home cooks find success preparing the chicken and broccoli up to 24 hours in advance, storing them separately, then reheating gently together in a covered skillet with a splash of broth before serving.
What if my broccoli is turning out mushy? To prevent this issue, steam the broccoli for only 4-5 minutes maximum and remember that it will continue cooking slightly from residual heat even after you remove the lid – it should still have a bit of crunch.
Can I use frozen broccoli instead of fresh? Betty’s solution is to use frozen broccoli in a pinch, but don’t thaw it first – add it directly to the pan frozen and reduce the steaming time to 3-4 minutes since it’s already been blanched.
How do I know when the chicken is fully cooked? I always use an instant-read thermometer inserted into the thickest part of the breast – it should read 165°F, and if you cut into it, the juices should run clear with no pink remaining.


