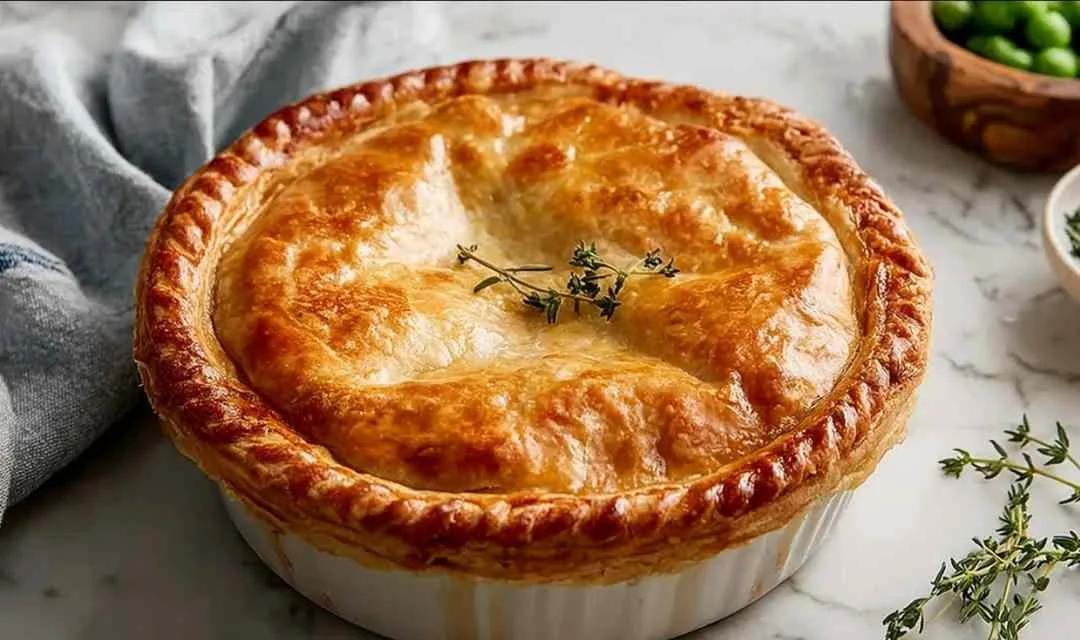
This chicken pot pie recipe brings together everything I love about comfort food: a golden, flaky crust that shatters at the first bite and a creamy filling that warms you from the inside out. It’s the kind of dish that makes your whole house smell like Sunday dinner at Grandma’s farm.
I’ll never forget the first time Betty pulled a chicken pot pie from her oven on a cold November evening. The crust had turned the most beautiful shade of golden brown, and when she sliced into it, steam rose up carrying the aroma of thyme, butter, and tender chicken. Her grandchildren gathered around the table before she even called them, drawn by that irresistible scent. Betty learned this recipe from her own grandmother during those Sunday visits to the farmhouse, where making things from scratch wasn’t just a choice, it was a way of showing love. She’s perfected it over the years, serving it to her family on countless occasions, and now she’s sharing those hard-earned secrets with you. Time to get our hands floury and create something your family will request again and again.
What Makes This Chicken Pot Pie So Special
Betty has been making chicken pot pie for over forty years, and this version combines all the lessons she’s learned along the way. It’s designed for real home cooks who want impressive results without complicated techniques.
- Truly homemade flaky crust that rivals any bakery, made with simple ingredients you likely have on hand
- Feeds a crowd generously with 10 hearty servings, perfect for family gatherings or Sunday dinners
- Freezer-friendly convenience lets you prepare ahead for those busy weeknights when comfort food saves the day
- Uses leftover chicken beautifully, transforming rotisserie chicken or holiday turkey into something spectacular
- Delivers consistent results with clear instructions that account for common pitfalls like soggy bottoms
- Classic creamy filling balances vegetables and chicken in a savory sauce seasoned just right
Ingredient Spotlight
All-purpose flour forms the foundation of both the flaky crust and the creamy filling, providing structure to the pastry and thickening power to the sauce.
Cold unsalted butter is the secret to achieving that coveted flaky, layered crust texture. I always keep mine in the freezer for 15 minutes before starting, and Betty swears this makes all the difference in creating those buttery pockets throughout the pastry.
Buttermilk adds subtle tanginess to the crust while keeping it tender, and the acidity helps create a more tender crumb than regular milk would produce.
Shredded chicken provides the hearty protein base for this chicken pot pie recipe. Betty often uses leftover rotisserie chicken from the grocery store, which cuts prep time significantly and adds wonderful flavor.
Heavy cream creates that luxurious, velvety texture in the filling that makes each bite feel indulgent. In my kitchen, I prefer heavy cream over milk because it doesn’t separate during baking and adds richness.
Fresh thyme brings an earthy, aromatic quality that’s essential to classic pot pie flavor. I’ve learned that fresh herbs truly shine in this recipe, though dried thyme works in a pinch using half the amount.
Chicken broth forms the savory base of the filling, and Betty always recommends using good-quality broth since it’s such a prominent flavor.
Mixed vegetables including carrots, celery, onions, and peas add color, nutrition, and textural variety. After years of making this, I’ve found that frozen peas work just as well as fresh and save precious prep time.
Egg wash creates that gorgeous golden-brown shine on top of the crust. Betty’s tip: brush it on generously but gently to avoid deflating the pastry edges.
How to Make Chicken Pot Pie
Step 1. Betty always starts by making the crust first, combining flour, sugar, and salt in a large bowl before adding the cold cubed butter. The key I discovered is to work quickly, rolling the butter into thin sheets with your rolling pin rather than cutting it in with a pastry blender, which creates those beautiful flaky layers.
Step 2. After chilling the flour-butter mixture for 15 minutes, add the cold buttermilk and gently bring the dough together. I’ve learned that less handling here means a more tender crust, so stop mixing as soon as the dough holds together.
Step 3. Divide the dough into two portions, one slightly larger for the bottom crust, and chill them for at least 30 minutes. Through trial and error, I learned that this resting time is non-negotiable for easy rolling and a flaky result.
Step 4. While the dough chills, melt butter in a large skillet over medium heat and cook the onions, carrots, celery, and garlic until softened, about 8 minutes. Betty’s tip: don’t rush this step because properly softened vegetables blend seamlessly into the creamy filling.
Step 5. Whisk in the flour, thyme, parsley, salt, and pepper, cooking for 2 minutes to eliminate any raw flour taste. I’ve found that this extra cooking time makes a noticeable difference in the final sauce quality.
Step 6. Gradually add the chicken broth and heavy cream while whisking constantly to prevent lumps. My family prefers when I take my time here, adding the liquid slowly and whisking thoroughly after each addition until the sauce is smooth and thick.
Step 7. Simmer the mixture until it thickens to coat the back of a spoon, then stir in the shredded chicken and frozen peas. After years of making this chicken pot pie recipe, I learned to let the filling cool for 15 minutes before assembling, which prevents the bottom crust from becoming soggy.
Step 8. Preheat your oven to 400°F, then roll out the larger dough portion and line a 9-inch pie pan, letting the edges hang over slightly. Betty always reminds me to work on a well-floured surface and roll from the center outward for even thickness.
Step 9. Pour the slightly cooled filling into the prepared crust, then roll out the second dough portion and drape it over the top. The key I discovered is trimming the excess to leave about a 1-inch overhang, then folding and crimping the edges to create a tight seal that prevents filling from bubbling out.
Step 10. Cut 4-5 slits in the top crust for steam vents, then brush the entire surface with beaten egg wash. I’ve found that these vents are essential for preventing a soggy top crust and allowing moisture to escape during baking.
Step 11. Bake at 400°F for 45 minutes until the crust turns a deep golden brown and the filling bubbles through the vents. Betty’s method works well because the high temperature ensures a crispy crust while heating the filling thoroughly, and if the edges brown too quickly, simply cover them with strips of aluminum foil.
Keeping This Chicken Pot Pie Fresh
I typically store leftover chicken pot pie in the refrigerator covered with aluminum foil or in an airtight container for up to 3 days. The crust softens slightly during storage, but the flavors actually deepen overnight, making leftovers a real treat. Betty always says that day-two pot pie heated in the oven tastes just as good as fresh from the oven.
Betty’s freezing method works exceptionally well for this recipe. You can freeze the pot pie either baked or unbaked, wrapped tightly in plastic wrap and then aluminum foil, for up to 3 months. I’ve found that unbaked frozen pot pies give you that fresh-baked experience when you’re ready to serve, just add 15-20 extra minutes to the baking time and bake directly from frozen. For baked pot pies, thaw overnight in the refrigerator before reheating.
For the best texture, I reheat by covering the pot pie with foil and warming in a 350°F oven for 25-30 minutes until heated through. Betty’s preferred approach is oven reheating because it keeps the crust crisp rather than soggy, though individual slices can be microwaved for 2-3 minutes if you’re in a hurry. Through years of experience, I’ve learned that removing the foil for the last 5 minutes of oven reheating brings back that beautiful golden color on top.
Perfect Partners for Chicken Pot Pie
This hearty pot pie pairs beautifully with lighter sides that balance the richness of the creamy filling.
- Simple green salad with vinaigrette cuts through the richness of the creamy filling and adds a fresh, crisp contrast that balances each bite
- Cranberry sauce brings a sweet-tart element that Betty learned from her New England friends, and the fruity brightness complements the savory pie beautifully. Try our fresh cranberry sauce recipe for homemade goodness
- Steamed green beans with butter and almonds add a fresh vegetable component while keeping the meal light despite the hearty main dish
- Roasted vegetables like parsnips, sweet potatoes, and Brussels sprouts create a complete autumn meal that honors traditional American farm cooking. Our fall dinner recipes guide has wonderful seasonal options
- Homemade biscuits might seem like carbs on carbs, but Betty’s family always requests them for soaking up any extra gravy on their plates. If you love pot pie with biscuits, try our chicken pot pie with biscuits variation
- Creamy scalloped potatoes make a wonderful side dish for special occasions. Our creamy scalloped potatoes recipe is always a hit
- If you’re looking for more comfort food pairings, our easy baked potato soup serves as a delicious starter course
FAQs
I recommend making the homemade crust because it’s truly what makes this chicken pot pie recipe special, but Betty understands that busy weeknights call for shortcuts. If you use store-bought crust, look for all-butter varieties and let them sit at room temperature for 10 minutes before rolling for easier handling.
To prevent this common issue, I’ve learned to let the filling cool for at least 15 minutes before pouring it into the crust, and Betty always bakes her pot pies on the lowest oven rack so the bottom gets direct heat. Many home cooks find success with brushing a thin layer of beaten egg white on the bottom crust before adding the filling as an extra moisture barrier.
Betty’s solution is to prepare the filling up to 2 days in advance and store it refrigerated, then make fresh dough and assemble on baking day. The best approach I’ve tested is making the entire pot pie unbaked, freezing it, and then baking from frozen when you’re ready to serve.
Classic Homemade Chicken Pot Pie Recipe
Ingredients
Equipment
Method
-
Combine flour, sugar, and salt in a large bowl. Add cubed butter and toss to coat. Roll butter into thin sheets with a rolling pin, combining with flour. Chill mixture for 15 minutes, then add buttermilk and cold water. Mix until dough just comes together.
-
Divide dough into two portions (one slightly larger) and shape into disks. Wrap in plastic and refrigerate for at least 30 minutes.
-
In a large skillet, melt butter over medium heat. Cook onions, carrots, celery, and garlic until softened, about 8 minutes.
-
Whisk in flour, thyme, parsley, salt, and pepper. Cook for 2 minutes, stirring constantly.
-
Gradually add chicken broth and heavy cream, whisking constantly. Simmer until thickened to coat the back of a spoon, about 5-7 minutes.
-
Stir in shredded chicken and frozen peas. Remove from heat and let cool for 15 minutes.
-
Preheat oven to 400°F. Roll out larger dough portion on a floured surface and line a 9-inch pie pan.
-
Pour cooled filling into the prepared crust. Roll out second dough portion and place over filling.
-
Trim excess dough leaving 1-inch overhang. Fold and crimp edges to seal. Cut 4-5 slits in top crust.
-
Brush entire top surface with beaten egg wash.
-
Bake for 45 minutes until crust is golden brown and filling bubbles through vents. Let cool for 10-15 minutes before serving.


