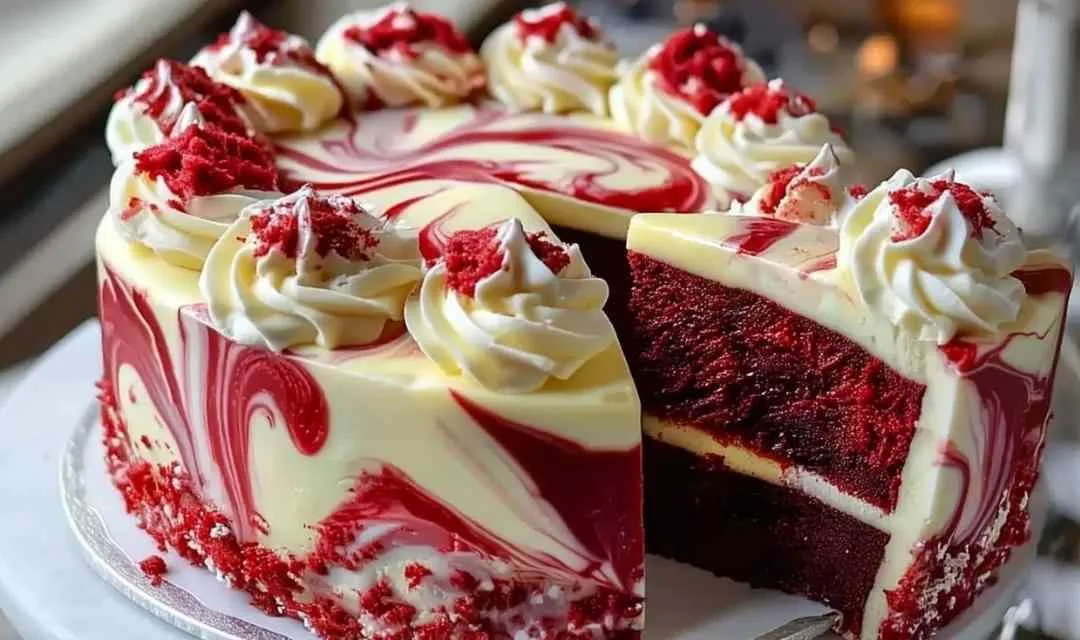
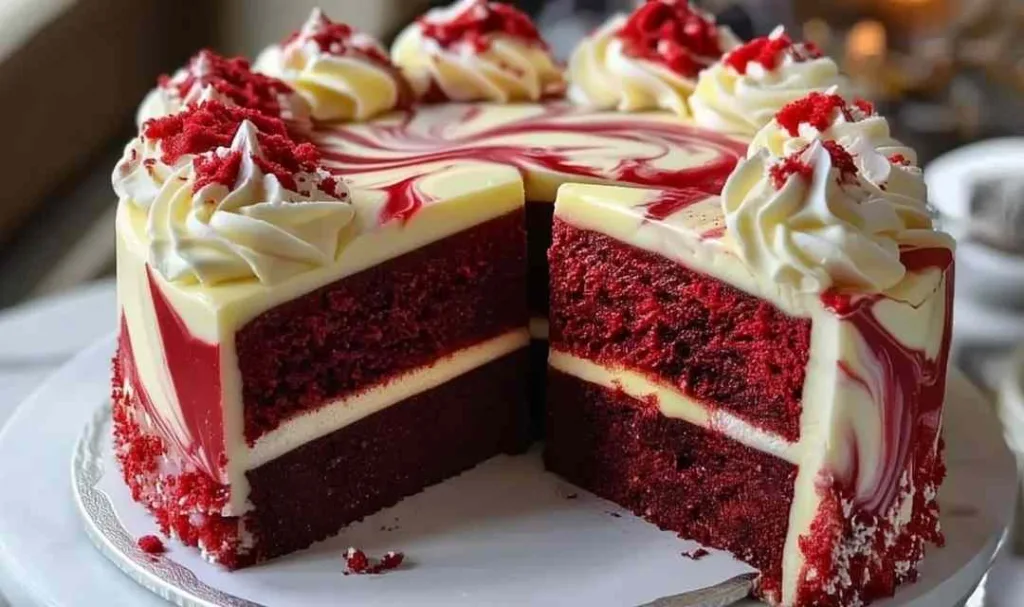
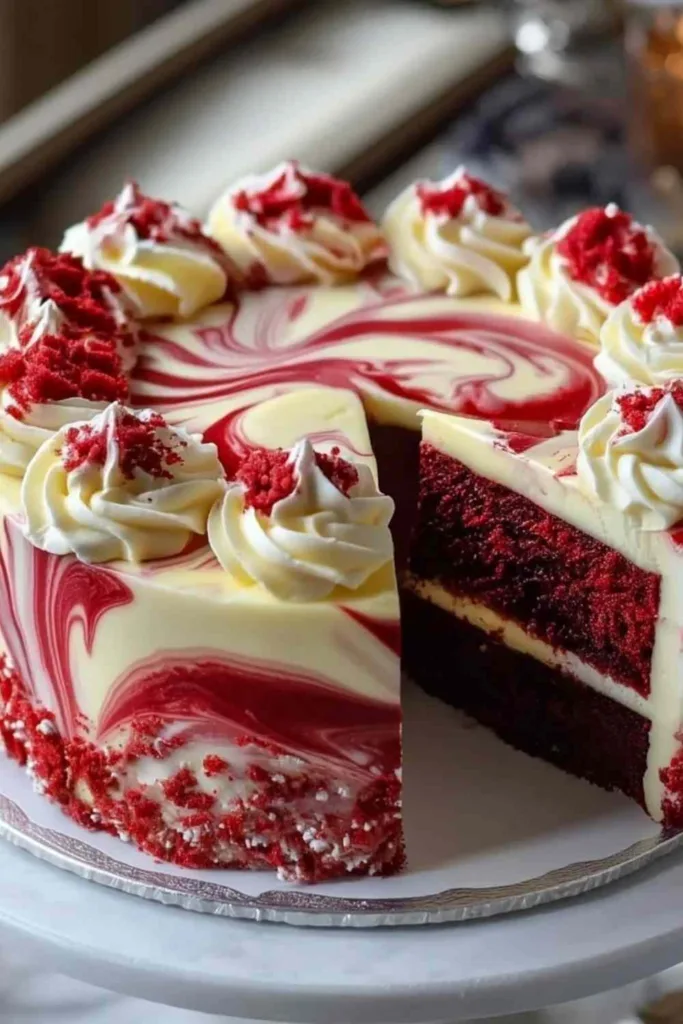
Red Velvet Cheesecake Swirl Cake brings together two beloved desserts in one stunning creation that’s perfect for celebrations and special moments. I still remember the first time I watched my grandmother marble cream cheese into crimson cake batter – the way those swirls danced together felt like pure kitchen magic. Growing up in our Midwest farmhouse, Sunday desserts were sacred, and this cake became our most requested showstopper for birthdays and Valentine’s Day gatherings.
There’s something special about watching that cream cheese ribbon through ruby-red batter, creating patterns that are never quite the same twice. The aroma that fills your kitchen – vanilla, cocoa, and that distinctive tang of buttermilk – takes me right back to those Sunday afternoons when family gathered around our big farmhouse table. My grandmother taught me that the secret to a memorable dessert isn’t complexity; it’s the love you fold into every layer. Time to get our hands floury!
What Makes This Red Velvet Cheesecake Swirl Cake So Special
This isn’t just another layer cake – it’s the dessert that taught me how two classics can become something even more memorable when they come together. The moist red velvet layers provide that tender crumb we all love, while the tangy cheesecake swirl adds richness without overwhelming sweetness.
- Uses everyday pantry ingredients you likely already have, from buttermilk to cocoa powder
- Comes together in under an hour of active prep time, perfect for busy celebration planning
- Delivers that impressive marbled effect that looks bakery-professional but requires just a simple knife swirl
- Adapts beautifully to different occasions – dress it up with white chocolate or keep it simple with powdered sugar
- Creates that perfect flavor balance between the subtle chocolate notes of red velvet and the tanginess of cream cheese
- Stores wonderfully for up to five days, making it ideal for advance preparation
Through years of making this cake for family gatherings, I’ve learned it’s the combination of textures that keeps people coming back for seconds – that soft, tender cake against the creamy cheesecake ribbons creates something truly special.
Ingredient Spotlight
All-purpose flour forms the foundation of your cake structure, and I always measure mine by spooning it into the cup rather than scooping to avoid dense, heavy layers.
Buttermilk delivers that signature tangy flavor and tender crumb that makes red velvet cakes so distinctive – its acidity also reacts with the baking soda to create lift.
Unsweetened cocoa powder adds subtle chocolate undertones without making this a chocolate cake; just two tablespoons is enough to enhance the red velvet character.
Red food coloring creates that iconic crimson hue, and I prefer gel coloring over liquid for more vibrant results without adding extra moisture to the batter.
Cream cheese must be at room temperature before you beat it – cold cream cheese creates lumps that won’t smooth out and ruins that silky cheesecake swirl.
White vinegar might seem unusual, but it reacts with the baking soda to help the cake rise while adding a slight tang that complements the buttermilk beautifully.
Vegetable oil keeps the cake incredibly moist and tender; unlike butter, oil stays liquid at room temperature, preventing the cake from drying out.
Powdered sugar sweetens the cheesecake mixture while dissolving smoothly – granulated sugar would create a grainy texture in the cream cheese.
How to Make Red Velvet Cheesecake Swirl Cake
Step 1. I always start by preheating my oven to 350°F and preparing my pans with both grease and parchment paper – this double protection ensures your beautiful cake layers release perfectly every time.
Step 2. Betty taught me to whisk all dry ingredients together first (flour, sugar, cocoa, baking soda, and salt) so they’re evenly distributed before any liquid touches them.
Step 3. In a separate bowl, combine your buttermilk, oil, eggs, vinegar, vanilla, and that gorgeous red food coloring – I’ve learned that mixing these thoroughly before adding to the dry ingredients prevents streaking.
Step 4. Gently fold your wet mixture into the dry ingredients, stirring just until you see no more flour streaks; overmixing develops gluten and creates tough, chewy cake instead of tender layers.
Step 5. For the cheesecake swirl, beat that room-temperature cream cheese until it’s completely smooth and fluffy, then add powdered sugar and vanilla – this takes about 2-3 minutes with an electric mixer.
Step 6. Divide your red velvet batter between the two prepared pans, then drop spoonfuls of the cheesecake mixture across the top of each pan, spacing them evenly.
Step 7. Here’s where the magic happens – use a butter knife to gently swirl through the batter in figure-eight motions, creating that beautiful marble effect without overblending.
Step 8. Bake for 30-35 minutes until a toothpick inserted in the center comes out with just a few moist crumbs; the cakes will spring back when gently pressed.
Step 9. After years of making layer cakes, I’ve learned that cooling them in the pans for exactly 10 minutes prevents cracking while making them easier to remove.
Step 10. Transfer your cakes to cooling racks and let them cool completely before frosting – warm cake will melt your frosting and create a messy situation.
Keeping This Red Velvet Cheesecake Swirl Cake Fresh
I typically store this cake in an airtight container in the refrigerator, where it stays fresh and delicious for up to five days. The cream cheese component means this isn’t a cake you can leave on the counter – it needs that cool environment. Betty always said the flavors actually deepen and mellow after a day in the fridge, making day-two slices even more delightful than fresh-from-the-oven.
For freezing, I’ve found the best approach is to wrap unfrosted cake layers individually in plastic wrap, then aluminum foil, before placing them in freezer bags. They’ll keep beautifully for up to three months this way. When you’re ready to use them, let the layers thaw in the refrigerator overnight still wrapped – this prevents condensation from making them soggy.
To serve, I always bring the cake to room temperature about 30 minutes before slicing. Cold cake is harder to cut cleanly, and the flavors really shine when it’s not refrigerator-cold. For the best texture, I let it sit on the counter rather than using the microwave, which can make the cream cheese swirls weep and create a soggy texture.
Perfect Partners for Red Velvet Cheesecake Swirl Cake
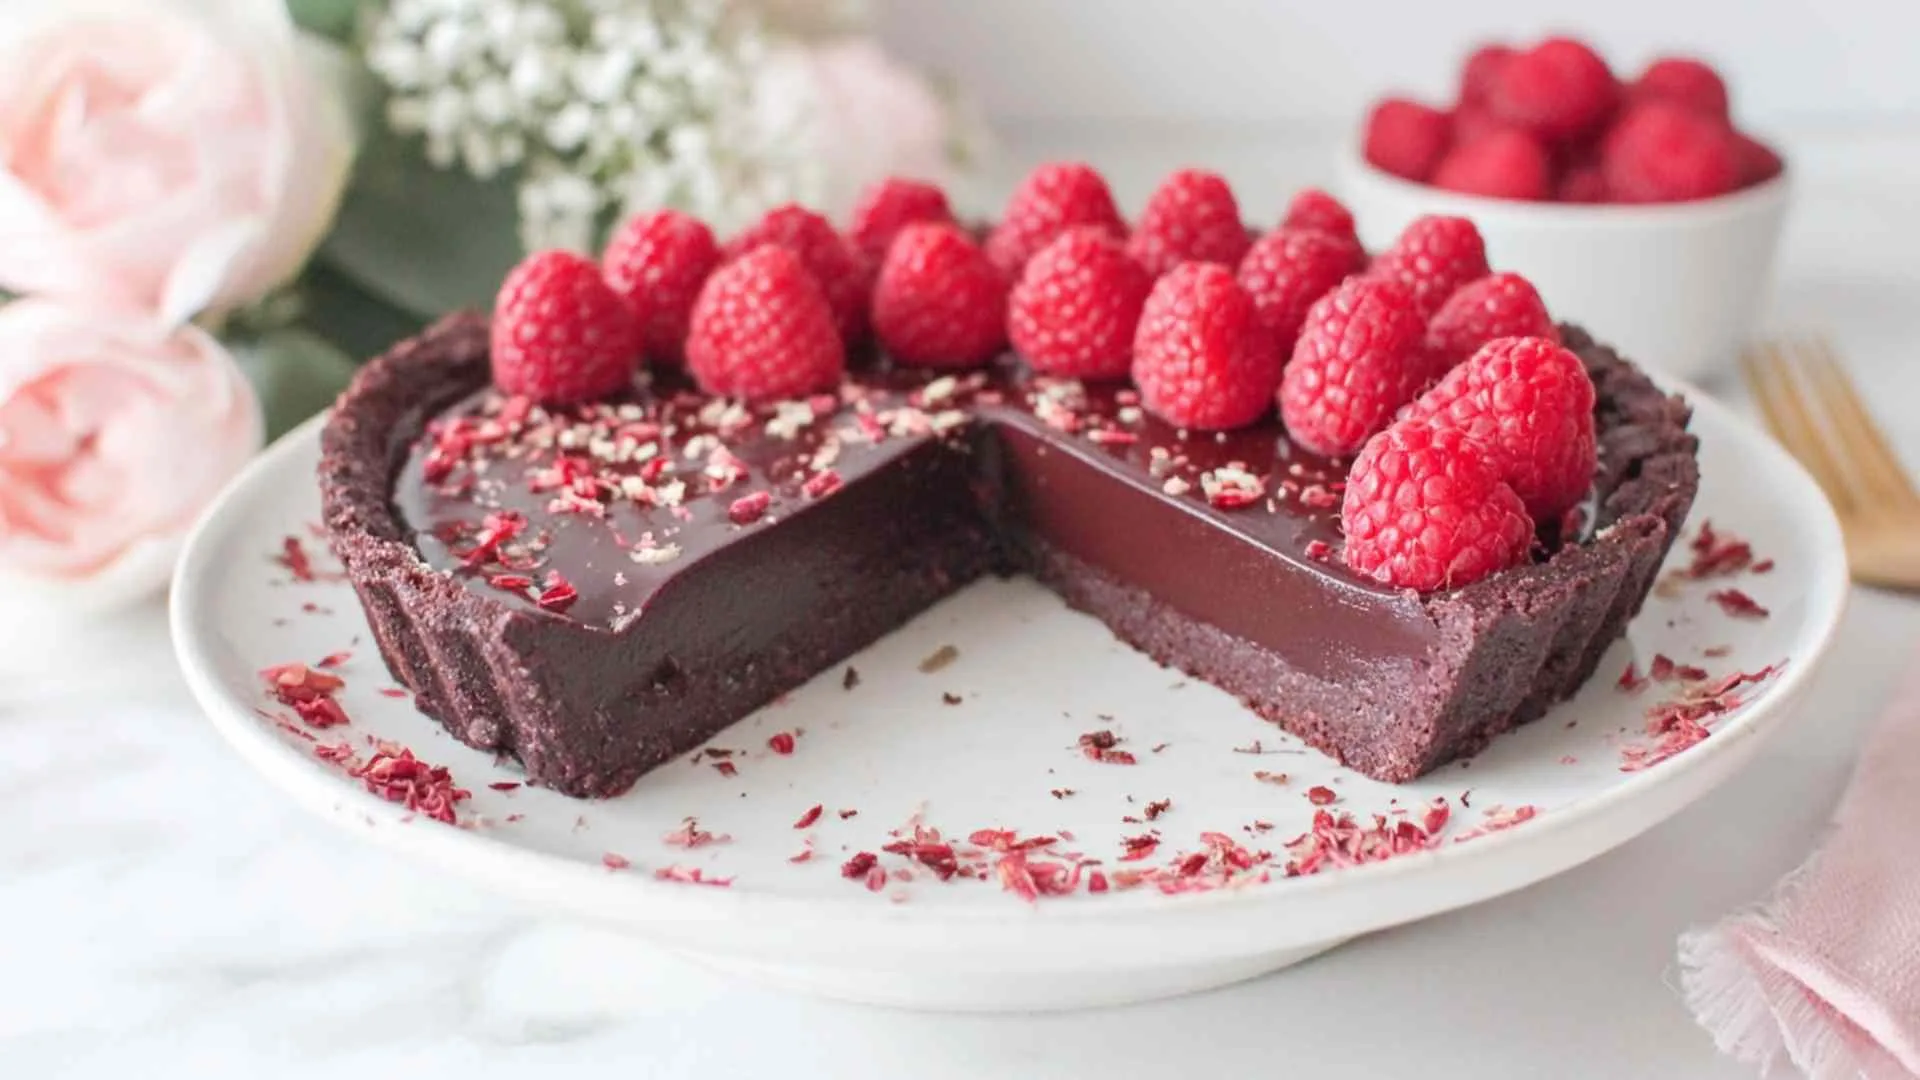
- Fresh berries – raspberries, strawberries, or blackberries – provide a tart contrast that cuts through the richness and adds beautiful color to your dessert plate
- Vanilla bean ice cream melts into those warm cake layers, creating a luxurious combination that’s perfect for special dinners
- Strong brewed coffee balances the sweetness beautifully; Betty always served cake with her farmhouse coffee at Sunday gatherings
- Whipped cream adds a light, airy element that complements the dense, rich cake without competing with the cream cheese flavors
- A Tres Leches Cake makes another wonderful celebration dessert if you’re planning a dessert table
- Cranberry Brie Bites served as appetizers create an elegant lead-in to this stunning dessert
- Chocolate shavings or curls scattered across the top create visual interest and add an extra layer of indulgence
- Blueberry Cream Cheese Croissant Casserole offers another cream cheese dessert option for brunch celebrations
What to Know About Making This Cake
I recommend sticking with gel food coloring for that vibrant crimson color, but if you prefer natural options, beet powder or natural red dye will work – just expect a more burgundy hue rather than bright red.
To prevent this issue, make sure your cream cheese mixture isn’t too thin and don’t swirl too aggressively – gentle figure-eights work best to keep the layers distinct.
Many home cooks find success with baking the layers 1-2 days ahead, wrapping them well, and storing in the refrigerator before frosting on the day of serving.
Red Velvet Cheesecake Swirl Cake
Ingredients
Equipment
Method
-
Preheat oven to 350°F (175°C). Grease and line two 9-inch round cake pans with parchment paper.
-
In a large bowl, whisk together flour, granulated sugar, cocoa powder, baking soda, and salt until evenly combined.
-
In another bowl, mix buttermilk, vegetable oil, eggs, white vinegar, vanilla extract, and red food coloring until thoroughly combined.
-
Gently fold wet ingredients into dry ingredients, stirring just until smooth and no flour streaks remain. Avoid overmixing.
-
In a separate bowl, beat cream cheese with an electric mixer until smooth and fluffy, about 2-3 minutes. Add powdered sugar and beat until well combined.
-
Divide red velvet batter evenly between the two prepared cake pans. Drop spoonfuls of cheesecake mixture across the top of each pan.
-
Using a butter knife, gently swirl the cheesecake mixture through the batter in figure-eight motions to create a marbled effect. Don’t over-swirl.
-
Bake for 30-35 minutes until a toothpick inserted in the center comes out with just a few moist crumbs.
-
Cool cakes in pans for 10 minutes, then turn out onto cooling racks to cool completely.
-
Once completely cool, frost with remaining cheesecake mixture or cream cheese frosting. Decorate with swirls and red velvet crumbs if desired.