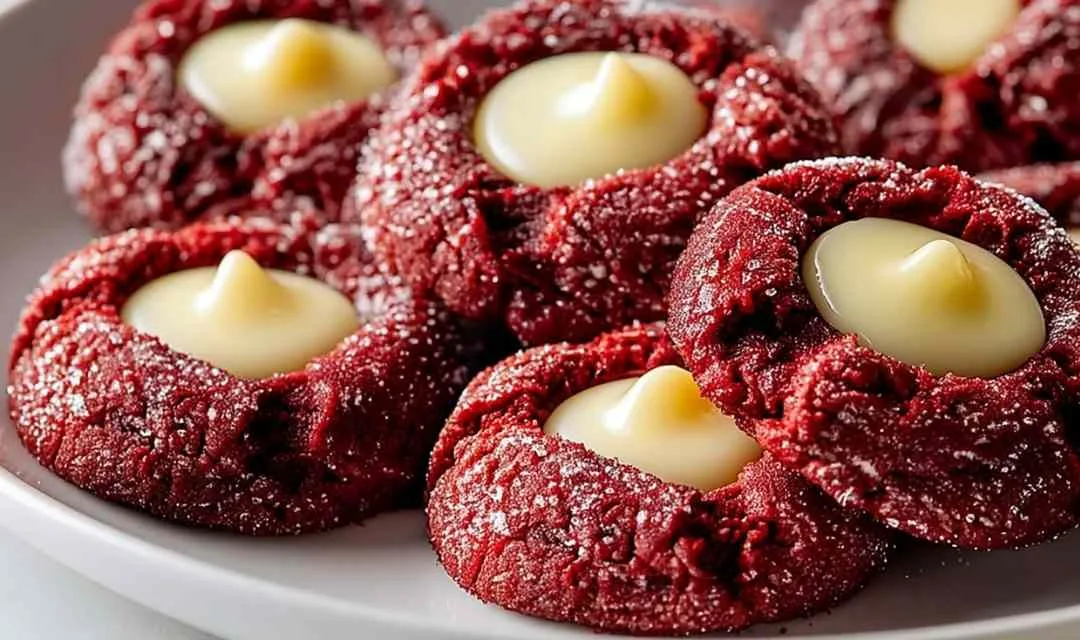
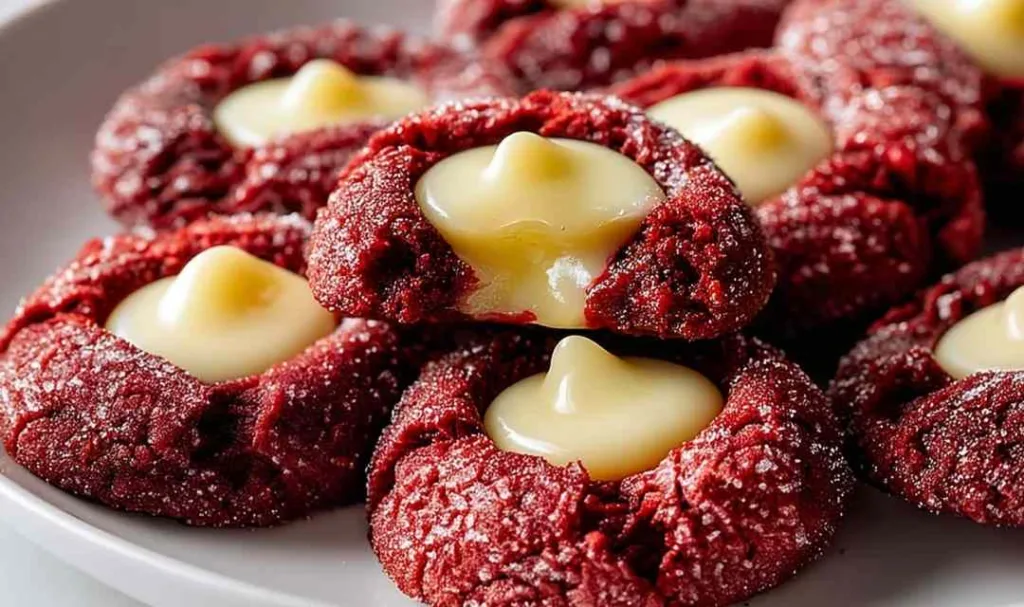
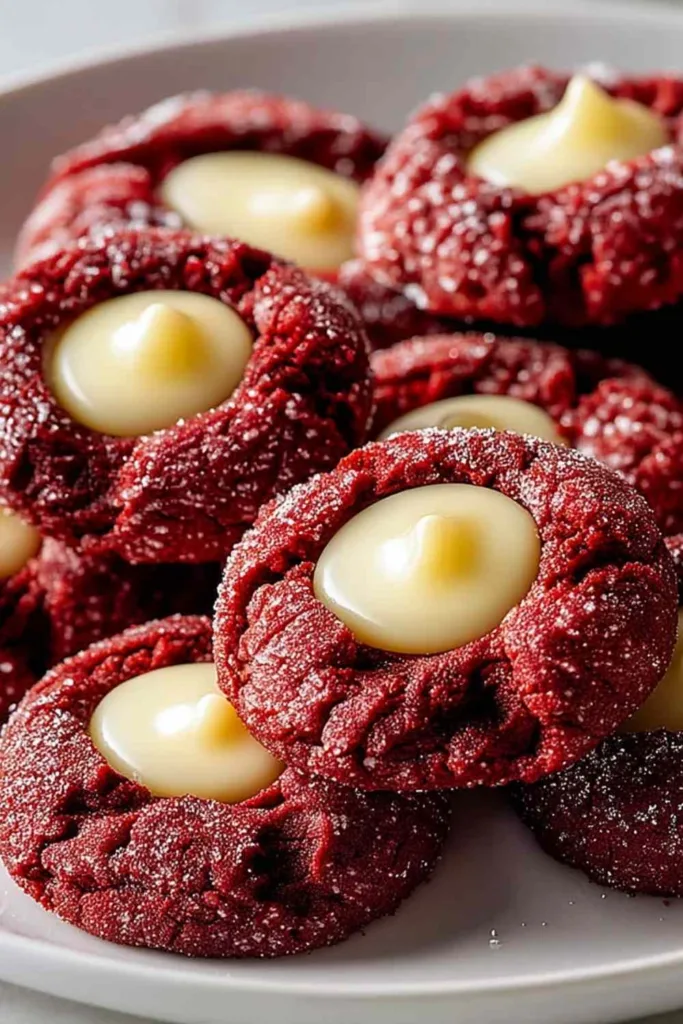
Red Velvet Cream Cheese Thumbprint Cookies combine the classic elegance of red velvet cake with the buttery simplicity of thumbprint cookies, creating a dessert that’s as stunning as it is delicious. I remember the first time I made these, my granddaughter’s eyes lit up at the vibrant red color, and she declared them “too pretty to eat” before devouring three in a row.
There’s something magical about thumbprint cookies that takes me back to Sunday baking sessions at my grandma’s farmhouse. She’d let us kids press our thumbs into the warm dough, creating little wells that she’d fill with homemade jam. These Red Velvet Cream Cheese Thumbprint Cookies carry that same spirit of hands-on baking, but with a sophisticated twist. The rich cocoa dough gets its gorgeous crimson hue from gel food coloring, while tangy cream cheese filling nestles perfectly in each indentation. When you pull a tray from the oven and see those jewel-like centers contrasting against the deep red cookies, you’ll understand why these have become my go-to for holiday cookie exchanges and Valentine’s Day celebrations. The combination of soft, slightly chewy texture with that luscious cream cheese center makes every bite feel like a celebration. Time to get our hands floury!
What Makes Red Velvet Cream Cheese Thumbprint Cookies So Special
These cookies bridge the gap between everyday baking and showstopping desserts, bringing together flavors that folks recognize and love in a format that’s surprisingly approachable. I’ve been making various thumbprint cookies for decades, but this red velvet version has earned a permanent spot in my holiday rotation because it delivers both visual impact and genuine flavor depth.
- Uses pantry staples you likely have on hand, with the exception of gel food coloring that creates that signature crimson hue
- Comes together in about an hour including chilling time, making them perfect for busy holiday baking schedules
- Delivers consistent, crowd-pleasing results thanks to the refrigerated dough that prevents spreading and maintains those perfect indentations
- Adapts beautifully for gift-giving since they stack well, travel without damage, and look professionally crafted
- Creates that perfect marriage of tangy cream cheese and subtle cocoa that makes red velvet desserts so beloved
- Freezes exceptionally well for up to three months, allowing you to bake ahead during less hectic times
After making batch after batch for church gatherings and family celebrations, I can tell you these cookies have never failed to impress. The cream cheese filling stays creamy even after the cookies cool completely, and that touch of cocoa in the dough provides just enough richness without overwhelming the delicate red velvet flavor.
Ingredient Spotlight
All-purpose flour forms the foundation of these cookies, providing structure while keeping the texture tender. I always spoon and level my flour rather than scooping directly from the bag to avoid dense cookies.
Unsweetened natural cocoa powder delivers that subtle chocolate undertone characteristic of red velvet without making the cookies taste like chocolate cookies. Dutch-processed cocoa works too, but natural cocoa gives a slightly tangier note that complements the cream cheese beautifully.
Red gel food coloring is absolutely essential here rather than liquid food coloring, as it provides vibrant color without adding extra moisture that would throw off the dough consistency. I typically use 1 to 2 ounces depending on how deep I want the red to be.
Buttermilk adds tang and tenderness to the cookie dough while activating the baking soda for a slight rise. If you don’t have buttermilk on hand, you can substitute with milk mixed with a tablespoon of lemon juice or white vinegar.
White vinegar might seem like an odd addition, but it’s a classic red velvet ingredient that reacts with the cocoa powder to enhance the red color and adds a subtle tang that balances the sweetness.
Full-fat cream cheese creates that signature tangy filling that makes these thumbprint cookies special. I always let it come to room temperature completely so it beats smooth without lumps, and I never use reduced-fat versions as they contain more water and won’t set properly.
Powdered sugar sweetens and thickens the cream cheese filling while giving it that silky, pipeable consistency. Sifting it beforehand prevents any lumps that could clog your piping tip.
Unsalted butter appears in both the cookie dough and the cream cheese filling, and using unsalted allows you to control the salt level precisely. I prefer European-style butter when I can find it because the higher fat content makes for richer cookies.
How to Make Red Velvet Cream Cheese Thumbprint Cookies
Step 1. I’ve learned that starting with properly measured ingredients makes all the difference, so whisk together your flour, cocoa powder, baking soda, and salt in a medium bowl and set it aside. This ensures even distribution of the leavening throughout the dough.
Step 2. Betty always starts by creaming the butter and sugar for a full 3 to 5 minutes until the mixture looks light and fluffy like whipped frosting. This incorporates air that helps create that tender, melt-in-your-mouth texture we’re after in these Red Velvet Cream Cheese Thumbprint Cookies.
Step 3. Add your egg, vanilla extract, and white vinegar to the butter mixture, beating just until combined and scraping down the bowl sides to ensure everything incorporates evenly. Overmixing at this stage can make the cookies tough.
Step 4. Through trial and error, I learned that adding the gel food coloring before the dry ingredients ensures the most even color distribution, so mix it in now until you achieve that gorgeous vibrant red hue that makes these cookies so eye-catching.
Step 5. Alternate adding the flour mixture in three parts with the buttermilk in two parts, beginning and ending with the dry ingredients and mixing on low speed only until the flour streaks disappear. This technique prevents overmixing while ensuring a tender crumb.
Step 6. The key I discovered is refrigerating the dough for at least 30 minutes and up to 2 hours, which makes it easier to handle, prevents excessive spreading during baking, and results in cookies with better texture and shape.
Step 7. While the dough chills, I prepare the cream cheese filling by beating softened cream cheese and butter together for 2 to 3 minutes until wonderfully smooth, then gradually adding sifted powdered sugar and beating until light and fluffy. Scraping the bowl frequently prevents lumps.
Step 8. After years of making these, I’ve found that transferring the filling to a piping bag fitted with a small round tip gives the most professional results, and chilling it for 15 to 20 minutes firms it up just enough for easy piping without being too stiff.
Step 9. Using a cookie scoop ensures uniform cookies that bake evenly, so portion the chilled dough into balls and place them 2 inches apart on your prepared baking sheets, then press a deep indentation into each center using your thumb or the back of a rounded measuring spoon.
Step 10. Pipe a generous dollop of cream cheese filling into each indentation, then bake at 375°F for 10 to 12 minutes until the edges are set and the filling appears slightly puffed. I always let them cool on the baking sheet for 5 to 7 minutes before transferring to a wire rack so the filling can set properly.
Keeping Red Velvet Cream Cheese Thumbprint Cookies Fresh
Because these cookies contain cream cheese filling, proper storage is essential to maintain both food safety and that wonderful creamy texture. I typically store these in an airtight container in the refrigerator where they’ll stay fresh for 3 to 5 days. Just let them sit at room temperature for about 10 minutes before serving so the cookie softens slightly and the filling becomes more creamy. Betty’s method involves placing parchment paper between layers to prevent the cookies from sticking together, which works beautifully when you’re storing multiple dozen.
These Red Velvet Cream Cheese Thumbprint Cookies freeze exceptionally well, which I take full advantage of during the busy holiday season. I arrange them in a single layer on a baking sheet and freeze until solid, then transfer to freezer-safe containers with parchment paper separating the layers. They’ll keep their quality for 2 to 3 months this way. When you’re ready to enjoy them, simply thaw at room temperature for about 30 minutes, and they taste just as fresh as the day you baked them.
For the best texture, I don’t recommend leaving these at room temperature for extended periods since the cream cheese filling can become too soft and potentially unsafe after a few hours. If you’re serving them at a party or gathering, set out only what you’ll need for a couple of hours and keep the rest refrigerated until you need to replenish the platter.
Perfect Partners for Red Velvet Cream Cheese Thumbprint Cookies
Hot cocoa or coffee makes an ideal pairing because the warmth of the beverage contrasts beautifully with the cool, creamy filling, and the bitterness of coffee or richness of chocolate balances the sweet cookie perfectly.
Fresh berries add a bright, tart element that cuts through the richness. I especially love serving these cookies alongside strawberries or raspberries during Valentine’s Day since the red colors complement each other so beautifully.
Vanilla ice cream creates an indulgent dessert experience when you crumble one of these cookies over a scoop. The cold, creamy ice cream melts slightly into the cookie, and every bite delivers multiple textures and temperatures.
Champagne or sparkling wine elevates these from everyday cookies to special occasion desserts. The bubbles and acidity in the wine cleanse your palate between bites, making each cookie taste as good as the first.
Simple sugar cookies round out a holiday cookie platter by providing simpler flavors that let these red velvet beauties shine as the showstopper. I always include a variety of textures and flavors when assembling gift boxes.
Spiced nuts offer a savory contrast that many folks appreciate. The warmth of cinnamon or the heat of cayenne in candied pecans provides an interesting counterpoint to the sweet, tangy cookies. These also pair wonderfully with cranberry brie bites for an elegant holiday spread.
FAQs
I recommend sticking with gel food coloring because liquid versions add too much moisture to the dough, which can affect the texture and cause excessive spreading during baking—you’d need several bottles of liquid coloring to achieve the same vibrant hue that just a couple ounces of gel provides.
To prevent this issue, make sure you’re pressing a deep enough indentation before adding the filling, and avoid overfilling each well—I’ve also found that chilling the filling slightly before piping helps it hold its shape better during baking.
Many home cooks find success with making the dough up to 2 days in advance and storing it covered in the refrigerator, or you can bake the cookies completely and freeze them for up to 3 months just thaw them in the refrigerator overnight before serving.

Red Velvet Cream Cheese Thumbprint Cookies
Ingredients
Equipment
Method
-
Preheat oven to 375°F (190°C). Line several baking sheets with parchment paper or silicone baking mats.
-
In a medium bowl, whisk together the all-purpose flour, unsweetened natural cocoa powder, baking soda, and salt. Set aside.
-
In a stand mixer, cream softened unsalted butter and granulated sugar on medium-high speed for 3-5 minutes until light and fluffy.
-
Add the egg, vanilla extract, and white vinegar. Beat on medium speed until just combined, scraping down the sides of the bowl.
-
Mix in 1-2 ounces of red gel food coloring until the dough achieves a vibrant red hue.
-
Add the dry mixture in three additions, alternating with two additions of buttermilk. Mix on low speed only until flour streaks disappear to avoid overmixing.
-
Scrape the dough into a ball, cover tightly with plastic wrap, and refrigerate for at least 30 minutes, or up to 2 hours.
-
In a clean stand mixer bowl, beat softened cream cheese and unsalted butter on medium speed for 2-3 minutes until smooth and creamy. Scrape down the sides of the bowl frequently.
-
Gradually add sifted powdered sugar, one cup at a time, mixing on low speed until combined. Increase speed to medium-high and beat for another 2-3 minutes until light and fluffy.
-
Stir in the vanilla extract and a pinch of salt until blended.
-
Transfer the cream cheese filling to a piping bag fitted with a small round tip (or a Ziploc bag with a snipped corner). Refrigerate for 15-20 minutes if needed to firm up.
-
Remove chilled dough. Using a 1.5 tablespoon cookie scoop or by hand, form uniform balls. Place them on prepared baking sheets, 2 inches apart.
-
Gently press an indentation into the center of each dough ball using your thumb or the back of a rounded measuring spoon.
-
Carefully pipe or spoon a generous dollop of the prepared cream cheese filling into the center of each indentation.
-
Bake for approximately 10-12 minutes at 375°F (190°C), until the edges are set and the cream cheese filling appears set and slightly puffed.
-
Remove from oven and allow cookies to cool on the baking sheets for about 5-7 minutes.
-
Transfer cookies gently to a wire rack to cool completely. This is critical for the cream cheese filling to fully set.
-
Once cooled, dust lightly with additional powdered sugar or drizzle with melted white chocolate for an elegant finish.