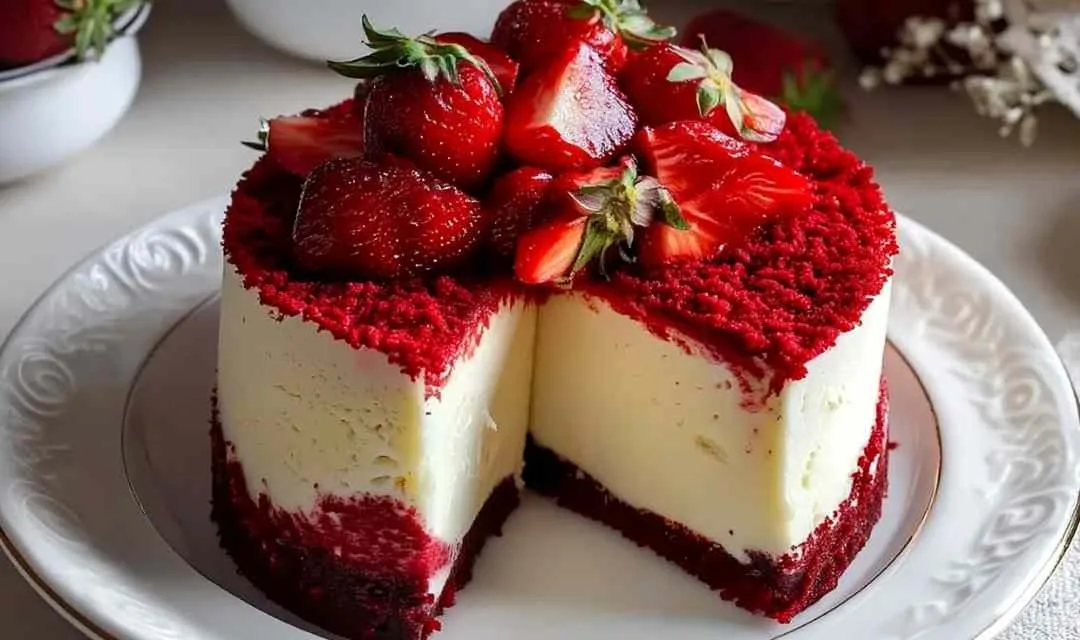
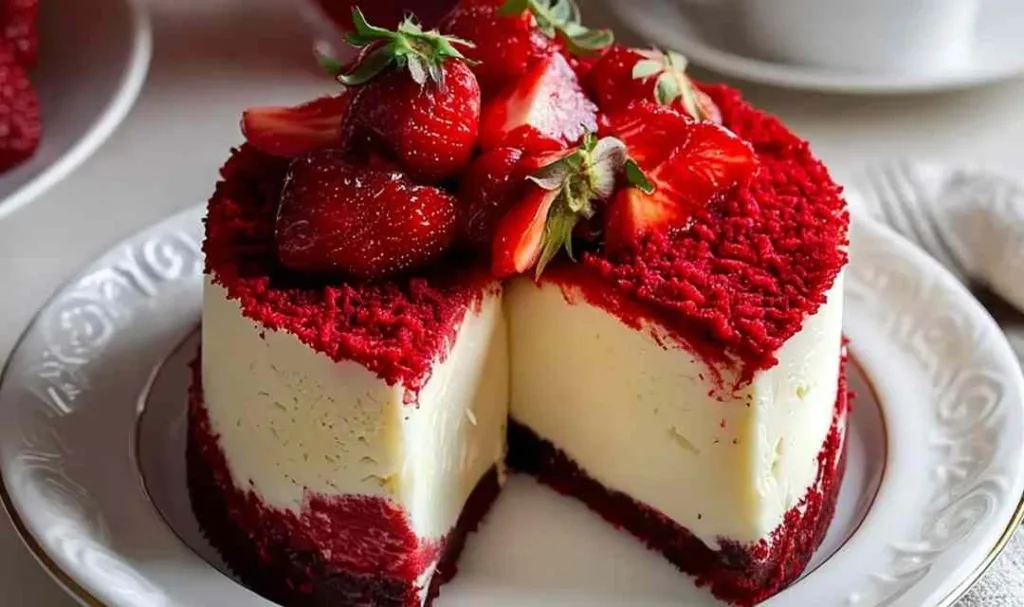
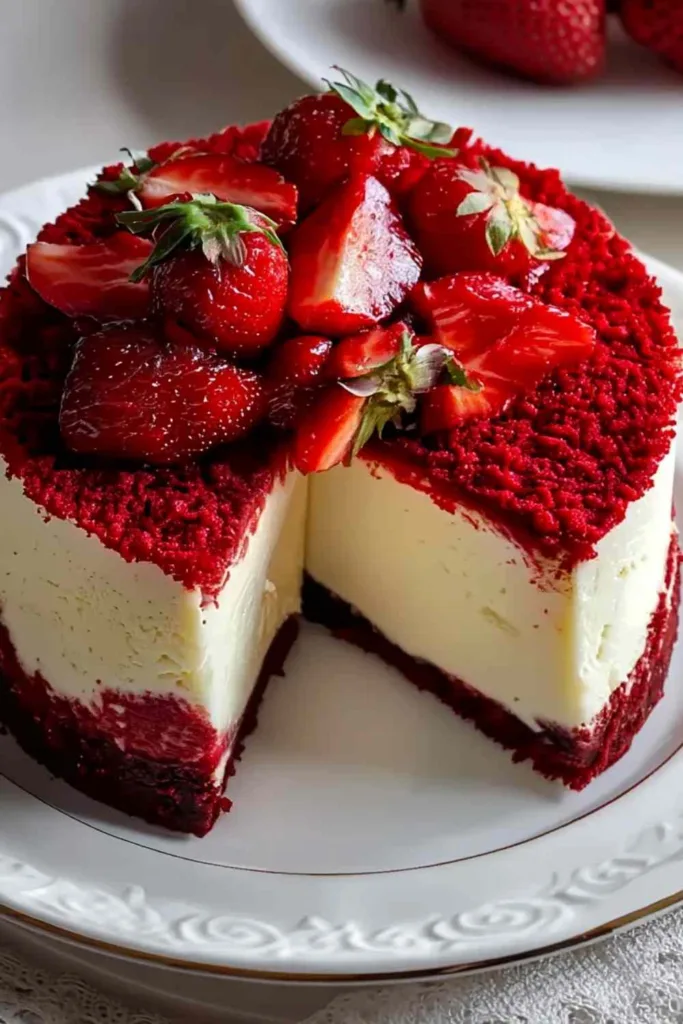
Red Velvet Strawberry Cheesecake combines three beloved desserts into one show-stopping creation that’ll have everyone asking for seconds. I still remember the first time I made this beauty for my granddaughter’s birthday – watching faces light up when I cut into those gorgeous red and white layers made every minute in the kitchen worthwhile.
There’s something magical about the way a red velvet cake base meets creamy cheesecake, all topped with glossy strawberries. Growing up in the Midwest, we had our fair share of layer cakes at Sunday gatherings, but this one takes tradition to a whole new level. The rich cocoa notes in the red velvet blend beautifully with the tangy cream cheese layer, while fresh strawberries add that bright, fruity finish. It’s the kind of dessert that makes ordinary days feel special and turns celebrations into unforgettable memories. Your kitchen’s about to smell incredible!
What Makes This Red Velvet Strawberry Cheesecake So Special
I’ve been baking cheesecakes for decades, and this Red Velvet Strawberry Cheesecake has earned its permanent spot in my recipe box. The three-layer approach might sound fancy, but I promise it’s more forgiving than you’d think – perfect for intermediate bakers ready to impress without the stress.
Here’s why this dessert works every time:
- Stunning visual appeal with contrasting red and white layers that photograph beautifully
- Balanced flavors where cocoa richness meets tangy cheesecake and fresh fruit brightness
- Crowd-pleasing combination that satisfies both cake lovers and cheesecake devotees
- Make-ahead friendly so you can prep the day before your celebration
- Uses familiar ingredients you likely have in your pantry or can grab at any grocery store
- Versatile presentation that works for birthdays, anniversaries, or holiday gatherings
This dessert became my go-to after my daughter requested “something different but not too weird” for her wedding shower. The combination of familiar flavors in an unexpected format hit that sweet spot perfectly.
Ingredient Spotlight
All-purpose flour forms the foundation of your red velvet base, creating structure without weighing down the tender crumb that makes red velvet cake so distinctive.
Cocoa powder provides that subtle chocolate undertone. I always use natural cocoa powder rather than Dutch-processed for the proper tangy flavor and vibrant red color.
Buttermilk reacts with the vinegar and baking powder to create an incredibly moist, tender cake base with just the right amount of acidity to balance the sweetness.
Red food coloring gives this dessert its signature dramatic appearance. I prefer gel food coloring because it delivers bold color without adding extra liquid to the batter.
Cream cheese must be fully softened to room temperature before mixing; this prevents lumps and creates that silky-smooth cheesecake layer we’re after.
Sour cream adds extra richness and a subtle tang to the cheesecake layer while helping prevent cracks during baking.
Fresh strawberries provide beautiful color and bright flavor. I always choose firm, red berries without soft spots for the best texture in the topping.
White vinegar activates the baking powder and interacts with the buttermilk to help the cake rise while adding a pleasant tang that cuts through the sweetness.
How to Make Red Velvet Strawberry Cheesecake
Step 1. Betty always starts by preheating the oven to 350°F and preparing the springform pan with both grease and parchment paper – this double protection ensures your beautiful layers release cleanly after chilling.
Step 2. I’ve learned that whisking the dry ingredients thoroughly before adding anything wet prevents flour pockets and distributes that cocoa powder evenly for consistent color and flavor.
Step 3. When cutting in the softened butter, aim for a texture like coarse sand with pea-sized bits – this creates the perfect tender crumb in your red velvet base.
Step 4. Mix your wet ingredients in a separate bowl until the red food coloring is completely uniform; this prevents streaking in your finished cake layer.
Step 5. Fold the wet mixture into the dry ingredients just until combined. Overmixing develops gluten and creates a tough cake, so stop as soon as you don’t see flour streaks.
Step 6. For the silkiest cheesecake layer, beat the cream cheese alone first until it’s completely smooth before adding sugar; this prevents lumps that are nearly impossible to remove later.
Step 7. Add eggs one at a time and mix gently. Through trial and error, I learned that overbeating at this stage incorporates too much air, which can cause cracks during baking.
Step 8. Pour the cheesecake batter carefully over the red velvet layer, starting from the center and letting it spread naturally to avoid disturbing that beautiful base.
Step 9. The cheesecake is perfectly done when the edges are set but the center still has a slight jiggle – it will firm up completely as it cools and chills.
Step 10. After years of making cheesecakes, I always let them cool completely at room temperature before refrigerating to prevent those disappointing cracks from temperature shock.
Step 11. Betty’s strawberry topping cooks quickly over medium heat. Stir gently and watch carefully so the berries soften and release their juices without scorching on the bottom.
Step 12. Let the strawberry topping cool completely before adding it to your chilled cheesecake; warm topping can melt the cheesecake surface and create a soggy layer.
Keeping This Red Velvet Strawberry Cheesecake Fresh
I typically store this cheesecake covered with plastic wrap or in an airtight container in the refrigerator, where it stays fresh for up to 5 days. The flavors actually deepen and meld beautifully after a day or two, which is why I often make this dessert the day before serving. For the best texture, I keep the strawberry topping in a separate sealed jar and add it fresh to each slice just before serving – this prevents the cheesecake from becoming soggy.
Betty’s freezing method works wonderfully for this recipe if you want to prepare well in advance. Wrap individual slices in a double layer of plastic wrap, then add a layer of aluminum foil to prevent freezer burn. Frozen slices keep for up to one month and taste remarkably fresh when thawed overnight in the refrigerator. I recommend freezing the cheesecake without the strawberry topping, then preparing fresh topping when you’re ready to serve.
For the best texture when serving, I always use a hot, clean knife to cut through the layers. Simply dip your knife in hot water, wipe it dry, and make your cut. Clean and reheat the knife between each slice for those picture-perfect wedges that show off the stunning red and white layers.
Perfect Partners for Red Velvet Strawberry Cheesecake
- Fresh whipped cream adds a light, airy contrast to the rich, dense cheesecake layers and creates an elegant presentation for special occasions
- Vanilla ice cream melts slightly against the chilled cheesecake, creating a delightful temperature contrast that guests always appreciate
- Fresh berries like raspberries and blueberries complement the strawberry topping while adding varied textures and additional pops of color to your dessert plate
- Strong brewed coffee cuts through the sweetness beautifully. My family always requests a pot of coffee when this dessert appears on the table
- Late-harvest Riesling or sparkling Rosé pairs wonderfully with the fruity, tangy flavors if you’re serving this for an adult celebration
- Fresh mint sprigs add a beautiful pop of green color and a subtle refreshing note that balances the richness of the cream cheese
If you’re looking for more stunning dessert options to impress your guests, you might also enjoy my Red Velvet Cream Cheese Thumbprint Cookies or the decadent Red Velvet Cheesecake Swirl Cake. For a lighter dessert option that still brings joy to the table, try my Berry Puff Twists.
FAQs
I recommend sticking with a springform pan for this recipe. The high sides and removable bottom make it much easier to release the delicate layers cleanly and present those beautiful colors.
To prevent cracking, make sure all your ingredients are at room temperature, avoid overmixing once you add the eggs, and let the cheesecake cool gradually at room temperature before refrigerating.
Many home cooks find success with frozen strawberries in the cooked topping, though I recommend thawing and draining them first to prevent excess liquid from making the topping too thin.

Red Velvet Strawberry Cheesecake
Ingredients
Equipment
Method
-
Preheat oven to 350°F (175°C). Grease and line a 9-inch springform pan with parchment paper for easy release.
-
In a large bowl, whisk together flour, sugar, cocoa powder, baking powder, and salt until evenly combined.
-
Add softened butter and blend with pastry cutter or electric mixer on low until mixture resembles coarse crumbs.
-
In separate bowl, whisk eggs, vanilla extract, red food coloring, buttermilk, and white vinegar until smooth and uniformly colored.
-
Gradually add wet mixture to dry ingredients, mixing just until combined. Pour into prepared pan and spread evenly.
-
Beat cream cheese on medium speed until completely smooth. Gradually add sugar, beating until creamy.
-
Add eggs one at a time to cream cheese mixture, mixing gently after each. Stir in vanilla extract, sour cream, and flour until smooth.
-
Carefully pour cheesecake batter over red velvet layer, tilting pan slightly to ensure even coverage.
-
Bake 50-60 minutes until center is set but slightly jiggly and edges are firm and lightly golden.
-
Cool completely at room temperature, then cover and refrigerate for at least 4 hours or overnight.
-
For topping, combine strawberries, sugar, and lemon juice in saucepan over medium heat. Cook 5-7 minutes until soft and slightly thickened.