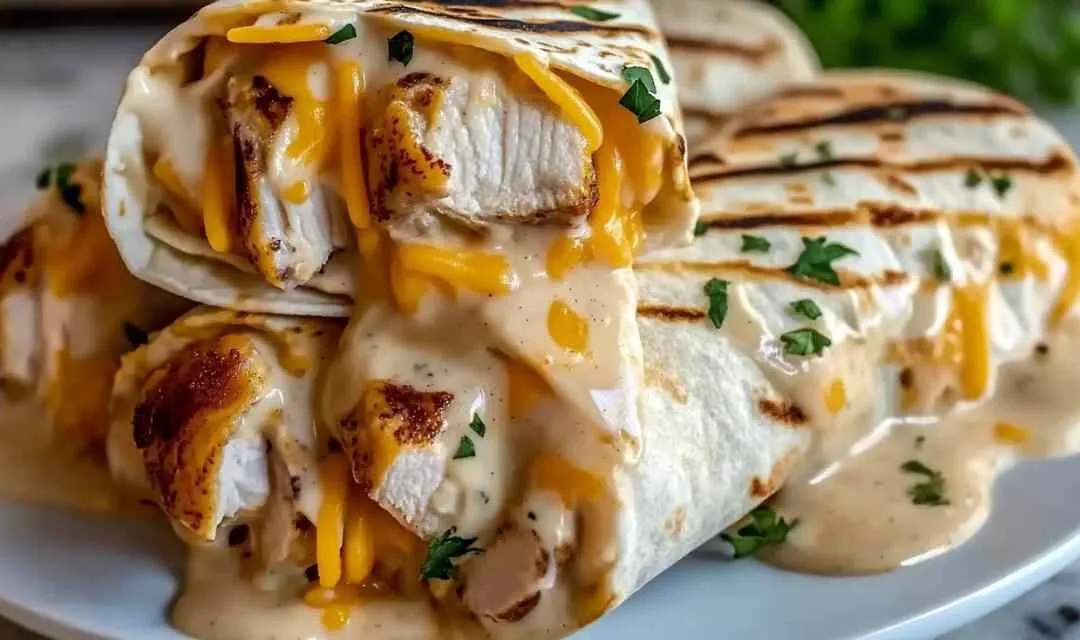
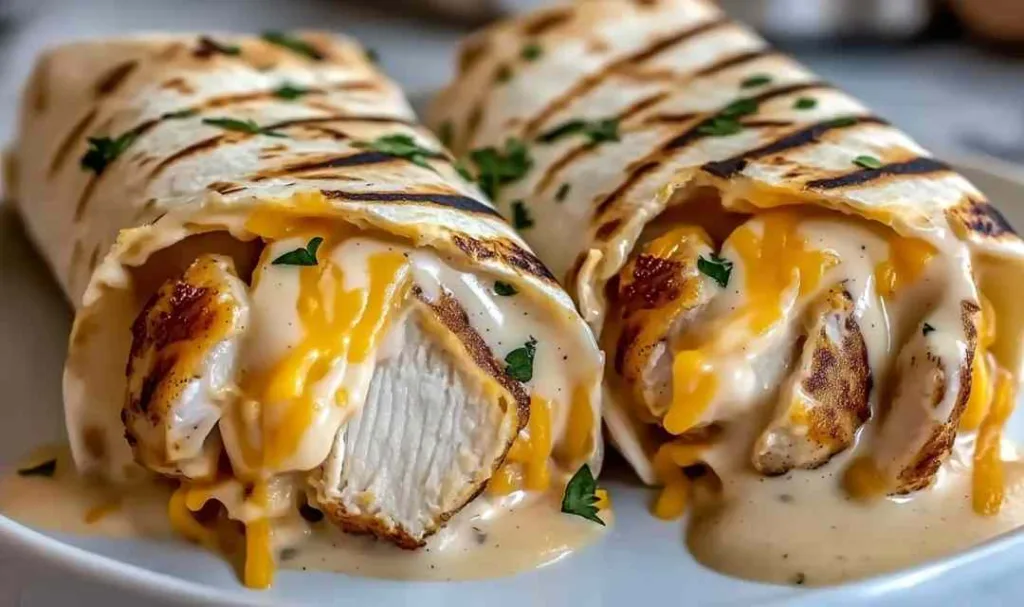
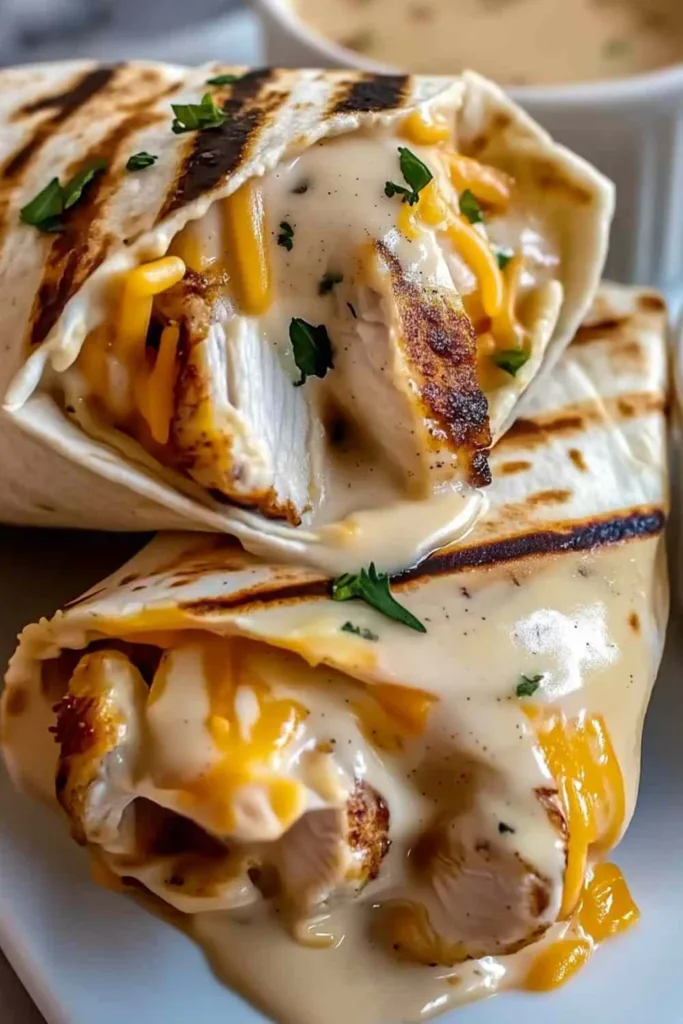
Cheesy Garlic Chicken Wraps deliver everything you crave in comfort food: juicy seasoned chicken, gooey melted cheese, and a garlic-butter punch that makes every bite unforgettable. I remember the first time I made these on a busy Wednesday evening when my grandkids were visiting. The kitchen filled with that irresistible aroma of garlic and butter, and before I knew it, everyone had gathered around the stove, asking “Is it ready yet?” That’s the magic of these wraps: they bring people together with minimal fuss and maximum flavor.
Growing up on my grandmother’s farm in the Midwest, we learned early that the best meals don’t have to be complicated. Sunday dinners often featured simple ingredients transformed into something special, and that philosophy guided me when I first experimented with these Cheesy Garlic Chicken Wraps. I wanted something my family could enjoy any night of the week, not just special occasions. The signature garlic butter glaze came about by accident one evening when I had extra herb butter and decided to brush it on the tortillas before crisping them. My daughter took one bite and declared it “restaurant-worthy,” and honestly, she wasn’t wrong. The golden, crispy exterior gives way to a creamy, cheesy filling that’s incredibly satisfying. Time to get our hands floury.
What Makes These Cheesy Garlic Chicken Wraps So Special
After making these wraps countless times for family dinners and potlucks, I’ve learned exactly why they’ve become a household favorite. These aren’t your average wraps: the combination of properly seasoned chicken, a three-cheese blend, and that buttery-crisp exterior creates something truly memorable.
Here’s what makes these wraps worth adding to your recipe box:
- Ready in just 33 minutes from start to finish, perfect for those hectic weeknight dinners when everyone’s hungry
- Uses simple pantry staples you likely already have, no hunting for specialty ingredients at three different stores
- The signature garlic butter glaze transforms ordinary tortillas into golden, crispy perfection with restaurant-quality flavor
- Incredibly versatile for meal prepping, make the components ahead and assemble when you’re ready to eat
- Family-friendly and customizable so even picky eaters can enjoy them with their preferred fillings
- Great for using leftover chicken from Sunday’s roast, making it a practical choice for reducing food waste
I’ve served these at church potlucks and family gatherings, and they disappear faster than my apple pie. The beauty is in their simplicity: good ingredients, proper technique, and that special touch of garlic butter that makes all the difference.
Ingredient Spotlight
Understanding your ingredients helps you make better cooking decisions, and I’ve learned through years of making these wraps which choices truly matter.
Chicken breast provides lean, high-quality protein that cooks quickly and stays tender when sliced thin. I always cut mine into strips against the grain for the most tender bite.
Fresh garlic cloves deliver authentic garlic flavor that pre-minced versions simply can’t match. In my kitchen, I prefer freshly minced garlic for its bright, pungent aroma that mellows beautifully when cooked.
Mediterranean herb blend adds complexity with its combination of oregano, basil, and thyme, creating that savory depth that makes these wraps taste like they came from a bistro.
Mozzarella and sharp cheddar create the perfect melting cheese combination. Mozzarella provides stretch and creaminess while cheddar adds sharp, tangy flavor that cuts through the richness.
Cream cheese acts as a binding agent that keeps the cheese mixture creamy and prevents it from becoming greasy when melted. This is Betty’s secret to that luxurious filling.
Red bell pepper contributes both sweetness and vibrant color while maintaining a slight crunch that contrasts beautifully with the tender chicken.
Fresh spinach wilts down to almost nothing but adds nutrients, color, and a subtle earthiness. I’ve found that adding it at the very end prevents it from becoming soggy.
Large flour tortillas serve as the vehicle for all these wonderful flavors. I always choose burrito-size tortillas for easier folding and more generous filling capacity.
Roasted garlic powder in the butter mixture intensifies the garlic flavor without the sharpness of raw garlic, creating that mellow, sweet garlic taste on the crispy exterior.
How to Make Cheesy Garlic Chicken Wraps Step by Step
After making these countless times, I’ve refined the process to ensure perfect results every time. Here’s exactly how to create restaurant-quality wraps in your own kitchen.
Step 1. I’ve learned that properly seasoning and searing the chicken creates the foundation for great flavor. Heat your large skillet over medium-high heat, add olive oil until shimmering, then cook seasoned chicken strips in a single layer for 3 minutes undisturbed to develop a golden crust before flipping for another 2-3 minutes.
Step 2. Betty always starts by building flavor in the same pan. Add sliced onions and cook for 2 minutes until softened, then add minced garlic for just 30 seconds (any longer and it burns), followed by your spices to toast them and release their aromatic oils.
Step 3. The key I discovered is adding vegetables in order of cooking time. Bell peppers go in first and cook for 3 minutes until softened but still slightly crisp, then return the chicken to combine everything, and finally fold in spinach just until wilted (about 45 seconds).
Step 4. For the creamiest cheese blend, I combine two-thirds of the shredded cheeses with cream cheese and sour cream in a medium bowl, mixing until well incorporated. Betty’s tip: let cream cheese sit at room temperature for easier blending.
Step 5. My family prefers when I brush the garlic butter on what will become the outside of the wrap. Whisk melted butter with roasted garlic powder, then brush one side of each tortilla and flip so the buttered side faces down during assembly.
Step 6. Through trial and error, I learned that proper assembly prevents soggy wraps. Spread 2 tablespoons of creamy cheese mixture in the center, top with one-sixth of the chicken-vegetable mixture, sprinkle with reserved dry cheese, then fold bottom up, sides in, and roll forward to create a tight package.
Step 7. I’ve found that cooking seam-side down first is crucial. Place wraps in a clean, dry skillet over medium heat and cook for 2-3 minutes until golden-brown, then flip carefully and cook another 2 minutes (covering with a lid in the last minute creates extra melty cheese inside).
Step 8. After years of making these Cheesy Garlic Chicken Wraps, I always let them rest for 1-2 minutes before slicing diagonally. This allows the cheese to set slightly and prevents everything from spilling out when you cut them.
Keeping These Cheesy Garlic Chicken Wraps Fresh
Proper storage ensures you can enjoy these wraps throughout the week, and I’ve tested every method to find what works best.
I typically store leftover wraps in an airtight container in the refrigerator for up to 3 days. Betty’s method works well because she wraps each one individually in parchment paper before placing them in the container. This prevents them from sticking together and maintains the integrity of the wrap. For the best texture when reheating, avoid the microwave which makes them soggy. Instead, I reheat by placing them in a dry skillet over medium-low heat for 2-3 minutes per side until warmed through and the exterior crisps up again.
Betty’s freezing method works well for meal prep. Assemble the wraps completely but don’t toast them yet. Wrap each one tightly in parchment paper, then aluminum foil, and place them in a freezer-safe bag. They’ll keep for up to 3 months this way. For the best results, I thaw them overnight in the refrigerator, then toast them fresh in a skillet as directed in the original recipe. The texture comes out nearly identical to freshly made wraps.
If you’re planning to meal prep, I recommend storing the chicken-vegetable mixture and cheese blend separately in the refrigerator for up to 2 days, then assembling and toasting fresh wraps when you’re ready to eat. This approach gives you the convenience of prep work while maintaining that perfect crispy-creamy contrast.
Perfect Partners for Cheesy Garlic Chicken Wraps
These hearty wraps pair beautifully with lighter sides that complement their rich, savory flavors without overwhelming the plate.
Fresh garden salad with lemon vinaigrette provides a crisp, acidic contrast that cuts through the richness of the cheese and garlic butter. I often add cherry tomatoes, cucumbers, and red onion for extra crunch and color.
Crispy sweet potato fries offer natural sweetness and additional texture while keeping the meal satisfying. The caramelized edges pair wonderfully with the savory garlic notes in the wraps. If you’re looking for a heartier option, try pairing these with my Southwest Ground Beef and Sweet Potato Skillet for a complete comfort food spread.
Creamy coleslaw delivers tangy crunch that balances the warm, melty interior of the wraps. Betty’s family always requests this pairing at summer gatherings.
Roasted vegetables like zucchini, carrots, and Brussels sprouts add nutritional value and earthy flavors that complement the Mediterranean herbs in the chicken mixture. For another delicious roasted vegetable option, check out my Roasted Autumn Vegetables with Balsamic Glaze.
Warm tomato soup creates a comforting combination reminiscent of grilled cheese and tomato soup but elevated with the sophisticated flavors of these gourmet wraps.
Fresh fruit salad with mint provides a refreshing, palate-cleansing finish. I particularly love serving watermelon and berries in summer or apple and grape medley in fall months.
FAQs
I recommend using boneless, skinless chicken thighs if you prefer. They’ll add more flavor and stay juicier, though they contain slightly more fat. Betty’s solution is to cook them a minute or two longer to ensure they’re fully cooked through.
To prevent this issue, warm your tortillas for 10-15 seconds in the microwave before assembling. The gentle heat makes them pliable and much easier to fold without cracking or tearing at the edges.
Many home cooks find success with preparing the chicken-vegetable mixture and cheese blend up to 2 days ahead, storing them separately in the refrigerator, then assembling and toasting fresh wraps when ready to eat for the best texture.

Cheesy Garlic Chicken Wraps
Ingredients
Equipment
Method
-
Heat large skillet over medium-high heat and add olive oil until shimmering. Toss chicken strips with salt and pepper. Place seasoned chicken in hot pan in a single layer without overcrowding. Cook undisturbed for 3 minutes to develop golden crust, then flip and cook another 2-3 minutes until just cooked through. Transfer to plate and tent with foil to keep warm.
-
In same pan, add sliced onions and cook for 2 minutes until softened and translucent. Add minced garlic and saute for 30 seconds until fragrant. Sprinkle in Mediterranean herb blend, smoky paprika, and chili flakes, stirring to coat and toast spices. Add bell peppers and cook for 3 minutes, stirring occasionally until softened but crisp. Return chicken to pan and toss everything together for 1 minute. Gently fold in fresh spinach, stirring just until wilted (about 45 seconds). Remove from heat.
-
In medium bowl, combine mozzarella and cheddar cheeses. Take 2/3 of mixture and blend with cream cheese and sour cream until well incorporated. Fold in fresh chives. Reserve remaining dry cheese for sprinkling inside wraps.
-
Whisk together melted butter and roasted garlic powder in small bowl. Lay tortillas flat on work surface and brush one side of each with aromatic mixture. Flip tortillas so buttered side faces down (this becomes the crispy exterior).
-
Working with one tortilla at a time, spread about 2 tablespoons creamy cheese mixture in center, leaving 2-inch border around edges. Top with 1/6 of chicken-vegetable mixture, distributing evenly. Sprinkle generous tablespoon of reserved dry cheese over filling. Fold bottom edge up over filling, fold in both sides, and continue rolling upward to create secure package. Press gently to seal, then set aside seam-side down.
-
Heat clean, dry skillet over medium heat. Place assembled wraps seam-side down in pan, working in batches to avoid crowding. Cook for 2-3 minutes until bottom develops golden-brown crust, then carefully flip. Cook for another 2 minutes on second side until crispy and cheese inside has melted. For even more melty interior, cover pan with lid during last minute of cooking.
-
Slice diagonally and serve immediately.


