These Panko Crusted Chicken Breasts bring that satisfying crunch we all crave without the fuss of deep frying. I remember Sunday dinners at my grandmother’s farm where the smell of frying chicken filled the whole house, and while we often use the classic Southern method, this panko version has become a modern favorite in my kitchen for its incredible texture and speed.
There is something truly special about a perfectly cooked piece of chicken, and this recipe captures that essence beautifully. Growing up in the Midwest, a good chicken dinner was a staple for family gatherings, and I have carried that tradition forward, adapting it with the ingredients I have come to love over the years.
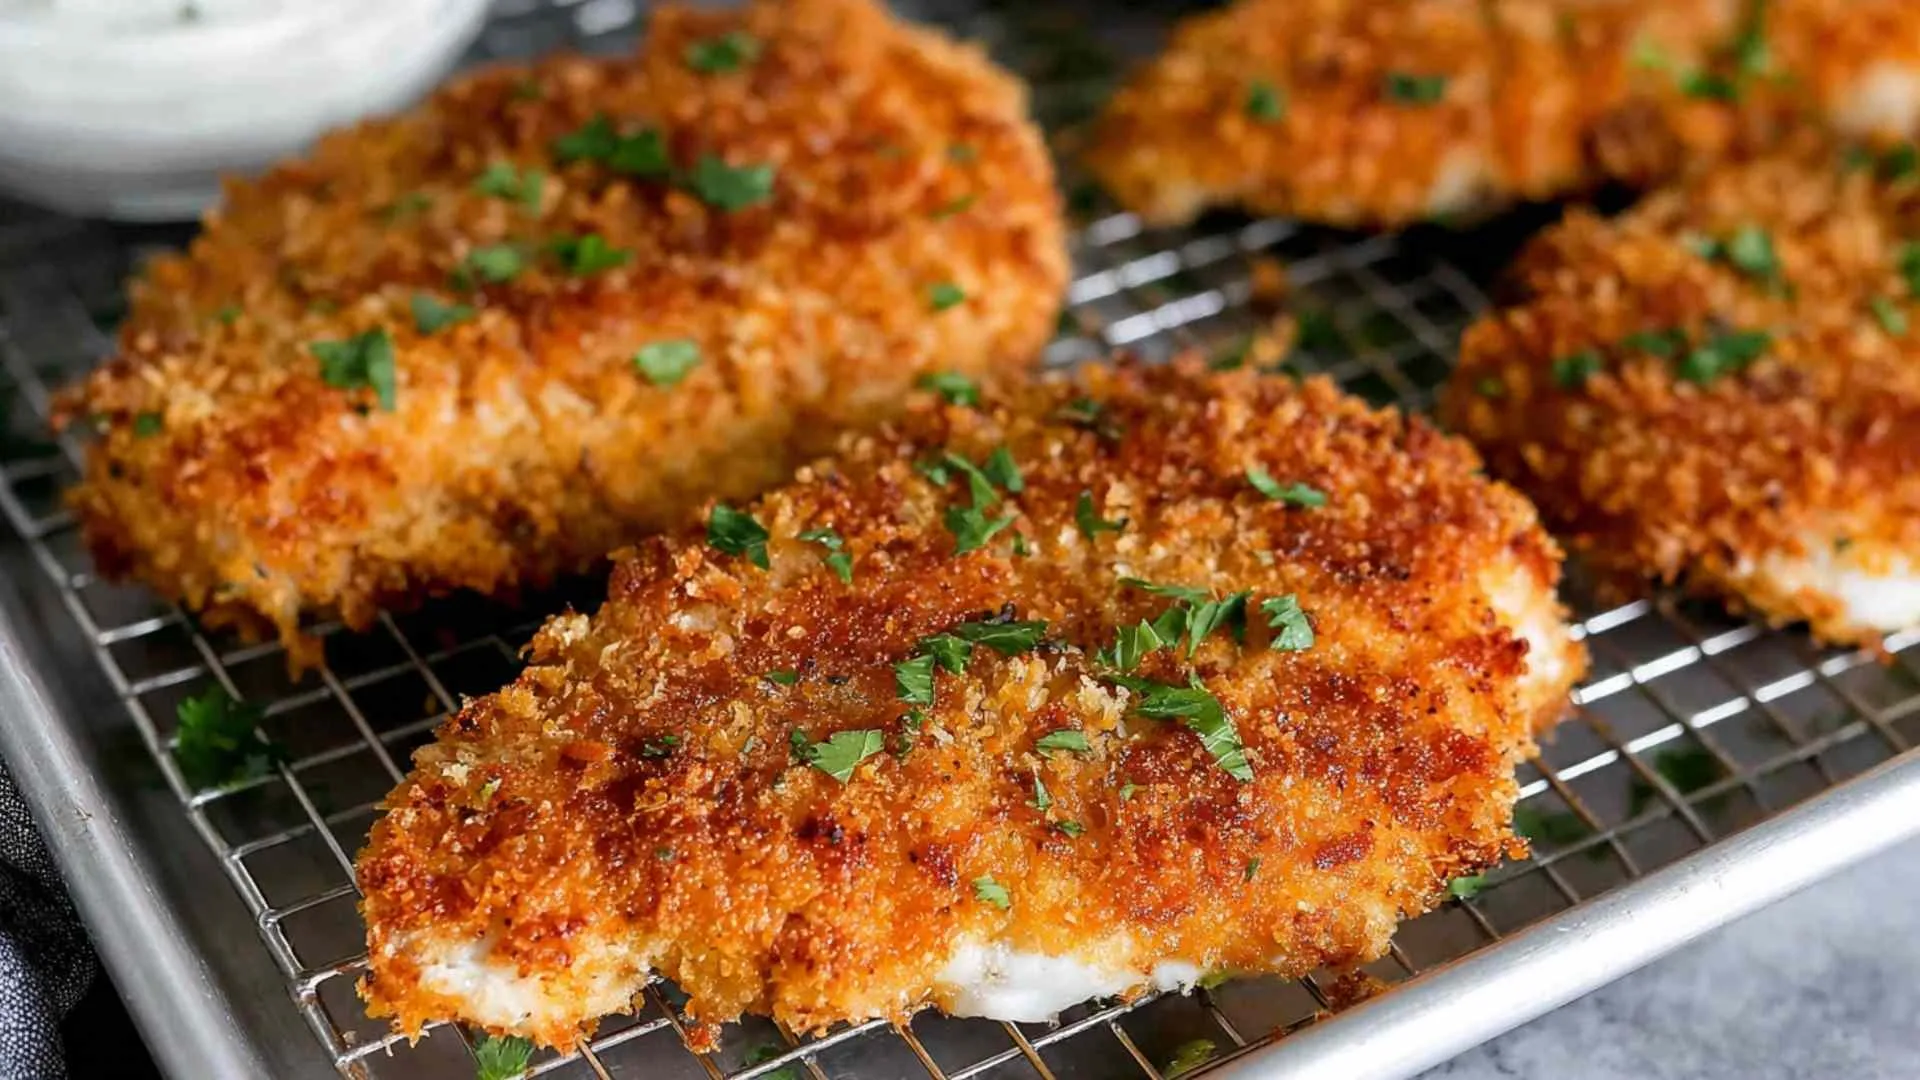
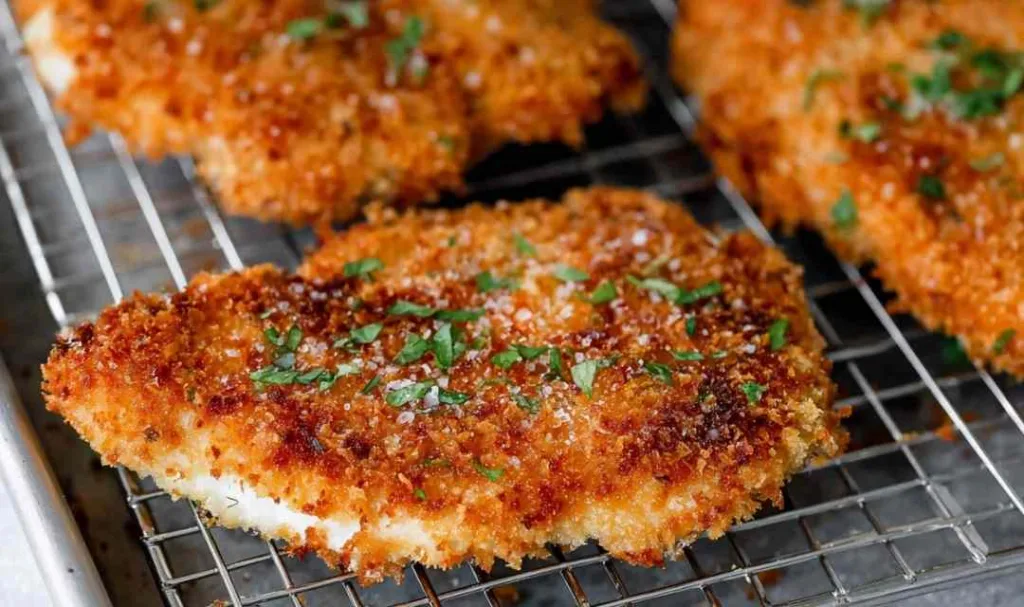
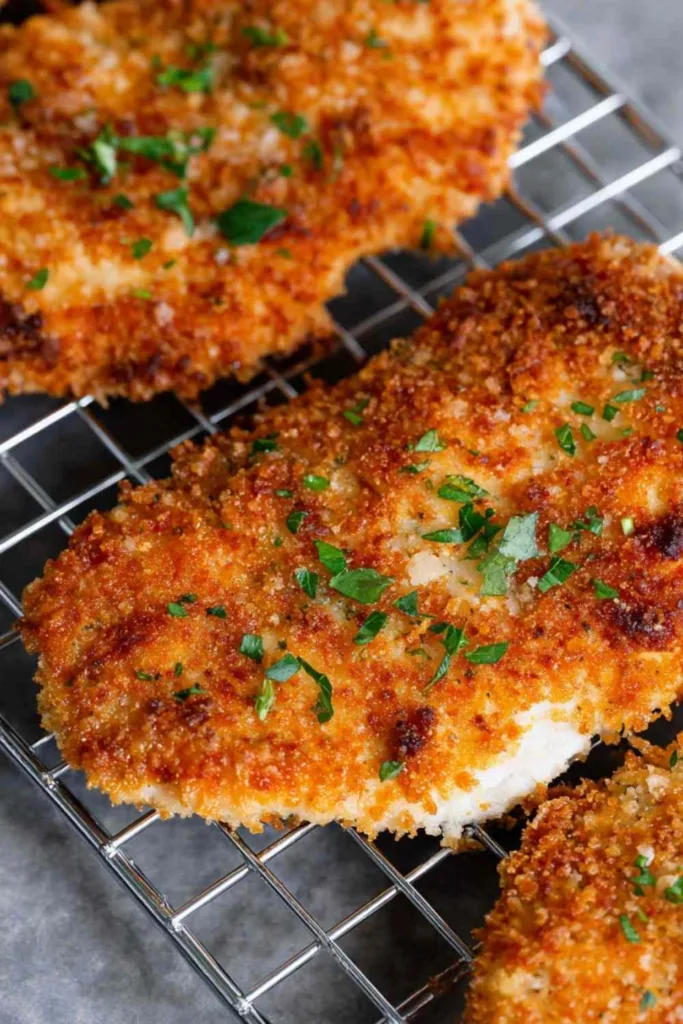
The sound of the breading hitting the hot oil takes me right back to those formative years, standing on a chair helping my mother at the stove. We use panko breadcrumbs here because they create an airy, ultra crispy crust that locks in all the natural juices of the meat. It pairs wonderfully with the savory notes of parmesan and just the right kick of spices to wake up your palate. It is a simple dish, but it brings a level of comfort and sophistication that makes it perfect for a Tuesday night dinner or a casual weekend get together. Your kitchen is about to smell incredible.
Why This Recipe Belongs in Your Recipe Box
This recipe is a staple in my home because it delivers restaurant quality results with the ease of home cooking. The combination of textures and flavors makes it a hit with everyone, even the picky eaters at the table.
- Perfectly crunchy on the outside and juicy on the inside
- Flavored with parmesan cheese and a custom blend of spices
- Options to pan fry for extra crispiness or bake for convenience
- Simple weeknight dinner ready in just 25 minutes
- Uses accessible ingredients you likely have in your pantry
Ingredient Spotlight
Understanding your ingredients is the first step to a successful dish. Each component plays a vital role in creating that perfect bite.
- Boneless, Skinless Chicken Breasts: I always start with high quality chicken. Pounding them to an even thickness ensures they cook quickly and stay tender.
- Plain Panko Breadcrumbs: These Japanese breadcrumbs are lighter and flakier than standard crumbs, giving the chicken its signature airy crunch.
- Fresh Grated Parmesan Cheese: In my kitchen, I prefer grating my own cheese because it melts better and adds a nutty, salty depth that pre shredded cheese lacks.
- Cajun or Italian Seasoning: This is where you can customize the flavor profile. I often switch between the two depending on whether I want a bit of heat or a herbaceous note.
- Egg: The egg wash is the crucial glue that holds the breading to the chicken, ensuring that golden crust stays put.
- Garlic and Onion Powder: These pantry staples provide a savory base layer of flavor that permeates the crust without overpowering the chicken.
How to Make Panko Crusted Chicken Breasts
Follow these steps to achieve that golden, crispy perfection every time. I have learned that taking your time with the breading process makes all the difference.
Step 1. Prepare the chicken. Carefully fillet each chicken breast into two thinner cutlets. Cover them with plastic wrap and lightly pound the thicker parts with a meat tenderizer or rolling pin to ensure an even thickness. Season both sides with ½ teaspoon of salt and ½ teaspoon of black pepper.
Step 2. Set up breading stations. Arrange three shallow dishes. In the first, combine the flour, ½ teaspoon salt, ½ teaspoon black pepper, onion powder, and garlic powder. In the second, whisk the egg with 1 teaspoon of water. In the third, mix the panko breadcrumbs, parmesan cheese, remaining salt, your chosen seasoning, and paprika.
Step 3. Dredge the chicken. Using tongs or your hands, coat each cutlet in the flour mixture first, shaking off any excess. This dry layer helps the egg stick. Next, dip it into the egg mixture, letting any excess drip off.
Step 4. Apply the crust. Press the chicken firmly into the panko mixture, ensuring both sides are evenly coated. I always pat the crumbs onto the chicken gently to help them adhere better during cooking.
Step 5. Heat the pan. In a large skillet, heat the olive oil and butter over medium heat. The butter adds a lovely flavor, but keeping the heat controlled is key to preventing the milk solids from burning.
Step 6. Pan fry to golden brown. Add the chicken to the skillet and cook for 3 to 4 minutes on each side. You are looking for a deep golden brown color and an internal temperature of 165 degrees F. If the crumbs are browning too fast, turn the heat down slightly.
Step 7. Rest and serve. Remove the chicken from the skillet and place it on a wire rack to rest for a couple of minutes. This step is essential for keeping the crust crispy and allowing the juices to redistribute.
Keeping This Chicken Fresh
If you happen to have leftovers, which is rare in my house, storing them properly will keep them tasty for the next day.
Refrigerator Storage: I typically store leftover chicken in an airtight container in the refrigerator. It will stay fresh for up to 3 days. To keep the crust from getting soggy, place a paper towel in the container to absorb excess moisture.
Freezing Guidelines: For longer storage, you can freeze these cooked cutlets. Wrap each piece individually in plastic wrap and then place them in a freezer bag. They will keep well for up to 2 months.
Reheating Methods: The best approach I have tested for reheating is a hot oven or a toaster oven. Bake at 375 degrees F for about 10 to 15 minutes until heated through. This method revives the crispiness much better than a microwave.
Perfect Partners for Panko Chicken
A great main dish deserves great sides. Here are a few of my family’s favorite pairings to complete your meal.
- Creamy Scalloped Potatoes: The tender potatoes and creamy sauce pair wonderfully with the crispy chicken texture. Creamy Scalloped Potatoes Recipe
- Crispy Garlic Parmesan Brussels Sprouts: This side matches the parmesan flavor profile of the chicken and adds a healthy veggie to the plate. Crispy Garlic Parmesan Brussels Sprouts
- Roasted Autumn Vegetables: The sweetness of the roasted veggies balances the savory spices of the chicken perfectly. Roasted Autumn Vegetables Recipe
- Apple Walnut Cranberry Salad: For a lighter meal, this fresh salad offers a sweet and tart crunch that cuts through the richness of the fried chicken. Apple Walnut Cranberry Salad Recipe
FAQs
Yes, you can bake them. I recommend placing the breaded chicken on a wire rack set over a baking sheet and spraying them with cooking spray. Bake at 400 degrees F for 12 to 15 minutes or until the internal temperature reaches 165 degrees F.
The key is the process, flour first, then egg, then crumbs. Also, make sure you press the panko mixture firmly onto the chicken. Letting the breaded chicken rest for 5 minutes before frying can also help the crust adhere.
Panko can brown quickly. If you notice this, simply lower your heat to medium low. You want the chicken to cook through gently without scorching the delicate crust.
Crispy Panko Crusted Chicken Breasts
Ingredients
Equipment
Method
-
Carefully fillet each chicken breast into two thinner cutlets. Cover with plastic wrap and lightly pound to an even thickness. Season with 1/2 teaspoon salt and 1/2 teaspoon black pepper.
-
Set up 3 breading stations. In the first dish, mix flour, 1/2 teaspoon salt, 1/2 teaspoon black pepper, onion powder, and garlic powder.
-
In the second dish, whisk the egg and 1 teaspoon of water.
-
In the third dish, combine panko breadcrumbs, parmesan cheese, 1/2 teaspoon salt, Cajun or Italian seasoning, and paprika.
-
Coat chicken in flour mixture, shaking off excess. Dip in egg mixture, letting excess drip off. Finally, press into panko mixture to coat evenly.
-
Heat olive oil and butter in a large skillet over medium heat. Add chicken and pan fry for 3-4 minutes per side until golden brown and internal temperature reaches 165 degrees F. Adjust heat if needed to prevent burning.
-
Remove from skillet and rest on a wire rack to keep crispy.