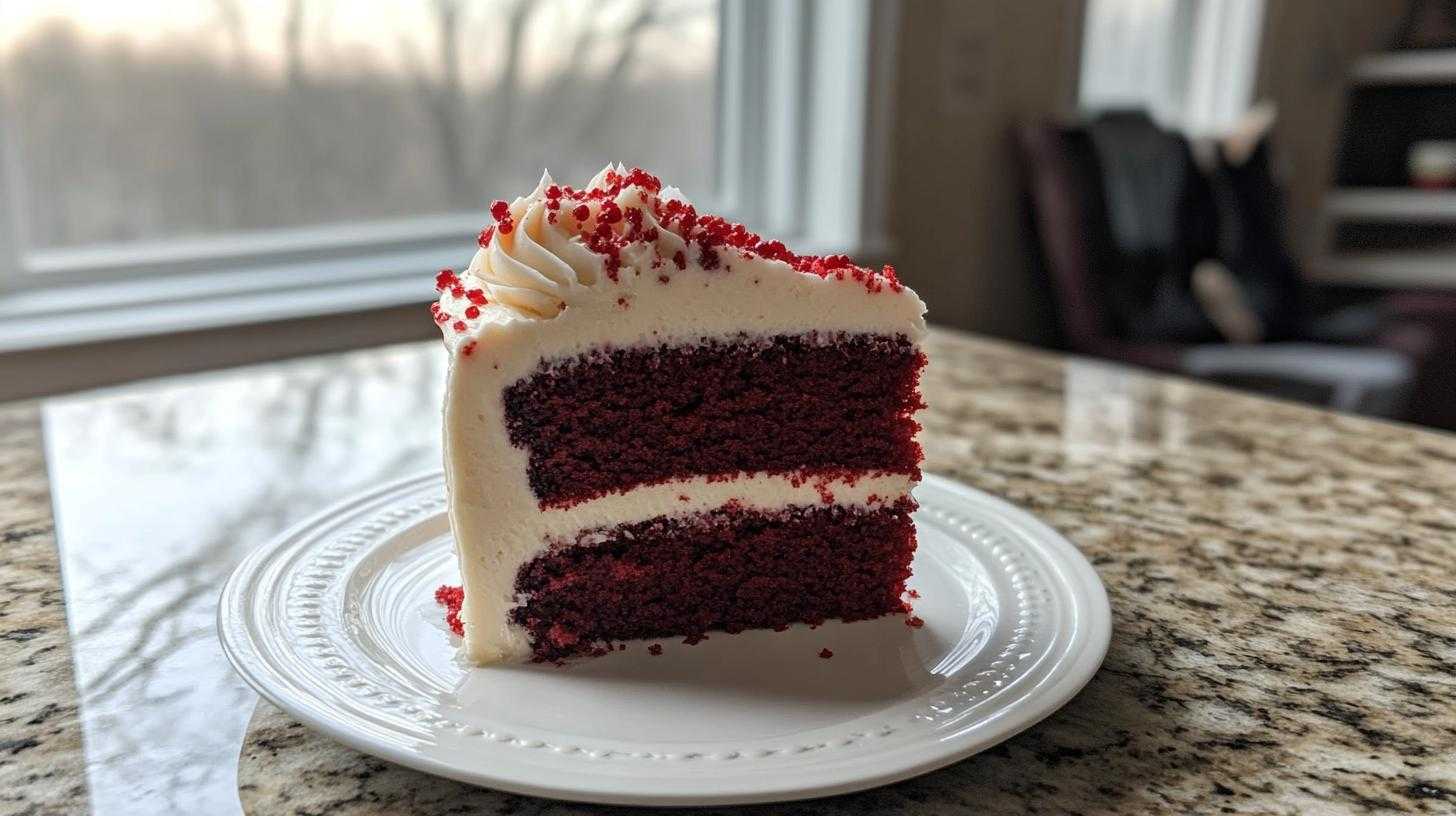
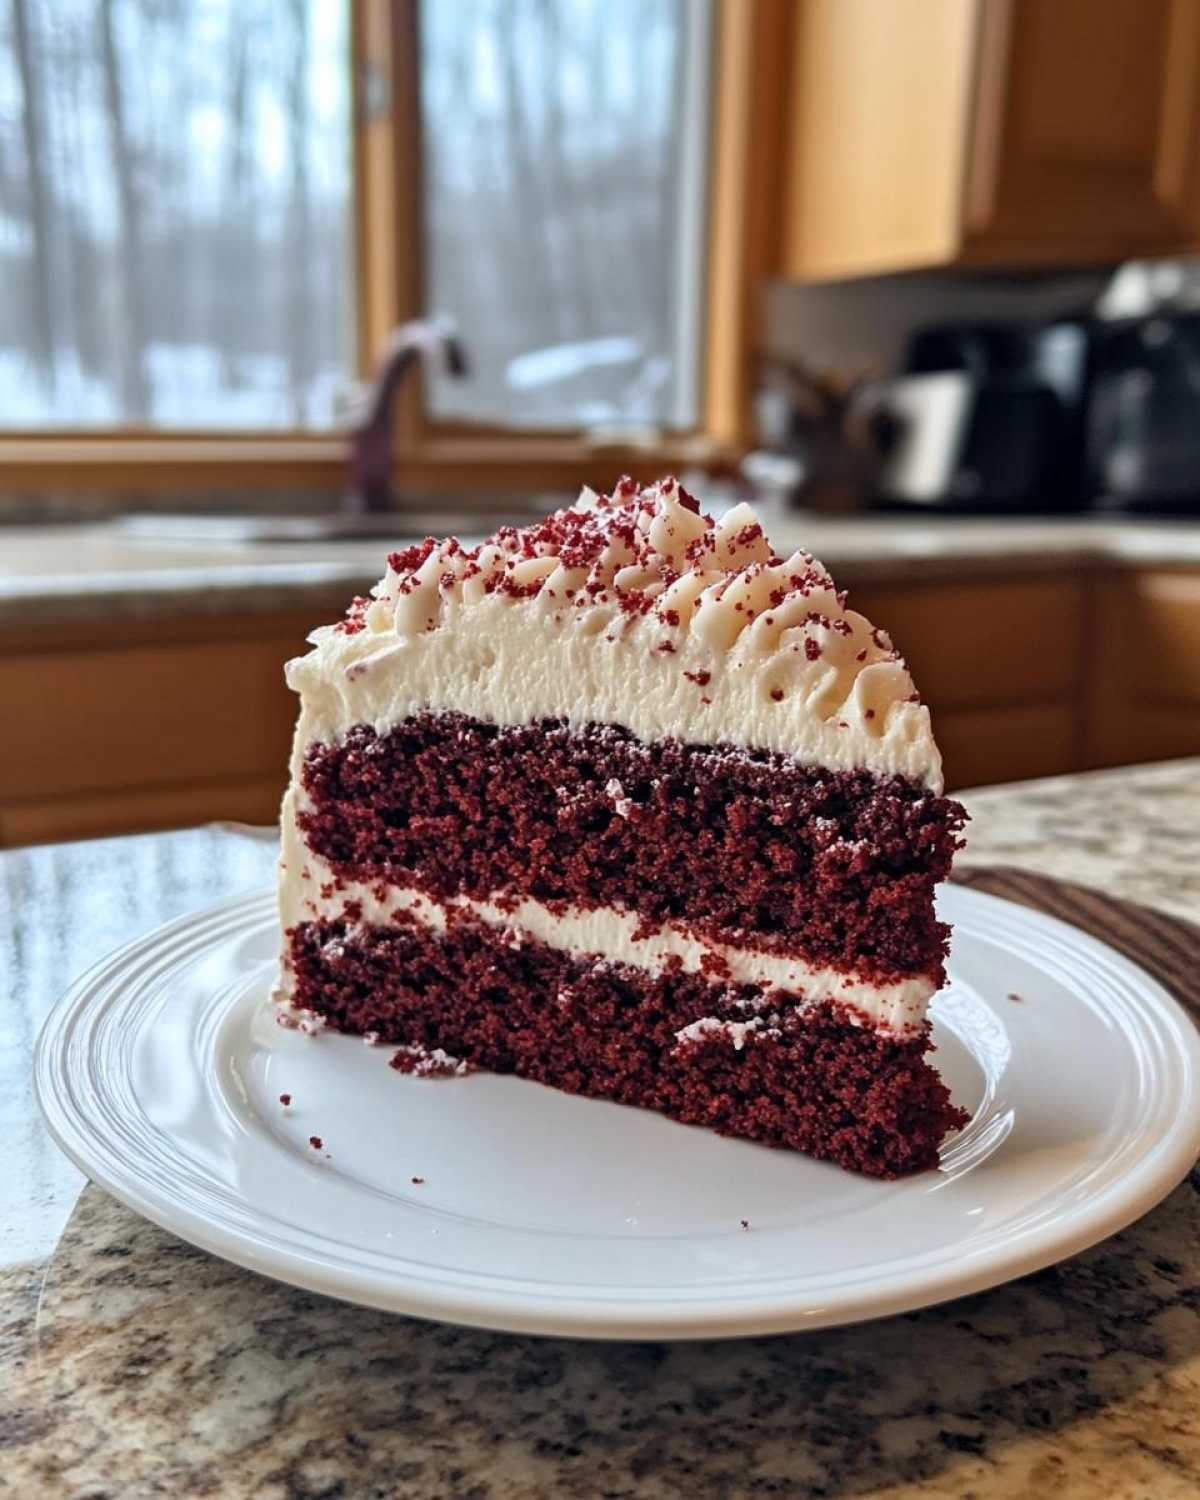
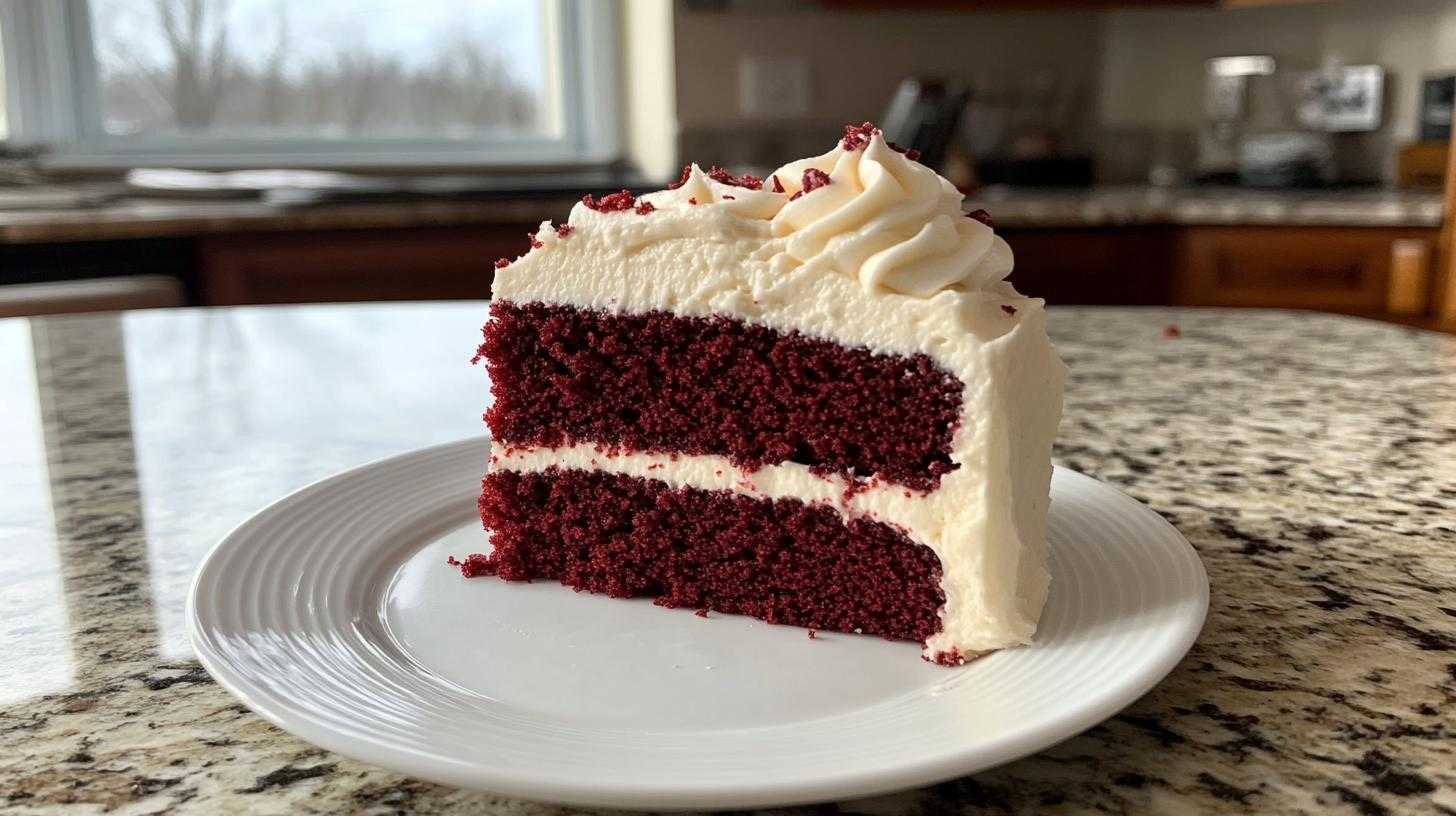
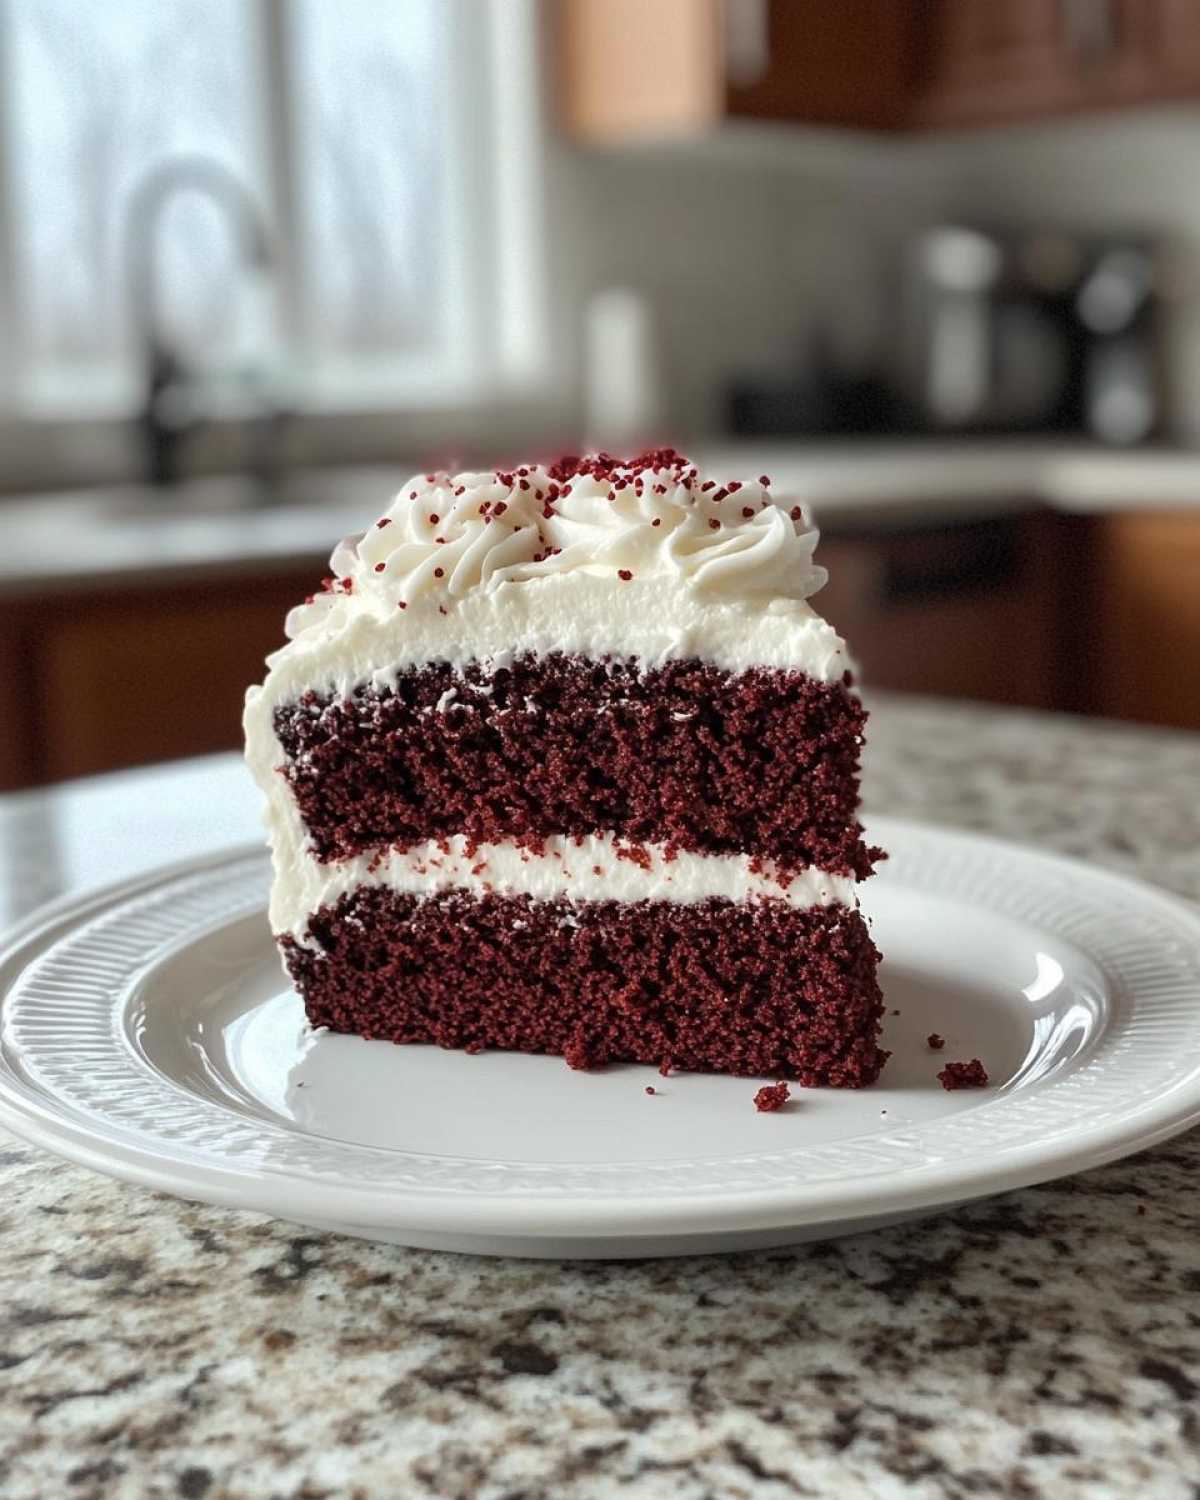
There’s something magical about the BEST RED VELVET CAKE. Its vibrant color and rich flavor make it a showstopper at any gathering. I remember the first time I made this cake for my sister’s birthday. The moment I pulled it out of the oven, the aroma filled the kitchen, and I could hardly wait to frost it. As I layered on the cream cheese frosting, I felt like an artist, creating a masterpiece. When we finally cut into it, the smiles on everyone’s faces were priceless. This cake has become a staple in our family, a classic dessert that never disappoints.
Whether it’s a birthday, anniversary, or just a cozy Sunday afternoon, the BEST RED VELVET CAKE always brings joy. The combination of the soft, moist cake and the tangy cream cheese frosting is simply irresistible. It’s not just a dessert; it’s a celebration on a plate. So, let’s dive into the secrets of making this delightful treat that will surely impress your family and friends!
Ingredients for the BEST RED VELVET CAKE
- 2 1/2 cups all-purpose flour
- 1 1/2 cups granulated sugar
- 1 teaspoon baking soda
- 1 teaspoon salt
- 1 teaspoon cocoa powder
- 1 1/2 cups vegetable oil
- 1 cup buttermilk, room temperature
- 2 large eggs, room temperature
- 2 tablespoons red food coloring
- 1 teaspoon vanilla extract
- 1 teaspoon white vinegar
- 8 oz cream cheese, softened
- 1/2 cup unsalted butter, softened
- 4 cups powdered sugar
- 1 teaspoon vanilla extract
- Pinch of salt
Gathering these ingredients is the first step to creating your masterpiece. Make sure your butter and eggs are at room temperature for the best results. Trust me, it makes a difference in the texture of your cake!
How to Prepare the BEST RED VELVET CAKE
Prepping the Oven and Pans
Before you start mixing, preheat your oven to 350°F (175°C). This step is crucial because it ensures your cake bakes evenly. While the oven heats up, grease and flour two 9-inch round cake pans. This prevents sticking and makes it easier to remove the cakes later. Trust me, a well-prepped pan is the first step to a perfect cake!
Mixing the Dry Ingredients
In a large bowl, sift together the flour, sugar, baking soda, salt, and cocoa powder. Sifting is key here; it aerates the flour and helps to combine the ingredients evenly. This step ensures your cake has a light and fluffy texture. I always take a moment to enjoy the sight of those beautiful, fluffy dry ingredients before moving on!
Combining Wet Ingredients
In another bowl, whisk together the vegetable oil, buttermilk, eggs, red food coloring, vanilla extract, and vinegar. Make sure everything is well combined. The order of mixing matters; starting with the oil helps to emulsify the mixture, creating a smooth batter. I love watching the vibrant red color come to life as I mix!
Combining Wet and Dry Ingredients
Now, it’s time to bring the wet and dry ingredients together. Gradually add the wet mixture to the dry ingredients, mixing gently until just combined. Be careful not to overmix; you want a smooth batter without lumps, but a few small lumps are okay. Overmixing can lead to a dense cake, and we want it light and airy!
Baking the Cake
Divide the batter evenly between the prepared pans. Bake in the preheated oven for 25-30 minutes. To check for doneness, insert a toothpick into the center of the cakes. If it comes out clean or with a few moist crumbs, they’re ready! The smell wafting through your kitchen will be heavenly.
Cooling the Cakes
Once baked, remove the cakes from the oven and let them cool in the pans for about 10 minutes. This cooling time allows the cakes to set. After that, transfer them to a wire rack to cool completely. Cooling is essential before frosting; if the cakes are warm, the frosting will melt and slide off!
Making the Cream Cheese Frosting
In a mixing bowl, beat the softened cream cheese and butter together until creamy and smooth. Gradually add the powdered sugar, vanilla extract, and a pinch of salt. Beat until the frosting is fluffy and well combined. The texture should be spreadable but not too runny. I always sneak a taste at this stage—it’s just too good!
Assembling the Cake
Once the cakes are completely cool, place one layer on a serving plate. Spread a generous amount of cream cheese frosting on top. Then, place the second layer on top and frost the top and sides of the cake with the remaining frosting. For a fun touch, you can decorate with sprinkles or create designs with extra frosting. Enjoy the process; it’s all part of the fun!
Why You’ll Love This Recipe
- Easy to Make: With simple steps and common ingredients, this recipe is perfect for both beginners and seasoned bakers.
- Deliciously Moist: The combination of buttermilk and oil ensures a tender, moist cake that melts in your mouth.
- Perfect for Celebrations: Whether it’s a birthday, wedding, or holiday, this cake is a showstopper that will impress your guests.
- Irresistible Flavor: The unique blend of cocoa and cream cheese frosting creates a flavor profile that’s both rich and refreshing.
- Customizable: You can easily add your own twist, like nuts or chocolate chips, to make it uniquely yours!
Tips for Success with the BEST RED VELVET CAKE
Making the BEST RED VELVET CAKE can be a delightful experience, but a few tips can help you avoid common pitfalls and ensure your cake turns out perfectly every time. Here are my top suggestions:
- Room Temperature Ingredients: Always use room temperature eggs and buttermilk. This helps create a smoother batter and a more even bake.
- Don’t Skip the Sifting: Sifting your dry ingredients is crucial. It prevents clumps and ensures even distribution of the baking soda and cocoa powder.
- Measure Accurately: Use a kitchen scale for precise measurements, especially for flour. Too much flour can lead to a dry cake.
- Check for Doneness: Every oven is different. Start checking your cakes a few minutes before the recommended time to avoid overbaking.
- Cool Completely: Make sure your cakes are completely cool before frosting. This prevents the frosting from melting and sliding off.
- Frosting Consistency: If your cream cheese frosting is too thick, add a splash of milk to reach the desired spreadable consistency.
- Chill the Cake: If you’re having trouble frosting, chill the cake for about 30 minutes. This helps the frosting set better.
With these tips in mind, you’ll be well on your way to creating a stunning and delicious BEST RED VELVET CAKE that will wow your family and friends!
Nutritional Information
When indulging in the BEST RED VELVET CAKE, it’s good to know what you’re enjoying. Here’s an estimated breakdown of the nutritional content per slice:
- Calories: 350
- Fat: 18g
- Saturated Fat: 8g
- Unsaturated Fat: 8g
- Trans Fat: 0g
- Cholesterol: 50mg
- Sodium: 300mg
- Carbohydrates: 45g
- Fiber: 1g
- Sugar: 30g
- Protein: 4g
Keep in mind that these values are estimates and can vary based on specific ingredients and portion sizes. Enjoy your slice of happiness, knowing it’s a delightful treat!
FAQ about the BEST RED VELVET CAKE
As you embark on your journey to create the BEST RED VELVET CAKE, you might have a few questions. Here are some common queries I’ve encountered, along with my answers to help you out:
Can I use a different type of food coloring?
While red food coloring is traditional for a classic red velvet cake, you can experiment with other colors if you want a fun twist. Just keep in mind that the flavor and appearance will change slightly!
What can I substitute for buttermilk?
If you don’t have buttermilk on hand, you can make a quick substitute. Mix 1 cup of milk with 1 tablespoon of vinegar or lemon juice. Let it sit for about 5 minutes, and you’ll have a perfect buttermilk replacement!
How do I store leftover cake?
To keep your BEST RED VELVET CAKE fresh, store it in an airtight container at room temperature for up to 3 days. If you want to keep it longer, refrigerate it for up to a week. Just make sure to let it come to room temperature before serving for the best flavor!
Can I freeze the cake?
Absolutely! You can freeze the cake layers before frosting. Wrap them tightly in plastic wrap and then in aluminum foil. They can be frozen for up to 3 months. Just thaw them in the fridge overnight before frosting and serving.
Why is my cake not red enough?
If your cake isn’t as vibrant as you’d like, it could be due to the type of cocoa powder used. Natural cocoa powder can dull the color. Try using Dutch-processed cocoa for a more intense red hue!
Storage & Reheating Instructions
After enjoying your BEST RED VELVET CAKE, you might have some leftovers. Here’s how to store and reheat them to keep that deliciousness intact:
Storing Leftovers
- Room Temperature: If you plan to eat the cake within 3 days, store it in an airtight container at room temperature. This keeps it moist and flavorful.
- Refrigeration: For longer storage, place the cake in the fridge. It can last up to a week. Just make sure it’s well covered to prevent it from drying out.
- Freezing: If you want to save it for later, freeze the cake layers before frosting. Wrap each layer tightly in plastic wrap, then in aluminum foil. They can be frozen for up to 3 months. When you’re ready to enjoy, thaw them in the fridge overnight.
Reheating Instructions
- Microwave: For a quick fix, place a slice in the microwave for about 10-15 seconds. This warms it up nicely without drying it out.
- Oven: If you prefer a more even heat, preheat your oven to 350°F (175°C). Wrap the cake in aluminum foil and heat for about 10-15 minutes. This method helps maintain the cake’s moisture.
With these storage and reheating tips, you can savor your BEST RED VELVET CAKE long after the celebration is over!

BEST RED VELVET CAKE: 5 Secrets to Irresistible Indulgence
- Total Time: 1 hour
- Yield: 12 servings 1x
- Diet: Vegetarian
Description
A classic dessert that never disappoints.
Ingredients
- 2 1/2 cups all-purpose flour
- 1 1/2 cups granulated sugar
- 1 teaspoon baking soda
- 1 teaspoon salt
- 1 teaspoon cocoa powder
- 1 1/2 cups vegetable oil
- 1 cup buttermilk, room temperature
- 2 large eggs, room temperature
- 2 tablespoons red food coloring
- 1 teaspoon vanilla extract
- 1 teaspoon white vinegar
- 8 oz cream cheese, softened
- 1/2 cup unsalted butter, softened
- 4 cups powdered sugar
- 1 teaspoon vanilla extract
- Pinch of salt
Instructions
- Preheat your oven to 350°F (175°C). Grease and flour two 9-inch round cake pans.
- In a large bowl, sift together the flour, sugar, baking soda, salt, and cocoa powder.
- In another bowl, whisk together the vegetable oil, buttermilk, eggs, red food coloring, vanilla extract, and vinegar until well combined.
- Gradually add the wet ingredients to the dry ingredients, mixing until just combined and smooth.
- Divide the cake batter evenly between the prepared cake pans.
- Bake in the preheated oven for 25-30 minutes, or until a toothpick inserted into the center comes out clean.
- Remove from the oven and let the cakes cool in the pans for 10 minutes. Then, transfer them to a wire rack to cool completely.
- In a mixing bowl, beat the softened cream cheese and butter together until creamy and smooth.
- Gradually add the powdered sugar, vanilla extract, and a pinch of salt. Beat until the frosting is fluffy and well combined.
- Once the cakes are completely cool, place one layer on a serving plate. Spread a generous amount of cream cheese frosting on top. Place the second layer on top and frost the top and sides of the cake with the remaining frosting.
- Optionally, you can decorate with sprinkles or additional frosting designs.
Notes
- Enjoy your Best Red Velvet Cake, a delightful treat perfect for any celebration!
- Prep Time: 30 minutes
- Cook Time: 30 minutes
- Category: Dessert
- Method: Baking
- Cuisine: American
Nutrition
- Serving Size: 1 slice
- Calories: 350
- Sugar: 30g
- Sodium: 300mg
- Fat: 18g
- Saturated Fat: 8g
- Unsaturated Fat: 8g
- Trans Fat: 0g
- Carbohydrates: 45g
- Fiber: 1g
- Protein: 4g
- Cholesterol: 50mg