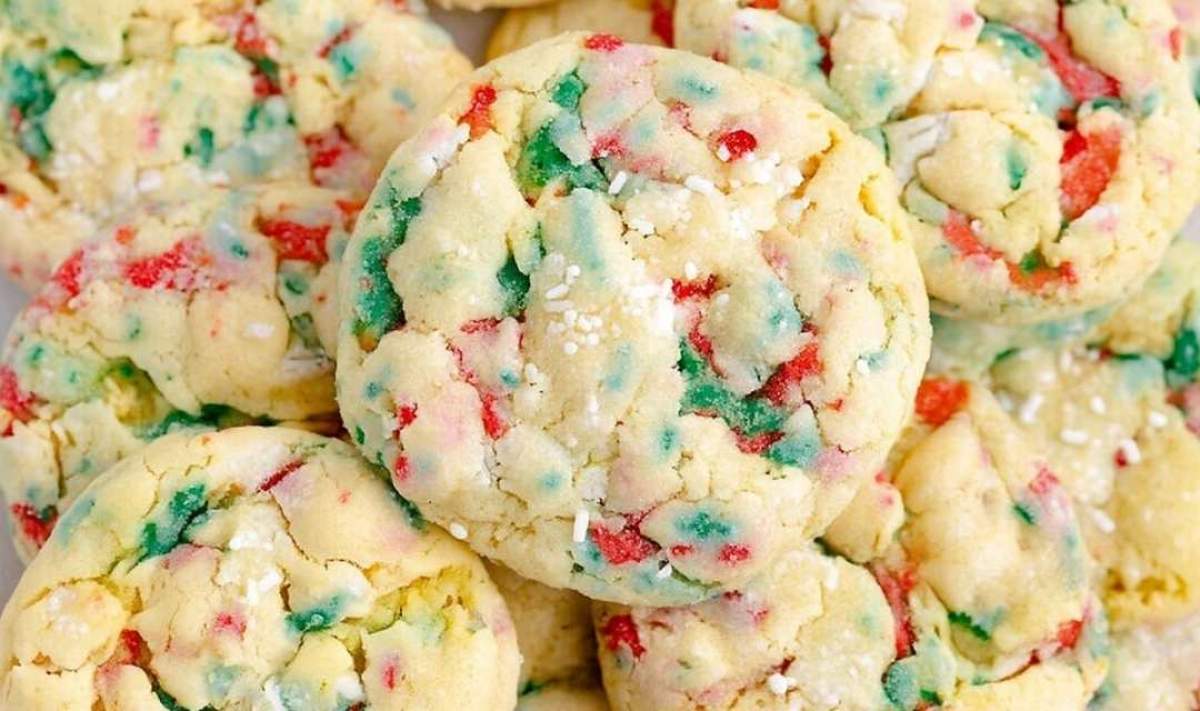
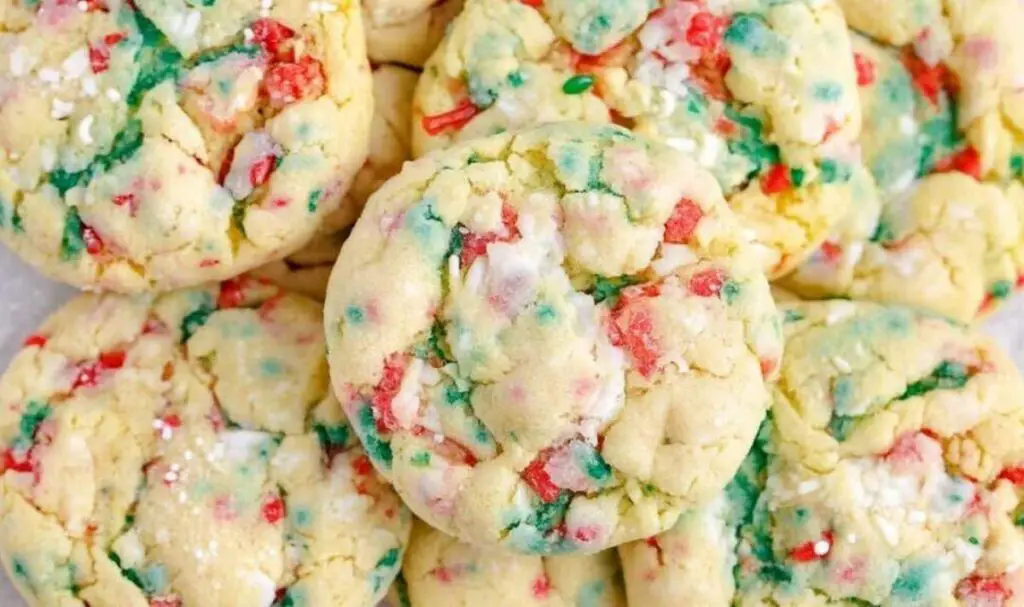
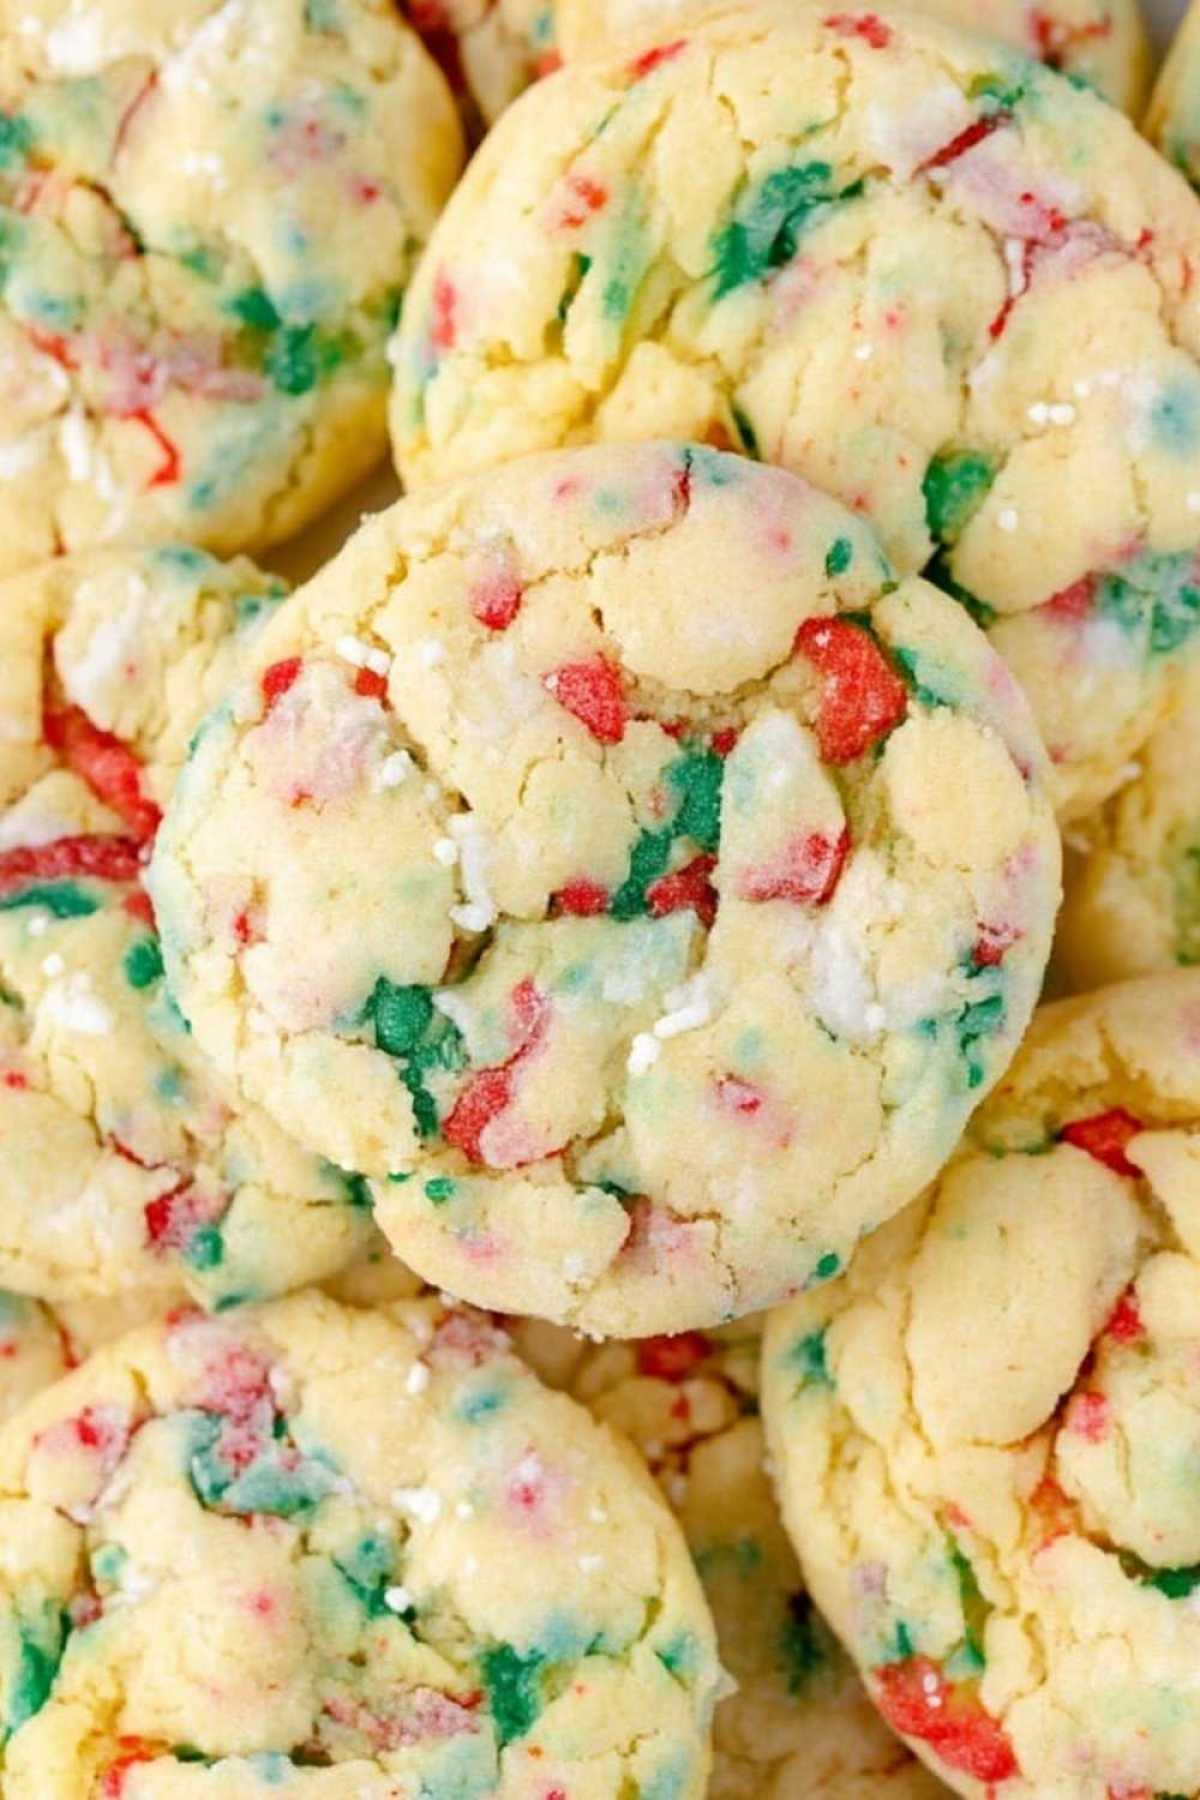
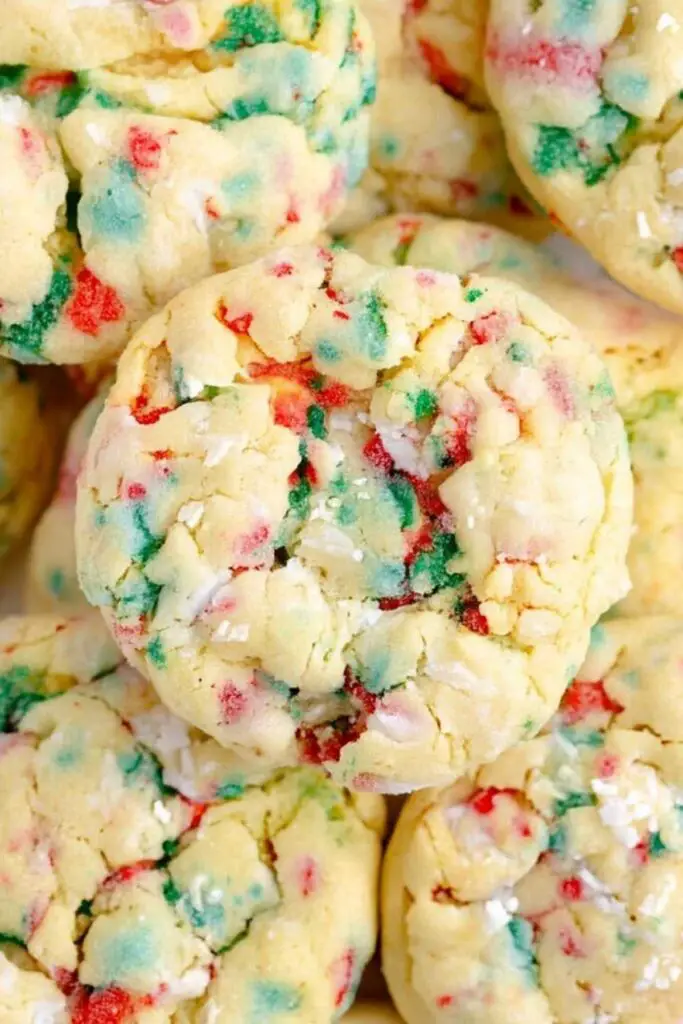
Christmas Gooey Butter Cookies are the ultimate holiday treat that combines the soft, chewy texture of cream cheese with festive sprinkles and a beautiful powdered sugar coating. These delightful cookies deliver that perfect balance of sweetness and comfort that makes every bite feel like a warm holiday hug.

I still remember the first time I made these cookies in my kitchen—it was three days before Christmas, and I needed something special for our annual cookie exchange. The house filled with the most incredible vanilla and butter aroma as they baked, and when I pulled them from the oven with their gorgeous crackled appearance, I knew I’d found something truly magical. My grandchildren couldn’t keep their hands off them, and neither could the neighbors when I delivered my holiday tins. The best part? They came together so easily that I had time to make three batches before the big day. Time to get our hands floury and create some holiday magic!
What Makes These Christmas Cookies So Special
After years of perfecting holiday treats in my kitchen, I can tell you that these Christmas Gooey Butter Cookies earn their place on every holiday table. They start with a foolproof cake mix base that saves precious time during busy December days, while the cream cheese creates that signature gooey texture that sets them apart from ordinary sugar cookies.
- Uses simple pantry staples you likely already have in your holiday baking supplies
- Comes together in just 30 minutes of hands-on time, perfect for last-minute cookie emergencies
- Delivers consistently soft, chewy results every single time with no risk of overbaking
- Adapts beautifully to any holiday theme by switching up the sprinkle colors
- Creates that perfect sweet-tangy balance from the cream cheese and vanilla combination
- Features a stunning crackled appearance that looks bakery-professional without any decorating skills
The beauty of this recipe lies in its reliability—I’ve made these cookies dozens of times for church potlucks, school events, and family gatherings, and they never disappoint.
Key Players in This Recipe
Full-fat cream cheese serves as the secret ingredient that creates the signature gooey texture and adds a subtle tangy richness that balances the sweetness perfectly. I always use the brick-style cream cheese rather than the spreadable variety for the best consistency.
Unsalted butter provides that essential buttery flavor and helps create the tender crumb structure. In my kitchen, I prefer using unsalted so I can control the overall saltiness of the final cookie.
Yellow cake mix acts as our time-saving base that delivers consistent results every time. I typically reach for Duncan Hines brand because it creates the perfect texture, though most quality cake mixes work beautifully.
Large egg binds everything together while adding structure and richness to each cookie. Room temperature eggs incorporate more easily into the cream cheese mixture.
Pure vanilla extract brings warmth and depth to the overall flavor profile. I always choose real vanilla extract over imitation for the best taste in these special holiday treats.
Holiday sprinkles add that festive pop of color and a slight textural contrast. I gently fold these in to prevent the colors from bleeding into the dough.
Powdered sugar creates the beautiful white coating that cracks as the cookies bake, giving them their signature bakery-style appearance.
How to Make Christmas Gooey Butter Cookies
Step 1. I always start by preheating my oven to 350°F and lining two baking sheets with parchment paper—this prevents any sticking and makes cleanup easier.
Step 2. In a large bowl, I beat the softened cream cheese, butter, egg, and vanilla extract with my electric mixer until the mixture becomes completely smooth and well-combined.
Step 3. Betty always adds the cake mix gradually, stirring just until a thick dough forms without overmixing, which keeps the cookies tender.
Step 4. I’ve learned that folding in the holiday sprinkles gently is key—too much mixing causes the colors to bleed and muddy the dough.
Step 5. After years of making these, I discovered that chilling the dough for at least 30 minutes makes it much easier to handle and shape into balls.
Step 6. I scoop the dough into 1½-inch balls and roll each one thoroughly in powdered sugar—this creates that beautiful crackled coating.
Step 7. Betty’s tip is to space the dough balls about 2 inches apart on the prepared baking sheets to allow for spreading.
Step 8. The key I discovered is baking for only 10-12 minutes until the edges are set but centers still look slightly soft—they’ll continue cooking on the hot pan.
Step 9. I let the cookies cool on the baking sheet for a few minutes before transferring to a wire rack, which prevents them from breaking while still warm.
Keeping These Cookies Fresh
I typically store these Christmas Gooey Butter Cookies in an airtight container at room temperature, where they’ll maintain their soft texture for up to three days. The cream cheese keeps them naturally moist, so they actually improve slightly after the first day as the flavors meld together.
Betty’s freezing method works wonderfully for make-ahead holiday planning—I place the completely cooled cookies in airtight containers or freezer bags where they’ll keep beautifully for up to three months. When I’m ready to serve them, I simply thaw them at room temperature for about 30 minutes, and they taste just as fresh as the day I made them.
For the best texture, I avoid refrigerating these cookies as the cold temperature can make them lose their signature soft, chewy consistency that makes them so special.
Christmas Gooey Butter Cookies
Ingredients
Equipment
Method
- Preheat oven to 350°F and line two baking sheets with parchment paper.
- In large bowl, beat together softened cream cheese, butter, egg, and vanilla extract with electric mixer until smooth.
- Stir in cake mix until thick dough forms.
- Gently fold in holiday sprinkles, being careful not to overmix so sprinkle colors don’t bleed into dough.
- Chill dough for at least 30 minutes to make it easier to handle.
- Scoop dough into 1½-inch balls and roll them in powdered sugar until fully coated.
- Place dough balls on prepared baking sheets, about 2 inches apart.
- Bake for 10-12 minutes, until edges are set but centers still look slightly soft.
- Let cookies cool on baking sheet for a few minutes before transferring to wire rack to finish cooling.
Notes
Perfect Partners for Christmas Gooey Butter Cookies
- Hot chocolate or spiced cider creates a cozy combination that captures the essence of holiday comfort
- Fresh coffee or Christmas blend tea provides a nice contrast to the cookies’ sweetness while warming up winter mornings
- Vanilla ice cream turns these cookies into an elegant dessert when slightly warmed and served alongside
- Holiday fruit salad offers a refreshing balance to the rich, buttery cookies during big family meals
- Christmas morning breakfast spread where these cookies add a sweet touch to bacon, eggs, and fresh pastries
- Cookie gift tins paired with homemade fudge and peppermint bark for the ultimate holiday treat collection
The versatility of these cookies makes them perfect for any holiday occasion, from intimate family gatherings to large community celebrations.
FAQs
• Can I make these cookies without an electric mixer? I recommend using an electric mixer for the best results since it properly incorporates the cream cheese and creates that smooth, even texture. Hand mixing can leave lumps that affect the final cookie consistency.
• What if my dough is too sticky to handle? Betty’s solution is to chill the dough longer—sometimes up to an hour if your kitchen is particularly warm. You can also lightly flour your hands when rolling the dough balls.
• Can I substitute the yellow cake mix for another flavor? Many home cooks find success with white cake mix or even strawberry for a fun twist. The key is sticking with the standard 15.25-ounce box size for proper dough consistency.
• How do I prevent the cookies from spreading too much? To prevent this issue, make sure your butter and cream cheese aren’t too warm, and don’t skip the chilling step. Properly chilled dough holds its shape much better during baking.
• Can I make the dough ahead of time? The best approach I’ve tested is preparing the dough up to 24 hours in advance and storing it covered in the refrigerator. Let it come to room temperature for easier handling before rolling and baking.