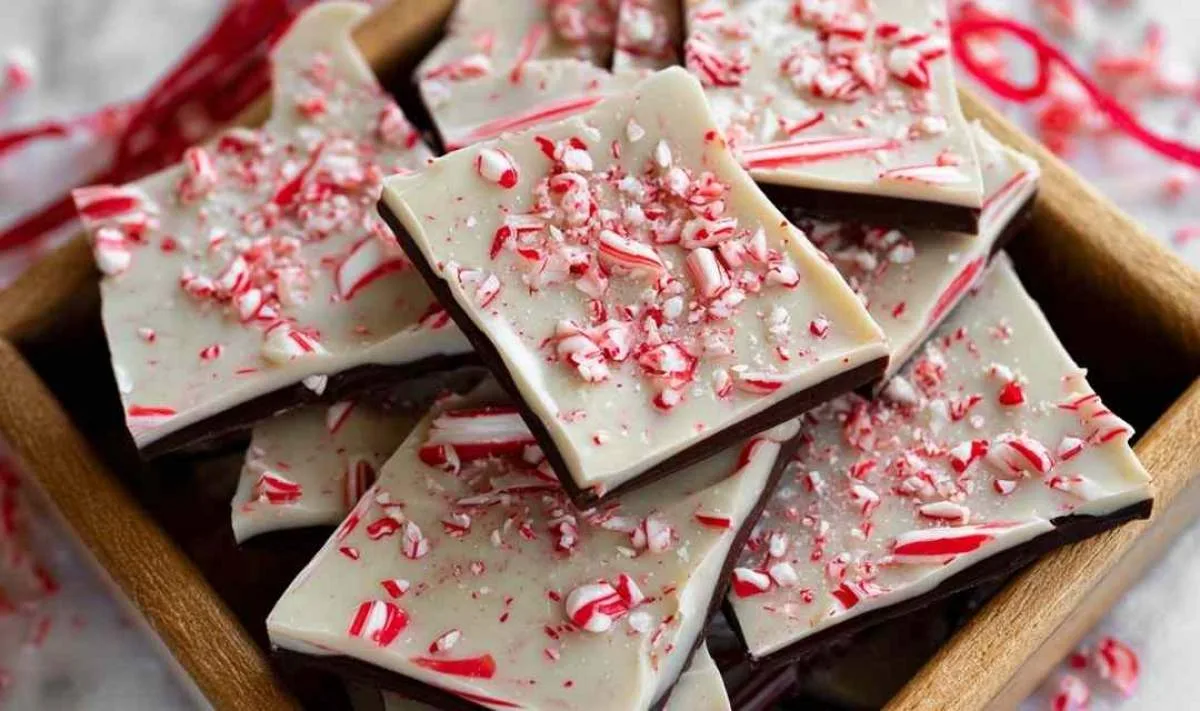
Easy peppermint bark is the ultimate festive dessert that transforms just three simple ingredients into a stunning homemade gift. I remember the first time I made peppermint bark in my farmhouse kitchen – the smell of melted chocolate mixed with cool peppermint filled the air, and my grandchildren couldn’t wait to help crush those candy canes with a rolling pin.
There’s something magical about holiday baking that brings families together, and peppermint bark has become one of those traditions in my home. Every December, I line my kitchen counter with parchment paper, melt chocolate in my trusty microwave-safe bowls, and let the little ones take turns sprinkling crushed candy canes over silky white chocolate. The best part? This treat looks like it came straight from a fancy chocolatier’s shop, but you’ll have it ready in under an hour with minimal effort. The crunch of peppermint against smooth layers of dark and white chocolate creates that perfect holiday flavor combination that never gets old. Time to get our aprons on and make some Christmas magic!
Why This Easy Peppermint Bark Belongs in Your Recipe Box
After decades of holiday baking, I’ve learned that the best recipes are the ones that deliver impressive results without keeping you tied to the kitchen for hours. This homemade peppermint bark recipe checks every box for busy home cooks who still want to create something special during the holiday season.
Here’s what makes this peppermint bark recipe so wonderful:
- Requires just four ingredients you can pick up at any grocery store – dark chocolate, white chocolate, peppermint extract, and candy canes
- Comes together in about 15 minutes of active time, with the refrigerator doing the rest of the work while you tackle your holiday to-do list
- Creates that perfect chocolate-peppermint combination with layers that stay beautifully intact when you follow my tested technique
- Adapts easily to dietary needs – swap in dairy-free chocolate chips or vegan alternatives without sacrificing flavor
- Makes a gorgeous homemade gift that friends and family actually get excited about receiving
- Turns into quality family time when kids help crush candy canes and sprinkle toppings
I’ve made batch after batch of this bark over the years for church bake sales, neighbor gifts, and our own dessert table, and it never fails to impress. The secret is in using quality chocolate and not rushing the setting process.
What Goes Into This Easy Peppermint Bark
Dark chocolate baking chips or bark: I always choose high-quality dark chocolate because it provides that rich, slightly bitter base that balances perfectly with the sweetness of white chocolate and candy canes.
White chocolate baking chips or bark: Look for white chocolate without palm oil – this makes all the difference in preventing those frustrating layer separations that can ruin your finished bark.
Peppermint extract: A little goes a long way here, and I’ve learned that pure peppermint extract delivers a cleaner, more authentic flavor than artificial versions.
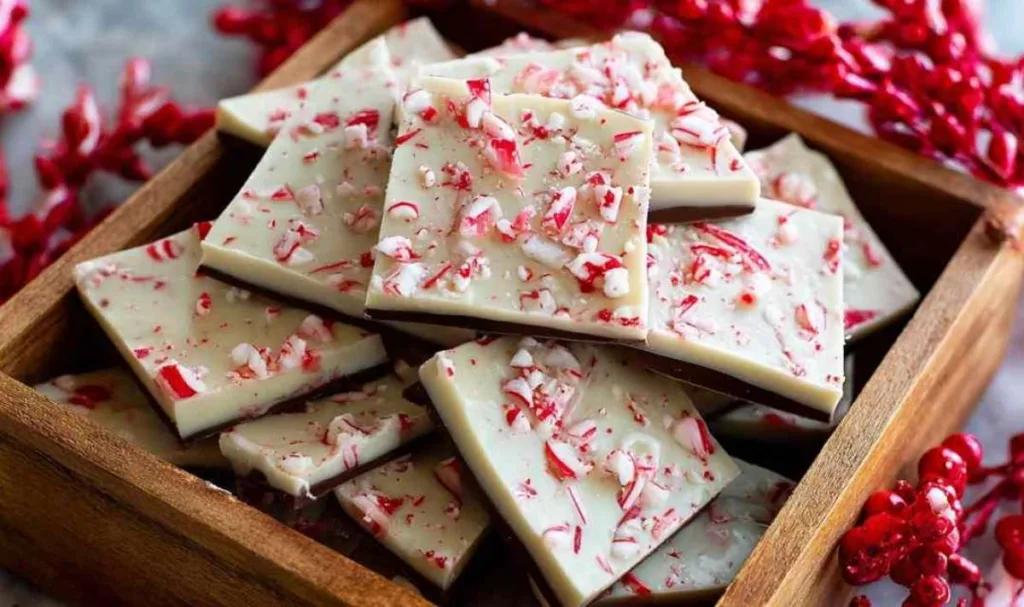
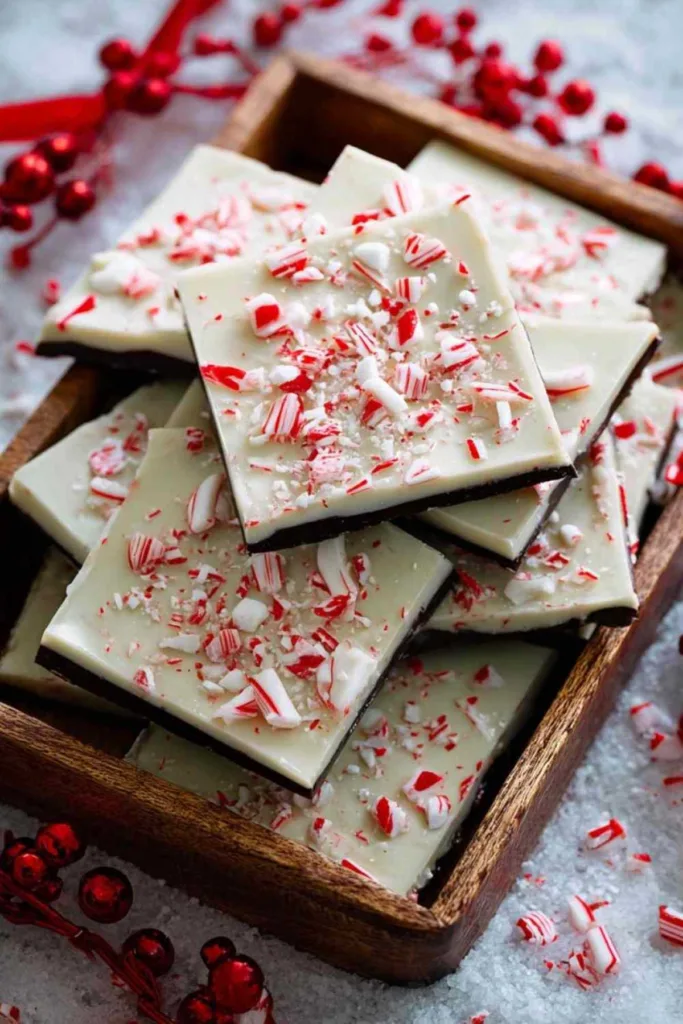
Candy canes: These regular-sized candy canes add that festive crunch and beautiful red-and-white appearance – I prefer organic options like Yum Earth when I can find them, as they’re free from artificial dyes and high fructose corn syrup.
Parchment paper: This kitchen essential makes removing your finished bark from the pan effortless and prevents any sticking issues.
How to Make Easy Peppermint Bark Step by Step
Step 1. I always start by lining my 8×8 pan with two pieces of parchment paper, one going in each direction, so the entire pan is covered and I can easily lift out the finished bark without any cracking.
Step 2. Melt the dark chocolate in a microwave-safe bowl using 30-second intervals, stirring thoroughly after each round – I’ve learned the hard way that scorched chocolate is beyond saving, so patience here really pays off (this usually takes 1 to 3 minutes total).
Step 3. Stir in half a teaspoon of peppermint extract into your melted dark chocolate, then pour it into your prepared pan and spread with the back of a spoon until you have an even layer covering the entire bottom.
Step 4. Place the pan in the refrigerator for about 30 minutes – the chocolate should feel firm to the touch before moving to the next layer.
Step 5. While your dark chocolate sets, crush those candy canes either in a food processor or by placing them in a freezer bag and using a rolling pin (the bag method is my preference because it contains the mess and gives kids something fun to do).
Step 6. After years of making this, I’ve found that melting the white chocolate using the same 30-second interval method prevents overheating – stir in the remaining half teaspoon of peppermint extract once it’s completely smooth.
Step 7. Pour your melted white chocolate over the set dark chocolate layer and spread it evenly with the back of a spoon, working somewhat quickly before it begins to harden.
Step 8. Sprinkle those crushed candy cane pieces evenly over the white chocolate layer and lightly press them with clean hands so they stick properly.
Step 9. The key I discovered is chilling the complete bark for 30 to 60 minutes until it’s completely hardened – rushing this step leads to messy pieces.
Step 10. My family prefers when I let the bark sit at room temperature for 5 to 10 minutes before cutting or breaking into pieces, as this prevents the chocolate layers from separating (which happens when it’s too cold).
Keeping This Peppermint Bark Fresh
I typically store my finished peppermint bark in an airtight container in a dark, cool spot in my pantry, where it stays fresh and delicious for 7 to 10 days. The key is keeping it away from heat and direct sunlight, which can cause the chocolate to bloom or soften. For gift-giving, I layer pieces between sheets of parchment paper in decorative tins to prevent them from sticking together.
If you need to extend its shelf life, the refrigerator works beautifully – my method involves storing the bark in an airtight container for up to 3 weeks. Just remember to bring it out and let it rest at room temperature for 5 to 10 minutes before serving, as chocolate gets incredibly hard when chilled and those layers might crack if you try to bite into it straight from the fridge.
For the best texture after cold storage, I’ve found that letting peppermint bark come to room temperature naturally makes all the difference – the chocolate regains its satisfying snap without being rock-hard, and the peppermint flavor comes through more vibrantly. Though this treat rarely lasts long enough in my house to need freezer storage, you can freeze it for up to 3 weeks using the same airtight container method if you’re planning ahead for holiday gifts or large gatherings.
Perfect Partners for Easy Peppermint Bark
Hot cocoa or coffee: Serving peppermint bark alongside a steaming mug creates that quintessential holiday moment – the cool mint complements warm beverages beautifully and makes for a cozy afternoon treat.
Vanilla ice cream: I love crumbling pieces of this bark over good quality vanilla ice cream for an instant peppermint chocolate chip dessert that takes seconds to assemble but tastes restaurant-worthy.
Christmas Spritz Cookies: Pairing this bark with buttery spritz cookies gives you textural variety on your dessert table, and the simple flavor of the cookies lets the peppermint chocolate really shine without competing flavors.
Christmas Thumbprint Cookies: Creating a simple dessert board with peppermint bark, thumbprint cookies, and mixed nuts offers guests variety and makes the candy feel more sophisticated – plus it’s easy to prepare when you’re hosting.
Yule Log Cake: Adding small pieces of peppermint bark as garnish on a yule log creates a stunning presentation that brings together two classic holiday flavors in one beautiful dessert.
Fresh strawberries: The bright, slightly tart flavor of fresh strawberries cuts through the richness of the chocolate and provides a surprising but delightful pairing that works especially well at holiday brunches.
Christmas Gooey Butter Cookies: Serving these soft, powdered sugar-dusted cookies alongside crunchy peppermint bark creates a wonderful contrast in textures that guests love.
Common Questions About Peppermint Bark
Can I use chocolate bars instead of chips? I recommend using high-quality chocolate bars chopped into small pieces – they actually melt more smoothly than some chips and often taste better since many baking chips contain stabilizers that prevent perfect melting.
Why did my chocolate layers separate? To prevent this issue, make sure you’re using white chocolate without palm oil and letting your bark rest at room temperature for 5 to 10 minutes before cutting – cold chocolate is brittle and the layers will crack apart.
Can I make peppermint bark ahead of time? Many home cooks find success making this bark up to three weeks in advance when stored properly in an airtight container – it’s actually one of the best make-ahead holiday treats since the flavors meld beautifully over time.
What if I don’t have peppermint extract? My solution is crushing extra candy canes into smaller pieces for more intense peppermint flavor throughout, though the extract really does make a noticeable difference in the overall taste.
How do I get clean, professional-looking pieces? The best approach I’ve tested involves using a sharp knife to score the bark lightly just before the top layer has fully set, which creates guidelines for breaking it into uniform pieces once it’s completely hardened.

Easy Peppermint Bark
Ingredients
Equipment
Method
- Melt the dark chocolate in a microwave-safe bowl in 30-second intervals, stirring after each interval, until completely melted and smooth (1 to 3 minutes total). Do not overheat as the chocolate will scorch.
- Stir 1/2 teaspoon of the peppermint extract into the melted dark chocolate. Pour into the prepared pan and spread with the back of a spoon until an even layer forms.
- Place in the refrigerator to set for about 30 minutes or until firm to the touch.
- While dark chocolate is chilling, crush your candy canes in a food processor or place in a freezer bag and crush using a rolling pin. Set aside.
- Once dark chocolate has set, melt the white chocolate in a microwave-safe bowl in 30-second intervals, stirring after each interval, until completely melted and smooth (1 to 3 minutes).
- Stir remaining 1/2 teaspoon of peppermint extract into the white chocolate. Pour over the dark chocolate layer and spread with the back of a spoon until even.
- Sprinkle the crushed candy cane pieces evenly over the white chocolate layer and lightly press with your hands.
- Once hardened, remove from fridge and let sit at room temperature for 5 to 10 minutes before cutting or breaking into pieces to prevent layers from separating.