Frosted Christmas Brownies turn simple brownie mix into festive holiday magic with just a few easy decorating tricks. I still remember the first time my grandchildren helped me cut brownies into Christmas trees and Santa hats. Their eyes lit up brighter than our tree lights, and we’ve made it a December tradition ever since.
There’s something special about brownies baked in December. When my kids were young, I’d whip up a double batch every year for our neighborhood cookie exchange, and these decorated beauties always disappeared first. The beauty of this recipe is how it transforms everyday brownie mix into something that looks like it came from a fancy bakery, but really just requires a springform pan and some colorful frosting. My farmhouse kitchen would fill with chocolate warmth while Christmas carols played on the radio, and we’d spend the afternoon decorating together. The kids arguing over who got to add the gold stars, flour dusting our aprons, and frosting somehow ending up on noses. Those messy, joy-filled afternoons taught me that the best holiday treats aren’t about perfection; they’re about creating memories while your hands are covered in frosting. Time to get our hands floury and make some Christmas magic!
What Makes These Frosted Christmas Brownies So Special
These brownies remind me of why I love holiday baking. They’re impressive without being fussy, and they bring everyone together in the kitchen. I’ve been making frosted Christmas brownies for neighborhood parties and school celebrations for years, and they never fail to get requests for the recipe.
- Uses ingredients you likely have on hand – brownie mix, frosting, and basic food coloring mean no special grocery trip
- Perfect for families to decorate together – cutting triangular shapes and piping frosting creates quality time without requiring professional skills
- Adapts to your decorating style – whether you pipe elaborate designs or simply spread frosting with a knife, they look festive
- Delivers consistently crowd-pleasing results – the double-thick brownies stay moist and fudgy even after decorating
- Creates impressive-looking desserts quickly – from mixing to decorating, you’ll have beautiful Frosted Christmas Brownies ready for your party
- Doubles as a fun holiday activity – kids love choosing colors and adding sprinkles, making these as much entertainment as dessert
Ingredient Spotlight
Brownie mix forms the foundation of these festive treats, and using two boxes creates those extra-thick, fudgy brownies that hold up beautifully under frosting and decorations. I always choose a quality mix with chocolate chunks for added richness.
9-inch springform pan is the secret to getting perfectly shaped brownies that release cleanly. Betty discovered this trick after years of struggling with regular pans, and it changed everything about making shaped brownies.
White frosting serves as your decorating canvas, and I typically buy 2-3 jars since you’ll be dividing it into red, green, and white portions. In my kitchen, I prefer cream cheese frosting for a slight tang that balances the sweetness.
Edible gel food coloring creates vibrant reds and greens without thinning your frosting the way liquid coloring does. I’ve learned that gel gives you control over the exact shade you want.
Large star frosting tip (1M) produces those beautiful rosette patterns that make your Frosted Christmas Brownies look professional, though a simple round tip works wonderfully too if that’s what you have.
Edible gold stars and white pearl sprinkles add that final festive sparkle. Betty always keeps these on hand during December because they transform simple desserts into holiday showstoppers.
How to Make Frosted Christmas Brownies
Step 1. I always start by preheating my oven according to the brownie box instructions and generously spraying my 9-inch springform pan with oil. This ensures the brownies release perfectly when it’s time to cut them into shapes.
Step 2. Mix both brownie mixes together in a large bowl and pour the thick batter into your prepared springform pan, spreading it evenly to the edges for consistent baking.
Step 3. Bake according to package directions, but check with a toothpick at the earliest suggested time. Betty’s tip: the double batch may take 5-10 minutes longer than the box says, so watch for that clean toothpick.
Step 4. After years of making these, I learned to let the brownies cool completely in the pan before attempting to remove them. Patience here prevents cracking and crumbling. This usually takes about 45 minutes to an hour.
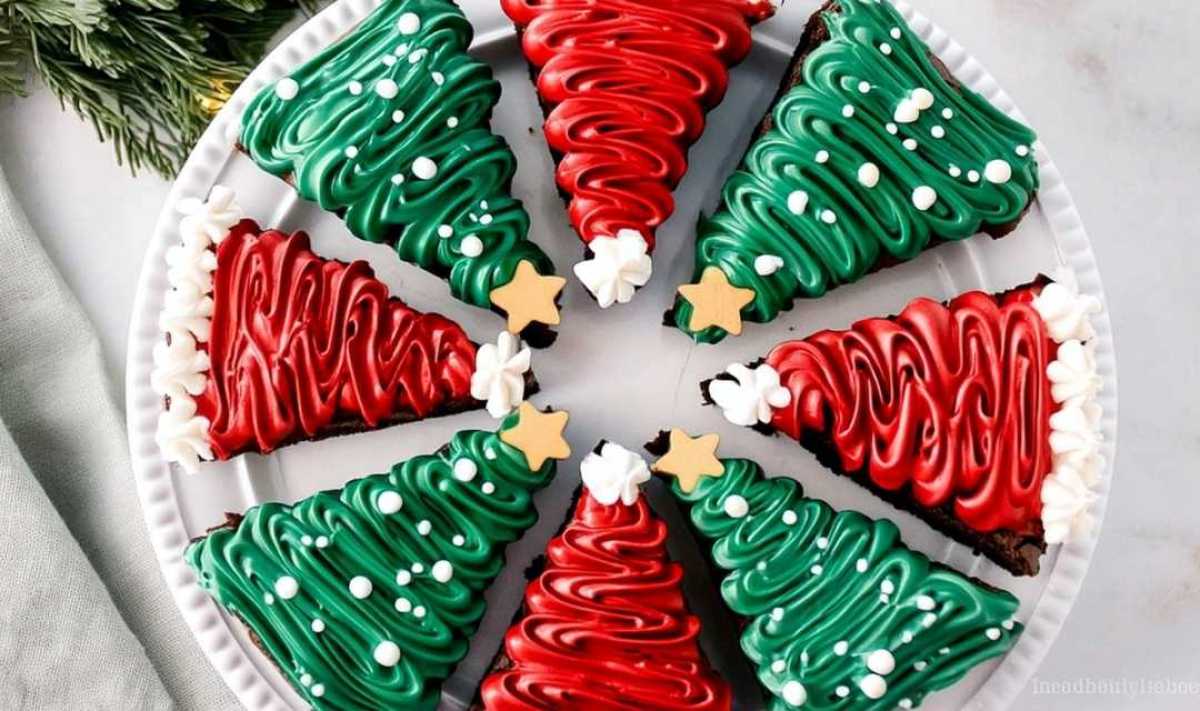
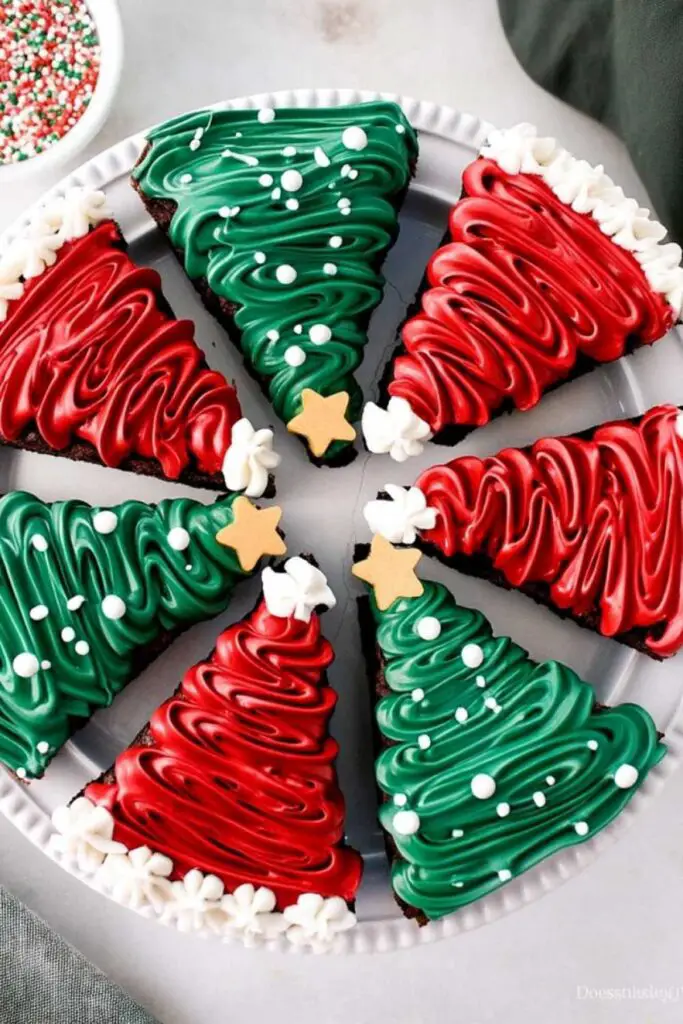
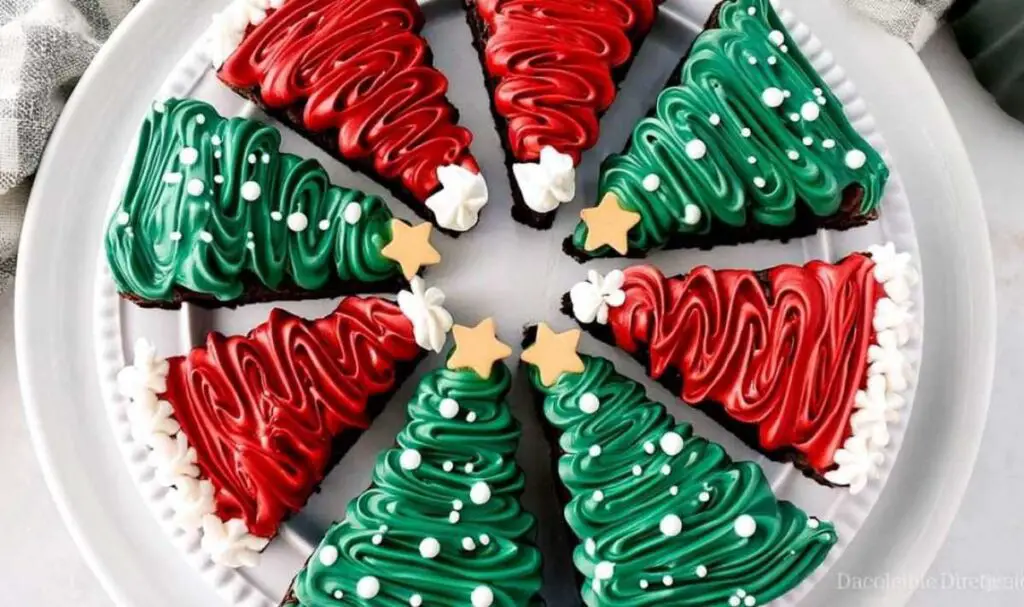
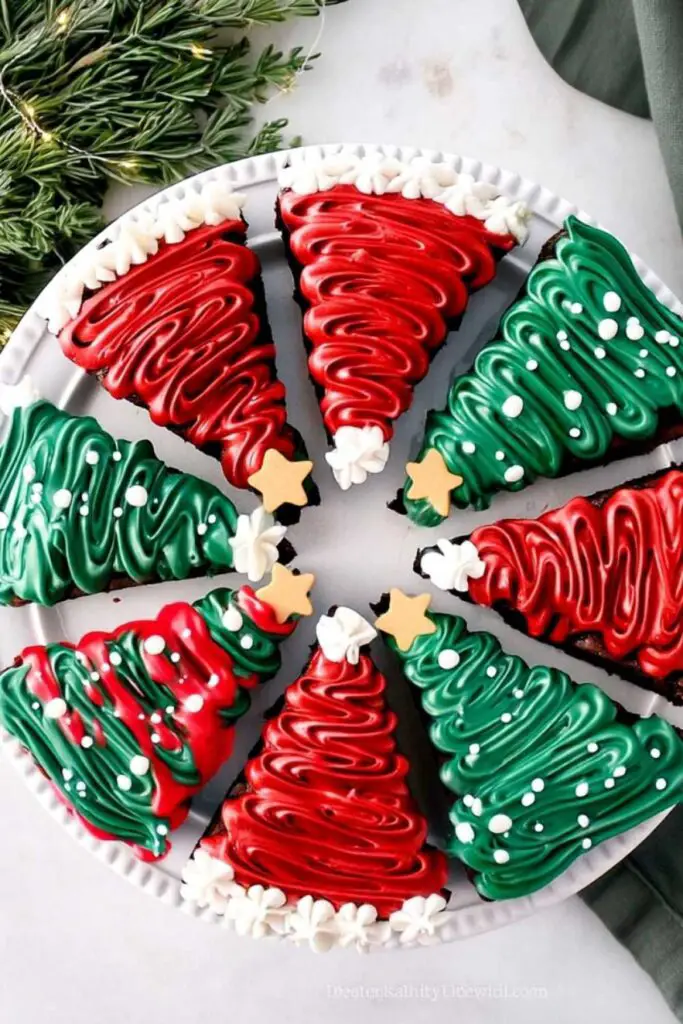
Step 5. Once cooled, release the springform pan and transfer the giant brownie round to a cutting board, then cut it into 8 equal triangular wedges like you’re slicing a pizza. This gives you 4 Christmas tree brownies and 4 Santa hat brownies.
Step 6. In separate small bowls, mix your white frosting with red gel coloring and green gel coloring. I’ve found that starting with just a few drops and adding more gives you better color control.
Step 7. Fill three icing bags fitted with your star tips: one with red frosting, one with green, and one with plain white, making sure to push the frosting down to eliminate air bubbles.
Keeping These Frosted Christmas Brownies Fresh
I typically store my decorated brownies in a single layer in an airtight container at room temperature, where they stay perfectly fresh for 2-3 days. Betty’s method works well because stacking them can smudge the frosting decorations, so if you need to stack, place parchment paper between layers. The frosting actually helps seal in the brownie’s moisture, keeping them fudgy longer than unfrosted brownies.
For make-ahead baking, I often bake the brownies up to three days in advance and store them undecorated in the refrigerator wrapped tightly in plastic wrap. This actually makes them easier to cut into clean triangular shapes. Through trial and error, I learned that you can freeze unfrosted brownies for up to three months wrapped in plastic wrap and then foil, but frozen frosted brownies don’t maintain their decorative appearance as well when thawed.
If you’re taking these to a party, I recommend decorating them the morning of or the night before for the freshest appearance. My family prefers when I store them in a cool spot rather than the refrigerator, as chilling can make the frosting slightly firm and the brownies lose that perfect room-temperature fudginess.

Frosted Christmas Brownies
Ingredients
Equipment
Method
- Preheat oven according to brownie box instructions and spray 9-inch springform pan with oil.
- Mix both brownie mixes together and pour into prepared springform pan.
- Bake according to package directions until toothpick comes out clean (may take 5-10 minutes longer than box suggests for double batch).
- Let brownies cool completely in pan (about 45 minutes to 1 hour), then release from springform and place on cutting board.
- Cut brownie round into 8 equal triangular wedges.
- In separate small bowls, mix white frosting with red gel coloring and green gel coloring to desired shades.
- Fill three icing bags fitted with star tips with red, green, and white frosting.
- For Christmas trees: pipe green frosting in rows from bottom to top creating tree shape, add white pearl sprinkles and gold stars. For Santa hats: pipe red triangle covering most of brownie, add white frosting trim along bottom edge and white pom-pom at tip.
- Let decorated brownies sit 15-20 minutes before serving to allow frosting to set slightly.
Notes
Perfect Partners for Frosted Christmas Brownies
- Hot chocolate or peppermint cocoa – The rich chocolate brownie paired with a warm, creamy beverage creates that cozy Christmas movie night feeling, and the sweetness levels complement each other beautifully.
- Vanilla ice cream – Serving these brownies slightly warm with a scoop of cold vanilla ice cream, similar to how you might serve berry crumble bars, offers a delightful temperature and texture contrast that my grandchildren always request.
- Fresh berries – A small bowl of raspberries or strawberries adds a tart, fresh element that cuts through the sweet frosting and provides a nice color contrast on your holiday dessert table.
- Coffee or spiced cider – For adult gatherings, I find that a robust coffee or warm spiced cider balances the sweetness and makes these Frosted Christmas Brownies work perfectly as an after-dinner treat.
- Sugar cookies and holiday fudge – When creating a full Christmas dessert spread, these brownies pair wonderfully with simpler cookies and candies, offering variety in both flavor and presentation.
- Eggnog – The creamy, spiced flavors of eggnog complement the chocolate brownies surprisingly well, creating a festive pairing that feels quintessentially Christmas.
FAQs
Can I use homemade brownies instead of mix?
I recommend using your favorite homemade brownie recipe if you prefer baking from scratch. Just make a double batch to fill the 9-inch springform pan with the same thick, fudgy texture that holds up well under frosting.
What if I don’t have gel food coloring?
Many home cooks find success with liquid food coloring, though you’ll need to use it sparingly and may need to add a bit of powdered sugar to your frosting to maintain the right piping consistency.
How can I make these without a springform pan?
Betty’s solution is to line a 9-inch round cake pan with parchment paper, leaving some overhang on the sides. You can lift the brownies out using the paper edges once they’ve cooled completely.
Can I make these Frosted Christmas Brownies ahead of time?
The best approach I’ve tested is baking the brownies 1-2 days ahead and storing them wrapped, then decorating them the day before serving for the freshest appearance and best frosting texture.
What other shapes can I cut besides triangles?
To prevent waste, I often use small cookie cutters to punch out stars, circles, or gingerbread men from the brownie round, though triangles maximize the number of pieces you get from one pan.
How do I get clean cuts when slicing?
I’ve found that wiping your knife with a damp cloth between each cut produces the cleanest edges. A long, sharp knife works better than a serrated one for these thick brownies.