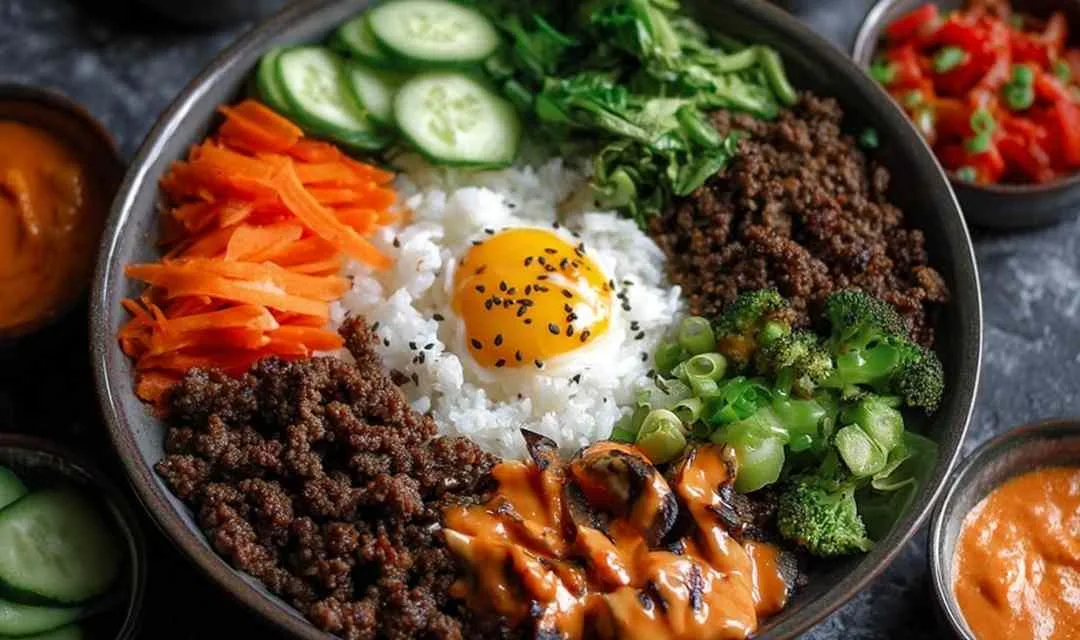
Ground Beef Bulgogi Bowls bring those incredible Korean BBQ flavors to your table in just 20 minutes, no takeout required. I discovered this shortcut version during a particularly hectic week when my family was craving something different, and it’s been a weeknight lifesaver ever since.
You know those evenings when you want something exciting but don’t have hours to marinate meat? That’s exactly when I turn to this recipe. Growing up in the Midwest, exotic flavors weren’t always at our fingertips, but nowadays I love experimenting with Korean-inspired dishes that still feel approachable. The sweet-savory bulgogi sauce reminds me of the glazes my grandmother used on Sunday pot roasts, just with a delicious Asian twist. Using ground beef instead of thinly sliced ribeye means you skip the marinade entirely, and that creamy kimchi sauce? It’s become my family’s new obsession. Time to get that skillet heating.
What Makes These Ground Beef Bulgogi Bowls So Special
When I first tried making traditional bulgogi, I loved the flavor but didn’t love waiting hours for the meat to marinate. This high protein bulgogi bowl version solves that problem beautifully while delivering the same bold, caramelized flavors my family craves.
Here’s why this recipe works every time:
- Ready in 20 minutes – Perfect for those evenings when everyone’s hungry and patience is running thin
- Packs 22 grams of protein per serving – Keeps everyone satisfied without feeling weighed down
- One pan cooking – Less cleanup means more time enjoying dinner with your loved ones
- Uses accessible ingredients – Everything you need is available at regular grocery stores, no specialty shop required
- Makes incredible leftovers – The flavors actually deepen overnight, making meal prep a breeze
- Endlessly versatile – Serve it over rice, in lettuce wraps, or even tucked into tacos
I’ve made this recipe dozens of times now, and it never fails to get compliments. Even my pickiest eater asks for seconds.
Key Players in This Recipe
Extra lean ground beef forms the protein-packed foundation of this dish, and using the leanest option keeps the calories in check while maximizing that 22 grams of protein per serving.
Soy sauce brings that essential umami depth that makes bulgogi taste authentically Korean; I always keep a bottle in my pantry for quick flavor boosts.
Honey balances the salty soy sauce with natural sweetness and helps create that gorgeous caramelized glaze on the beef.
Rice vinegar adds brightness and a subtle tang that cuts through the richness, preventing the dish from feeling too heavy.
Toasted sesame oil delivers that nutty, aromatic quality that makes Korean food so irresistible; a little goes a long way, so don’t skip it.
Fresh garlic and ginger provide the aromatic backbone that makes your kitchen smell absolutely incredible while cooking.
Kimchi stars in the creamy sauce, adding probiotic benefits along with that signature tangy, spicy kick that Korean cuisine is known for.
Gochujang in the kimchi sauce brings moderate heat and complex fermented flavor; if you’re new to it, start with one tablespoon and adjust from there.
Scallion greens get folded in at the very end to maintain their fresh, crisp bite and vibrant color against the caramelized beef.
How to Make Ground Beef Bulgogi Bowls
Step 1. I always start by making the kimchi sauce first so those flavors have time to meld – simply blend the kimchi, mayo, gochujang, honey, and water in your food processor until completely smooth, then refrigerate while you cook the beef.
Step 2. Heat the olive oil in your large skillet over medium-high heat, and here’s a trick I learned: let the ground beef brown undisturbed for 4-5 minutes on one side before breaking it apart, which creates better texture and deeper flavor.
Step 3. While the beef browns, whisk together your bulgogi sauce ingredients in a bowl – the soy sauce, rice vinegar, honey, sesame oil, crushed garlic, ginger, and black pepper.
Step 4. Once the beef is fully cooked and nicely browned, pour that bulgogi sauce right over the meat and stir everything together to coat evenly.
Step 5. Betty’s tip: Let the sauced beef cook untouched for 3-4 minutes so the sugars caramelize on the bottom of the pan, creating those sticky, flavorful bits that make this dish special.
Step 6. Turn off the heat and gently fold in those scallion pieces – adding them at the end keeps them bright green and pleasantly crisp instead of wilted.
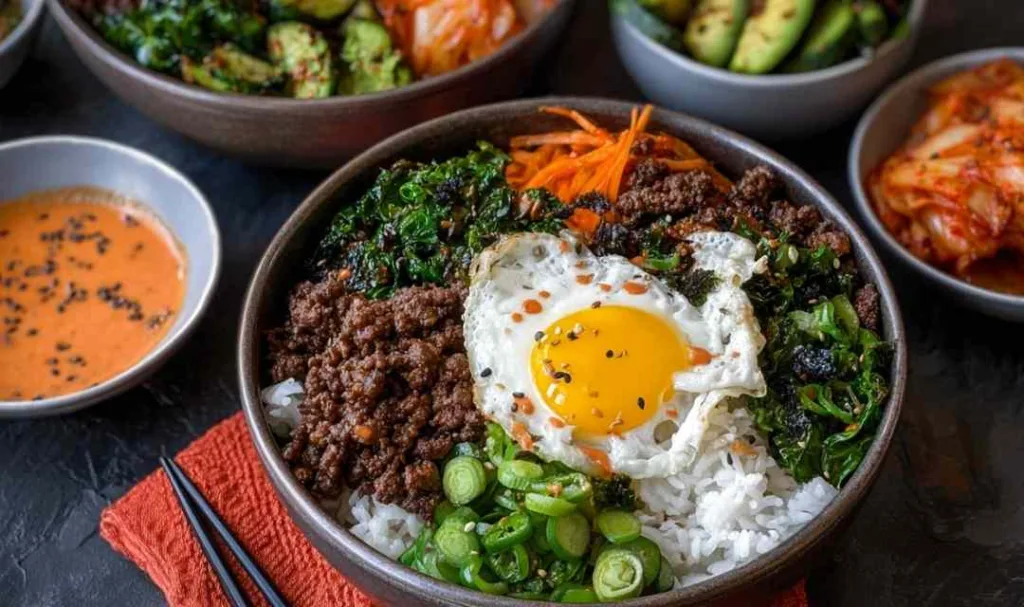
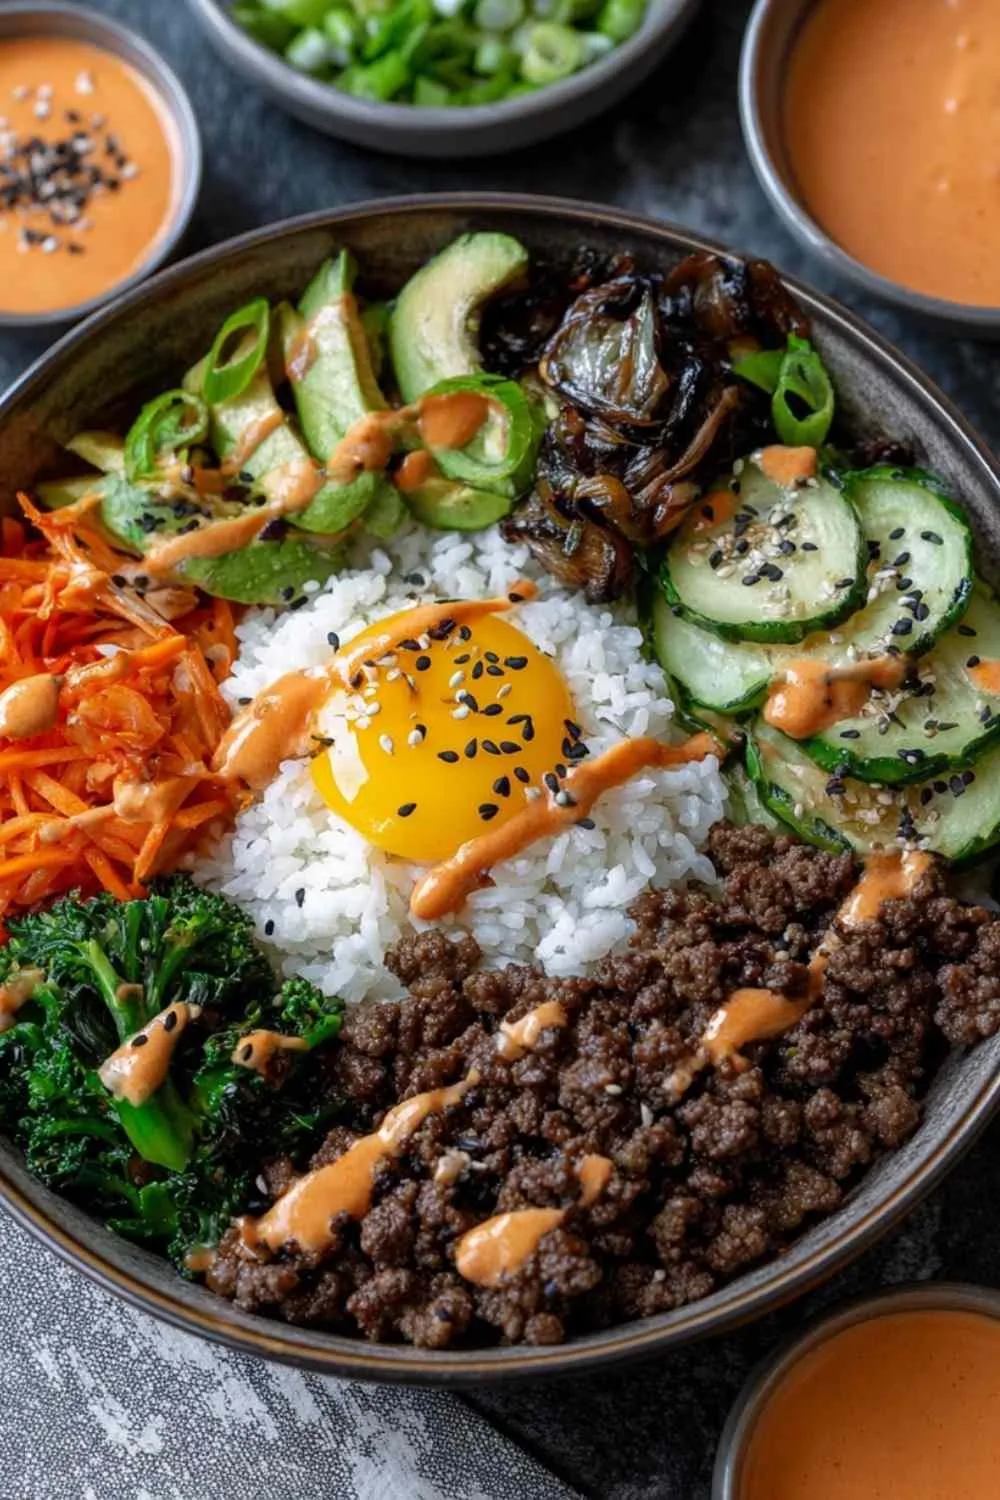
Step 7. Serve your bulgogi over warm rice or crisp lettuce cups, drizzle generously with that creamy kimchi sauce, and sprinkle with toasted sesame seeds for the perfect finishing touch.
Keeping This Bulgogi Fresh
I typically store the bulgogi beef and kimchi sauce in separate airtight containers in the refrigerator, where they’ll stay fresh for up to 5 days. This separation prevents the rice or greens from getting soggy and makes building quick lunch bowls throughout the week incredibly easy.
For longer storage, the cooked bulgogi beef freezes beautifully for up to 3 months in freezer-safe containers or bags. I don’t recommend freezing the kimchi sauce since the mayo can separate upon thawing, but it’s simple enough to whip up a fresh batch when needed.
To reheat, I prefer warming the beef in a skillet over medium heat with a splash of water to prevent drying out, stirring occasionally until heated through. The microwave works in a pinch – just use 60-second intervals at medium power, stirring between each, to ensure even heating. Betty’s method is always the stovetop because it revives that caramelized texture better than any other method.

Perfect Partners for Bulgogi Bowls
- Roasted broccoli or Brussels sprouts – The slight bitterness of these vegetables cuts through the sweet bulgogi sauce beautifully; I air fry broccoli florets at 350°F for 6-8 minutes or bake at 425°F for 12-15 minutes until crispy. For more vegetable inspiration, try my garlic butter chicken with broccoli technique.
- Pickled carrots – Quick-pickled carrots add a tangy crunch that refreshes your palate between bites; simply marinate julienned carrots in rice vinegar, sugar, and salt.
- Cucumber crunch salad – Thinly sliced cucumbers tossed with rice vinegar, sesame oil, and a pinch of sugar provide cool, crisp contrast to the warm, savory beef.
- Cauliflower rice mixed with sticky rice – For a lower-carb option that doesn’t sacrifice satisfaction, I use a 2:3 ratio of cauliflower rice to regular rice.
- Soft boiled or fried eggs – A runny yolk adds richness and turns this into an even more substantial meal; my family loves breaking the yolk and mixing it through everything. Try this alongside my high protein broccoli cheddar soup for a protein-packed dinner.
- Traditional kimchi or other Korean banchan – Serve small dishes of store-bought kimchi, seasoned spinach, or bean sprouts for an authentic Korean meal experience.
If you love Asian-inspired bowls, check out my Korean BBQ steak rice bowls with spicy cream sauce or my bang bang chicken bowl for more flavorful dinner ideas.
FAQs
I recommend sticking with extra lean (93/7 or leaner) to keep this a high protein, lower calorie meal, but 85/15 ground beef will work if you drain the excess fat after browning.
While kimchi provides unique tangy flavor, you can use sriracha mixed with a tablespoon of rice vinegar for heat, though you’ll lose that fermented complexity that makes the sauce special.
The key I discovered is using medium-high heat rather than high, and adding the sauce after the beef is fully cooked so the sugars have just 3-4 minutes to caramelize without scorching.
Absolutely – Betty’s solution is cooking the beef on Sunday and storing it separately from your rice and vegetables, then assembling fresh bowls throughout the week for lunches or quick dinners.
Gochujang has moderate heat with sweet undertones; start with one tablespoon in the kimchi sauce and taste before adding more if you prefer extra kick.
Many home cooks find success with bottled bulgogi or Korean BBQ sauce as a time-saver, though making it fresh gives you better control over sweetness and sodium levels.
Ground Beef Bulgogi Bowls with Creamy Kimchi Sauce
Ingredients
Equipment
Method
- Add all kimchi sauce ingredients (kimchi, mayo, gochujang, honey, water) to a food processor and blend until smooth. Refrigerate while preparing the beef.
- Add olive oil to a large skillet over medium-high heat. Once hot, brown the ground beef on one side for 4-5 minutes before breaking apart and fully cooking.
- While beef cooks, mix the bulgogi sauce ingredients together in a bowl (soy sauce, rice vinegar, honey, sesame oil, garlic, ginger, black pepper).
- Add the sauce to the cooked beef and stir everything together. Cook for 3-4 minutes, untouched, until the sauce thickens and begins to caramelize on the bottom of the beef.
- Turn off heat and fold in the scallion greens.
- Serve the beef over rice or in lettuce wraps with the kimchi sauce, toasted sesame seeds, and other desired sides.