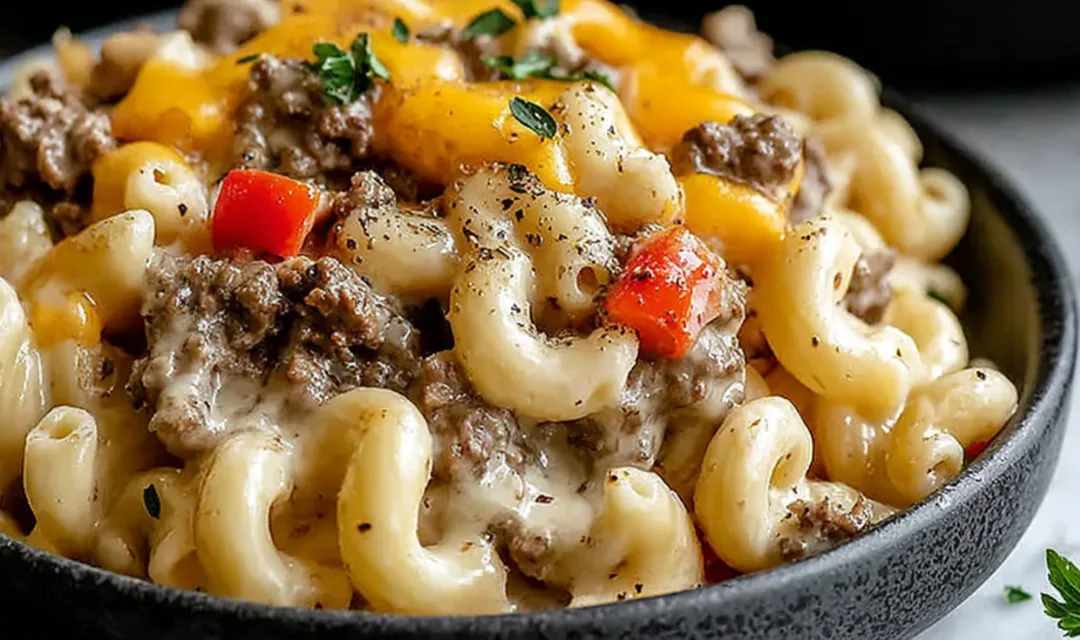
This High-Protein Philly Cheesesteak Mac & Cheese brings together two comfort food classics in one skillet, delivering 30 grams of protein per serving without any fuss. I’ve been making this recipe for years when my grandkids come over, and it never fails to get everyone’s phone away from the table and their forks diving in for seconds.
There’s something magical about the way melted cheese coats pasta while savory beef and peppers bring that Philly cheesesteak flavor we all crave. I remember the first time I combined these two favorites – it was a rainy Wednesday evening, and I had leftover peppers and onions from the farmer’s market sitting in my fridge. My grandson had just started lifting weights and was always asking for protein-packed meals, so I thought, why not marry the creamy comfort of mac and cheese with the hearty satisfaction of a Philly cheesesteak? The result was pure magic. Now, whenever the family gathers around my kitchen table, this dish makes an appearance, and I love watching everyone scrape their plates clean. Time to get your skillet ready.
What Makes This High-Protein Mac & Cheese So Special
I’ve spent decades perfecting comfort food recipes that don’t sacrifice nutrition for flavor, and this high-protein Philly cheesesteak mac & cheese hits every mark. Growing up in the Midwest, we believed that good food should fuel your body and warm your soul, and this dish does exactly that.
- Delivers 30 grams of protein per serving without protein powder or supplements – just real, wholesome ingredients
- Ready in 30 minutes flat, perfect for those evenings when everyone’s hungry and time is short
- One-skillet cooking means minimal cleanup, which is music to any home cook’s ears
- Incredibly versatile with options to swap ground beef for turkey or chickpeas depending on your family’s preferences
- Uses everyday ingredients you likely already have in your pantry and fridge
- Tastes like restaurant-quality comfort food without the price tag or the wait
My family requests this dish at least twice a month, and I never get tired of making it because I know they’re getting a balanced, protein-rich meal that genuinely satisfies.
Ingredient Spotlight
Lean Ground Beef: I always choose 90/10 or 93/7 lean ground beef because it provides excellent protein without excess grease, and you won’t need to drain much fat from the skillet, keeping all those savory flavors intact.
Bell Peppers: Using a colorful mix of red, green, and yellow peppers not only makes the dish visually appealing but also adds natural sweetness and a slight crunch that mimics authentic Philly cheesesteak flavors.
Light Cream Cheese: This ingredient creates that velvety, creamy sauce without being overly heavy, and it melts beautifully when you keep the heat low and stir patiently.
Mozzarella Cheese: I prefer fresh-shredded mozzarella over pre-shredded because it melts smoother without those anti-caking agents, giving you that stretchy, gooey texture everyone loves.
Whole Wheat Macaroni: While regular macaroni works perfectly fine, whole wheat or chickpea pasta bumps up the protein and fiber content, making this high-protein Philly cheesesteak mac & cheese even more nutritious.
Reserved Pasta Water: Never skip this step – that starchy water is liquid gold for creating a sauce that clings to every piece of pasta instead of pooling at the bottom of the bowl.
Garlic and Onions: These aromatic vegetables build the flavor foundation, and I’ve learned through years of cooking that sautéing them until translucent releases their natural sweetness.
Paprika and Chili Flakes: These spices add warmth and a subtle kick without overwhelming the dish, and you can always adjust them based on your family’s heat tolerance.
How to Make High-Protein Philly Cheesesteak Mac & Cheese
Step 1. I always start by bringing a large pot of well-salted water to a rolling boil, then add the macaroni and cook it until just al dente – about 8-10 minutes – stirring occasionally so nothing sticks to the bottom.
Step 2. Before draining the pasta, scoop out about 125ml (roughly 1/2 cup) of that cloudy pasta water and set it aside in a measuring cup. Betty’s tip: this starchy liquid will transform your sauce from good to absolutely incredible.
Step 3. While the pasta cooks, melt 1-2 tablespoons of butter in a large 12-inch skillet over medium heat until it’s bubbling, then toss in your minced garlic, chopped onion, and colorful bell peppers.
Step 4. I’ve found that sautéing the vegetables for 4-5 minutes while stirring frequently brings out their natural sweetness, and you’ll know they’re ready when the onions turn translucent and your kitchen smells amazing.
Step 5. Crumble in the lean ground beef, breaking it apart with your wooden spoon as it browns, and cook for 5-7 minutes until no pink remains. Through trial and error, I learned that thorough cooking ensures the best texture and flavor.
Step 6. Season the beef mixture generously with salt, pepper, paprika, and chili flakes, then drain any excess fat if needed – though with lean beef, there usually isn’t much.
Step 7. Reduce the heat to low (this is crucial), then stir in the light cream cheese, shredded mozzarella, and cheese slices, stirring continuously but gently until it all melts into a smooth, velvety sauce.
Step 8. Betty always reminds me that patience during this step prevents the cheese from becoming grainy or separated, so take your time and let the cheese melt slowly over that low heat – about 3-4 minutes of gentle stirring does the trick.
Step 9. Add the cooked macaroni to the skillet along with the reserved pasta water, stirring everything together until each piece of pasta is beautifully coated in that creamy, cheesy sauce.
Step 10. If the sauce seems too thick, gradually add a bit more pasta water until you reach your desired consistency. I typically find that the reserved amount is just right, but every stove cooks a little differently, so adjust as needed.
Keeping This High-Protein Mac & Cheese Fresh
I typically store leftovers in an airtight container in the refrigerator, where this dish stays fresh for up to 3 days. Make sure the mac and cheese has cooled completely before sealing the container to prevent condensation, which can make the pasta mushy. My family prefers when I portion it into individual containers for quick grab-and-go lunches throughout the week.
For longer storage, this high-protein Philly cheesesteak mac and cheese freezes beautifully for up to 3 months. Betty’s freezing method works well because she portions the cooled mac and cheese into freezer-safe containers, leaving about half an inch of space at the top for expansion. Label each container with the date so you can keep track of freshness. When you’re ready to enjoy it again, thaw it overnight in the refrigerator rather than at room temperature.
For the best texture, I reheat by warming the mac and cheese gently in a saucepan over low heat, adding a splash of milk or reserved pasta water to restore that creamy consistency. You can also reheat individual portions in the microwave at 50% power, stirring every 30 seconds and adding a tablespoon of milk to prevent drying out. After years of making this, I’ve discovered that slow, gentle reheating makes all the difference between a dried-out disappointment and a meal that tastes freshly made.
Perfect Partners for This Mac & Cheese
- Crisp Garden Salad: A simple salad with mixed greens, cherry tomatoes, cucumbers, and a light vinaigrette cuts through the richness of the cheese sauce and adds refreshing crunch to your plate.
- Garlic Bread: There’s nothing quite like using warm, buttery garlic bread to scoop up every last bit of that creamy sauce – it’s a combination my grandkids can never resist.
- Roasted Vegetables: Roasted zucchini, carrots, or roasted autumn vegetables with balsamic glaze provide a sweet, slightly charred contrast that complements the savory mac and cheese beautifully.
- Tangy Coleslaw: The crisp, cool crunch of coleslaw with a vinegar-based dressing provides the perfect textural and flavor contrast to this warm, creamy dish.
- Steamed Broccoli: I love serving high-protein air fryer broccoli alongside this mac and cheese because it adds nutritious greens to the plate while its mild flavor doesn’t compete with the bold cheesesteak flavors.
- Sweet Iced Tea or Lemonade: A cold glass of sweetened iced tea or fresh lemonade refreshes your palate between bites and is a classic pairing in my Midwest kitchen.
FAQs
I recommend ground turkey as an excellent lean protein alternative that works beautifully in this recipe – just make sure to season it a bit more generously since turkey can be milder than beef.
To prevent this issue, always reduce your heat to low before adding the cheese and stir constantly while it melts. Rushing this step with high heat is the most common mistake I see home cooks make.
Many home cooks find success with prepping the vegetables and browning the beef up to 3 days in advance, then storing them separately in the refrigerator – just cook the pasta fresh and assemble everything when you’re ready to serve.

High-Protein Philly Cheesesteak Mac & Cheese
Ingredients
Equipment
Method
-
Bring a large pot of well-salted water to a rolling boil. Add the macaroni and cook until al dente, about 8-10 minutes, stirring occasionally. Before draining, reserve 125ml of pasta water in a measuring cup.
-
While pasta cooks, melt 1-2 tablespoons butter in a large skillet over medium heat until bubbling. Add minced garlic, chopped onion, and bell peppers. Sauté for 4-5 minutes, stirring frequently, until vegetables become tender and onions turn translucent.
-
Crumble in the lean ground beef, breaking it apart with a wooden spoon as it cooks. Brown for 5-7 minutes until no pink remains. Drain any excess fat if needed.
-
Season the beef mixture generously with salt, pepper, paprika, and chili flakes to taste.
-
Reduce heat to low. Stir in light cream cheese, shredded mozzarella, and cheese slices. Keep stirring constantly until everything melts together into a smooth, velvety sauce, about 3-4 minutes. Be patient during this step to prevent graininess.
-
Add the cooked macaroni along with the reserved pasta water to the skillet. Mix until all pasta is evenly coated in the creamy sauce. If the sauce appears too thick, gradually add more pasta water until reaching desired consistency.
-
Taste and adjust seasoning as needed. Garnish with fresh parsley if desired and serve immediately.