Hillbilly Hot Rolls
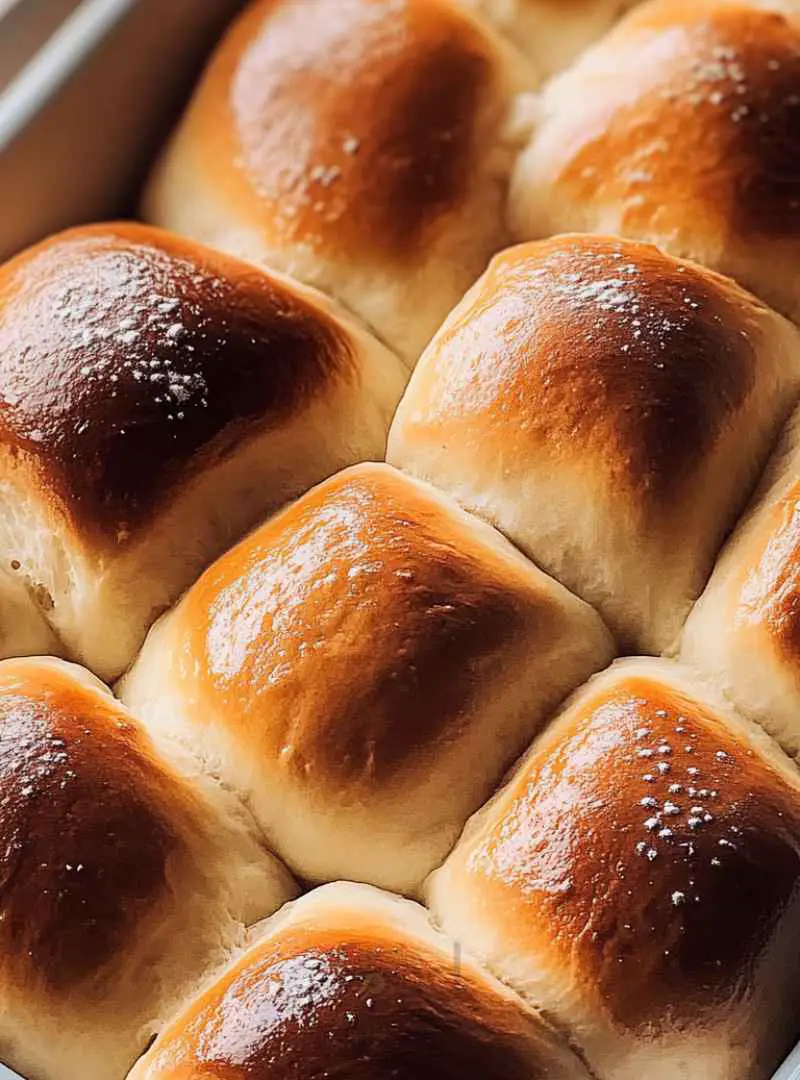
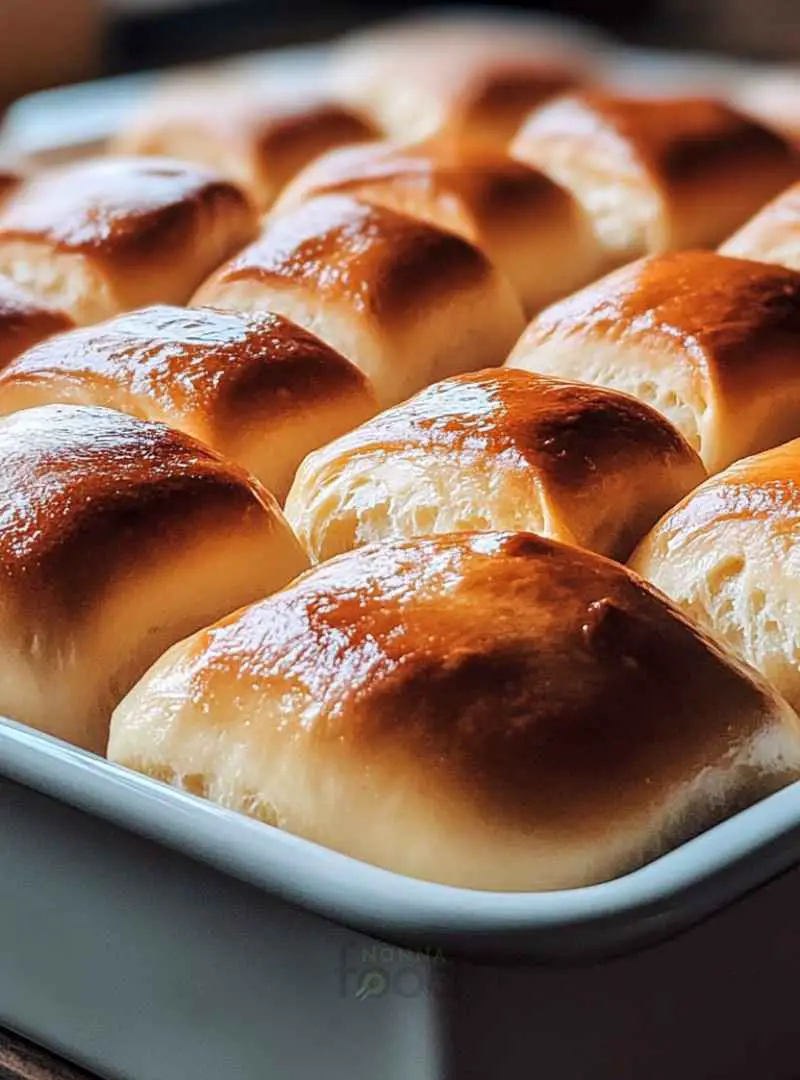
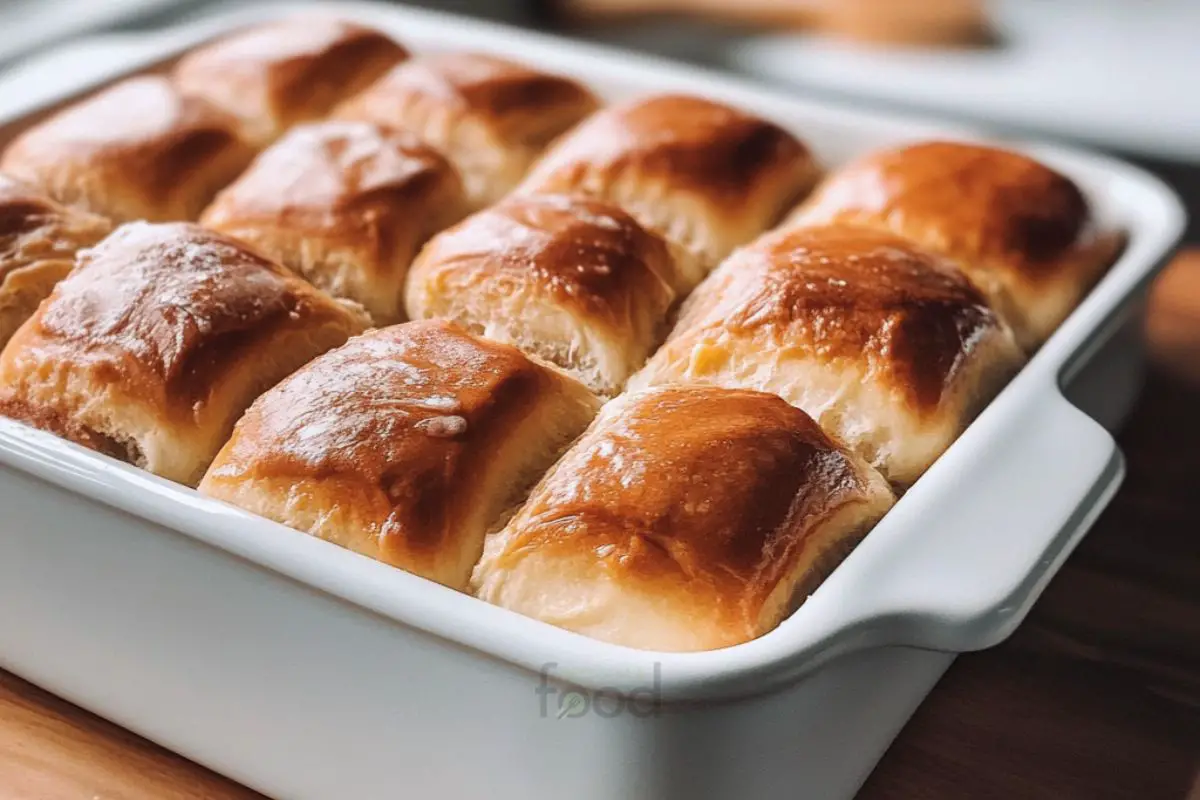
Hillbilly Hot Rolls are more than just a delicious bread; they are a warm embrace of comfort and tradition. These rolls are soft, fluffy, and perfect for any meal. Whether you’re serving them at a family dinner or enjoying them with a cozy breakfast, they bring a sense of home to the table. The delightful aroma of freshly baked rolls fills the air, making it hard to resist their charm.

What Are Hillbilly Hot Rolls?
Hillbilly Hot Rolls are a type of homemade bread that is known for its light and airy texture. Made with simple ingredients like flour, sugar, yeast, and milk, these rolls are easy to prepare. They are often enjoyed warm, straight from the oven, and can be served with butter, jam, or even as a side to hearty meals. The name “Hillbilly” reflects their rustic roots, evoking images of family gatherings and country kitchens.
The History Behind Hillbilly Hot Rolls
The history of Hillbilly Hot Rolls is deeply rooted in Southern cooking traditions. These rolls have been passed down through generations, often made by grandmothers who knew the secret to perfect bread. The term “hillbilly” refers to the people living in the Appalachian region, where hearty, homemade meals are a way of life. Over time, these rolls have become a staple in many households, cherished for their simplicity and flavor. They symbolize warmth, hospitality, and the joy of sharing food with loved ones.
Ingredients for Hillbilly Hot Rolls
To create the perfect Hillbilly Hot Rolls, you need just a handful of simple ingredients. Each component plays a vital role in achieving that soft, fluffy texture and delightful flavor. Here’s what you’ll need:
- 4 cups all-purpose flour: This is the base of your rolls, providing structure and texture.
- 1/4 cup granulated sugar: Sugar adds sweetness and helps the rolls brown beautifully.
- 1 tablespoon instant yeast: This is the magic ingredient that makes the rolls rise and become fluffy.
- 1 teaspoon salt: Salt enhances the flavor and balances the sweetness.
- 1 cup warm milk (about 110°F): Warm milk activates the yeast, helping the dough rise.
- 1/4 cup unsalted butter, melted: Butter adds richness and a lovely flavor to the rolls.
- 2 large eggs: Eggs provide moisture and help bind the ingredients together.
These ingredients are commonly found in most kitchens, making it easy for anyone to whip up a batch of Hillbilly Hot Rolls. The combination of these elements creates a dough that is not only easy to work with but also results in rolls that are irresistibly soft and delicious. So, gather your ingredients and get ready to bake!
Step-by-Step Preparation of Hillbilly Hot Rolls
Now that you have gathered all your ingredients, it’s time to dive into the step-by-step preparation of Hillbilly Hot Rolls. This process is simple and rewarding, leading to delicious, fluffy rolls that everyone will love. Let’s get started!
Step 1: Prepare the Dough for Hillbilly Hot Rolls
Combining Dry Ingredients
Begin by taking a large mixing bowl. In this bowl, whisk together the 4 cups of all-purpose flour, 1/4 cup of granulated sugar, 1 tablespoon of instant yeast, and 1 teaspoon of salt. Make sure these dry ingredients are well combined. This step is crucial as it ensures that the yeast is evenly distributed, which helps the rolls rise uniformly.
Mixing Wet Ingredients
Next, grab a separate bowl for the wet ingredients. Combine 1 cup of warm milk (about 110°F), 1/4 cup of melted unsalted butter, and 2 large eggs. Mix these ingredients until they are smooth and well blended. The warmth of the milk is important as it activates the yeast, setting the stage for a perfect rise.
Combining Mixtures
Now, pour the wet mixture into the bowl with the dry ingredients. Using a wooden spoon or spatula, stir the mixture until a soft dough forms. It’s okay if the dough is a bit sticky; that’s a good sign! This dough will become the base for your delightful Hillbilly Hot Rolls.
Step 2: Knead the Dough for Hillbilly Hot Rolls
Kneading Techniques
Once your dough is formed, it’s time to knead. Transfer the dough onto a lightly floured surface. Knead the dough for about 5-7 minutes. You want it to become smooth and elastic. To knead, fold the dough over itself, push it down with the heel of your hand, and then turn it a quarter turn. Repeat this process until the dough feels soft and pliable.
First Rise Process
After kneading, place the dough in a greased bowl. Cover it with a clean kitchen towel. Let it rise in a warm place for about 1 hour, or until it has doubled in size. This first rise is essential as it allows the yeast to work its magic, creating those fluffy rolls we all love.
Step 3: Shape and Second Rise of Hillbilly Hot Rolls
Shaping the Rolls
Once the dough has risen, it’s time to shape the rolls. Gently punch down the dough to release the air. Then, divide the dough into 12 equal pieces. Roll each piece into a ball, making sure they are smooth. This shaping helps create a nice round roll that will rise beautifully in the oven.
Second Rise Process
Place the shaped rolls in a greased baking dish. Cover them with a towel again and let them rise for another 30-40 minutes. During this second rise, the rolls will puff up, becoming light and airy. This step is crucial for achieving that perfect texture.
Step 4: Bake the Hillbilly Hot Rolls
Preheating the Oven
While the rolls are rising, preheat your oven to 375°F (190°C). This ensures that the rolls will bake evenly and develop a lovely golden color.
Baking Instructions
Once the rolls have completed their second rise, it’s time to bake! Place the rolls in the preheated oven and bake for 15-20 minutes. Keep an eye on them; you want them to be golden brown on top. The aroma of baking rolls will fill your kitchen, making it hard to wait!
Cooling the Rolls
After baking, remove the rolls from the oven. Let them cool slightly in the pan before serving. This cooling period allows the rolls to set, making them easier to handle. Enjoy your freshly baked Hillbilly Hot Rolls warm, with butter or your favorite spread!
Variations of Hillbilly Hot Rolls
While the classic Hillbilly Hot Rolls are delightful on their own, there are many fun variations you can try. These variations can add a unique twist to your rolls, making them even more enjoyable. Let’s explore some sweet and savory options!
Sweet Variations
If you have a sweet tooth, consider adding some delicious flavors to your Hillbilly Hot Rolls. Here are a few ideas:
- Cinnamon Sugar Rolls: Before shaping the rolls, sprinkle a mixture of cinnamon and sugar onto the dough. Roll it up tightly and slice into pieces. This creates a delightful swirl of sweetness in each roll.
- Honey Butter Rolls: Mix honey into the melted butter before brushing it on top of the rolls before baking. This adds a sweet glaze that enhances the flavor.
- Chocolate Chip Rolls: Fold in mini chocolate chips into the dough during the mixing stage. These sweet morsels will melt and create pockets of chocolate goodness in every bite.
These sweet variations are perfect for breakfast or dessert. They can be served warm with a drizzle of icing or a dollop of whipped cream.
Savory Additions
If you prefer savory flavors, there are plenty of ways to enhance your Hillbilly Hot Rolls. Here are some tasty suggestions:
- Garlic Herb Rolls: Add minced garlic and your favorite herbs, like rosemary or thyme, to the dough. This will infuse the rolls with a wonderful savory aroma.
- Cheese-Stuffed Rolls: Before shaping, place a small cube of cheese in the center of each piece of dough. Seal it up and shape it into a ball. The cheese will melt and create a gooey surprise inside.
- Jalapeño Cheddar Rolls: Mix in diced jalapeños and shredded cheddar cheese into the dough for a spicy kick. These rolls are perfect for serving with chili or soups.
These savory additions can elevate your Hillbilly Hot Rolls, making them a fantastic side dish for any meal. Whether you choose sweet or savory, these variations will surely impress your family and friends!
Cooking Note for Hillbilly Hot Rolls
When making Hillbilly Hot Rolls, a few cooking notes can help ensure your baking experience is smooth and successful. First, always measure your ingredients accurately. Using a kitchen scale can be beneficial for precise measurements, especially for flour. Too much flour can lead to dense rolls, while too little can make them too sticky.
Next, pay attention to the temperature of your ingredients. The warm milk should be around 110°F. If it’s too hot, it can kill the yeast, preventing the dough from rising. Conversely, if it’s too cold, the yeast may not activate properly. A simple way to check the temperature is to use a kitchen thermometer or test it with your wrist; it should feel warm but not hot.
Additionally, the rising times can vary based on your kitchen’s temperature. If your kitchen is cooler, the dough may take longer to rise. Conversely, in a warm environment, it may rise faster. Always look for the dough to double in size as a sign that it’s ready for the next step.
Lastly, don’t rush the baking process. Each oven is different, so keep an eye on your rolls as they bake. They should be golden brown on top and sound hollow when tapped on the bottom. Allowing them to cool slightly before serving will enhance their texture and flavor. With these tips in mind, you’ll be well on your way to baking perfect Hillbilly Hot Rolls every time!
Serving Suggestions for Hillbilly Hot Rolls
Hillbilly Hot Rolls are incredibly versatile and can complement a wide range of meals. Their soft, fluffy texture and delightful flavor make them a perfect addition to any dining experience. Here are some serving suggestions to elevate your meal:
- With Butter: Serve the rolls warm with a generous pat of butter. The butter melts into the rolls, creating a rich and comforting taste.
- As a Side Dish: Pair Hillbilly Hot Rolls with hearty dishes like roasted chicken, beef stew, or chili. They are perfect for soaking up delicious sauces and gravies.
- For Breakfast: Enjoy them as a breakfast treat! Serve with jam, honey, or a sprinkle of powdered sugar for a sweet start to your day.
- With Soup or Salad: These rolls make a great accompaniment to soups and salads. Their lightness balances out heavier dishes, making for a well-rounded meal.
- As Sliders: Use the rolls to create mini sandwiches or sliders. Fill them with your favorite meats, cheeses, and toppings for a fun and tasty treat.
- For Dipping: Serve the rolls alongside a warm cheese dip or a savory garlic butter for a delightful appetizer.
These serving suggestions highlight the versatility of Hillbilly Hot Rolls. Whether you enjoy them as a side, a snack, or a part of a larger meal, they are sure to please everyone at the table. So, get creative and enjoy these delightful rolls in various ways!
Tips for Perfect Hillbilly Hot Rolls
Creating the perfect Hillbilly Hot Rolls is an art that can be mastered with a few helpful tips. These suggestions will guide you in achieving that soft, fluffy texture and delightful flavor that everyone loves. Let’s dive into some essential tips for baking these delicious rolls!
- Use Fresh Ingredients: Always check the expiration dates on your yeast and flour. Fresh ingredients are key to achieving the best rise and flavor in your rolls. If your yeast is old, it may not activate properly, leading to dense rolls.
- Warm Environment: Yeast loves warmth! If your kitchen is cool, consider placing the dough in a slightly warm oven (turned off) or near a sunny window. This will help the dough rise more effectively.
- Don’t Over-Knead: While kneading is important, over-kneading can make the dough tough. Knead just until the dough is smooth and elastic. A gentle touch goes a long way!
- Check for Doneness: To ensure your rolls are perfectly baked, tap the bottom of one roll. If it sounds hollow, they are done! If not, give them a few more minutes in the oven.
- Brush with Butter: For an extra touch of flavor, brush the tops of the rolls with melted butter right after they come out of the oven. This adds a beautiful sheen and enhances the taste.
- Experiment with Flavors: Don’t hesitate to try different herbs, spices, or fillings in your rolls. Adding garlic, cheese, or herbs can elevate the flavor profile and make your rolls unique.
- Store Properly: If you have leftovers, store them in an airtight container at room temperature. This keeps them soft and fresh for the next day. You can also freeze them for longer storage.
By following these tips, you’ll be well on your way to baking perfect Hillbilly Hot Rolls every time. Enjoy the process, and don’t forget to share your delicious creations with family and friends!
Breakdown of Time for Hillbilly Hot Rolls
Understanding the time required for each step in making Hillbilly Hot Rolls can help you plan your baking session effectively. Here’s a detailed breakdown of the time involved in preparing these delightful rolls:
Prep Time
The prep time for Hillbilly Hot Rolls is approximately 20 minutes. This includes gathering your ingredients, measuring them out, and mixing the dough. It’s a straightforward process that allows you to get your hands into the dough quickly. Make sure to have everything ready before you start, as this will make the process smoother and more enjoyable.
Cooking Time
The cooking time for Hillbilly Hot Rolls is about 20 minutes. This is the time spent baking the rolls in the oven. During this period, the rolls will rise and develop a beautiful golden-brown color. Keep an eye on them as they bake, as ovens can vary in temperature. You want to ensure they are perfectly baked and not overdone.
Total Time
The total time from start to finish for making Hillbilly Hot Rolls is approximately 2 hours. This includes the prep time, the first rise (about 1 hour), the second rise (30-40 minutes), and the cooking time. While it may seem like a lengthy process, most of this time is hands-off, allowing you to relax or prepare other parts of your meal while the dough rises and bakes.
By breaking down the time involved, you can better plan your baking session and enjoy the delightful process of making Hillbilly Hot Rolls. With just a little patience, you’ll be rewarded with warm, fluffy rolls that are perfect for any occasion!
Nutritional Information for Hillbilly Hot Rolls
Understanding the nutritional content of Hillbilly Hot Rolls can help you enjoy them as part of a balanced diet. While these rolls are a delightful treat, it’s good to know what you’re consuming. Here’s a breakdown of the key nutritional components:
Calories
Each Hillbilly Hot Roll contains approximately 150 calories. This makes them a satisfying addition to your meal without being overly indulgent. Enjoying one or two rolls can complement your dinner without adding too many extra calories.
Protein Content
In terms of protein, each roll provides about 4 grams. While this isn’t a high protein food, it does contribute to your daily intake. Pairing these rolls with protein-rich foods, like chicken or beans, can create a well-rounded meal.
Sodium Levels
Each roll contains around 200 milligrams of sodium. This is a moderate amount, making it important to consider your overall sodium intake for the day. If you’re watching your sodium levels, enjoy these rolls in moderation, especially if served with salty dishes.
Overall, Hillbilly Hot Rolls can be a delightful part of your diet. They offer a balance of flavor and nutrition, making them a great choice for family meals or special occasions. Enjoy them fresh from the oven, and feel good about the wholesome ingredients that go into each roll!
FAQs About Hillbilly Hot Rolls
Can I make Hillbilly Hot Rolls ahead of time?
Yes, you can make Hillbilly Hot Rolls ahead of time! One option is to prepare the dough and let it rise. After the first rise, you can shape the rolls and place them in a greased baking dish. Cover them tightly with plastic wrap and refrigerate. When you’re ready to bake, let them sit at room temperature for about 30 minutes before preheating the oven. This way, you can enjoy fresh rolls without the hassle of starting from scratch!
What can I serve with Hillbilly Hot Rolls?
Hillbilly Hot Rolls are incredibly versatile and pair well with many dishes. You can serve them alongside roasted meats, like chicken or beef, to soak up delicious gravies. They also complement soups and stews perfectly. For a lighter option, enjoy them with salads or as a base for sliders. Don’t forget to offer butter, honey, or jam for spreading, enhancing the rolls’ flavor even more!
How do I store leftover Hillbilly Hot Rolls?
To store leftover Hillbilly Hot Rolls, place them in an airtight container at room temperature. This keeps them soft and fresh for up to 2 days. If you want to keep them longer, consider freezing them. Wrap each roll tightly in plastic wrap and place them in a freezer-safe bag. They can be frozen for up to 3 months. When you’re ready to enjoy them, simply thaw at room temperature or warm them in the oven for a few minutes.
Can I freeze Hillbilly Hot Rolls?
Absolutely! Freezing Hillbilly Hot Rolls is a great way to enjoy them later. After baking, let the rolls cool completely. Then, wrap each roll in plastic wrap and place them in a freezer-safe bag. They can be frozen for up to 3 months. To reheat, simply thaw them at room temperature and warm them in the oven at 350°F (175°C) for about 10 minutes. This will bring back their soft, fluffy texture!
Conclusion on Hillbilly Hot Rolls
In conclusion, Hillbilly Hot Rolls are a delightful addition to any meal. Their soft, fluffy texture and rich flavor make them a favorite among families and friends alike. Whether you enjoy them fresh from the oven or as part of a larger feast, these rolls bring warmth and comfort to the table.
Making Hillbilly Hot Rolls is not just about following a recipe; it’s about creating memories. The process of mixing, kneading, and baking can be a joyful experience, especially when shared with loved ones. Plus, the aroma of freshly baked rolls wafting through your home is simply irresistible!
With the variations and serving suggestions provided, you can easily customize these rolls to suit your taste. From sweet cinnamon rolls to savory garlic herb options, the possibilities are endless. So, don’t hesitate to experiment and make these rolls your own.
As you embark on your baking journey, remember the tips and techniques shared in this article. They will help you achieve the perfect Hillbilly Hot Rolls every time. Enjoy the process, savor the results, and share the love of homemade bread with those around you.
So, gather your ingredients, roll up your sleeves, and get ready to bake some delicious Hillbilly Hot Rolls. Your family and friends will thank you for it!
Delicious Black Eyed Peas Stew
Ingredients
Equipment
Method
- Drain and rinse the soaked black-eyed peas under cold water.
- In a large pot, combine the rinsed peas and vegetable broth. Bring to a boil, then reduce heat and simmer for 30 minutes.
- Add cumin, smoked paprika, salt, and pepper to the sautéed vegetables and cook for an additional minute.
- Combine the cooked black-eyed peas and their broth with the sautéed vegetables. Add the bay leaf and bring to a gentle simmer.
- Let the stew simmer for 15-20 minutes, stirring occasionally. Adjust seasoning as needed.

