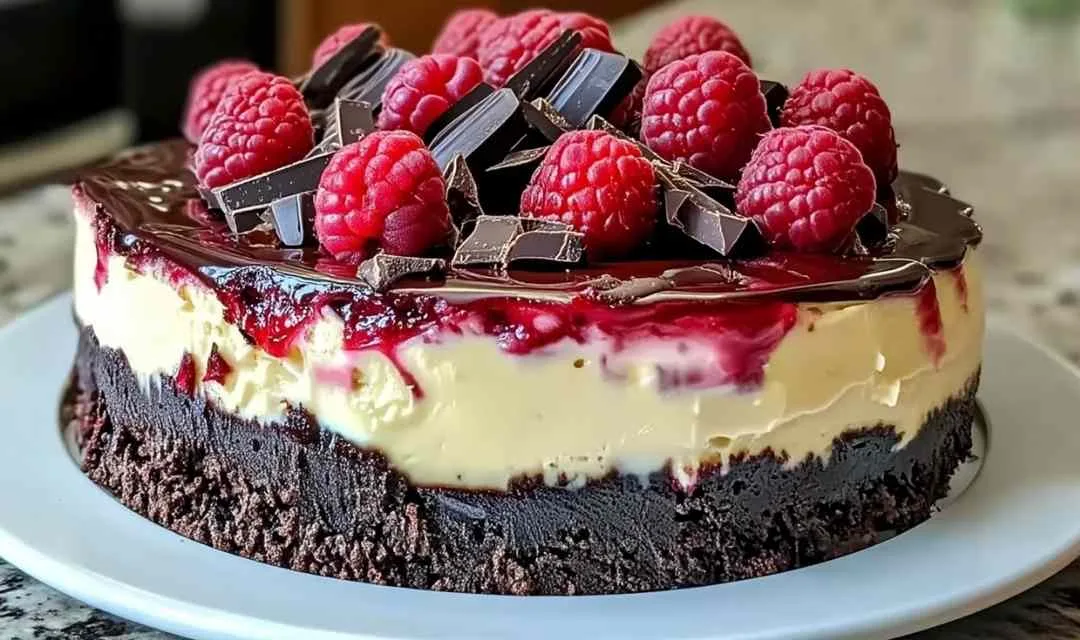
Hot Cocoa Cheesecake with Marshmallow Whipped Cream transforms your favorite winter drink into a show-stopping dessert that’ll have everyone asking for seconds. I still remember the first time I served this at our family’s Christmas gathering – my granddaughter took one bite and said it tasted like a snow day wrapped in chocolate. That’s exactly what this creamy, dreamy cheesecake delivers.
There’s something magical about the way chocolate and marshmallows come together, isn’t there? In my kitchen, I’ve spent years perfecting cheesecakes for every occasion, but this one holds a special place in my recipe box. It reminds me of those cold Midwest evenings when I’d make hot cocoa for the kids after they came in from building snowmen, their cheeks rosy and their mittens soaked through. Now, I’ve captured all that warmth and nostalgia in a dessert that’s surprisingly forgiving for bakers of any skill level. The chocolate cookie crust provides the perfect foundation, while the silky hot chocolate-infused filling melts on your tongue like velvet. And that marshmallow whipped cream on top? Pure magic. Time to get your springform pan ready!
What Makes This Hot Cocoa Cheesecake So Special
This isn’t just another cheesecake recipe – it’s the dessert that brings my whole family running to the kitchen. After decades of baking for Sunday gatherings and holiday celebrations, I’ve learned what makes a recipe truly worth keeping, and this hot cocoa cheesecake checks every box.
- Uses pantry staples you probably already have, from chocolate sandwich cookies to hot chocolate mix
- Foolproof water bath method ensures a crack-free, professionally smooth top every single time
- Stunning presentation that makes you look like a pastry chef without the culinary school degree
- Make-ahead friendly since it actually tastes better after chilling overnight in the refrigerator
- Customizable topping options let you add peppermint, caramel, or crushed candy canes for your family’s preferences
- Feeds a crowd with 12 generous slices perfect for potlucks and holiday parties
I’ve watched nervous bakers transform into confident dessert makers with this recipe. The hot chocolate mix adds such a rich, nostalgic flavor that you just can’t get from regular cocoa powder alone.

Ingredient Spotlight
Chocolate sandwich cookies form the foundation of our crust, and I always reach for the classic variety because they create that perfect balance of chocolatey flavor and sturdy structure when mixed with butter.
Hot chocolate mix is the secret ingredient that makes this cheesecake taste exactly like your favorite winter beverage – I prefer using a quality brand with real cocoa, never the sugar-free versions which can leave a strange aftertaste.
Cream cheese should be genuinely softened to room temperature before you start mixing; in my kitchen, I set mine out about two hours before baking to ensure it blends silky smooth without any lumps.
Sour cream adds a subtle tang that cuts through the richness and keeps the filling from being overly sweet, which is exactly what you want in a well-balanced cheesecake.
Marshmallow fluff whips into the most incredible cloud-like topping when combined with cold heavy cream, creating that signature hot cocoa experience right on top of each slice.
Heavy whipping cream must be cold straight from the refrigerator to whip properly – I’ve learned to chill my mixing bowl and beaters for 15 minutes beforehand for the stiffest, most stable peaks.
Large eggs bind everything together, but the key I discovered is adding them one at a time on low speed to avoid incorporating too much air, which causes those dreaded cracks.
How to Make Hot Cocoa Cheesecake
Step 1. Betty always starts by preheating the oven to 325°F and wrapping her springform pan tightly with a double layer of heavy-duty aluminum foil – I’ve learned this step prevents even a single drop of water from seeping in during the water bath.
Step 2. Pulse those chocolate sandwich cookies in your food processor until they’re fine crumbs, then pour in the melted butter and pulse again until the mixture looks like wet sand; press this firmly into the bottom and halfway up the sides of your prepared pan, then bake for 10 minutes.
Step 3. I’ve found that beating the softened cream cheese and sugar on medium speed for about 2 minutes creates that completely smooth, lump-free base that makes all the difference – don’t rush this step.
Step 4. After years of making this hot cocoa cheesecake, I learned to add the sour cream, hot chocolate mix, vanilla, salt, and flour on low speed, scraping down the bowl to catch any pockets of unmixed cream cheese hiding near the bottom.
Step 5. Add those eggs one at a time on low speed, beating just until each one disappears into the batter – overmixing at this stage incorporates air bubbles that expand in the oven and cause cracks.
Step 6. Pour the silky filling into your slightly cooled crust, place the springform pan into a larger roasting pan, then carefully pour hot water into the roasting pan until it reaches halfway up the sides of your cheesecake pan.
Step 7. Bake for 60-75 minutes until the edges are set but the center still has a slight jiggle when you gently shake the pan – Betty’s tip: it should move like Jello, not liquid, and will firm up completely as it cools.
Step 8. Turn off your oven, crack the door open about 4 inches, and let the cheesecake sit in that warm environment for a full hour; this gradual cooling prevents the dreaded cracks that come from temperature shock.
Step 9. Remove the cheesecake from the oven and water bath, let it cool completely on a wire rack for about 2 hours, then cover and refrigerate for at least 6 hours – I always make mine the night before serving.
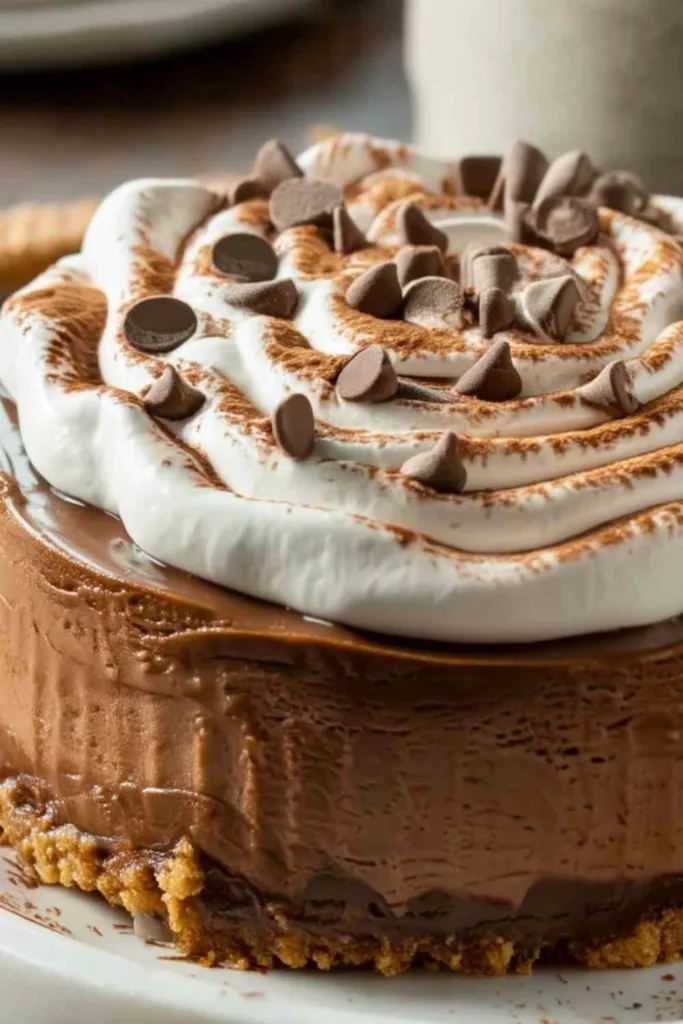
Step 10. Just before serving your hot cocoa cheesecake, whip that cold heavy cream with marshmallow fluff and vanilla on high speed until stiff peaks form, then spread or pipe it onto your chilled cheesecake and finish with chocolate shavings or mini marshmallows.
Keeping This Hot Cocoa Cheesecake Fresh
I typically store leftover slices in an airtight container in the refrigerator for up to 5 days, though in my house, they rarely last past day three. The marshmallow whipped cream holds up surprisingly well for about 24 hours, but for the freshest presentation, I recommend adding it to individual slices as you serve them rather than topping the entire cheesecake at once.
Betty’s freezing method works beautifully for this dessert – I slice the cheesecake before freezing, wrap each piece tightly in plastic wrap, then place them in a freezer-safe bag where they keep perfectly for up to 2 months. Through trial and error, I learned to skip the marshmallow topping before freezing and add it fresh after thawing overnight in the refrigerator, which preserves that fluffy, cloud-like texture everyone loves.
For the best texture when serving from the refrigerator, I let slices sit at room temperature for about 10 minutes before serving. This slight warming brings out all those rich, creamy hot chocolate flavors and makes each bite melt on your tongue. The key I discovered is keeping the cheesecake covered with plastic wrap pressed directly against the surface to prevent it from absorbing any refrigerator odors or developing that dried-out layer on top.
Perfect Partners for Hot Cocoa Cheesecake
- Fresh raspberry sauce provides a bright, tart contrast that cuts through the rich chocolate and marshmallow sweetness, plus that deep red color looks stunning against the white topping
- Strong, hot coffee is my family’s preferred beverage pairing – the slight bitterness balances the dessert’s sweetness perfectly and creates that café experience right at home
- Vanilla ice cream served alongside a slice might sound indulgent, but the cold, creamy contrast with the dense cheesecake creates an incredible temperature and texture experience
- Crushed peppermint candies sprinkled on top add a festive holiday twist that reminds me of those candy cane hot cocoas I used to make for the grandkids
- Caramel drizzle swirled over the marshmallow cream brings a sophisticated, slightly salty-sweet element that makes this dessert feel even more special for company
- Chocolate chip toffee shortbread cookies make a wonderful accompaniment for texture variety and extended dessert service
- Red velvet cream cheese thumbprint cookies create a beautiful holiday dessert spread when served alongside this cheesecake
Storage Tips
Store your hot cocoa cheesecake covered in the refrigerator for up to 5 days. For freezing, slice individual portions and wrap tightly before storing for up to 2 months. Add the marshmallow whipped cream fresh to each slice for the best texture and presentation.
Common Questions
I recommend sticking with the water bath because it creates that steamy, gentle heat that prevents cracks and ensures even cooking throughout – skipping it often results in a dry, cracked top and overcooked edges.
Through years of baking, I’ve learned that cracks come from three main culprits: overmixing after adding eggs, baking at too high a temperature, or cooling too quickly, so mix gently, keep your oven at 325°F, and let it cool gradually in the turned-off oven.
Many home cooks find success using 1/2 cup unsweetened cocoa powder plus 1/4 cup extra sugar, but the hot chocolate mix creates that authentic, nostalgic flavor with its hint of vanilla and creaminess that regular cocoa just can’t replicate.

Hot Cocoa Cheesecake with Marshmallow Whipped Cream
Ingredients
Equipment
Method
- Preheat oven to 325°F. Wrap the bottom and sides of a 9-inch springform pan tightly with a double layer of heavy-duty aluminum foil to prevent water seepage.
- Pulse the cookies in a food processor until fine crumbs. Pour in melted butter and pulse until mixture looks like wet sand. Press firmly into bottom and about halfway up sides of prepared pan. Bake for 10 minutes, then set aside to cool slightly.
- Beat softened cream cheese and sugar on medium speed for about 2 minutes until completely smooth with no lumps. Scrape down bowl.
- Add sour cream, hot chocolate mix, vanilla, salt, and flour. Beat on low speed until just combined. Add eggs one at a time, beating on low after each addition until only just incorporated.
- Pour filling into slightly cooled crust. Place springform pan into a larger roasting pan. Carefully pour hot water into roasting pan until it comes about halfway up sides of springform pan.
- Bake for 60-75 minutes. Edges will be set but center will have a slight jiggle (should move like Jello, not liquid).
- Turn oven off, crack door open about 4 inches, and let cheesecake sit in warm oven for 1 hour for gradual cooling.
- Remove from oven and water bath, then let cool completely on wire rack for about 2 hours. Cover and refrigerate for at least 6 hours, overnight is best.
- Just before serving, combine cold heavy cream, marshmallow fluff, and vanilla in chilled bowl. Whip with mixer on high speed until stiff peaks form. Spread or pipe onto chilled cheesecake and garnish with chocolate shavings or mini marshmallows.