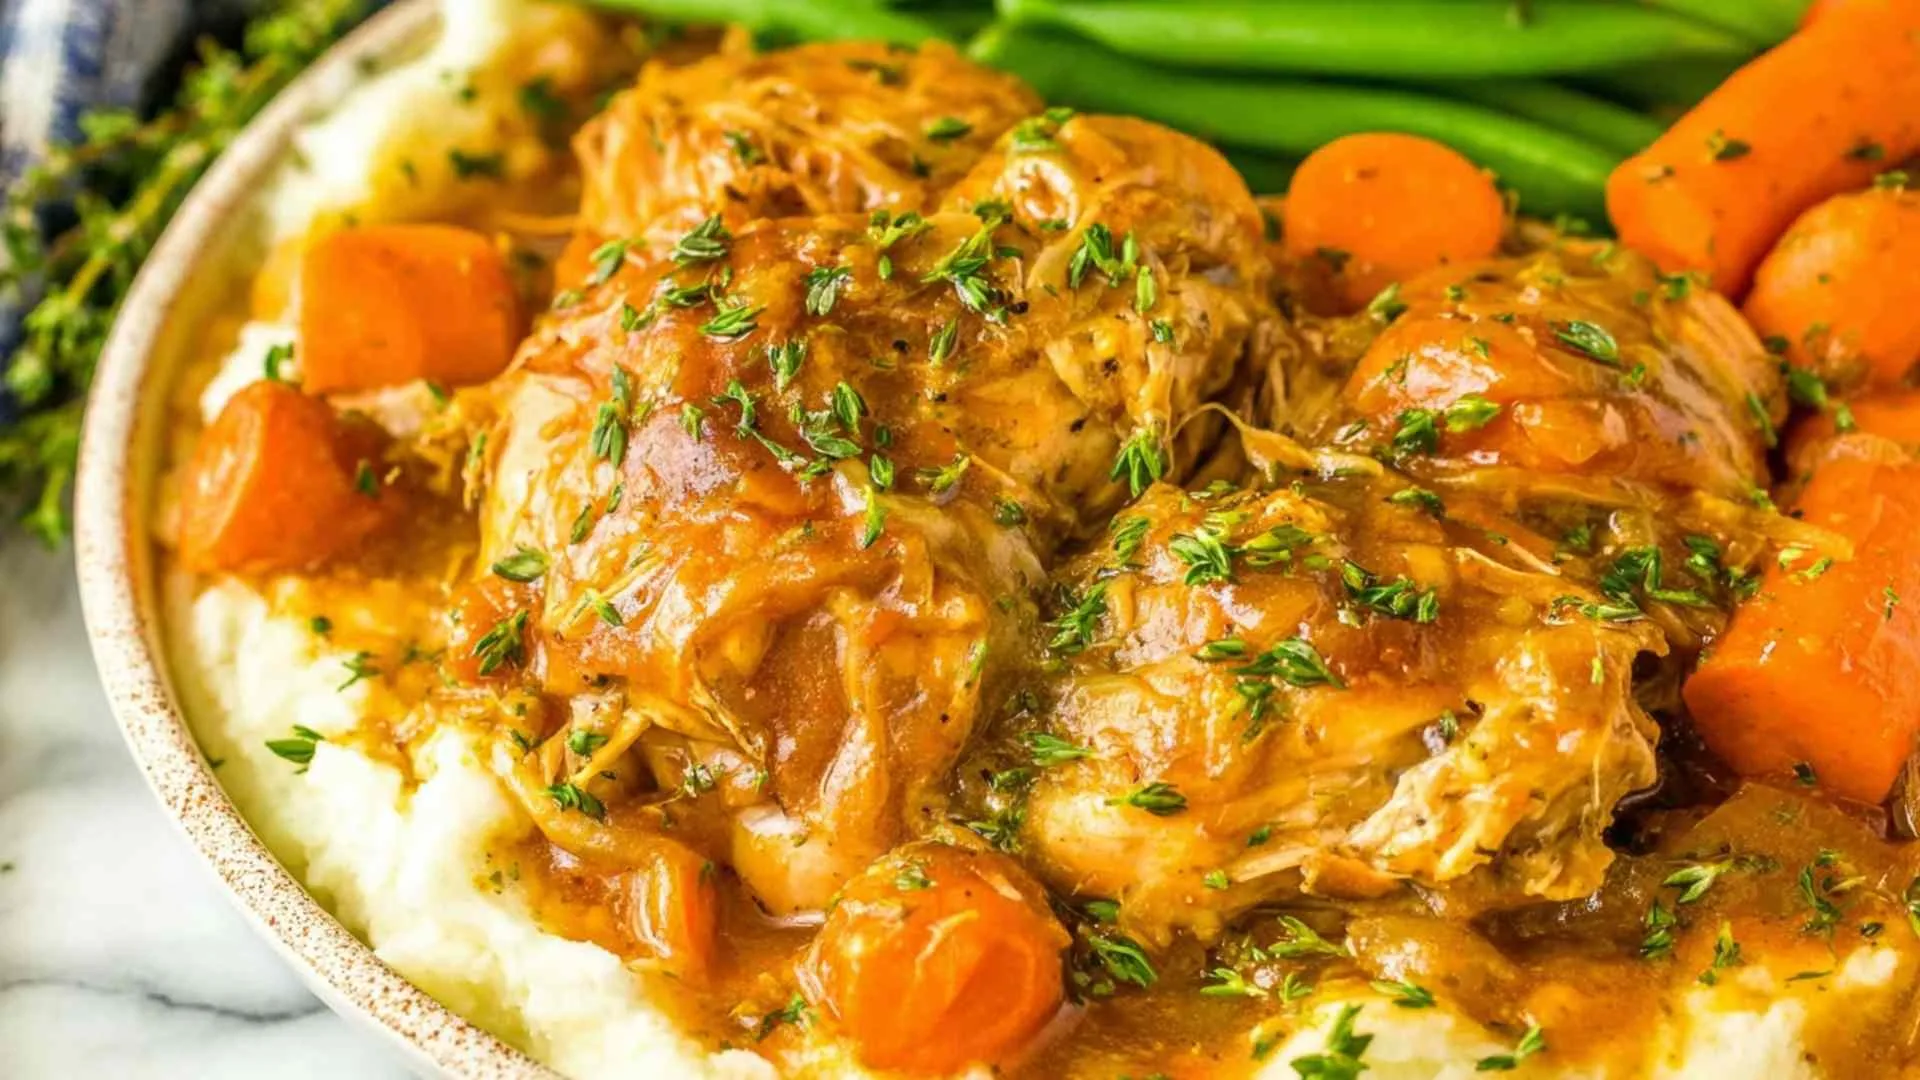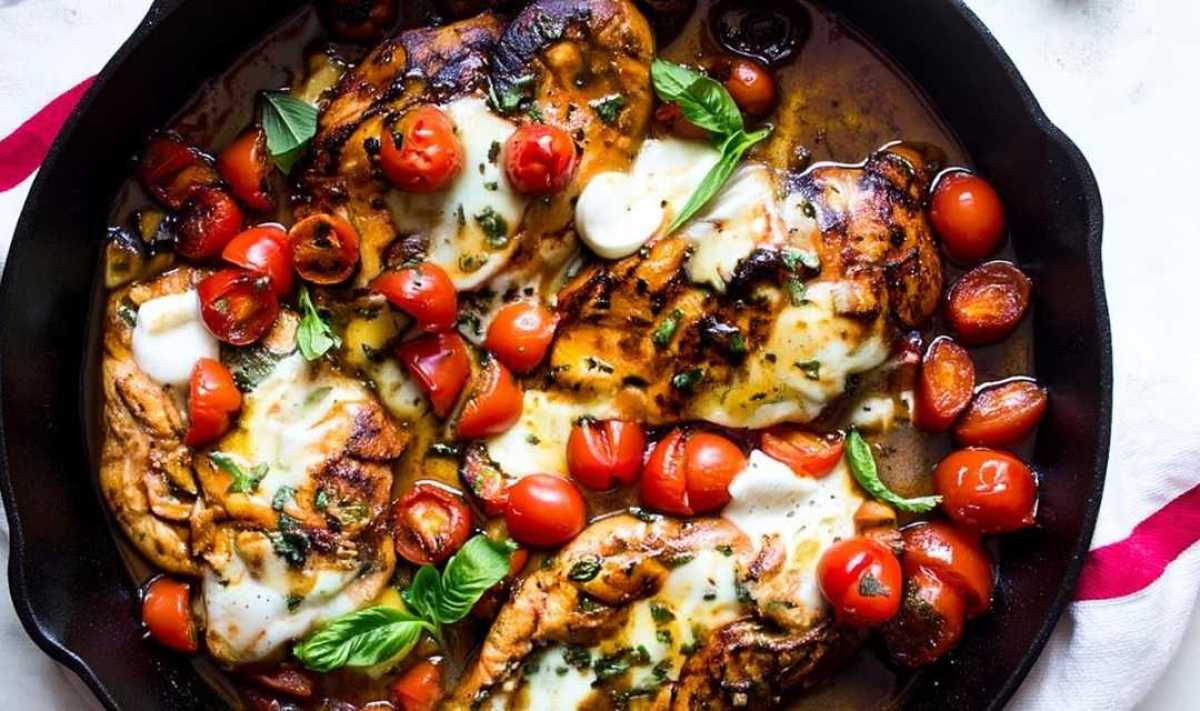
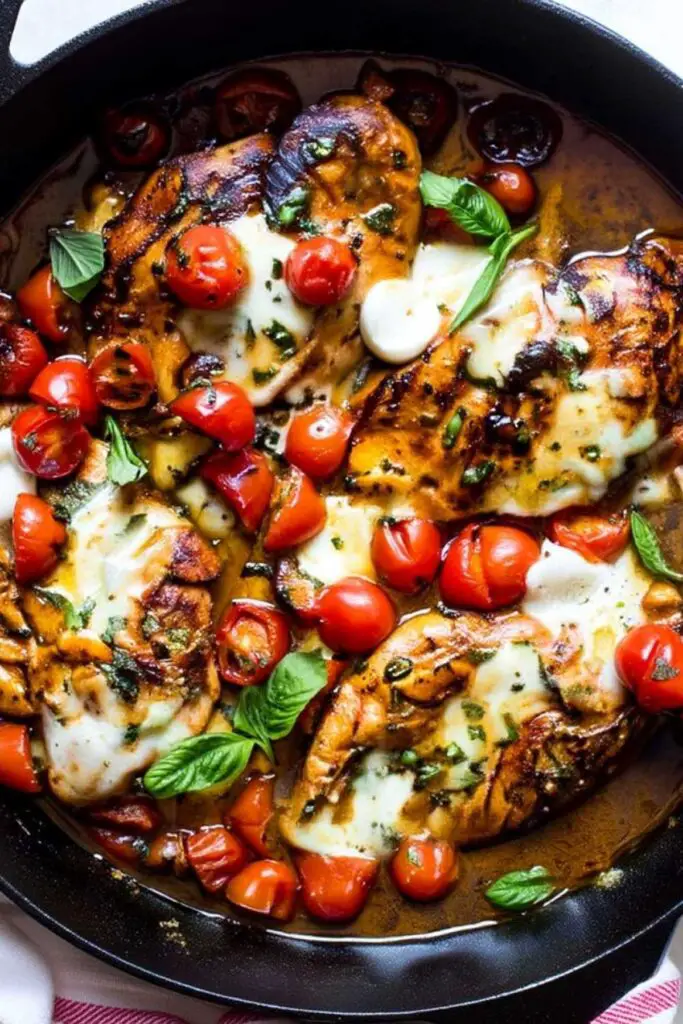
One pan balsamic chicken transforms ordinary weeknight cooking into something special with just a handful of ingredients and one skillet. This recipe delivers restaurant-quality flavors right from your own kitchen, combining perfectly seared chicken with a tangy-sweet balsamic glaze and fresh Italian toppings.
After thirty years of cooking for my family, I’ve learned that the best meals often come from the simplest approaches. This one pan balsamic chicken reminds me of those cozy Sunday dinners at my grandmother’s farmhouse, where she’d create magic with whatever ingredients she had on hand. The aroma of balsamic vinegar mingling with fresh herbs always takes me back to her kitchen, where every meal felt like a celebration. What makes this dish truly special is how it brings together the comfort of home cooking with the sophisticated flavors of Italian cuisine. Let’s get cooking!
Why You’ll Love This One Pan Balsamic Chicken
This recipe has become a staple in my kitchen because it delivers incredible flavor without any fuss. Growing up in the Midwest, I learned to appreciate dishes that could feed a hungry family without keeping me tied to the stove all evening. This one pan balsamic chicken captures that same spirit of practical, delicious cooking that brings everyone to the table.
- Perfect for busy weeknights when you need dinner ready in 30 minutes
- Only one pan to wash, making cleanup a breeze
- Simple ingredients you probably already have in your pantry
- Juicy, flavorful chicken that never comes out dry
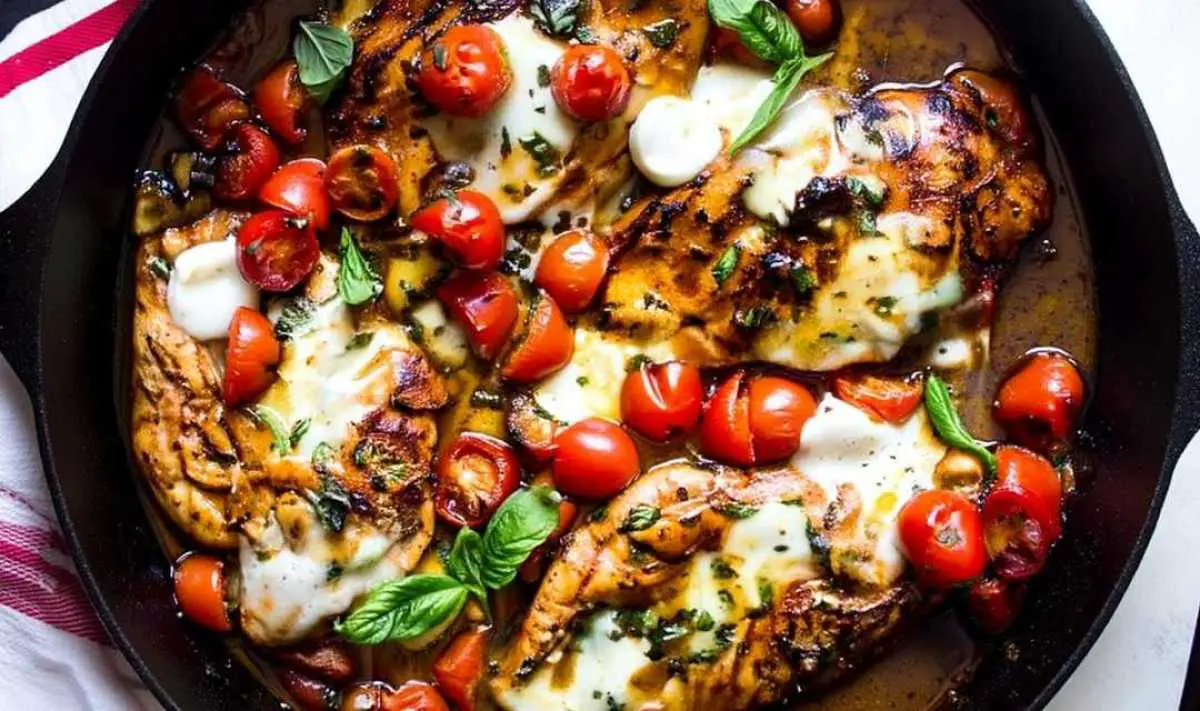
- Beautiful presentation that’s impressive enough for company
- Works wonderfully over rice, pasta, or mashed potatoes
This comforting dish is more than just dinner—it’s a reminder that the best meals don’t require complicated techniques, just good ingredients and a little kitchen wisdom passed down through generations.
Ingredient Note List
Balsamic Vinegar: I always use a good quality balsamic vinegar because it’s the star of the sauce, providing that perfect balance of tangy and slightly sweet flavors that make this dish memorable.
Honey: The honey balances the acidity of the balsamic vinegar and helps create a beautiful glaze that coats the chicken as it bakes.
Dijon Mustard: This adds a subtle depth and helps emulsify the sauce, creating a smooth texture that clings perfectly to the chicken.
Fresh Mozzarella Balls: I prefer using ciliegine or pearls because they melt beautifully without becoming too watery, giving you those perfect melted cheese moments in every bite.
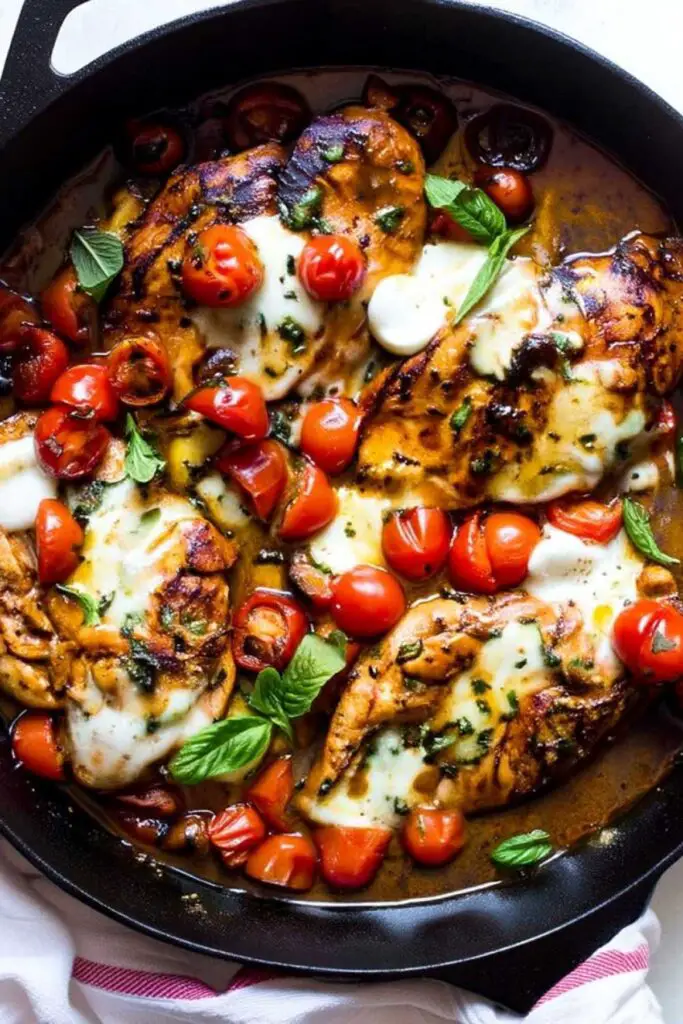
Grape Tomatoes: These little gems hold their shape during baking and provide bursts of fresh, juicy flavor that complement the rich balsamic sauce.
Fresh Basil: Nothing beats the aroma of fresh basil—it adds a bright, herbaceous note that makes this one pan balsamic chicken taste like it came from an Italian kitchen.
Chicken Breasts: I always pound the chicken to even thickness because it ensures uniform cooking and prevents dry, overcooked edges while keeping the center perfectly juicy.
Italian Seasoning: This herb blend adds warmth and complexity to the balsamic sauce without requiring multiple individual spices.

How to Cook One Pan Balsamic Chicken
Step 1. I usually start by whisking together all the sauce ingredients in a small bowl, making sure the honey completely dissolves—this creates a smooth, glossy mixture that will coat the chicken beautifully.
Step 2. In my experience, tossing the tomatoes, mozzarella, and basil together ahead of time allows the flavors to meld slightly and ensures even distribution over the chicken.
Step 3. Preheating the oven to 400°F while you prep everything else keeps the cooking process moving smoothly—I’ve found this temperature gives the perfect balance of cooking the chicken through while melting the cheese.
Step 4. When heating the oil in your oven-safe skillet, wait until it shimmers before adding the chicken—this ensures that perfect golden sear that locks in all the juices.
Step 5. I always season the chicken generously with salt and pepper just before searing because it creates a flavorful crust that enhances the overall taste of the dish.
Step 6. Searing the chicken for just 1-2 minutes per side creates beautiful color and flavor—my grandmother always said patience here pays off with better-tasting results.
Step 7. Adding the balsamic sauce while the pan is still hot creates an instant simmer, and I love scraping up those golden brown bits from the bottom because they add incredible depth to the sauce.
Step 8. Removing the pan from heat before adding the tomato mixture prevents the mozzarella from melting too quickly and becoming tough during the oven cooking.
Step 9. Baking for 18-23 minutes gives the chicken time to cook through completely while the tomatoes soften and the mozzarella gets perfectly bubbly and golden.
Step 10. Resting the chicken for 5 minutes before serving is crucial—it allows the juices to redistribute, ensuring every bite is moist and flavorful.
How to Store & Reheat
I usually store any leftovers in an airtight container in the refrigerator, where they stay fresh for up to 3-4 days. Make sure the dish cools completely before sealing to prevent condensation that could make the chicken soggy.
For longer storage, this dish can be frozen for up to 2 months, though I recommend wrapping individual portions tightly in foil first, then placing them in freezer bags. The texture holds up surprisingly well when frozen properly.
For best results, I prefer reheating this one pan balsamic chicken gently in the oven at 325°F for about 15 minutes, covered with foil to prevent drying out. You can also use the microwave in 30-second intervals, but add a splash of water or broth to keep the chicken moist and prevent the cheese from becoming rubbery.
One Pan Balsamic Chicken
Ingredients
Equipment
Method
- In a separate bowl, toss tomatoes, mozzarella, and basil with salt and pepper.
- Preheat oven to 400°F (200°C).
- Season chicken with salt and pepper. Heat oil in an oven-safe skillet over medium-high. Sear chicken 1–2 minutes per side until golden.
- Pour balsamic sauce into skillet and scrape up brown bits. Remove from heat and scatter tomato–mozzarella mixture over chicken.
- Bake uncovered for 18–23 minutes, until chicken is fully cooked (165°F internal temperature).
- Remove from oven and let rest 5 minutes before serving.
Notes
What to Serve with One Pan Balsamic Chicken
Creamy Garlic Mashed Potatoes: The rich, buttery texture of mashed potatoes soaks up the balsamic sauce beautifully, creating the perfect comfort food combination that my family requests again and again.
Lemon Rice Pilaf: Light and fluffy rice provides a neutral base that lets the bold balsamic flavors shine while adding substance to make this a complete meal.
Roasted Asparagus: The slight char and crisp texture of roasted asparagus creates a lovely contrast to the tender chicken, while the earthy flavor complements the Italian herbs perfectly.
Crusty Garlic Bread: There’s nothing quite like having good bread to soak up every drop of that delicious balsamic sauce—it’s practically required in my kitchen.
Simple Caesar Salad: A crisp salad with tangy dressing provides a fresh, cool contrast to the warm, rich flavors of the chicken dish.
Buttered Egg Noodles: These tender noodles are perfect for catching all the sauce and cheese, making every forkful satisfying and complete.
FAQs
How do I prevent the chicken from drying out?
I always recommend pounding the chicken to even thickness and not overcooking it—use a meat thermometer to ensure it reaches exactly 165°F for perfectly juicy results every time.
Can I use chicken thighs instead of breasts?
Absolutely! Chicken thighs work wonderfully in this recipe, though you’ll need to increase the cooking time to 25-30 minutes since dark meat takes a bit longer to cook through.
What if my balsamic sauce seems too thin?
If the sauce looks thin after searing, don’t worry—it will thicken slightly as it bakes with the chicken, and the natural juices will help create a more concentrated flavor.
Can I make this one pan balsamic chicken ahead of time?
You can prepare everything up to the baking step, cover tightly, and refrigerate for up to 24 hours—just add an extra 5 minutes to the baking time if cooking straight from the fridge.