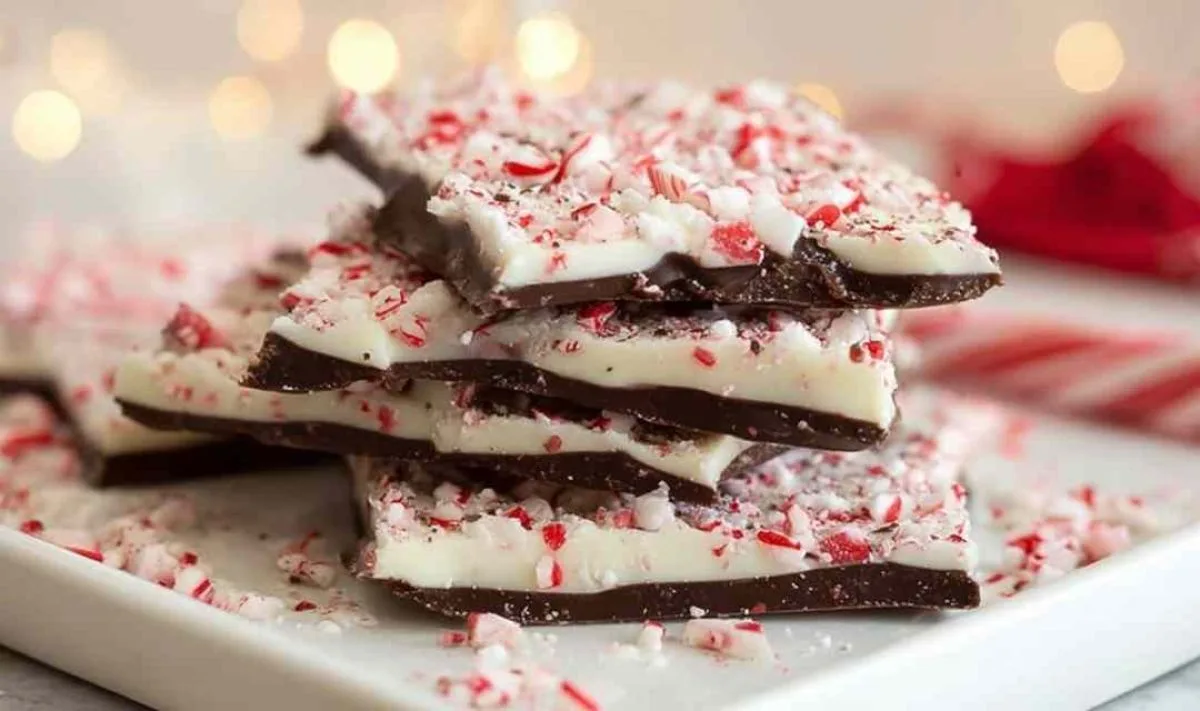
Peppermint Bark is a classic Christmas candy that brings back memories of Nonna Betty’s holiday kitchen, where the scent of melted chocolate and crushed peppermint filled the farmhouse every December. This simple three-ingredient treat became her go-to gift for neighbors, teachers, and anyone who needed a little holiday cheer.
There’s something magical about making candy that doesn’t require fancy equipment or culinary school training. Betty discovered this recipe during one particularly busy Christmas season when she needed dozens of gifts but had limited time. She melted some chocolate, crushed a few candy canes her grandchildren had hung on the tree, and created something that looked bakery-perfect in just minutes. The combination of rich dark chocolate with sweet white chocolate and those crunchy peppermint bits became an instant family tradition. Friends started requesting it every year, and Betty loved knowing she could whip up a batch while her grandkids decorated cookies at the kitchen table. The best part? You don’t even need to turn on the oven. Time to get our hands chocolatey!
What Makes This Peppermint Bark So Special
Betty always says that the simplest recipes often bring the most joy, and this peppermint bark proves her point perfectly. After years of making elaborate Christmas treats, she found that this effortless candy bark became the most requested gift in her circle.
- Uses just three ingredients you can grab at any grocery store during the holidays
- Comes together in 10 minutes of active work, perfect when you’re juggling multiple holiday tasks
- Requires zero baking skills or special candy-making equipment
- Delivers consistent results every single time without temperamental techniques
- Creates impressive homemade gifts that look like they came from an expensive chocolatier
- Offers the perfect flavor balance between rich dark chocolate and creamy white chocolate with refreshing peppermint crunch
Betty loves that even her youngest grandchildren can help make this recipe. It’s become one of those kitchen projects that brings generations together during the busiest season of the year.
Ingredient Spotlight
Dark chocolate chips: These create the rich, slightly bitter base layer that balances the sweetness of the white chocolate. I always choose quality chocolate chips (look for at least 60% cocoa content) because they melt smoothly and taste significantly better than bargain brands.
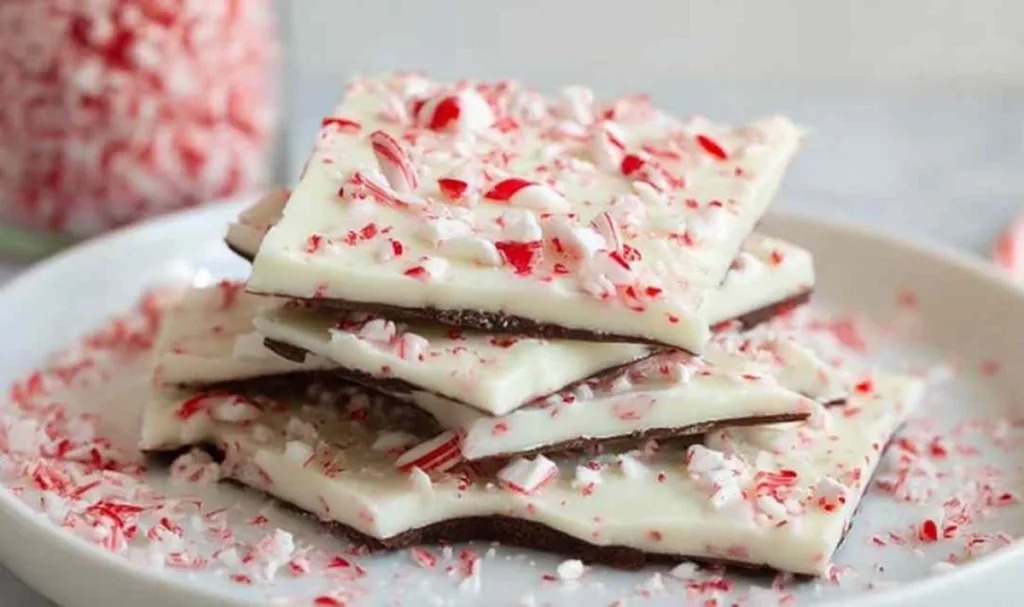
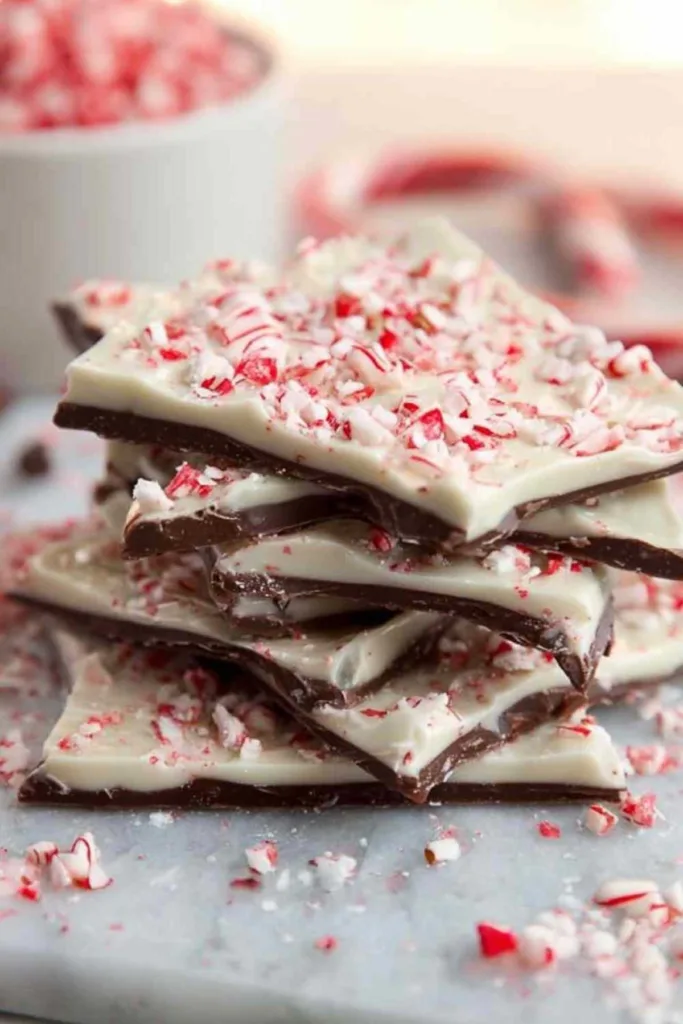
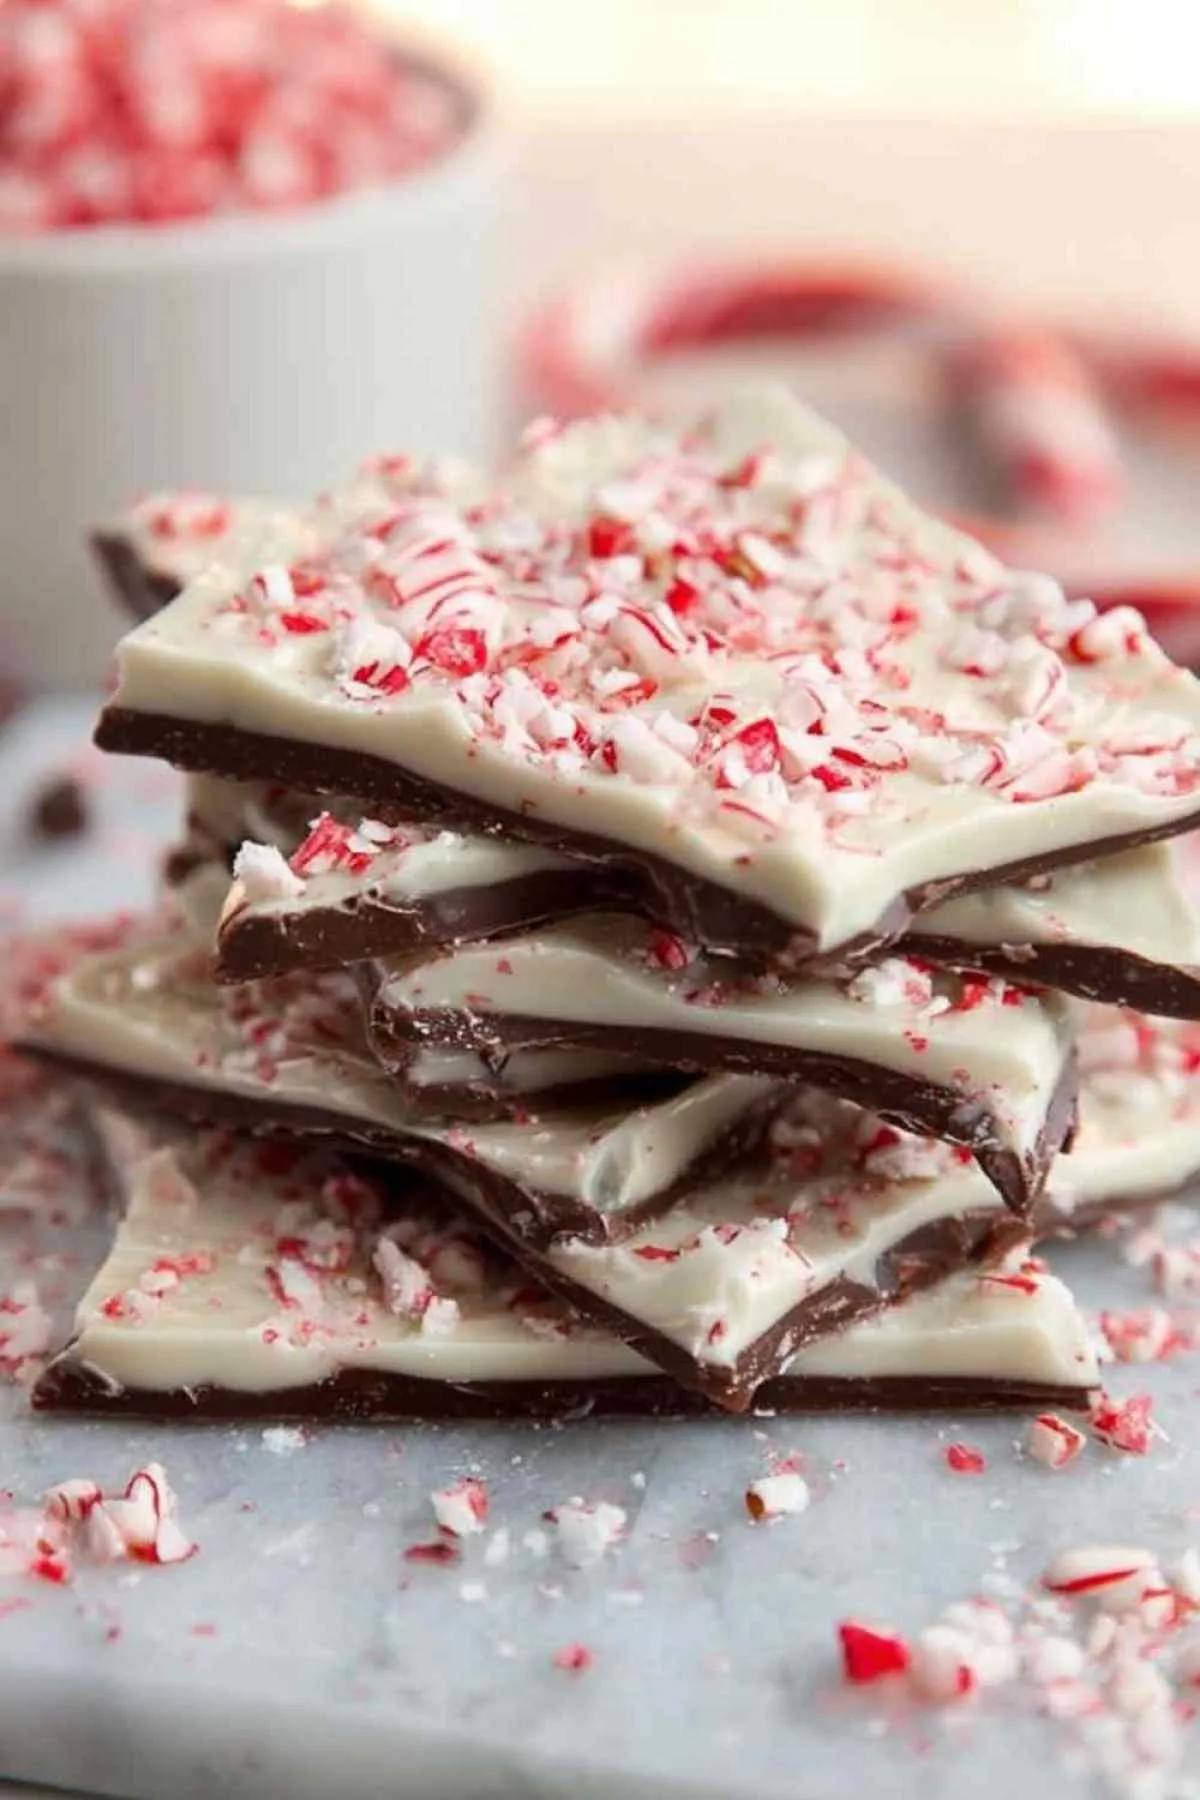
White chocolate chips: This sweet, creamy layer provides the perfect canvas for the peppermint pieces and creates that beautiful two-tone appearance that makes peppermint bark so visually stunning.
Crushed candy canes or peppermint candies: These add the essential peppermint flavor and satisfying crunch that defines this Christmas treat. Betty prefers candy canes because they’re readily available and the red-and-white pieces create a festive look.
How to Make Peppermint Bark
Step 1. Before you begin, place your candy canes in a zip-top bag and crush them with a rolling pin until you have 1/2 cup of small pieces. Set aside while you prepare the chocolate.
Step 2. Line a standard 13×18-inch baking sheet with parchment paper so the bark releases easily after chilling. I’ve learned that wax paper works too, but parchment is Betty’s preferred choice for cleanest results.
Step 3. Melt the dark chocolate in a microwave-safe bowl for 45 seconds, then stir and continue heating in 10-second intervals, stirring between each one until completely smooth and no lumps remain. Rushing this process can scorch the chocolate, so patience pays off.
Step 4. Melt the white chocolate chips in a separate bowl following the same method, being extra careful since white chocolate can seize if overheated. Stop heating as soon as the last few chips melt with stirring.
Step 5. Stir 1/4 cup of crushed peppermint candies into the melted white chocolate until evenly distributed. This adds flavor throughout the white layer.
Step 6. Pour the melted dark chocolate onto the parchment paper and spread it evenly to about 1/4 inch thickness using the back of a spoon or offset spatula.
Step 7. Immediately pour the peppermint-studded white chocolate over the dark layer and carefully spread to cover. Work quickly here so the bottom layer doesn’t harden, or your layers won’t stick together properly.
Step 8. Sprinkle the remaining 1/4 cup of crushed peppermints over the top while the white chocolate is still wet, pressing them gently so they stick.
Step 9. Refrigerate for 10 to 15 minutes until firm to the touch. Betty’s tip: don’t chill too long or the layers might separate when you cut it.
Step 10. Remove from refrigerator and cut into rustic pieces using a sharp knife. Irregular pieces actually look more artisan and homemade, which adds to the charm. This recipe makes about 24 pieces.
Keeping This Peppermint Bark Fresh
Store your finished peppermint bark in an airtight container in the refrigerator for up to three weeks, layering pieces between parchment paper to prevent sticking. I typically keep mine in a cool spot in the fridge, and Betty’s method of adding parchment between layers has saved many batches from becoming one giant chocolate mass.
The bark is perfectly fine sitting out at room temperature for a few hours during holiday parties. In fact, it’s easier to bite into when it’s not refrigerator-cold. However, if your kitchen runs warm or you’re in a climate with higher temperatures, keep it chilled until just before serving to maintain that satisfying snap when you break it.
For gifting, Betty packages the bark in mason jars or decorative cellophane bags tied with ribbon, and it holds up beautifully for several days at room temperature. The key is storing it in a cool, dry place away from direct heat or sunlight, which would cause the chocolate to bloom or soften.
Perfect Partners for Peppermint Bark
- Hot chocolate or peppermint mochas: The bark makes an elegant stirrer or side treat that echoes the drink’s flavors. Try breaking a small piece right into steaming cocoa for extra indulgence.
- Christmas cookie platters: Arrange peppermint bark pieces alongside gooey butter cookies, thumbprint cookies, and brownies for a varied dessert spread that offers different textures and flavors.
- Vanilla ice cream: Crushed peppermint bark becomes an instant topping that adds crunch and minty freshness to creamy frozen desserts.
- Coffee or espresso: The dark chocolate base pairs beautifully with bold coffee, making this combination perfect for holiday breakfast casseroles or afternoon gatherings.
- Christmas tree charcuterie board: Add a few pieces of peppermint bark to your festive appetizer spread alongside cheese, crackers, and other sweet treats for visual appeal and variety.
FAQs
Can I use milk chocolate instead of dark chocolate? I recommend milk chocolate if you prefer sweeter bark. It creates a candy that’s more approachable for children, though Betty prefers the balance of dark chocolate against the sweet white layer.
Why did my chocolate layers separate when I cut the bark? This happens when the bottom layer hardens before you add the top layer. Work quickly and pour the white chocolate immediately after spreading the dark chocolate to ensure they bond together properly.
Can I make peppermint bark ahead of time? Absolutely. Many home cooks find success making this up to three weeks in advance when stored properly in the refrigerator, which makes it perfect for early holiday prep.
What’s the best way to crush candy canes without making a mess? Betty’s solution is placing unwrapped candy canes in a zip-top bag and crushing them with a rolling pin. This contains the pieces and gives you control over how fine or chunky you want the peppermint bits.
Can I use chocolate melting wafers instead of chips? To prevent texture issues, I use chocolate chips for better snap, though melting wafers work fine if you prefer softer bark that’s easier to bite. Just know it won’t have that professional candy-shop crack when you break it.
How do I prevent the white chocolate from seizing? The best approach I’ve tested is heating in short intervals and stirring thoroughly between each one. White chocolate is more temperamental than dark, so patience and gentle heat are essential.
Peppermint Bark
Ingredients
Equipment
Method
- Place candy canes in a zip-top bag and crush with a rolling pin until you have 1/2 cup of small pieces. Set aside.
- Line a standard 13×18-inch baking sheet with parchment paper or wax paper and set aside.
- Place dark chocolate chips in a microwave-safe bowl and heat for 45 seconds. Stir, then continue heating in 10-second intervals, stirring between each interval, until completely melted and smooth with no lumps remaining.
- In a separate microwave-safe bowl, melt white chocolate chips using the same method. Stop heating as soon as the last few chips melt with stirring to prevent seizing.
- Stir 1/4 cup of the crushed peppermint candies into the melted white chocolate until well combined.
- Pour melted dark chocolate onto the prepared parchment paper and spread evenly to about 1/4 inch thickness using the back of a spoon or offset spatula.
- Immediately pour the white chocolate mixture over the dark chocolate layer and carefully spread to cover completely, working quickly so the layers adhere.
- Sprinkle the remaining 1/4 cup crushed peppermints over the top, pressing gently to help them stick.
- Refrigerate for 10 to 15 minutes or until firm to the touch. Do not chill too long or layers may separate when cutting.
- Remove from refrigerator and cut into 24 pieces with a sharp knife. Store in airtight container in refrigerator.