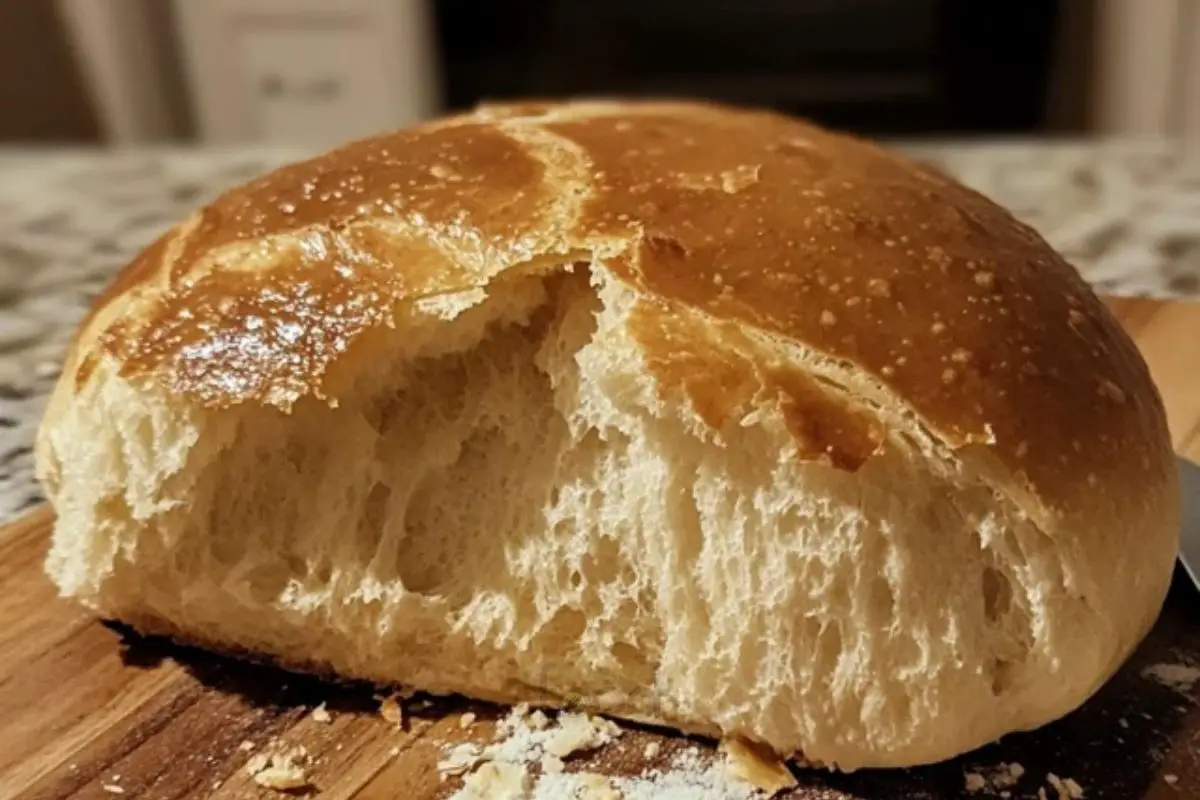
Sourdough Bread Recipe
Sourdough bread is more than just a loaf; it’s a delightful journey into the world of baking. This ancient method of bread-making has been cherished for centuries. The unique flavor and texture of sourdough come from the natural fermentation process. It’s a beautiful blend of science and art, making it a favorite among home bakers and professional chefs alike.
The Art of Sourdough Baking
Baking sourdough bread is like creating a masterpiece. It requires patience, practice, and a little love. The process begins with a sourdough starter, which is a mixture of flour and water that captures wild yeast and bacteria from the environment. This starter is what gives sourdough its signature tangy flavor and airy texture.
As you mix, stretch, and fold the dough, you’ll notice how it transforms. Each step is crucial, from preparing the starter to the final bake. The dough needs time to rise and develop flavor. This slow fermentation process is what sets sourdough apart from other types of bread.
Moreover, sourdough baking is forgiving. If you make a mistake, you can often salvage it. The beauty of sourdough lies in its ability to adapt. You can experiment with different flours, hydration levels, and add-ins to create a loaf that’s uniquely yours.
In this article, we’ll guide you through a simple yet delicious sourdough bread recipe. Whether you’re a beginner or an experienced baker, you’ll find joy in the process. So, roll up your sleeves, and let’s dive into the wonderful world of sourdough baking!
Ingredients for Sourdough Bread Recipe
To create a delightful sourdough bread, you need just a few simple ingredients. Each one plays a vital role in the flavor and texture of the final loaf. Here’s what you’ll need:
- 60 g active sourdough starter (scant 1/2 cup): This is the heart of your bread. It contains the wild yeast and bacteria that help the dough rise and develop flavor.
- 340 g water (1 1/2 cup): Water hydrates the flour and activates the gluten. It’s essential for creating a soft and airy crumb.
- 490 g bread flour (about 3 1/2 cups): Bread flour has a higher protein content than all-purpose flour. This helps create a strong gluten structure, giving your bread a chewy texture.
- 10 g salt (1 1/2 tsp): Salt enhances the flavor of the bread and controls the fermentation process. It’s crucial for balancing the taste.
These ingredients are easy to find and can be adjusted based on your preferences. For instance, you can experiment with different types of flour, such as whole wheat or rye, to add unique flavors to your sourdough bread. Remember, the quality of your ingredients matters. Using fresh, high-quality flour and a well-fed starter will yield the best results.
Now that you have your ingredients ready, let’s move on to the next step in our sourdough bread journey!
Step-by-Step Preparation of Sourdough Bread Recipe
Now that you have your ingredients ready, it’s time to dive into the step-by-step preparation of your sourdough bread. Each step is essential for creating that perfect loaf. Let’s get started!
Step 1: Preparing the Starter
First things first, you need to prepare your sourdough starter. This is the magic ingredient that makes your bread rise. If your starter has been in the fridge, take it out and let it warm up to room temperature. This usually takes about an hour. If it looks a bit sluggish, feed it with equal parts flour and water. This will help it become bubbly and active again. A lively starter is key to a successful sourdough bread recipe!
Step 2: Mixing the Dough
Once your starter is ready, it’s time to mix the dough. In a large mixing bowl, weigh out your active sourdough starter. Then, add the water and mix gently. You can use a dough whisk, fork, or even your hands. Next, add the bread flour and salt. Mix everything together until it forms a shaggy dough. Don’t worry about it being perfect; just make sure all the flour is incorporated. Cover the bowl with plastic wrap or a damp tea towel and let it rest for one hour. This resting period is crucial for hydration.
Step 3: Bulk Fermentation
After the hour is up, it’s time for the bulk fermentation. This is where the dough starts to rise and develop flavor. Dip your fingers in water to prevent sticking, then grab a section of the dough. Pull it gently upwards and fold it over to the opposite side of the bowl. Turn the bowl slightly and repeat this process until you’ve stretched and folded all around the bowl. Cover the bowl again and let it rest for another hour. You’ll repeat this stretching and folding process three more times, allowing the dough to rest after each session. This helps build strength in the dough.
Step 4: Shaping the Dough
After the final stretch and fold, it’s time to shape your dough. Prepare your banneton basket by dusting it with flour. Gently peel away one edge of the risen dough and use the same stretching and folding technique to gather it into a ball. This helps create surface tension. Transfer the dough into the banneton, seam side up, and sprinkle a bit of flour on top to prevent sticking. Cover the banneton with plastic wrap and place it in the fridge for 3-4 hours or overnight for the final proofing. This cold proofing enhances the flavor and texture of your bread.
Step 5: Final Proofing
During the final proofing, the dough will rise again, developing even more flavor. If you’ve placed it in the fridge overnight, take it out about 30 minutes before baking. This allows the dough to come to room temperature. You’ll know it’s ready when it has puffed up and feels airy to the touch. This step is crucial for achieving that beautiful open crumb structure in your sourdough bread.
Step 6: Baking the Bread
Now comes the exciting part—baking your bread! Preheat your oven to 450°F (232°C) with a Dutch oven inside. This helps create steam, which is essential for a crispy crust. Cut a piece of parchment paper large enough to fit inside the Dutch oven. After the final proofing, remove the dough from the fridge and take off the covering. Place the parchment paper on top of the dough in the banneton, then gently turn the basket over to transfer the dough onto the parchment. Score the top of the dough with a bread lame or razor blade. Carefully remove the hot Dutch oven from the oven, lift the lid, and lower the dough into it using the parchment paper. Replace the lid and bake for 50 minutes without opening the oven. This will give you a beautiful, golden crust!
Variations of Sourdough Bread Recipe
While the classic sourdough bread recipe is delightful on its own, there are many ways to add a personal touch. By incorporating different ingredients, you can create unique flavors and textures. Let’s explore some exciting variations of sourdough bread that you can try!
Adding Seeds and Nuts
One of the simplest ways to enhance your sourdough bread is by adding seeds and nuts. These ingredients not only add flavor but also provide a delightful crunch. Here are some popular options:
- Sunflower Seeds: These seeds add a nutty flavor and a satisfying crunch. You can mix them into the dough or sprinkle them on top before baking.
- Sesame Seeds: Toasted sesame seeds give a rich, nutty taste. They can be added to the dough or used as a topping for a beautiful finish.
- Walnuts: Chopped walnuts bring a hearty texture and a slightly bitter flavor that pairs well with the tanginess of sourdough.
- Pumpkin Seeds: Also known as pepitas, these seeds add a lovely green color and a mild flavor. They are great for mixing into the dough.
To incorporate seeds or nuts, simply add them during the mixing stage of your dough. Start with about 50-100 grams (1/2 to 1 cup) of your chosen ingredient. Adjust based on your taste preference. Enjoy the delightful surprise of flavors in every bite!
Incorporating Herbs and Spices
Another fantastic way to elevate your sourdough bread is by adding herbs and spices. These ingredients can transform your loaf into a fragrant delight. Here are some ideas to consider:
- Rosemary: Fresh or dried rosemary adds a wonderful aroma and flavor. Mix in about 1-2 tablespoons of chopped rosemary for a savory touch.
- Garlic: Roasted garlic or garlic powder can give your bread a deliciously rich flavor. Use 1-2 cloves of roasted garlic or 1 teaspoon of garlic powder.
- Thyme: This herb offers a subtle earthiness. Add 1-2 teaspoons of dried thyme to your dough for a lovely flavor.
- Cinnamon: For a sweet twist, consider adding cinnamon. About 1 teaspoon mixed into the dough can create a warm, comforting flavor.
When adding herbs and spices, mix them in during the dough mixing stage. This will ensure an even distribution throughout your loaf. Experiment with different combinations to find your favorite flavor profile!
These variations not only make your sourdough bread more exciting but also allow you to express your creativity in the kitchen. So, don’t hesitate to try new ingredients and make this recipe your own!
Cooking Note for Sourdough Bread Recipe
Baking sourdough bread is a rewarding experience, but it does come with its own set of challenges. Here are some important cooking notes to keep in mind as you embark on your sourdough journey. These tips will help ensure that your bread turns out perfectly every time!
First, always use a reliable sourdough starter. The health of your starter is crucial for the success of your bread. If your starter is not bubbly and active, your bread may not rise properly. Make sure to feed your starter regularly, especially before you plan to bake.
Next, pay attention to the temperature of your ingredients. Warm water helps activate the yeast in your starter, while cooler temperatures can slow down fermentation. Ideally, your water should be around 80°F (27°C) for optimal results. If your kitchen is too warm, consider refrigerating your dough during the bulk fermentation to prevent over-proofing.
Additionally, the humidity in your environment can affect the dough’s hydration. If you live in a dry area, you may need to add a little more water to your dough. Conversely, if it’s very humid, you might need to reduce the water slightly. Always adjust based on the feel of the dough; it should be soft and slightly tacky but not overly sticky.
When it comes to baking, using a Dutch oven is highly recommended. This method traps steam, which is essential for achieving a crispy crust. If you don’t have a Dutch oven, you can create steam in your oven by placing a pan of water on the bottom rack while baking.
Lastly, patience is key! Sourdough bread requires time to develop its flavor and texture. Don’t rush the fermentation or proofing stages. Allowing the dough to rise slowly will result in a more flavorful loaf. Remember, good things come to those who wait!
By keeping these cooking notes in mind, you’ll be well on your way to mastering the art of sourdough baking. Enjoy the process, and don’t forget to savor the delicious results!
Serving Suggestions for Sourdough Bread Recipe
Freshly baked sourdough bread is a treat on its own, but it can be even more delightful when paired with the right accompaniments. Here are some serving suggestions to enhance your sourdough experience:
- Classic Butter: Spread a generous pat of unsalted butter on warm slices of sourdough. The butter melts into the bread, creating a rich and creamy flavor that’s simply irresistible.
- Avocado Toast: Mash ripe avocado and season it with salt, pepper, and a squeeze of lemon juice. Spread it on toasted sourdough for a nutritious and delicious breakfast or snack.
- Cheese Platter: Pair your sourdough with a selection of cheeses. Soft cheeses like brie or goat cheese complement the tangy flavor of the bread beautifully. Add some fruits and nuts for a complete platter.
- Soup Companion: Serve slices of sourdough alongside your favorite soup. The bread is perfect for dipping into hearty soups like tomato basil or creamy potato leek.
- Sandwiches: Use sourdough as the base for delicious sandwiches. Layer it with meats, cheeses, and fresh veggies for a satisfying lunch. The crusty exterior holds up well against hearty fillings.
- French Toast: Transform your leftover sourdough into a delightful breakfast by making French toast. Dip slices in a mixture of eggs, milk, and cinnamon, then cook until golden brown.
These serving suggestions not only highlight the unique flavor of sourdough bread but also allow you to enjoy it in various ways. Whether you’re having a casual meal or hosting a gathering, sourdough can elevate any dining experience. So, slice up that loaf and get creative with your pairings!
Tips for Perfecting Your Sourdough Bread Recipe
Perfecting your sourdough bread recipe can be a delightful journey filled with learning and experimentation. Here are some valuable tips to help you achieve that perfect loaf every time. With a little practice and patience, you’ll be baking like a pro!
First, always ensure your sourdough starter is healthy and active. A strong starter is the backbone of your bread. Feed it regularly and keep it at room temperature before baking. This will ensure it’s bubbly and ready to work its magic in your dough.
Next, pay attention to the dough’s hydration. The amount of water you use can greatly affect the texture of your bread. A higher hydration dough will yield a more open crumb, while a lower hydration dough will be denser. Experiment with different hydration levels to find what you like best.
Temperature plays a crucial role in sourdough baking. Warmer temperatures speed up fermentation, while cooler temperatures slow it down. If your kitchen is warm, consider refrigerating your dough during bulk fermentation. This can help control the rise and develop more complex flavors.
Don’t forget about the importance of timing. Each step in the process, from mixing to baking, requires patience. Allow your dough to rise fully during bulk fermentation and final proofing. This will ensure a light and airy loaf. If you’re unsure, perform the “poke test.” Gently poke the dough; if it springs back slowly, it’s ready.
When shaping your dough, create surface tension by pulling the dough towards you. This helps the loaf hold its shape during baking. A well-shaped loaf will rise beautifully in the oven, resulting in a stunning final product.
Lastly, practice makes perfect! Don’t be discouraged by initial failures. Each bake teaches you something new. Keep notes on what works and what doesn’t. Over time, you’ll develop a better understanding of your dough and how to achieve the results you desire.
By following these tips, you’ll be well on your way to mastering your sourdough bread recipe. Enjoy the process, embrace the learning curve, and savor the delicious results of your hard work!
Breakdown of Time for Sourdough Bread Recipe
Understanding the time commitment for baking sourdough bread is essential for planning your baking day. Each stage of the process requires specific time allocations, and knowing these can help you manage your schedule effectively. Here’s a detailed breakdown of the time involved in making your delicious sourdough bread.
Prep Time
The prep time for this sourdough bread recipe is approximately 4 hours. This includes the time needed to prepare your sourdough starter, mix the dough, and perform the initial stretch and fold sessions. Here’s how the time breaks down:
- Preparing the Starter: 1 hour (if your starter is already active, this time may be shorter).
- Mixing the Dough: 15 minutes to combine the ingredients.
- Stretch and Fold Sessions: 3 hours total (1 hour for each of the three sessions).
During this prep time, you can engage in other activities, as the dough will be resting and developing flavor.
Cooking Time
The cooking time for your sourdough bread is about 50 minutes. This includes the time spent baking the bread in the preheated Dutch oven. Here’s a quick overview:
- Preheating the Oven: 30 minutes (this can overlap with your final proofing time).
- Baking the Bread: 50 minutes without opening the oven.
It’s important to allow the bread to bake undisturbed to achieve that perfect crust.
Total Time
The total time from start to finish for this sourdough bread recipe is approximately 22 hours and 50 minutes. This includes the long fermentation and proofing times, which are crucial for developing the bread’s flavor and texture. Here’s how it breaks down:
- Prep Time: 4 hours.
- Bulk Fermentation: 8-10 hours.
- Final Proofing: 3-4 hours (or overnight).
- Cooking Time: 50 minutes.
While the total time may seem lengthy, much of it is hands-off. You can easily fit this recipe into your day by planning ahead. Enjoy the process, and soon you’ll be rewarded with a beautiful loaf of sourdough bread!
Nutritional Information for Sourdough Bread Recipe
Understanding the nutritional content of your sourdough bread can help you make informed choices about your diet. Sourdough bread is not only delicious but also offers several health benefits. Here’s a breakdown of the key nutritional components in a typical loaf made from the recipe provided.
Calories
One slice of sourdough bread (approximately 50 grams) contains about 130 calories. This makes it a satisfying option for breakfast or a snack. The calories primarily come from carbohydrates, which provide energy for your body. Enjoying sourdough in moderation can fit well into a balanced diet.
Protein
Sourdough bread is a good source of protein, with each slice containing around 4 grams. Protein is essential for building and repairing tissues in your body. It also helps keep you feeling full longer, making sourdough a great choice for meals and snacks. Pairing it with protein-rich toppings, like eggs or cheese, can enhance its nutritional value.
Sodium
Each slice of sourdough bread has about 200 milligrams of sodium. While sodium is necessary for maintaining fluid balance and proper muscle function, it’s important to monitor your intake. If you’re watching your sodium levels, consider using less salt in the recipe or enjoying the bread with low-sodium toppings.
Overall, sourdough bread can be a nutritious addition to your diet. It provides essential nutrients while being versatile enough to pair with various toppings and meals. Enjoy your homemade sourdough bread as part of a healthy lifestyle!
FAQs about Sourdough Bread Recipe
What is the best flour for sourdough bread?
The best flour for sourdough bread is bread flour. It has a higher protein content than all-purpose flour, which helps create a strong gluten structure. This gluten is essential for trapping the gases produced during fermentation, resulting in a light and airy loaf. However, you can also experiment with whole wheat flour or rye flour for added flavor and nutrition. Mixing different flours can yield unique textures and tastes, so feel free to get creative!
How long does sourdough bread last?
Sourdough bread can last for about 3 to 5 days when stored properly. To keep it fresh, store your bread in a paper bag at room temperature. Avoid plastic bags, as they can trap moisture and make the crust soft. If you want to keep your bread longer, consider freezing it. Wrap the loaf tightly in plastic wrap and then in aluminum foil. When you’re ready to enjoy it, simply thaw it at room temperature or toast slices directly from the freezer.
Can I use a bread machine for sourdough?
Yes, you can use a bread machine for sourdough, but it may require some adjustments. Most bread machines have a specific setting for sourdough. However, the traditional method of hand mixing, stretching, and folding often yields better results. If you choose to use a bread machine, make sure your sourdough starter is active and bubbly. Follow the machine’s instructions for adding ingredients, and monitor the dough’s consistency during the process.
What should I do if my sourdough doesn’t rise?
If your sourdough doesn’t rise, there could be a few reasons. First, check the health of your sourdough starter. It should be active and bubbly before you begin. If it’s sluggish, feed it and wait until it becomes lively. Additionally, temperature plays a crucial role in fermentation. If your kitchen is too cold, the dough may take longer to rise. Try placing it in a warmer spot or using a proofing box. Lastly, ensure you’re using the right flour and enough water to create a proper dough consistency. If all else fails, don’t be discouraged! Each baking experience is a learning opportunity.
Conclusion on Sourdough Bread Recipe
Baking sourdough bread is a rewarding and fulfilling experience. From the moment you prepare your starter to the delightful aroma that fills your kitchen as the bread bakes, each step is a celebration of the art of baking. This sourdough bread recipe is not just about creating a loaf; it’s about embracing a tradition that has stood the test of time.
As you’ve learned, the process involves patience, practice, and a bit of creativity. Whether you choose to stick to the classic recipe or experiment with various add-ins, the possibilities are endless. Each loaf you bake will tell a story, reflecting your unique touch and preferences.
Remember, the key to great sourdough lies in understanding your ingredients and the fermentation process. With each bake, you’ll gain more confidence and skill. Don’t be afraid to make mistakes; they are part of the journey. Every loaf is a chance to learn and improve.
So, gather your ingredients, roll up your sleeves, and dive into the wonderful world of sourdough baking. Share your creations with family and friends, and enjoy the satisfaction of serving homemade bread. With this sourdough bread recipe, you’re not just baking; you’re creating memories and nourishing those you love.
Happy baking, and may your sourdough adventures be filled with joy and deliciousness!
Sourdough Bread
Ingredients
Equipment
Method
- Prepare your sourdough starter by letting it warm to room temperature if it has been refrigerated. Feed it with equal parts flour and water if it looks sluggish.
- In a large mixing bowl, combine the active sourdough starter with water. Mix gently using a dough whisk, fork, or your hands.
- Add the bread flour and salt to the mixture. Stir until a shaggy dough forms, ensuring all flour is incorporated. Cover the bowl and let it rest for 1 hour.
- After resting, perform the bulk fermentation by stretching and folding the dough. Wet your fingers to prevent sticking, grab a section of the dough, pull it upwards, and fold it over. Repeat this process around the bowl for a total of 4 times, resting for 1 hour between each stretch and fold.
- Shape the dough by gathering it into a ball and transferring it to a floured banneton basket, seam side up. Cover and refrigerate for 3-4 hours or overnight for final proofing.
- Preheat your oven to 450°F (232°C) with a Dutch oven inside. Remove the dough from the fridge and let it come to room temperature for about 30 minutes.
- Transfer the dough onto a piece of parchment paper, score the top with a razor blade, and carefully place it into the hot Dutch oven. Cover and bake for 50 minutes without opening the oven.
- Remove the bread from the oven and let it cool on a wire rack before slicing.