Welcome to the delightful world of baking! Today, we’re diving into a fun and colorful treat that will brighten up any occasion: Colorful Stained Glass Cookies. These cookies are not just a feast for the eyes; they are also a delicious addition to your dessert table. With their vibrant colors and sweet flavors, they are sure to impress your family and friends.
What Are Colorful Stained Glass Cookies?
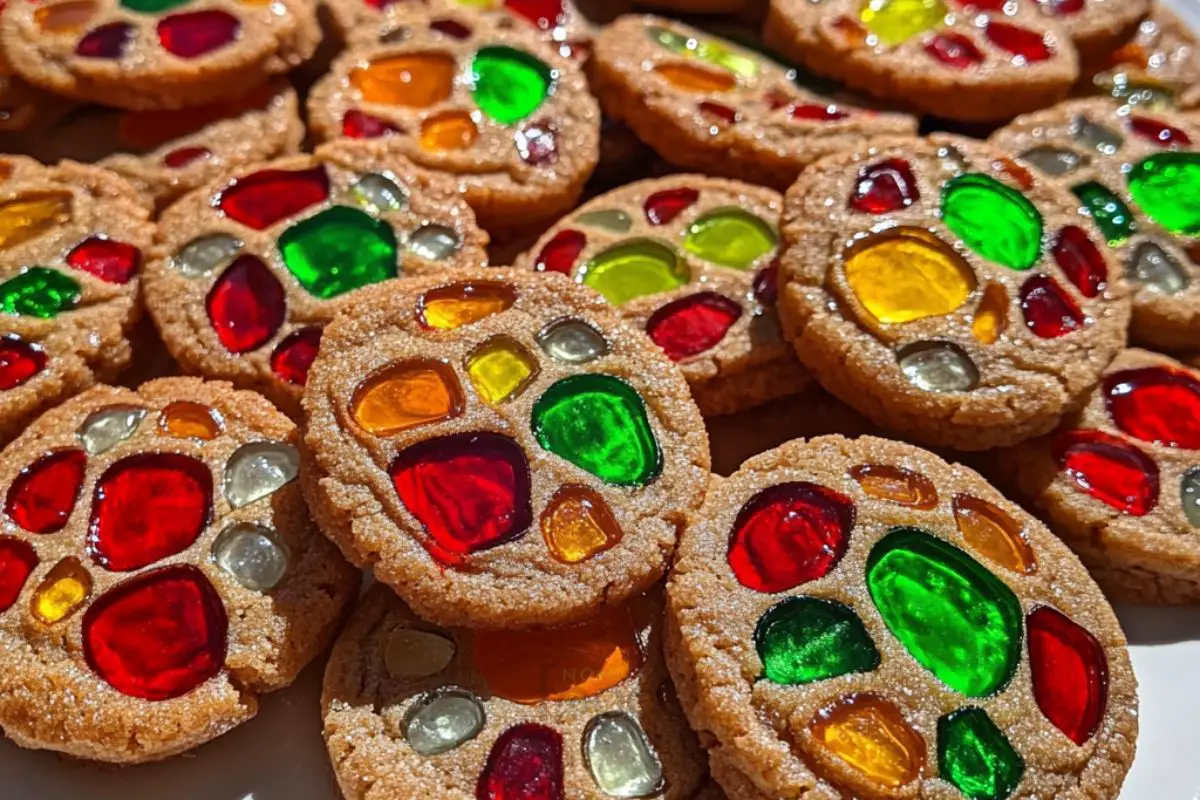
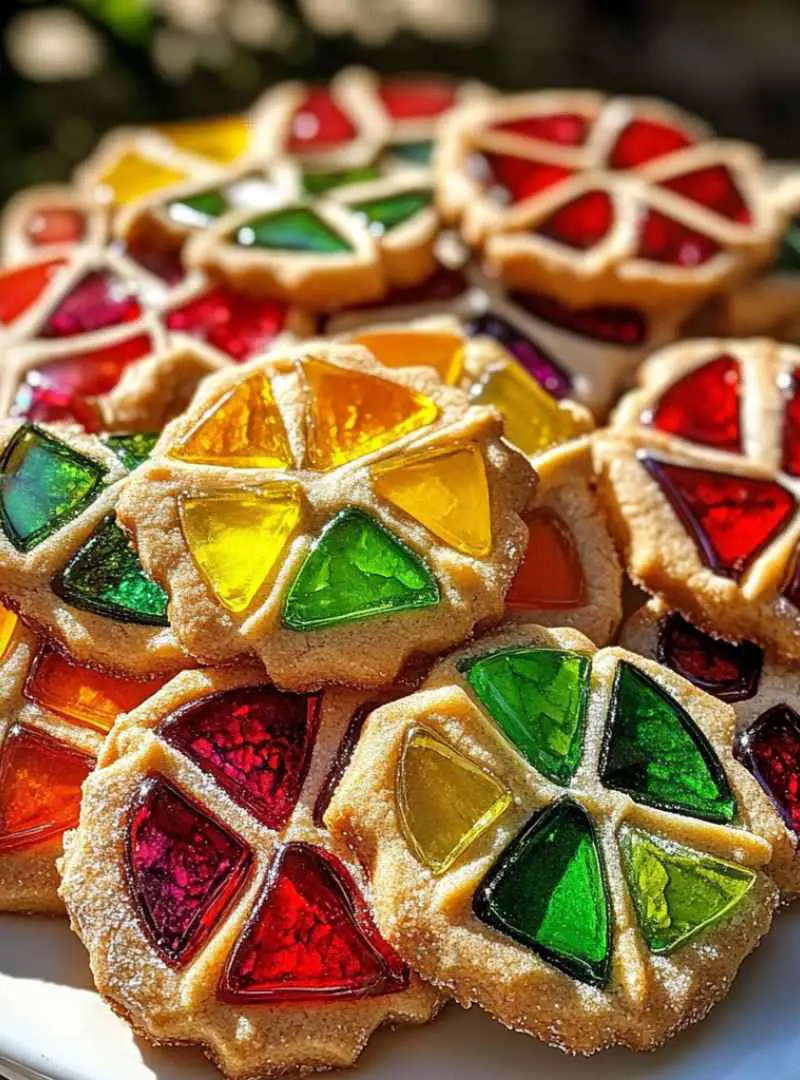
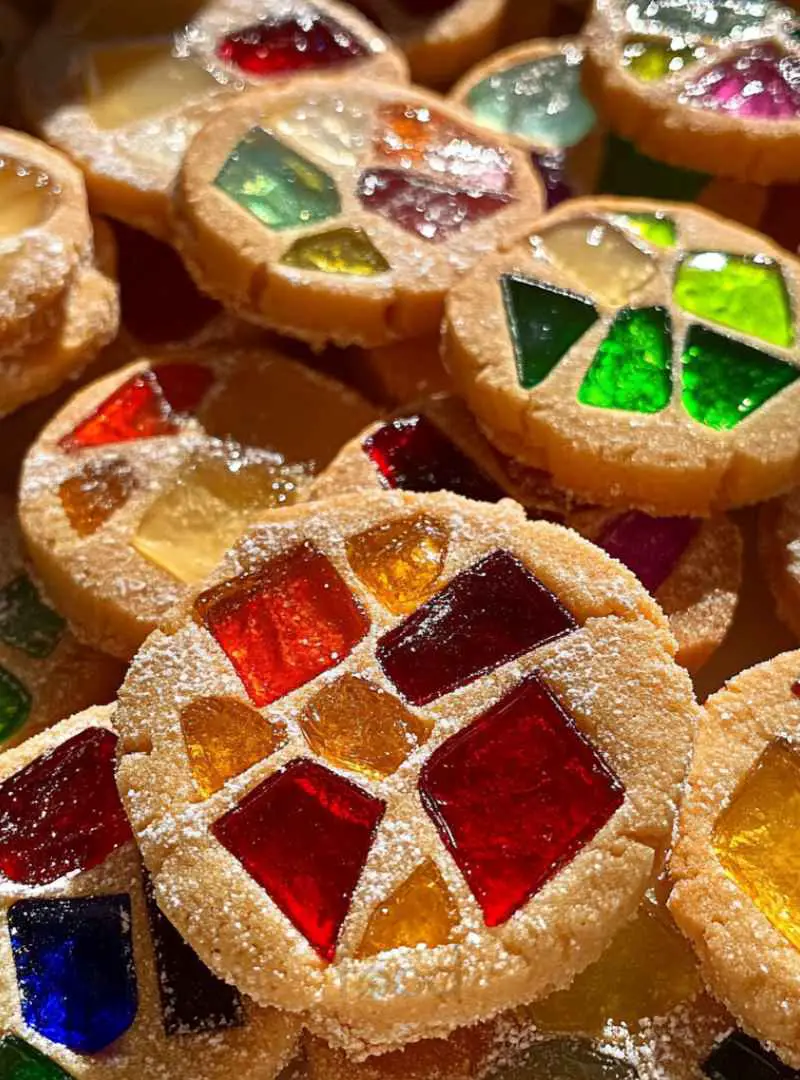
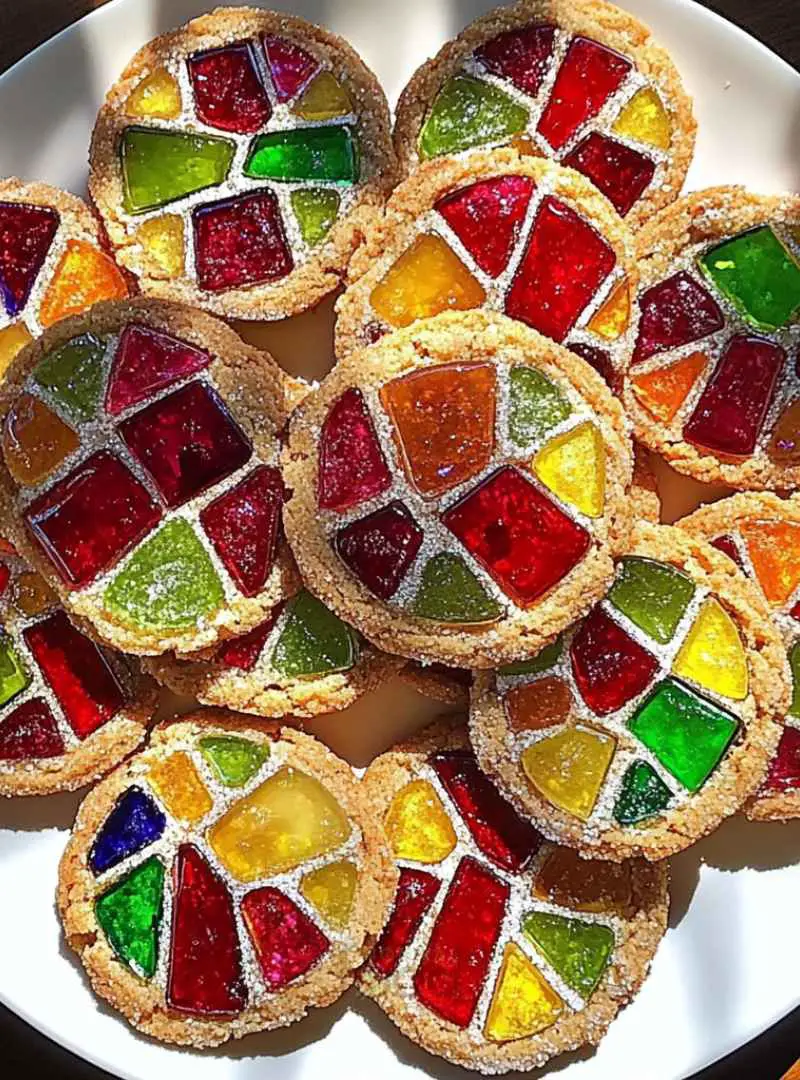
Colorful Stained Glass Cookies are unique cookies that feature a beautiful, transparent center made from melted hard candies. When baked, the candies create a stunning stained glass effect that looks like art. The cookies themselves are buttery and sweet, making them a perfect balance of flavors. They are often cut into festive shapes, making them ideal for holidays, parties, or any celebration.
Why You Should Make Colorful Stained Glass Cookies for Festive Celebrations
There are many reasons to whip up a batch of these delightful cookies. First, they are visually striking and can serve as a centerpiece on your dessert table. Second, they are easy to make, even for beginner bakers. The process of creating these cookies is fun and engaging, especially when you involve kids or friends. Lastly, they are versatile! You can customize the colors and shapes to match any theme or occasion, from Christmas to birthdays. So, why not add a splash of color to your next celebration with these tasty treats?
Ingredients for Colorful Stained Glass Cookies Recipe for Festive Celebrations
To create your own batch of Colorful Stained Glass Cookies, you will need a few simple ingredients. Each component plays a vital role in achieving that perfect texture and flavor. Here’s what you’ll need:
- 2 3/4 cups all-purpose flour
- 1 teaspoon baking powder
- 1/2 teaspoon salt
- 1 cup unsalted butter, softened
- 1 cup granulated sugar
- 1 large egg
- 1 teaspoon vanilla extract
- 1 teaspoon almond extract
- 1 cup crushed hard candies (such as Jolly Ranchers or Life Savers)
- Powdered sugar (for dusting)
These ingredients are easy to find at your local grocery store. The combination of butter, sugar, and extracts gives the cookies a rich flavor. Meanwhile, the hard candies will create that stunning stained glass effect. Feel free to experiment with different candy colors to match your celebration theme!
Preparation of Colorful Stained Glass Cookies Recipe for Festive Celebrations
Now that you have gathered all your ingredients, it’s time to start preparing your Colorful Stained Glass Cookies. The process is simple and enjoyable. Follow these steps to create your delicious cookies!
Step 1: Prepare the Dough
Mixing Dry Ingredients
Begin by mixing the dry ingredients. In a medium bowl, whisk together 2 3/4 cups of all-purpose flour, 1 teaspoon of baking powder, and 1/2 teaspoon of salt. This mixture will provide the structure for your cookies. Set it aside for now.
Creaming Butter and Sugar
Next, take a large mixing bowl and add 1 cup of softened unsalted butter and 1 cup of granulated sugar. Using an electric mixer, beat them together until the mixture is light and fluffy. This should take about 3-4 minutes. The fluffiness is key to achieving a soft cookie texture.
Adding Egg and Extracts
Once your butter and sugar are well combined, it’s time to add the wet ingredients. Beat in 1 large egg, 1 teaspoon of vanilla extract, and 1 teaspoon of almond extract. Mix until everything is well incorporated. The extracts will add a lovely flavor to your cookies.
Combining Mixtures
Now, gradually add the dry mixture to the butter mixture. Mix until just combined. Be careful not to overmix, as this can make your cookies tough. Once combined, divide the dough into two discs. Wrap each disc in plastic wrap and refrigerate for at least 1 hour. Chilling the dough helps the cookies hold their shape while baking.
Step 2: Shape and Cut Cookies
Preheating the Oven
While your dough is chilling, preheat your oven to 350°F (175°C). This ensures that your cookies bake evenly. Also, line your baking sheets with parchment paper to prevent sticking.
Rolling Out Dough
After the dough has chilled, take one disc out of the refrigerator. On a lightly floured surface, roll it out to about 1/4 inch thick. Use cookie cutters to cut out fun shapes. Remember to cut a smaller shape in the center of each cookie to create the stained glass effect.
Filling with Candy
Place the cut-out cookies on the prepared baking sheets. Now comes the fun part! Fill the center of each cookie with 1 cup of crushed hard candies. You can mix different colors for a vibrant look. Make sure not to overfill, as the candy will spread while baking.
Step 3: Bake and Cool
Baking Cookies
It’s time to bake! Place the baking sheets in the preheated oven and bake for 8-10 minutes. Keep an eye on them; the edges should be lightly golden, and the candy should be melted in the center.
Cooling Process
Once baked, allow the cookies to cool on the baking sheets for a few minutes. This helps them set. Then, transfer them to a wire rack to cool completely. This step is crucial for achieving the perfect texture.
Step 4: Dust and Serve
Dusting with Sugar
After your cookies have cooled, it’s time to add a sweet finishing touch. Dust the cookies with powdered sugar for an extra layer of sweetness. This not only enhances the flavor but also makes them look even more festive!
Enjoying Your Cookies
Now, your Colorful Stained Glass Cookies are ready to be enjoyed! Serve them at your next gathering or as a delightful treat for any occasion. Their beautiful appearance and delicious taste will surely impress everyone!
Variation of Colorful Stained Glass Cookies Recipe for Festive Celebrations
While the classic Colorful Stained Glass Cookies are delightful as they are, there are many ways to add your personal touch. You can experiment with different flavors and shapes to make these cookies even more special. Let’s explore some fun variations!
Alternative Flavor Combinations
Why stick to just vanilla and almond? You can easily switch up the flavors in your cookies. Here are some ideas:
- Chocolate Stained Glass Cookies: Replace half of the all-purpose flour with cocoa powder. This will give your cookies a rich chocolate flavor. Pair it with mint or cherry-flavored hard candies for a delicious twist.
- Citrus Burst: Add the zest of 1 lemon or orange to the dough for a refreshing citrus flavor. Use lemon or orange-flavored candies to enhance this theme.
- Spiced Cookies: Incorporate 1 teaspoon of cinnamon or ginger into the dry ingredients. This will give your cookies a warm, cozy flavor, perfect for fall or winter celebrations.
Feel free to mix and match these flavors to create your own unique cookie experience. The possibilities are endless!
Different Shapes and Themes
Another fun way to customize your Colorful Stained Glass Cookies is by changing their shapes and themes. Here are some ideas to inspire you:
- Holiday Shapes: Use cookie cutters in festive shapes like stars, trees, or hearts for holidays like Christmas, Valentine’s Day, or Halloween. These shapes will add a seasonal touch to your cookie platter.
- Seasonal Themes: For spring, use flower-shaped cutters and fill them with pastel-colored candies. In the fall, try pumpkin or leaf shapes with warm-colored candies.
- Personalized Cookies: Create custom shapes that represent special occasions, like wedding bells for weddings or baby bottles for baby showers. These personalized touches will make your cookies memorable.
By varying the flavors and shapes, you can create a delightful assortment of Colorful Stained Glass Cookies that will impress your guests and make any celebration even more festive!
Cooking Note for Colorful Stained Glass Cookies Recipe for Festive Celebrations
When it comes to baking Colorful Stained Glass Cookies, a few cooking notes can help ensure your cookies turn out perfectly every time. These tips will guide you through the process and help you avoid common pitfalls.
First, make sure your butter is softened but not melted. Softened butter is crucial for achieving that light and fluffy texture. If your butter is too warm, it can lead to overly flat cookies. To soften butter quickly, cut it into small cubes and let it sit at room temperature for about 15 minutes.
Next, when measuring flour, use the spoon-and-level method. This means spooning the flour into your measuring cup and leveling it off with a knife. Avoid scooping directly from the bag, as this can pack the flour and lead to dry cookies.
Additionally, be mindful of the baking time. Every oven is different, so keep an eye on your cookies as they bake. If you notice the edges turning golden but the centers still look soft, it’s time to take them out. They will continue to cook slightly on the baking sheet after being removed from the oven.
Lastly, let your cookies cool completely before dusting them with powdered sugar. If the cookies are still warm, the sugar may melt and create a sticky mess. Once cooled, the sugar will sit beautifully on top, enhancing both the look and taste of your colorful creations.
By following these cooking notes, you’ll be well on your way to baking stunning and delicious Colorful Stained Glass Cookies that everyone will love!
Serving Suggestions for Colorful Stained Glass Cookies Recipe for Festive Celebrations
Once your Colorful Stained Glass Cookies are baked and beautifully dusted with powdered sugar, it’s time to think about how to serve them. The way you present these cookies can enhance their appeal and make your gathering even more festive. Here are some delightful serving suggestions to consider!
Pairing with Beverages
Pairing your cookies with the right beverages can elevate the entire experience. Here are some tasty options:
- Milk: A classic choice! The creamy texture of milk complements the sweetness of the cookies perfectly. Serve it cold for a refreshing treat.
- Hot Chocolate: For a cozy touch, offer hot chocolate. The rich chocolate flavor pairs wonderfully with the colorful cookies, making it a delightful combination.
- Tea: A warm cup of tea, whether it’s herbal or black, can balance the sweetness of the cookies. Consider flavors like chamomile or chai for a comforting pairing.
- Coffee: For adults, a nice cup of coffee can be a great match. The bitterness of coffee contrasts nicely with the sugary cookies, creating a delightful taste experience.
Feel free to mix and match these beverages based on your guests’ preferences. Offering a variety will ensure everyone finds something they enjoy!
Presentation Ideas for Festive Occasions
How you present your Colorful Stained Glass Cookies can make a big impact. Here are some creative ideas to showcase your cookies:
- Cookie Platters: Arrange the cookies on a decorative platter. Use colorful napkins or a festive tablecloth to enhance the visual appeal. You can even add some fresh flowers or greenery for a beautiful touch.
- Gift Boxes: For a thoughtful gesture, package the cookies in cute gift boxes. Tie them with a ribbon and add a personalized note. This makes for a lovely gift for friends or family.
- Cookie Jars: Display the cookies in a clear glass jar. This not only keeps them fresh but also allows guests to see the vibrant colors. Place the jar on a table where guests can easily grab a cookie.
- Themed Displays: If you’re celebrating a specific occasion, consider a themed display. For example, use Halloween decorations for a spooky vibe or Christmas ornaments for a festive feel.
With these serving suggestions, your Colorful Stained Glass Cookies will not only taste amazing but also look stunning at your next celebration. Enjoy the smiles and compliments from your guests as they indulge in these delightful treats!
Tips for Perfecting Your Colorful Stained Glass Cookies Recipe for Festive Celebrations
To ensure your Colorful Stained Glass Cookies turn out perfectly every time, it’s essential to keep a few tips in mind. Baking can be a bit tricky, but with the right guidance, you can avoid common pitfalls and create delicious cookies that everyone will love. Here are some helpful tips to perfect your baking experience!
Common Mistakes to Avoid
Even experienced bakers can make mistakes. Here are some common ones to watch out for:
- Overmixing the Dough: Mixing too much can lead to tough cookies. Once you combine the dry and wet ingredients, mix just until everything is incorporated.
- Not Chilling the Dough: Skipping the chilling step can result in cookies that spread too much while baking. Always refrigerate the dough for at least an hour.
- Using Warm Ingredients: Make sure your butter is softened but not melted. Warm ingredients can change the texture of your cookies.
- Ignoring Oven Temperature: Every oven is different. Use an oven thermometer to ensure your oven is at the correct temperature for baking.
- Not Watching the Baking Time: Keep an eye on your cookies as they bake. They can go from perfect to overdone quickly!
By avoiding these common mistakes, you’ll be on your way to baking beautiful and tasty Colorful Stained Glass Cookies!
Storage Tips for Freshness
Once you’ve baked your cookies, you’ll want to keep them fresh for as long as possible. Here are some storage tips:
- Cool Completely: Always let your cookies cool completely before storing them. This prevents moisture buildup, which can make them soggy.
- Use an Airtight Container: Store your cookies in an airtight container to keep them fresh. You can also layer them with parchment paper to prevent sticking.
- Keep in a Cool Place: Store the container in a cool, dry place away from direct sunlight. This helps maintain their texture and flavor.
- Freeze for Longer Storage: If you want to keep your cookies for an extended period, consider freezing them. Place them in a freezer-safe container or bag, and they can last for up to three months.
By following these storage tips, you can enjoy your Colorful Stained Glass Cookies for days to come, keeping their delightful taste and appearance intact!
Breakdown of Time for Colorful Stained Glass Cookies Recipe for Festive Celebrations
Understanding the time required for each step in the Colorful Stained Glass Cookies recipe can help you plan your baking session effectively. Here’s a detailed breakdown of the time involved in making these delightful cookies:
Prep Time
The prep time for these cookies is approximately 20 minutes. This includes gathering your ingredients, mixing the dough, and preparing it for chilling. Make sure to have everything ready before you start to make the process smoother!
Chill Time
After preparing the dough, you will need to chill it for at least 1 hour. Chilling is crucial as it helps the cookies maintain their shape while baking. You can use this time to clean up your kitchen or plan your cookie decorating!
Cook Time
The actual cooking time for baking the cookies is around 8-10 minutes. Keep an eye on them as they bake to ensure they don’t overcook. The cookies should be lightly golden around the edges, and the candy centers should be melted.
Total Time
In total, you should expect to spend about 1 hour and 30 minutes from start to finish. This includes prep time, chill time, and cook time. It’s a manageable amount of time for such a fun and colorful treat!
By breaking down the time needed for each step, you can better plan your baking session and enjoy the process of making these beautiful Colorful Stained Glass Cookies!
Nutritional Information for Colorful Stained Glass Cookies Recipe for Festive Celebrations
Understanding the nutritional content of your Colorful Stained Glass Cookies can help you enjoy them in moderation. Here’s a breakdown of the key nutritional components per cookie, based on a batch of 24 cookies:
Calories
Each Colorful Stained Glass Cookie contains approximately 120 calories. This makes them a delightful treat that can fit into your dessert plans without overwhelming your daily calorie intake. Enjoying one or two cookies can satisfy your sweet tooth while keeping your calorie count in check.
Protein
These cookies provide about 1.5 grams of protein each. While cookies are not a significant source of protein, they do contribute a small amount. Pairing them with a glass of milk can enhance your protein intake while enjoying these sweet treats!
Sodium
Each cookie contains roughly 50 milligrams of sodium. This is a relatively low amount, making these cookies a suitable option for most diets. However, if you are watching your sodium intake, it’s always good to be mindful of portion sizes.
Overall, Colorful Stained Glass Cookies are a fun and tasty treat that can be enjoyed during festive celebrations. By keeping track of their nutritional information, you can indulge in these delightful cookies while maintaining a balanced diet!
FAQs about Colorful Stained Glass Cookies Recipe for Festive Celebrations
Can I use different types of hard candies for the filling?
Absolutely! You can use a variety of hard candies to fill your Colorful Stained Glass Cookies. Popular choices include Jolly Ranchers, Life Savers, and even Werther’s Originals. The key is to choose candies that melt well and create a vibrant color. Mixing different colors can also enhance the visual appeal of your cookies, making them even more festive!
How do I store leftover Colorful Stained Glass Cookies?
To keep your leftover Colorful Stained Glass Cookies fresh, allow them to cool completely. Then, store them in an airtight container at room temperature. This will help maintain their texture and flavor. If you want to keep them for a longer period, consider freezing them. Just make sure to layer them with parchment paper to prevent sticking!
Can I make the dough ahead of time?
Yes, you can make the dough ahead of time! Prepare the dough as instructed, then wrap it tightly in plastic wrap and refrigerate. The dough can be stored in the fridge for up to three days. If you want to keep it longer, you can freeze it for up to three months. Just remember to thaw it in the refrigerator before rolling it out and baking!
What occasions are best for serving Colorful Stained Glass Cookies?
Colorful Stained Glass Cookies are perfect for a variety of occasions! They are especially popular during holidays like Christmas, Halloween, and Easter. However, they can also be a delightful addition to birthday parties, baby showers, or any festive gathering. Their vibrant colors and unique design make them a hit at any celebration!
Conclusion
Recap of the Joy of Making Colorful Stained Glass Cookies for Festive Celebrations
In conclusion, making Colorful Stained Glass Cookies is a delightful experience that brings joy to both the baker and the guests. These cookies are not only visually stunning but also deliciously sweet. The process of mixing, rolling, and cutting the dough is a fun activity that can be enjoyed with family and friends. Plus, the excitement of watching the hard candies melt into a beautiful stained glass effect is truly magical. Whether you’re celebrating a holiday, a birthday, or just a casual get-together, these cookies will surely add a festive touch to your dessert table.
Encouragement to Try the Recipe
So, why not give this Colorful Stained Glass Cookies recipe a try? Gather your ingredients, invite some friends or family to join you, and enjoy the process of baking together. Remember, the best part of baking is sharing your creations with others. Your loved ones will appreciate the effort you put into making these beautiful cookies. Plus, they’ll love indulging in the sweet, colorful treats! Happy baking, and may your celebrations be filled with joy and deliciousness!

Colorful Stained Glass Cookies
Ingredients
Equipment
Method
- Mix the dry ingredients: flour, baking powder, and salt in a medium bowl.
- Cream together the softened butter and granulated sugar until light and fluffy.
- Add the egg, vanilla extract, and almond extract to the butter mixture and mix well.
- Gradually add the dry mixture to the wet mixture until just combined. Divide the dough into two discs, wrap in plastic wrap, and refrigerate for at least 1 hour.
- Preheat the oven to 350°F (175°C) and line baking sheets with parchment paper.
- Roll out the chilled dough to 1/4 inch thick and cut out shapes with cookie cutters, making sure to cut a smaller shape in the center.
- Fill the center of each cookie with crushed hard candies, being careful not to overfill.
- Bake the cookies for 8-10 minutes until the edges are lightly golden and the candy is melted.
- Allow the cookies to cool on the baking sheets for a few minutes before transferring them to a wire rack to cool completely.
- Dust the cooled cookies with powdered sugar before serving.
