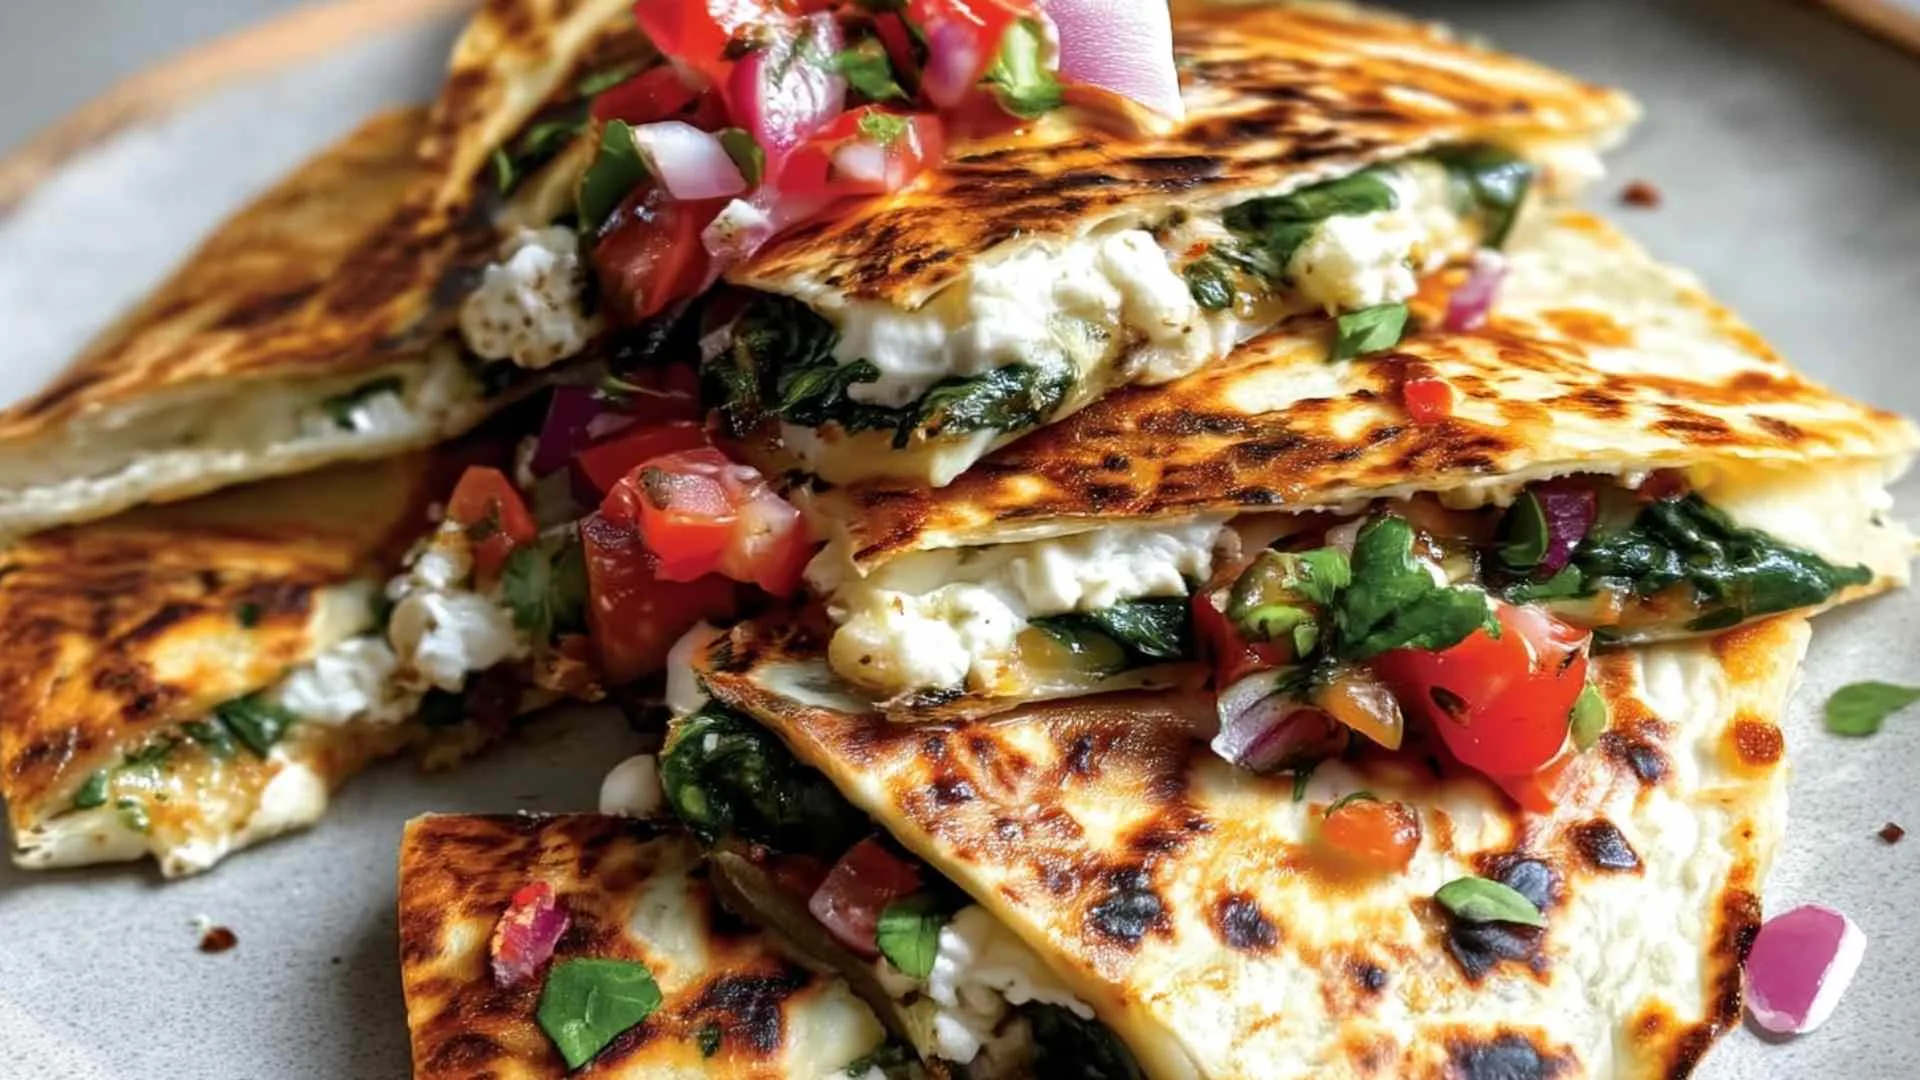
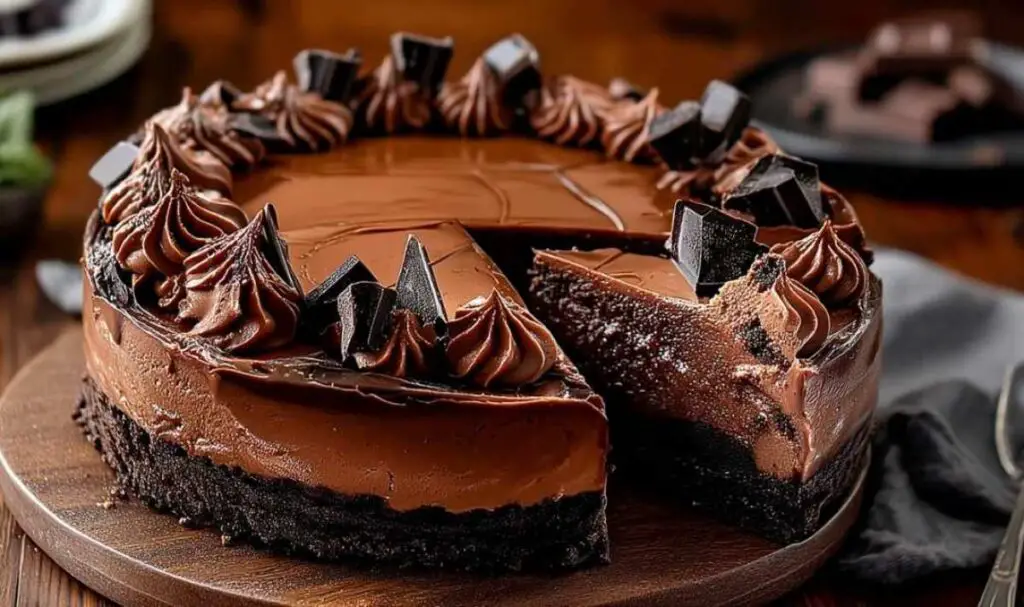
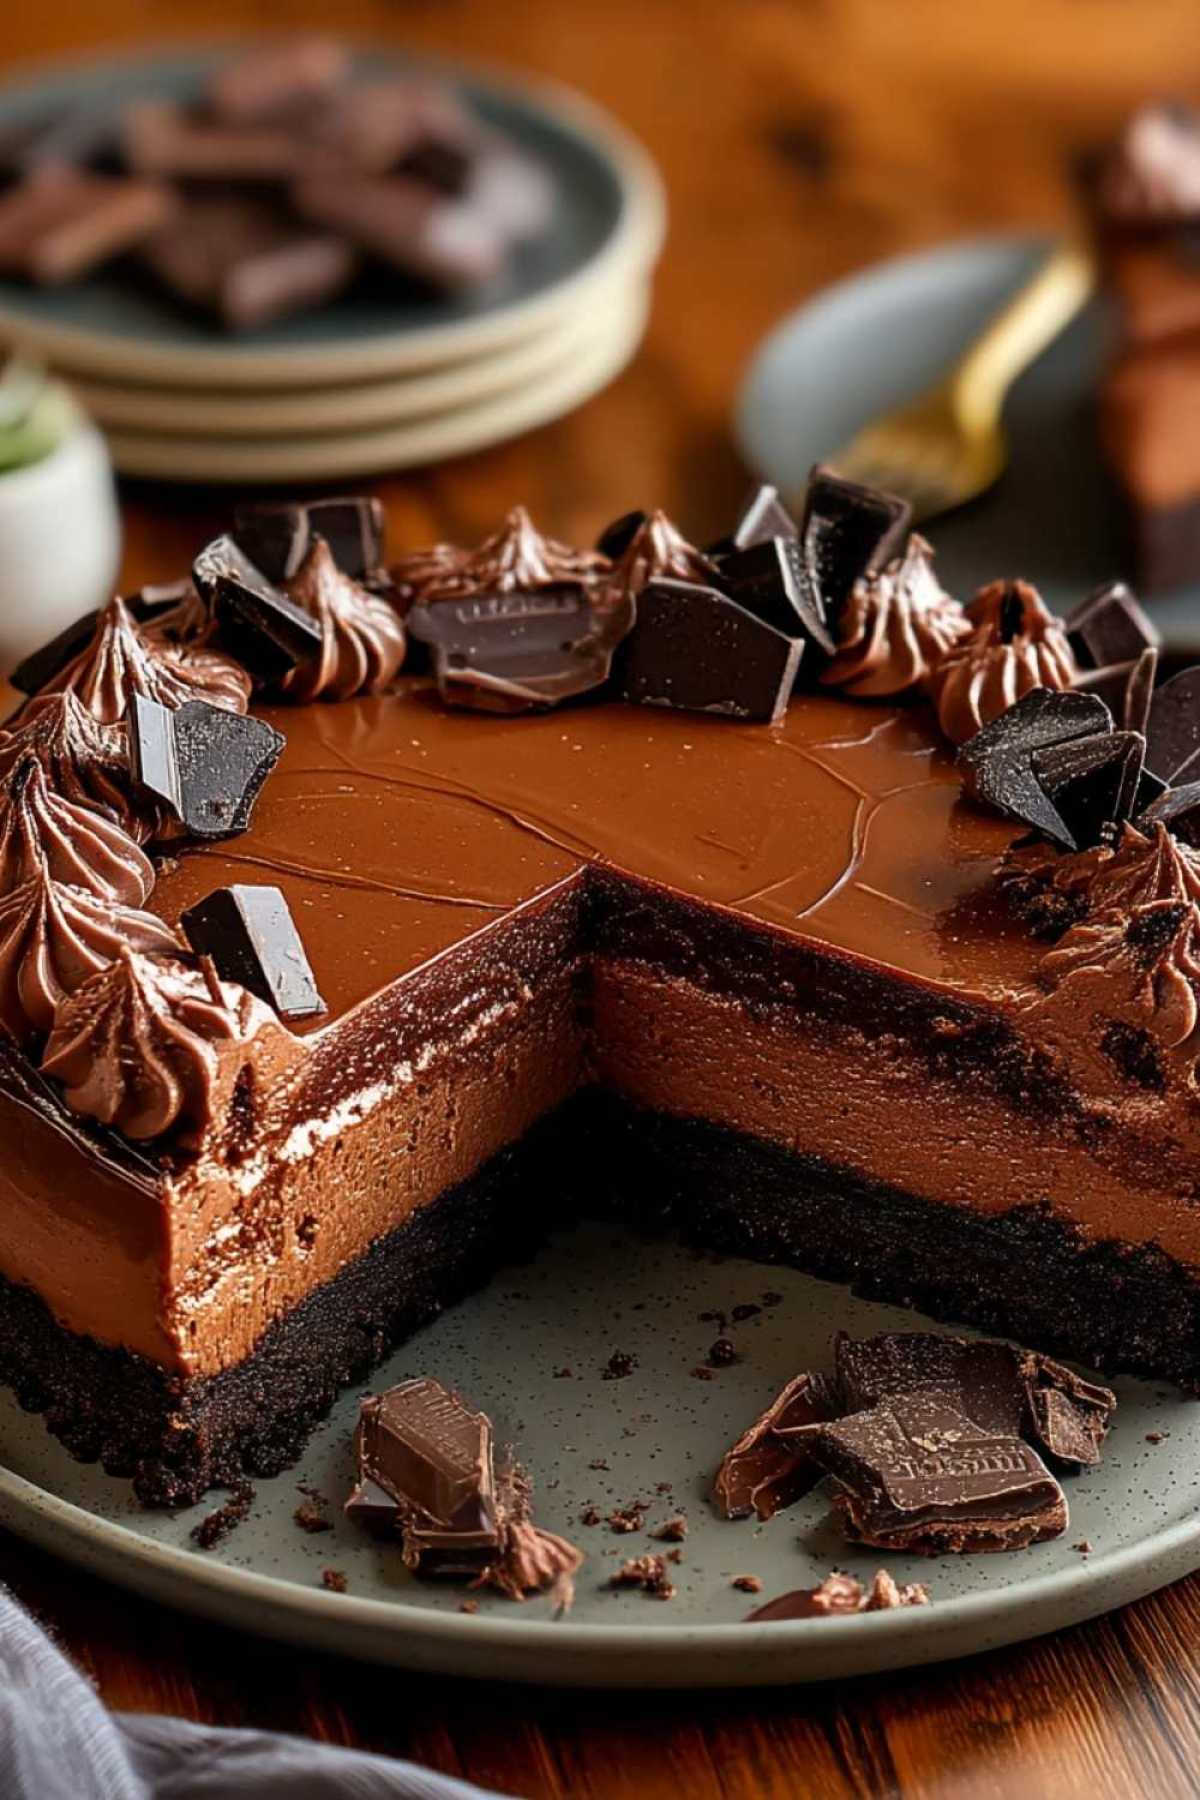
Triple Chocolate Cheesecake is the ultimate dessert for chocolate lovers who want something truly spectacular. This rich, creamy cheesecake combines three types of chocolate in beautiful layers that taste as good as they look, making it perfect for celebrations or whenever you need something extra special.
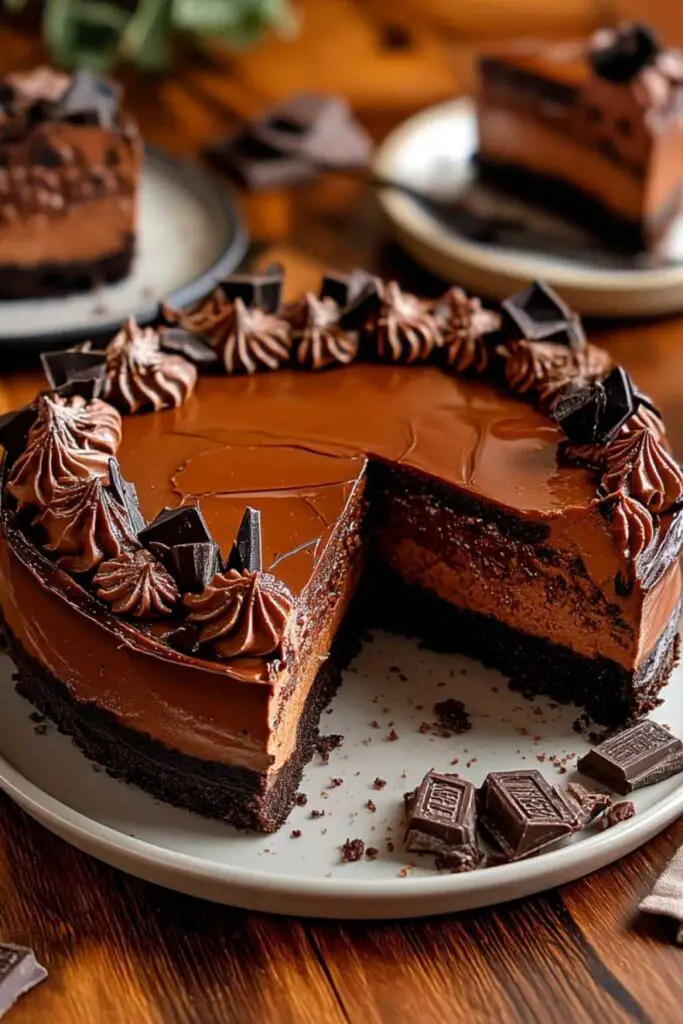
I still remember the first time I made a triple chocolate cheesecake for my grandson’s birthday – the look on his face when I sliced into those gorgeous chocolate layers was priceless. He’d been asking for “the most chocolatey dessert ever,” and this beauty delivered beyond his wildest dreams. The kitchen smelled like a chocolate shop for hours, and everyone at the party went back for seconds. What I love most about this recipe is how it looks fancy and complicated, but it’s surprisingly straightforward once you understand the technique. The secret is working with each chocolate layer separately and giving yourself enough cooling time – patience really does pay off here. My grandma always said the best desserts are the ones you make with love and don’t rush, and this cheesecake proves her right every single time. Time to get our mixing bowls ready!
What Makes This Triple Chocolate Cheesecake So Special
This isn’t just another chocolate dessert – it’s three chocolate experiences in one stunning package. I’ve been making cheesecakes for over forty years, and this triple chocolate version has become my go-to when I really want to impress guests or treat my family to something memorable.
- Uses accessible ingredients you can find at any grocery store, from the cream cheese to the chocolate varieties
- Comes together in about 90 minutes of active work, though the cooling time requires patience for the best results
- Delivers consistently beautiful layers that slice cleanly and look bakery-quality on every plate
- Adapts to your chocolate preferences by letting you choose the quality and brands you love most
- Creates that perfect contrast between the crunchy chocolate crust and silky-smooth filling
- Stores beautifully for days, actually tasting even better on day two when the flavors have melded together
What I find most rewarding is watching people’s reactions when they take that first bite – the way the three chocolates work together creates a flavor experience that’s rich without being overwhelming.
Ingredient Spotlight
Chocolate graham cracker crumbs form the foundation of this cheesecake, providing a chocolatey base that complements the filling without competing with it. I always choose the pre-made crumbs to save time, though crushing whole crackers works just as well if you have them on hand.
Cream cheese is the heart of any great cheesecake, and I’ve learned that bringing it to room temperature before mixing is absolutely crucial. Cold cream cheese creates lumps that no amount of beating will smooth out, so I set mine on the counter at least an hour before baking.
Dark chocolate brings sophisticated depth to the bottom layer, and I prefer using chocolate with 60-70% cocoa content. Anything darker can taste bitter in the creamy filling, while milk chocolate doesn’t provide enough contrast.
Milk chocolate creates the middle layer with its familiar, comforting sweetness that most people grew up loving. This layer tends to be everyone’s favorite because it strikes that perfect balance between rich and sweet.
White chocolate tops everything off with its buttery vanilla notes that lighten the overall richness. In my kitchen, I prefer white chocolate chips or baking bars rather than candy melts, which don’t have the same creamy texture.
Sour cream might seem like an unusual addition, but it’s my secret weapon for ultra-creamy texture and a subtle tang that keeps the sweetness in check. Betty always added this to her cheesecakes, and I’ve never made one without it since.
Eggs bind everything together and give the cheesecake its structure, but adding them one at a time and mixing gently prevents too much air from getting incorporated. Too much air means cracks, and nobody wants a cracked cheesecake.
How to Make Triple Chocolate Cheesecake
Step 1. I’ve learned that preheating the oven to exactly 325°F gives you the gentle, even heat that cheesecakes need to bake without cracking or becoming rubbery.
Step 2. Betty always started with a firm crust, pressing the chocolate graham cracker mixture into the pan with the bottom of a measuring cup to create an even, compact layer that won’t crumble when you slice the cheesecake later.
Step 3. After years of making cheesecakes, I learned that beating the cream cheese completely smooth before adding anything else is the secret to a silky filling – I spend a good two minutes on this step alone.
Step 4. The key I discovered is dividing your filling equally into three bowls before adding the chocolates, which ensures each layer is the same thickness and creates those beautiful, distinct stripes when you slice. Mix the melted dark chocolate and about 2.5 tablespoons of sour cream into the first bowl, milk chocolate and sour cream into the second, then white chocolate and the remaining sour cream into the third.
Step 5. Pour each chocolate layer carefully over the back of a spoon to prevent the layers from mixing together – start with dark on the bottom, followed by milk chocolate, then finish with the white chocolate on top.
Step 6. I’ve found that checking for doneness by giving the pan a gentle shake works better than any timer – the center should jiggle slightly like Jello, not ripple like liquid.
Step 7. Through trial and error, I learned that letting the cheesecake cool gradually in the turned-off oven prevents those disappointing cracks that can ruin the presentation, though the taste is always perfect either way.
Keeping This Triple Chocolate Cheesecake Fresh
This cheesecake actually improves with a day or two of refrigeration, as the flavors meld together and the texture becomes even creamier. I typically store leftovers covered with plastic wrap pressed directly against any cut surfaces, then wrap the whole pan in foil to prevent it from absorbing other refrigerator odors. It will stay fresh and delicious for up to five days, though in my house, it rarely lasts that long.
For longer storage, this cheesecake freezes beautifully – something I discovered when I made two for a church bake sale and had half of one left over. I slice the cheesecake first, then wrap individual pieces tightly in plastic wrap followed by aluminum foil before freezing. They’ll keep for up to three months this way, and you can pull out just one or two slices whenever a chocolate craving strikes.
For the best texture, I reheat by letting frozen slices thaw overnight in the refrigerator rather than using the microwave, which can make the filling watery. If you’re serving it to guests, pull it from the fridge about 15-20 minutes before serving – slightly cool but not ice-cold brings out all those beautiful chocolate flavors. Betty’s freezing method works well because the cream cheese filling doesn’t separate or become grainy like some desserts do, making this one of the few cheesecakes that freezes perfectly.
Triple Chocolate Cheesecake
Ingredients
Equipment
Method
- Preheat your oven to 325°F (160°C).
- In a mixing bowl, combine chocolate graham cracker crumbs, melted butter, and ¼ cup sugar. Press mixture firmly into the bottom of a 9-inch springform pan. Bake for 10 minutes, then cool while preparing filling.
- Beat softened cream cheese until completely smooth, about 2 minutes. Gradually add 1 cup sugar and beat until well combined. Add eggs one at a time, mixing gently after each addition. Mix in vanilla extract.
- Divide filling equally into three separate bowls. Stir melted dark chocolate and about 2.5 tablespoons sour cream into the first bowl until smooth. Repeat with milk chocolate and sour cream in the second bowl and white chocolate with remaining sour cream in the third bowl.
- Pour dark chocolate filling into cooled crust and spread evenly. Carefully pour milk chocolate filling over the back of a spoon onto the dark layer, then smooth. Finally, add white chocolate layer on top.
- Bake for 55-60 minutes until center is set but still jiggles slightly when gently shaken.
- Turn off oven and let cheesecake sit inside with door slightly ajar for 1 hour. Remove and cool to room temperature.
- Refrigerate for at least 4 hours or overnight. Before serving, garnish with whipped cream and chocolate shavings.
Notes
Perfect Partners for Triple Chocolate Cheesecake
Fresh berries – A bowl of strawberries, raspberries, or blackberries provides a bright, tart contrast to the rich chocolate that cleanses your palate between bites. The natural acidity cuts through the cream cheese beautifully. Try pairing with Berry Crumble Bars for a complete dessert spread.
Vanilla bean ice cream – I love serving a small scoop alongside each slice because the cold, creamy vanilla complements rather than competes with the chocolate layers, and it’s especially nice when the cheesecake is at room temperature.
Espresso or strong coffee – The slight bitterness of a good cup of coffee balances the sweetness perfectly, and it’s what I always serve when this cheesecake appears at Sunday dinner.
Whipped cream with a splash of Kahlua – For adult gatherings, I make a boozy whipped cream that adds another dimension to each bite. Just a tablespoon of coffee liqueur in a cup of heavy cream does the trick.
Caramel sauce drizzle – While this cheesecake doesn’t need much embellishment, a thin drizzle of salted caramel sauce adds a sophisticated touch that makes it feel even more special for celebrations.
Fresh mint leaves – A simple garnish of mint provides a pop of color and a refreshing note that’s especially welcome after a heavy meal, plus it makes the presentation look professional. Consider serving with Vanilla Sponge Cake for variety at your dessert table.

FAQs
I recommend sticking with the dark, milk, and white chocolate combination for the best flavor balance, but you can certainly adjust the cocoa percentages to suit your taste – just avoid going darker than 70% cocoa as it can become bitter.
The most common cause is overbaking or cooling too quickly, which is why I always turn off the oven and let the cheesecake sit inside with the door cracked for an hour before bringing it to room temperature.
Absolutely – this is actually one of the best make-ahead desserts since it needs several hours to chill anyway, and many home cooks find success making it a full day before serving for even better texture and flavor.
Betty’s solution is to dip your knife in hot water and wipe it clean between each cut, which melts through the filling smoothly without dragging or tearing the layers.