the Delicious DIY Chicken Recipe
Are you looking for a simple yet mouthwatering meal? Look no further! This diy chicken recipe is perfect for anyone who loves a hearty dish without spending hours in the kitchen. With just a few ingredients and straightforward steps, you can create a flavorful chicken that will impress your family and friends.
Why Choose a DIY Chicken Recipe?
Choosing a DIY chicken recipe allows you to control the ingredients and flavors. You can customize the seasoning to suit your taste. Plus, making your own chicken dish is often healthier than store-bought options. You know exactly what goes into your meal, ensuring it’s fresh and free from preservatives. Not to mention, cooking at home can be a fun and rewarding experience!
Overview of the Delicious DIY Chicken Recipe
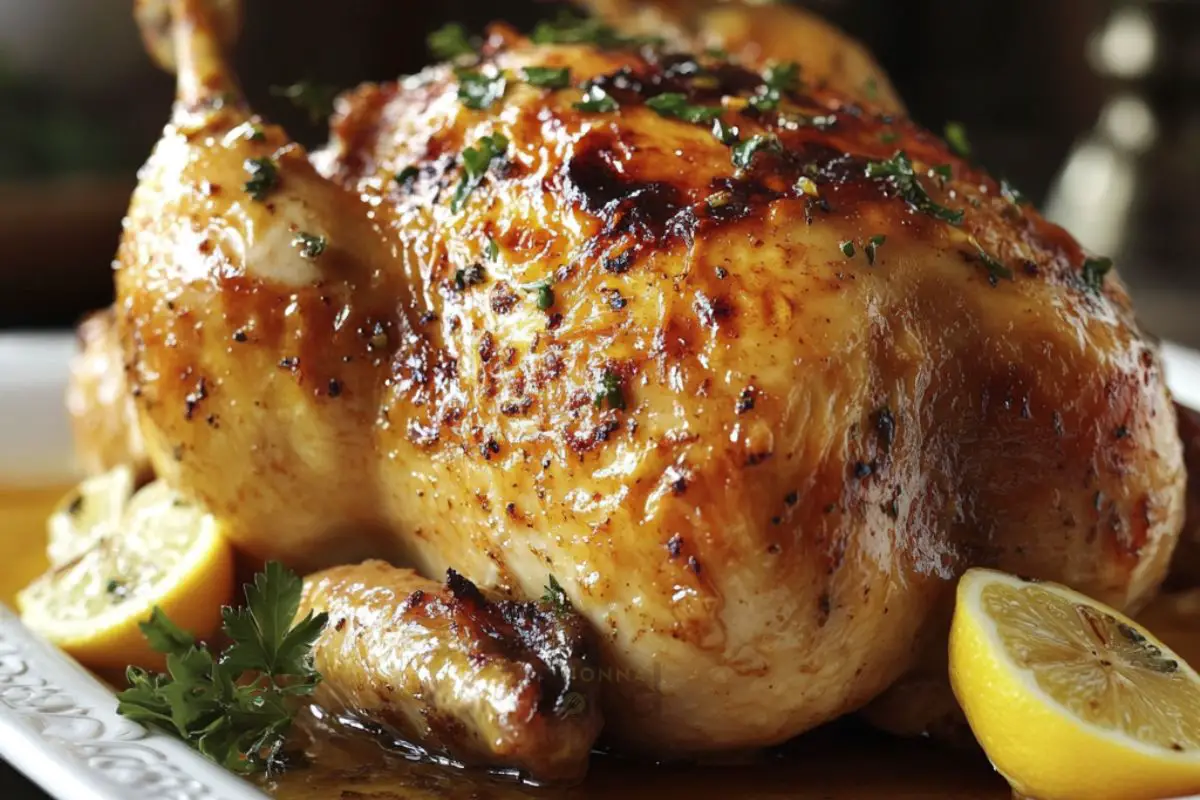
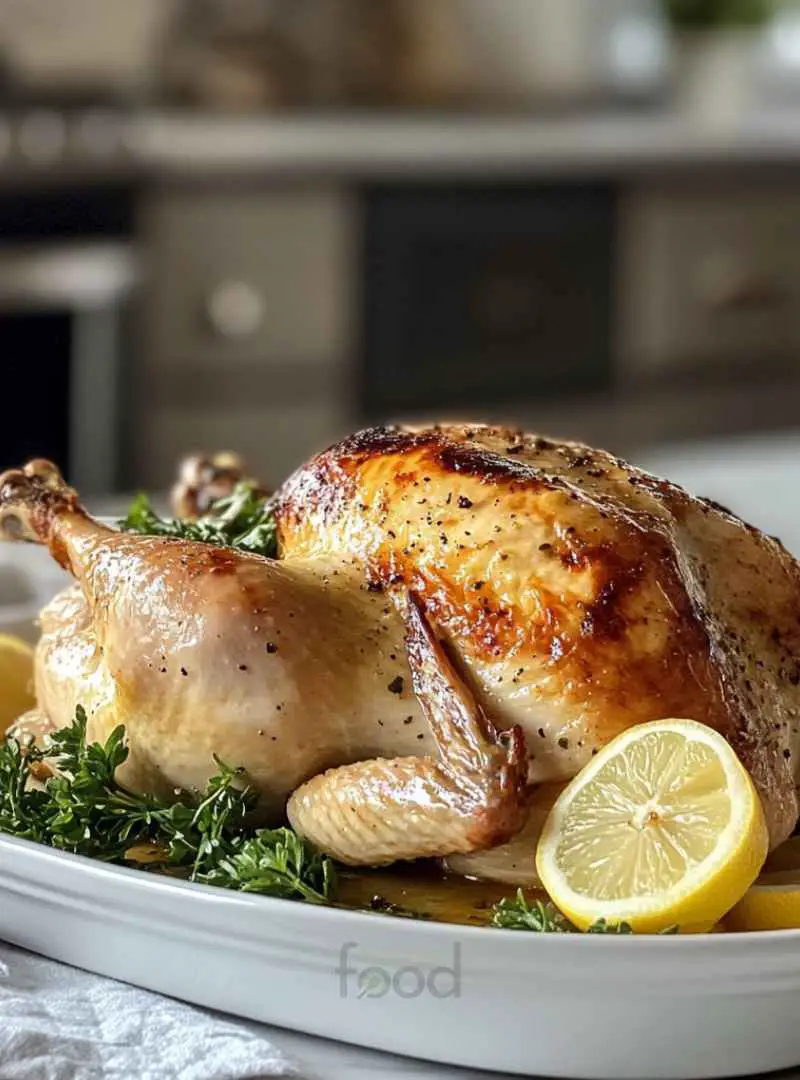
This delicious DIY chicken recipe features a whole chicken seasoned with aromatic herbs and spices. The combination of garlic, paprika, and fresh lemon creates a delightful flavor that seeps into the meat. Roasting the chicken in the oven ensures it becomes tender and juicy. In just a little over an hour, you’ll have a stunning centerpiece for your dinner table. Whether it’s a family gathering or a cozy night in, this dish is sure to satisfy everyone’s appetite.
Ingredients for the Delicious DIY Chicken Recipe
To create your own diy chicken masterpiece, you’ll need a few simple ingredients. Each one plays a vital role in enhancing the flavor and texture of the chicken. Here’s what you’ll need:
- 1 whole chicken (about 4-5 lbs)
- 2 tablespoons olive oil
- 4 cloves garlic, minced
- 1 tablespoon paprika
- 1 teaspoon dried thyme
- 1 teaspoon dried rosemary
- Salt and pepper to taste
- 1 lemon, quartered
- Fresh herbs (like parsley or cilantro) for garnish
These ingredients are not only easy to find but also work together to create a deliciously seasoned chicken. The olive oil helps the spices stick, while the garlic and herbs infuse the meat with flavor. The lemon adds a refreshing zest that brightens the dish. With these components, you’re well on your way to a delightful meal!
Step-by-Step Preparation of the Delicious DIY Chicken
Now that you have your ingredients ready, it’s time to dive into the preparation of your diy chicken. Follow these simple steps to ensure your chicken turns out perfectly every time. Let’s get started!
Step 1: Prepare the Chicken
Preheat the Oven
First things first, preheat your oven to 375°F (190°C). This step is crucial as it ensures your chicken cooks evenly. A hot oven helps to lock in the juices, making your chicken tender and flavorful.
Clean the Chicken
Next, rinse the whole chicken under cold water. This helps to remove any unwanted residue. After rinsing, pat the chicken dry with paper towels. Drying the chicken is important because it allows the seasoning to stick better. Don’t forget to check the cavity and remove any giblets that may be inside!
Step 2: Season the Chicken
Mix the Seasoning
In a small bowl, combine the olive oil, minced garlic, paprika, thyme, rosemary, salt, and pepper. Stir well to create a smooth paste. This mixture is what will give your chicken its delicious flavor. Feel free to adjust the spices according to your taste preferences!
Rub the Seasoning on the Chicken
Now, it’s time to rub the seasoning all over the chicken. Make sure to get under the skin for maximum flavor. This is where the magic happens! The spices will infuse the meat, making every bite a burst of flavor. Don’t forget to place the lemon quarters inside the cavity for an extra zing!
Step 3: Roast the Chicken
Place in Roasting Pan
Transfer your seasoned chicken to a roasting pan, breast side up. Tuck the wing tips under the body to prevent them from burning. This little trick helps to keep the wings from getting too crispy while the rest of the chicken cooks.
Roast to Perfection
Now, it’s time to roast! Place the chicken in the preheated oven and roast for about 1 hour and 15 minutes. You’ll know it’s done when the internal temperature reaches 165°F (75°C) and the juices run clear when pierced. The aroma will fill your kitchen, making it hard to wait!
Step 4: Rest and Serve the Chicken
Resting the Chicken
Once your chicken is cooked, remove it from the oven. Let it rest for 10-15 minutes before carving. This resting period allows the juices to redistribute throughout the meat, ensuring every slice is juicy and tender.
Garnish and Serve
Finally, carve the chicken and serve it on a platter. Garnish with fresh herbs like parsley or cilantro for a pop of color. Your delicious DIY chicken is now ready to be enjoyed! Gather your loved ones and dig in!
Variations of the Delicious DIY Chicken Recipe
While the original diy chicken recipe is already a hit, there are many ways to switch things up! You can experiment with different seasonings and cooking methods to create a unique dish every time. Let’s explore some exciting variations that will keep your meals fresh and flavorful.
Different Seasoning Options
One of the best parts about cooking chicken is the endless possibilities for seasoning. Here are a few ideas to inspire your creativity:
- Spicy Cajun: Add Cajun seasoning for a kick! Mix in cayenne pepper, onion powder, and a bit of cumin for a zesty flavor.
- Herb-Infused: Use fresh herbs like basil, oregano, and dill instead of dried ones. Fresh herbs can elevate the taste and aroma.
- Asian Twist: Incorporate soy sauce, ginger, and sesame oil for an Asian-inspired flavor. Serve with rice for a complete meal.
- BBQ Style: Brush the chicken with your favorite barbecue sauce during the last 15 minutes of roasting for a sweet and smoky finish.
Feel free to mix and match these seasonings to find your perfect flavor profile. The key is to have fun and enjoy the process!
Cooking Methods: Grilling vs. Roasting
While roasting is a classic method, grilling your chicken can add a delightful smoky flavor. Here’s a quick comparison of both methods:
| Method | Flavor | Cooking Time | Texture |
|---|---|---|---|
| Roasting | Rich and savory | 1 hour 15 minutes | Tender and juicy |
| Grilling | Smoky and charred | 30-45 minutes | Crispy skin with juicy meat |
To grill, preheat your grill to medium heat. Place the seasoned chicken on the grill and cook, turning occasionally, until the internal temperature reaches 165°F (75°C). This method is perfect for summer barbecues and outdoor gatherings!
Whichever method you choose, both roasting and grilling will yield a delicious diy chicken that your family will love. Enjoy experimenting with these variations to make your chicken dish truly your own!
Cooking Note for the Delicious DIY Chicken Recipe
When preparing your diy chicken, there are a few important cooking notes to keep in mind. These tips will help ensure that your chicken turns out perfectly every time, making your meal a delightful experience.
First, always check the freshness of your chicken. A fresh chicken will have a pleasant smell and firm texture. If you’re using frozen chicken, make sure to thaw it completely in the refrigerator before cooking. This helps it cook evenly and prevents any food safety issues.
Next, consider using a meat thermometer. This handy tool takes the guesswork out of cooking. Insert the thermometer into the thickest part of the chicken, avoiding the bone. When it reads 165°F (75°C), your chicken is safe to eat and perfectly cooked.
Another tip is to baste the chicken during roasting. Basting involves spooning the juices from the bottom of the pan over the chicken. This keeps the meat moist and adds extra flavor. You can baste every 20-30 minutes for the best results.
Lastly, don’t rush the resting period after cooking. Allowing the chicken to rest for 10-15 minutes is crucial. This step helps the juices redistribute, ensuring that each slice is juicy and flavorful. If you cut into the chicken too soon, you may lose those delicious juices!
By following these cooking notes, you’ll elevate your diy chicken recipe to new heights. Enjoy the process and savor the delicious results!
Serving Suggestions for the Delicious DIY Chicken
Once your diy chicken is ready, it’s time to think about how to serve it. The right side dishes and presentation can elevate your meal, making it even more enjoyable. Here are some ideas to help you create a complete dining experience.
Side Dishes that Complement the Chicken
Pairing your chicken with delicious side dishes can enhance the overall flavor of your meal. Here are some tasty options:
- Roasted Vegetables: A mix of seasonal vegetables like carrots, potatoes, and bell peppers roasted alongside the chicken adds color and nutrition.
- Garlic Mashed Potatoes: Creamy mashed potatoes with a hint of garlic make a comforting side that pairs perfectly with the savory chicken.
- Steamed Green Beans: Lightly steamed green beans add a fresh crunch and vibrant color to your plate.
- Quinoa Salad: A refreshing quinoa salad with cucumbers, tomatoes, and a lemon vinaigrette offers a healthy and zesty contrast.
- Caesar Salad: A classic Caesar salad with crisp romaine, croutons, and parmesan cheese provides a nice balance to the rich flavors of the chicken.
These side dishes not only complement the chicken but also create a well-rounded meal that everyone will love!
Presentation Ideas for Serving
How you present your diy chicken can make a big difference in the dining experience. Here are some creative presentation ideas:
- Platter Display: Serve the carved chicken on a large platter, garnished with fresh herbs and lemon wedges. This creates an inviting centerpiece for your table.
- Individual Plates: For a more formal setting, plate each serving with a portion of chicken and a side dish. Add a sprig of parsley for a pop of color.
- Rustic Style: Place the chicken on a wooden cutting board, surrounded by roasted vegetables. This gives a homey, rustic feel to your meal.
- Family Style: Serve the chicken and sides in bowls on the table, allowing everyone to help themselves. This encourages sharing and conversation.
With these serving suggestions, your diy chicken will not only taste amazing but also look beautiful on the table. Enjoy the compliments from your guests as they dig into your delicious creation!
Tips for Perfecting Your Delicious DIY Chicken
To make your diy chicken truly exceptional, consider these helpful tips. They will guide you in choosing the right chicken and ensuring it remains juicy and flavorful throughout the cooking process. Let’s dive into these essential tips!
Choosing the Right Chicken
When it comes to selecting the perfect chicken, quality matters. Here are some key points to keep in mind:
- Freshness: Always opt for fresh chicken when possible. Fresh chicken has a better flavor and texture compared to frozen options.
- Organic or Free-Range: If your budget allows, consider organic or free-range chicken. These chickens are often raised in better conditions and can have a richer taste.
- Size: A whole chicken weighing between 4-5 lbs is ideal for roasting. This size ensures even cooking and provides enough meat for several servings.
- Check Labels: Look for labels that indicate no added hormones or antibiotics. This ensures you’re getting a healthier product.
By choosing the right chicken, you set the foundation for a delicious diy chicken dish that everyone will love!
Ensuring Juiciness and Flavor
To achieve a juicy and flavorful chicken, follow these tips:
- Brining: Consider brining your chicken before cooking. Soaking it in a saltwater solution for a few hours can enhance moisture and flavor.
- Marinating: Marinate the chicken overnight with your seasoning mix. This allows the flavors to penetrate deeply, resulting in a more flavorful dish.
- Use a Meat Thermometer: As mentioned earlier, using a meat thermometer is crucial. It helps you avoid overcooking, which can lead to dry meat.
- Baste Regularly: Basting the chicken with its own juices during roasting keeps the skin crispy while locking in moisture.
- Resting Time: Don’t skip the resting period after cooking. This step is vital for redistributing the juices, ensuring every bite is succulent.
By following these tips, you’ll create a diy chicken that is not only delicious but also bursting with flavor and juiciness. Enjoy the process and the delightful results!
Breakdown of Time for the Delicious DIY Chicken Recipe
Understanding the time needed for each step of your diy chicken recipe is essential for planning your meal. Here’s a detailed breakdown of the time involved in preparing and cooking your chicken, so you can manage your kitchen time effectively.
Prep Time
The prep time for this diy chicken recipe is approximately 15 minutes. During this time, you will gather your ingredients, clean the chicken, and mix the seasoning. It’s a quick and straightforward process that sets the stage for a delicious meal.
Cooking Time
The cooking time for roasting the chicken is about 1 hour and 15 minutes. This duration allows the chicken to cook thoroughly while developing a beautiful golden-brown skin. Remember, the key is to ensure the internal temperature reaches 165°F (75°C) for safe consumption.
Total Time
In total, you’ll spend around 1 hour and 30 minutes from start to finish. This includes both the prep and cooking times. With just a little over an hour, you can have a mouthwatering diy chicken ready to serve, making it a perfect option for busy weeknights or special occasions.
By keeping track of these timeframes, you can enjoy a stress-free cooking experience and focus on the joy of sharing a delicious meal with your loved ones!
Nutritional Information for the Delicious DIY Chicken Recipe
Understanding the nutritional content of your diy chicken recipe is essential for maintaining a balanced diet. This section will provide you with key nutritional information, helping you make informed choices for your meals. Let’s break down the calories, protein content, and sodium levels in this delicious dish.
Calories
One serving of the delicious DIY chicken recipe contains approximately 350-400 calories. This number can vary based on the size of the chicken and the amount of seasoning used. The calorie count is reasonable for a hearty meal, making it a satisfying option without excessive calorie intake.
Protein Content
Chicken is an excellent source of protein, and this recipe is no exception. Each serving provides about 30-35 grams of protein. Protein is essential for building and repairing tissues, making this diy chicken a great choice for those looking to increase their protein intake. It’s perfect for active individuals and families alike!
Sodium Levels
The sodium content in this recipe is approximately 600-700 mg per serving. This level is mainly influenced by the added salt and any seasoning blends used. If you’re watching your sodium intake, consider reducing the amount of salt or using low-sodium alternatives. This way, you can enjoy the flavors without compromising your health.
By keeping these nutritional facts in mind, you can enjoy your diy chicken recipe while maintaining a balanced diet. It’s a delicious and nutritious meal that everyone can appreciate!
FAQs about the Delicious DIY Chicken Recipe
How do I know when the chicken is fully cooked?
To ensure your diy chicken is fully cooked, use a meat thermometer. Insert it into the thickest part of the chicken, avoiding the bone. The internal temperature should reach 165°F (75°C). Additionally, the juices should run clear when you pierce the chicken. If they are pink, it needs more cooking time. Always check these indicators to guarantee a safe and delicious meal!
Can I use frozen chicken for this recipe?
Yes, you can use frozen chicken, but it’s important to thaw it first. The best way to thaw chicken is to place it in the refrigerator overnight. This method keeps the chicken at a safe temperature. Avoid thawing at room temperature, as it can lead to bacteria growth. Once thawed, follow the recipe as usual for your diy chicken!
What are some good side dishes to serve with chicken?
There are many delicious side dishes that pair well with your diy chicken. Here are a few ideas:
- Roasted vegetables, such as carrots and potatoes
- Garlic mashed potatoes for a creamy texture
- Steamed green beans for a fresh crunch
- Quinoa salad with a zesty lemon dressing
- Classic Caesar salad for a crisp and flavorful addition
These sides not only complement the chicken but also create a well-rounded meal that everyone will enjoy!
How can I store leftovers from the Delicious DIY Chicken Recipe?
Storing leftovers from your diy chicken is easy! Allow the chicken to cool completely before storing. Place it in an airtight container and refrigerate. Leftover chicken can last for about 3-4 days in the fridge. If you want to keep it longer, consider freezing it. Wrap the chicken tightly in plastic wrap or aluminum foil, then place it in a freezer-safe bag. Frozen chicken can last for up to 4 months. When ready to eat, thaw it in the refrigerator and reheat thoroughly before serving!
Conclusion: Enjoying Your Delicious DIY Chicken Recipe
In conclusion, this diy chicken recipe is not just a meal; it’s an experience. From the moment you start preparing the ingredients to the delightful aroma that fills your kitchen, every step is a joy. The combination of simple ingredients and straightforward instructions makes it accessible for cooks of all skill levels. Whether you’re a seasoned chef or a beginner, you can create a dish that’s both impressive and satisfying.
As you gather around the table with family and friends, the delicious flavors of your roasted chicken will surely be the highlight of the meal. The tender, juicy meat paired with your choice of sides creates a well-rounded dining experience that everyone will love. Plus, the opportunity to customize the seasoning and cooking method means you can make this recipe your own, adding your personal touch each time.
So, don’t hesitate! Roll up your sleeves and dive into this delightful diy chicken recipe. Enjoy the process, savor the flavors, and most importantly, share the joy of a home-cooked meal with those you care about. Happy cooking!
Delicious DIY Chicken
Ingredients
Equipment
Method
-
Preheat your oven to 375°F (190°C).
-
Rinse the whole chicken under cold water and pat dry with paper towels.
-
In a small bowl, combine olive oil, minced garlic, paprika, thyme, rosemary, salt, and pepper to create a seasoning paste.
-
Rub the seasoning all over the chicken, including under the skin, and place lemon quarters inside the cavity.
-
Transfer the chicken to a roasting pan, breast side up, and tuck the wing tips under the body.
-
Roast the chicken in the preheated oven for about 1 hour and 15 minutes, or until the internal temperature reaches 165°F (75°C).
-
Remove the chicken from the oven and let it rest for 10-15 minutes before carving.
-
Carve the chicken and serve it on a platter, garnished with fresh herbs.