I stumbled upon these Bacon Cheeseburger Bombs recipe last summer when I was looking for creative finger foods for my son’s graduation party. The combination of juicy ground beef, melted cheese, and smoky bacon wrapped in flaky biscuit dough creates these incredible bites that taste like they came from a gourmet food truck.
My family has always been big on burger night traditions, but sometimes you want that familiar flavor without the mess of a traditional burger. These little bombs of flavor started as an experiment in my kitchen one rainy Saturday afternoon. I had ground beef that needed using and a tube of biscuit dough in the fridge – the perfect storm for culinary creativity! The first batch disappeared so quickly that my husband accused the kids of hiding some for later.
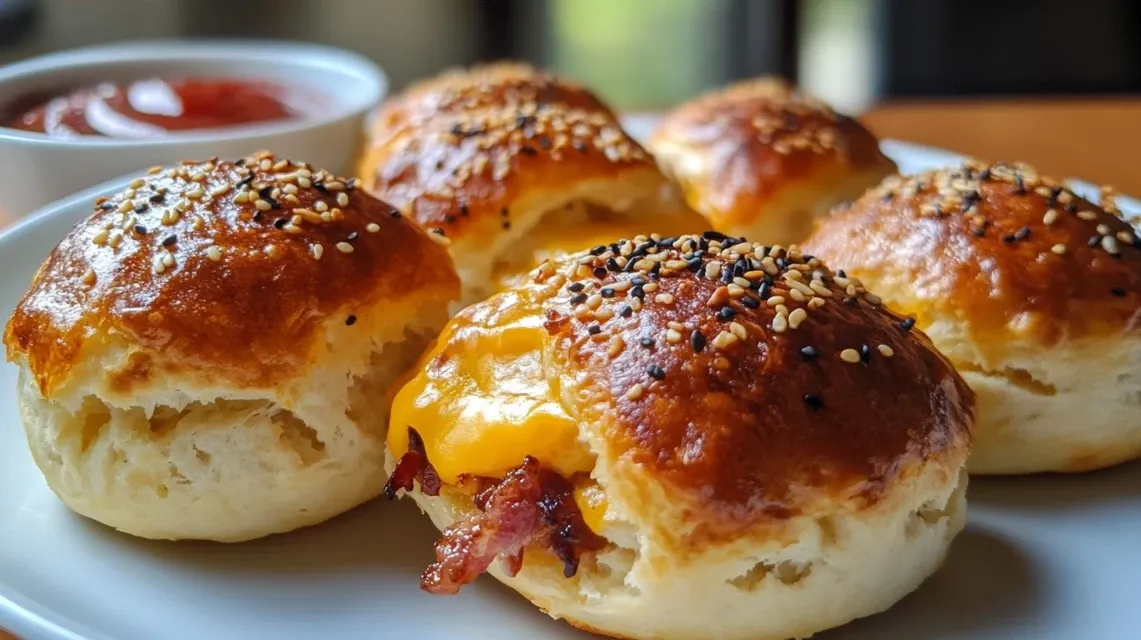
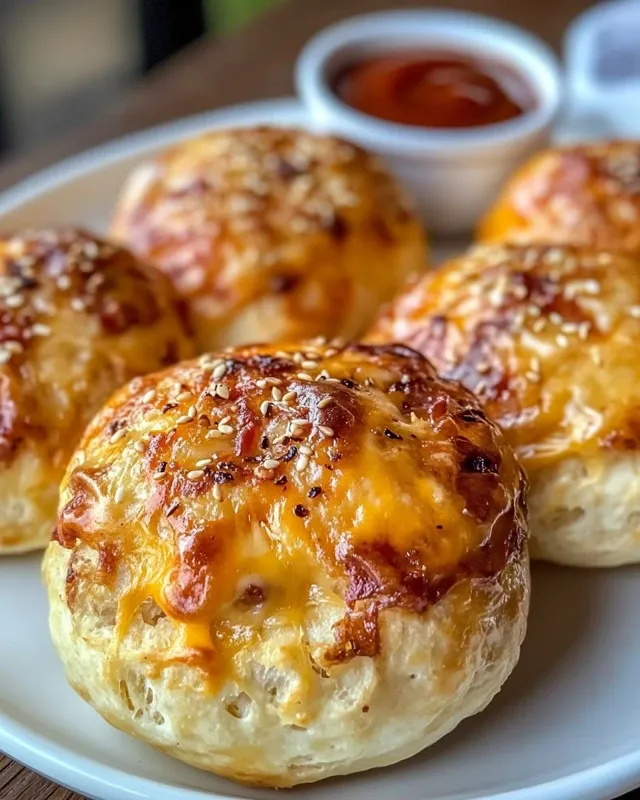
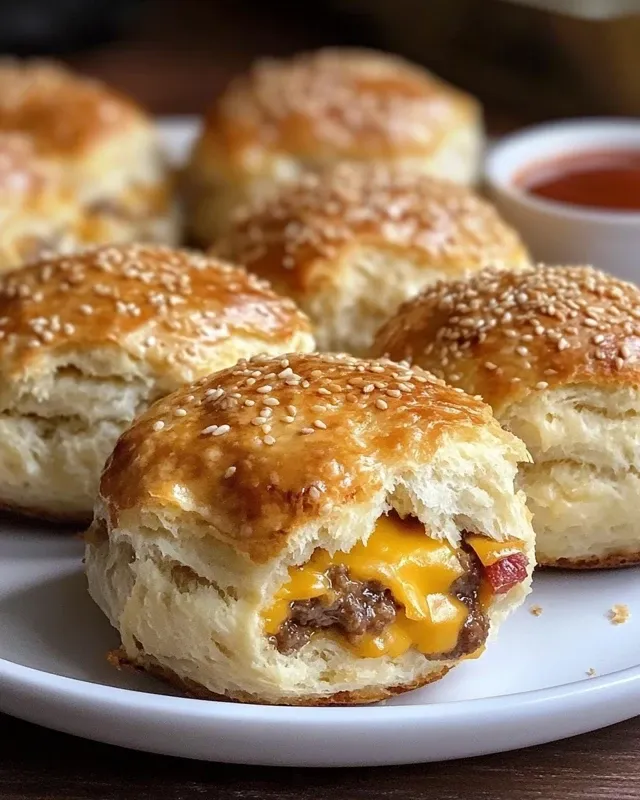
There’s something magical about the way the cheese melts into the seasoned beef mixture, all wrapped in that golden brown biscuit blanket. These Bacon Cheeseburger Bombs have become my go-to recipe when I need to impress guests without spending hours in the kitchen. Ready to give them a try?
Why You’ll Love These Cheesy Burger Bombs!
I’ve brought these Bacon Cheeseburger Bombs to countless potlucks and family gatherings, and they’re always the first appetizer to disappear from the table. This recipe has been passed around by friends so many times that I’ve started keeping copies on hand to share at parties!
- Perfect finger food for any occasion – From game day gatherings to kid-friendly dinners, these handheld treats are always a crowd-pleaser.
- Simple ingredients you likely already have – No fancy shopping required, just basic pantry and fridge staples.
- Make-ahead friendly – I often prepare these the morning before a party and just pop them in the oven when guests arrive.
- Kid-approved and adult-adored – My picky 10-year-old requests these regularly, while my foodie friends ask for the recipe.
- Customizable to your taste preferences – I’ve made versions with different cheeses, added jalapeños for heat, and even created breakfast variations.
My neighbor stopped by just as these were coming out of the oven last Sunday, and the aroma alone convinced her to stay for an impromptu lunch. After one bite, she immediately asked for the recipe.
Ingredient Note List
Ground Beef: I always recommend using 80/20 ground beef because it has just the right amount of fat to keep these burger bombs juicy and flavorful without becoming greasy.
Cheddar Cheese: Shredding it yourself is always best for that perfect melt and flavor, but pre-shredded works in a pinch when I’m short on time.
Turkey Bacon: This lighter alternative to traditional bacon still delivers that wonderful smoky flavor while keeping these Bacon Cheeseburger Bombs a bit more heart-friendly.
Garlic Powder: A little goes a long way in mimicking that classic burger joint flavor – it adds depth without overpowering the other ingredients.
Onion Powder: I love using this instead of fresh onions because it distributes evenly throughout the meat mixture and prevents any crunchy surprises in these soft, savory bombs.
Refrigerated Biscuit Dough: The secret to that perfect golden exterior – I’ve tried making these with homemade dough, but honestly, the convenience and consistent results of refrigerated biscuits can’t be beat for this recipe.
Sesame Seeds: These tiny seeds add that authentic burger bun appearance and a subtle nutty flavor that makes guests wonder what your secret ingredient is.
How to Make Bacon Cheeseburger Bombs
Step 1. I always start by browning the ground beef in a large skillet over medium heat, breaking it into small crumbles as it cooks. In my experience, smaller pieces distribute more evenly in the filling.
Step 2. Once the beef is fully cooked, I drain off any excess fat using a colander – this helps prevent soggy biscuit bottoms, which was a mistake I made the first time around.
Step 3. My daughter loves helping me combine the cooked beef, shredded cheddar, and crumbled turkey bacon in a large mixing bowl. We’ve found that mixing everything while the beef is still warm helps the cheese start melting slightly for a better blend of flavors.
Step 4. I’ve learned that adding the seasonings – garlic powder, onion powder, salt and pepper – after draining the beef ensures none of that flavor gets lost with the drained fat.
Step 5. When working with the biscuit dough, I use the palm of my hand to flatten each piece into a circle about 4 inches in diameter. If the dough starts sticking to your hands, a light dusting of flour works wonders.
Step 6. My husband prefers when I place a generous tablespoon of filling in the center of each flattened biscuit – about 2 tablespoons makes them too difficult to seal properly, as I discovered through trial and error.
Step 7. I’ve found that the best way to seal these bombs is to bring up all sides of the dough and pinch firmly at the top, then gently roll between my palms to smooth out the seams.
Step 8. Before baking, I like to place the bombs seam-side down on a parchment-lined baking sheet and brush the tops lightly with melted butter before sprinkling with sesame seeds – this extra step creates that irresistible golden crust.

How to Store & Reheat
I usually store any leftover Bacon Cheeseburger Bombs in an airtight container in the refrigerator, where they stay delicious for up to 3 days. The first time I made these, I was surprised at how well they maintained their flavor even after cooling down.
For freezing, I’ve had great success wrapping each cooled bomb individually in plastic wrap, then placing them all in a freezer-safe bag. They freeze beautifully for up to 2 months, making them perfect for emergency appetizers or quick weeknight dinners.
When it comes to reheating, I prefer using the oven at 350°F for about 10-12 minutes to maintain that crispy exterior. The microwave works in a pinch (about 30 seconds per bomb), but in my experience, the biscuit texture isn’t quite the same – it tends to get a bit chewy rather than flaky. If reheating from frozen, I add about 5-7 extra minutes in the oven, no need to thaw first.
What to Serve with Bacon Cheeseburger Bombs
Crisp Dill Pickle Spears: The tangy crunch of pickle spears provides the perfect contrast to the rich, savory bombs – just like pickles complement a traditional burger.
Sweet Potato Fries: My family loves the slightly sweet flavor of these fries paired with the savory bombs. I toss them with a little cinnamon and salt before baking for an extra flavor boost.
Simple Garden Salad: A light, fresh salad with tomatoes, cucumbers, and a vinaigrette dressing helps balance the richness of the bombs. In my kitchen, I often add avocado for creaminess.
Homemade Coleslaw: The cool, crisp texture and tangy flavor cut through the richness of the bombs beautifully. My grandmother’s recipe with a touch of apple cider vinegar works perfectly here.
Corn on the Cob: During summer months, nothing complements these bombs better than sweet corn brushed with herb butter – the sweetness plays wonderfully against the savory beef.
FAQs
Can I use regular bacon instead of turkey bacon?
Absolutely! I often use regular bacon when serving these to guests who aren’t watching their fat intake – it adds extra flavor and richness.
How do I prevent the cheese from leaking out during baking?
Make sure to pinch the seams of the dough very firmly and roll the ball gently between your palms to ensure it’s properly sealed before baking.
Can I prepare these ahead of time?
Yes! I frequently assemble them up to 8 hours ahead and refrigerate until ready to bake – just add 2-3 minutes to the baking time.
What’s the best way to reheat leftovers?
I recommend reheating in a 350°F oven for 8-10 minutes for the best texture – microwaving tends to make the biscuit dough chewy rather than flaky.
Can I add vegetables to the filling?
Absolutely! I’ve added finely diced bell peppers and onions with great success – just make sure to sauté them first to remove excess moisture.
How do I know when they’re done baking?
Look for an even golden-brown color on the outside – in my experience, if you wait until they’re deep golden, the inside will be perfectly hot and the cheese beautifully melted.
Bacon Cheeseburger Bombs
Ingredients
Equipment
Method
- In a skillet over medium heat, cook the ground beef until browned and fully cooked. Drain any excess fat.
- In a bowl, combine the cooked beef, shredded cheddar cheese, crumbled turkey bacon, garlic powder, onion powder, salt, and pepper. Mix until well combined.
- Preheat your oven to 375°F (190°C).
- Open the can of biscuit dough and separate the biscuits.
- Flatten each biscuit into a circle. Place a generous spoonful of the beef and cheese mixture in the center of each biscuit. Fold the edges over the filling and pinch to seal tightly.
- Place the filled biscuit bombs seam-side down on a greased baking sheet. If desired, sprinkle sesame seeds on top for added flavor.
- Bake in the preheated oven for 15-20 minutes, or until the biscuits are golden brown.
- Remove from the oven and let cool slightly. Serve warm with ketchup and mustard on the side for dipping.