Baked Italian Sub Sandwiches bring that deli-style comfort right to your home oven, and I’ve been making them for my family’s game day gatherings for over twenty years now. There’s something magical about how the cheese melts into every nook and cranny while the bread gets perfectly golden and crispy.
I still remember the first time I made these for a Sunday football party at my house. My grandson Tommy was about ten years old, and he’d been begging me to make “something different” from our usual spread. I thought back to the Italian deli in our small Midwest town where my mother used to take me as a girl, watching the counter worker layer meat after meat onto those crusty rolls. That’s when it hit me: why not bring that deli magic home and bake it? The kitchen filled with the most incredible aroma of melting cheese and toasted bread, and by halftime, every single Baked Italian Sub Sandwich had disappeared. Tommy declared them “better than the deli,” which made this Nonna’s heart swell. Time to get your oven preheated and your appetite ready!
What Makes This Baked Italian Sub Sandwich So Special
My years of feeding hungry families have taught me that the best recipes are the ones you can rely on when time is short but expectations are high. These Italian sub sandwiches check every box for busy home cooks and party hosts alike.
After making these dozens of times for everything from quick weeknight dinners to Super Bowl parties, I’ve discovered why they’ve become such a beloved recipe in my kitchen:
- Uses ingredients you likely have on hand – Basic deli meats, cheese, and vegetables mean no special grocery run required
- Comes together in under 30 minutes – Perfect for those evenings when everyone’s starving and you need dinner fast
- Delivers that irresistible contrast – Crispy, golden bread on the outside with gooey, melted cheese and savory meats inside
- Adapts to any dietary preference – Swap meats, change cheeses, add more veggies. These sandwiches are wonderfully forgiving
- Feeds a crowd without stress – Make four at once or double the batch for larger gatherings
- Creates restaurant-quality results – That bakery-fresh taste without leaving your kitchen
I’ve served these at countless family gatherings, and they never fail to impress. Even picky eaters in my family ask for seconds!

Ingredient Spotlight
Sub rolls form the foundation of these sandwiches, and I always choose a crusty variety with a soft interior that can hold up to all those delicious fillings without getting soggy.
Provolone cheese melts beautifully and provides that classic Italian deli flavor with a mild, slightly sharp taste that complements the meats perfectly without overpowering them.
Salami brings a robust, garlicky flavor with just the right amount of spice, and I prefer a good-quality Italian salami that has those characteristic white fat marbling throughout.
Pepperoni adds a familiar pizza-like taste that kids especially love, while contributing a touch of heat and a beautiful red color to your sandwich layers. If you love pepperoni as much as my family does, you might also enjoy my Pepperoni Pizza Bombs for another fun game day option.
Ham balances the spicier meats with its sweet, mild flavor, and in my kitchen, I prefer a honey ham or tavern ham for that extra layer of sweetness.
Romaine lettuce provides essential crunch and freshness that cuts through all the rich, savory elements, and I always shred it rather than using whole leaves for easier eating.
Tomatoes add juicy brightness and acidity that brings the whole sandwich into balance, and I’ve learned that slightly underripe tomatoes work better as they won’t make the bread soggy.
Olive oil creates that golden, crispy exterior when drizzled over the top before baking, transforming ordinary bread into something that rivals any Italian bakery.
Dried oregano adds that authentic Italian herb flavor that ties all the ingredients together with its earthy, slightly peppery notes.
How to Make Baked Italian Sub Sandwiches
Step 1. I’ve found that preheating your oven to 400°F and preparing your baking dish with nonstick spray ensures these Baked Italian Sub Sandwiches won’t stick and makes cleanup a breeze later.
Step 2. Betty always starts by slicing the sub rolls lengthwise, being careful to leave a hinge on one side so they open like a book. This keeps everything together while baking.
Step 3. Through trial and error, I learned that laying the meats in a specific order matters: salami first, then pepperoni, and finally ham creates the best flavor progression with each bite.
Step 4. The key I discovered is placing the provolone cheese directly on top of the meats so it melts down and around them, creating that gooey, irresistible texture everyone loves.
Step 5. My family prefers when I add the lettuce and tomatoes before baking rather than after, as it slightly wilts the lettuce and warms the tomatoes for a more cohesive sandwich experience.
Step 6. Sprinkle dried oregano over the vegetables for that authentic Italian deli flavor. You can also add a pinch of red pepper flakes if you like a little heat.
Step 7. I’ve learned that drizzling olive oil generously over each sandwich is non-negotiable. This is what creates that bakery-style golden crust and adds incredible flavor.
Step 8. After years of making these, I know that 10 to 12 minutes is the sweet spot where the cheese is perfectly melted and bubbly while the bread turns golden without burning.
Step 9. Betty’s tip: Let them rest for just 2 to 3 minutes after removing from the oven so the cheese sets slightly, making them easier to handle and less messy to eat.
Keeping This Recipe Fresh
I typically store leftover Baked Italian Sub Sandwiches wrapped tightly in aluminum foil or in an airtight container in the refrigerator, where they’ll stay fresh for up to 3 days. The bread will soften a bit in storage, but don’t worry – reheating brings back much of that original texture.
Betty’s freezing method works surprisingly well for these sandwiches if you want to prep ahead. I recommend wrapping each sandwich individually in plastic wrap, then placing them in a freezer bag with as much air removed as possible. They’ll keep for up to 2 months frozen. When you’re ready to enjoy them, let them thaw in the refrigerator overnight.
For the best texture, I reheat by placing the sandwiches back in a 350°F oven for 8 to 10 minutes until heated through and the bread crisps up again. The microwave works in a pinch (about 1 to 2 minutes on high), but you’ll sacrifice that crispy exterior that makes these sandwiches so special. I’ve found that covering them loosely with foil for the first 5 minutes of reheating, then uncovering for the last few minutes, prevents the bread from getting too hard while still achieving some crispiness.

Perfect Partners for Baked Italian Sub Sandwiches
- Classic potato chips or kettle chips provide that essential salty crunch alongside your sandwich, and I always set out a big bowl for game day gatherings.
- Creamy coleslaw offers a cool, tangy contrast to the warm, savory sandwiches. The crisp cabbage and creamy dressing are perfect palate cleansers between bites.
- Dill pickle spears are a traditional deli accompaniment that adds that briny, acidic punch that cuts through the richness of the cheese and meats.
- Italian pasta salad keeps the Italian theme going strong with colorful vegetables, tangy dressing, and pasta that makes this a complete, satisfying meal.
- Homemade marinara sauce serves as an excellent dipping option for those who like a little extra Italian flavor. Just warm it up and serve it on the side.
- Garden salad with Italian vinaigrette brings freshness and lightness to balance the hearty sandwiches, making this meal feel more complete and less heavy.
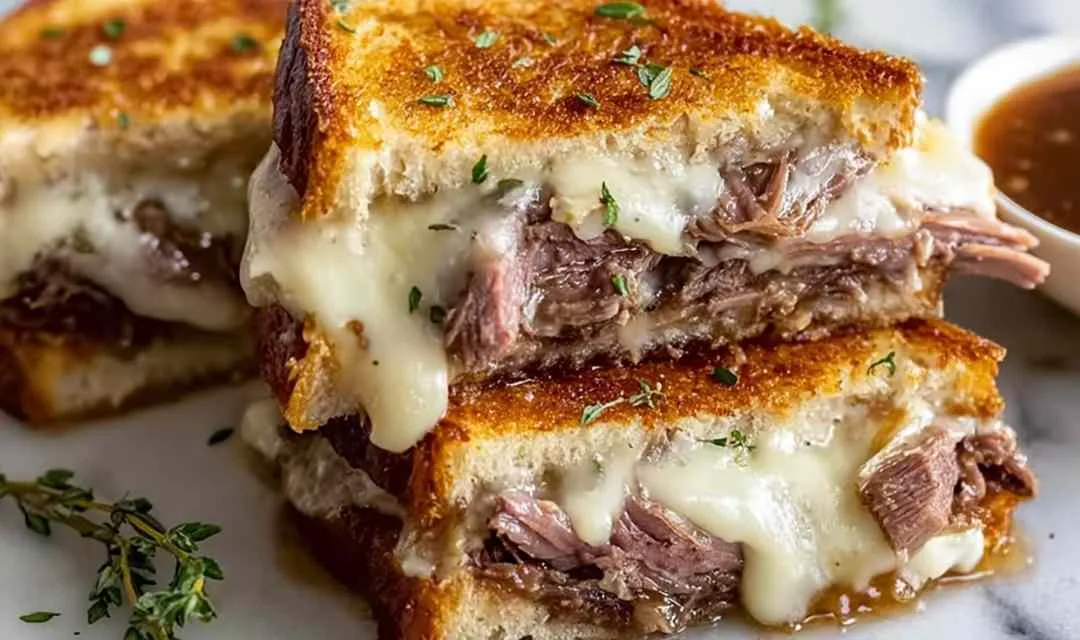
- French Dip Grilled Cheese makes an excellent companion sandwich if you’re serving a crowd and want variety. You can find my recipe at French Dip Grilled Cheese.
For more hearty handheld options that work great for entertaining, try my Cheesy Garlic Chicken Wraps or Mozzarella Pepperoni Croissant Rolls.
FAQs
I recommend assembling the sandwiches up to 4 hours ahead, covering them tightly with plastic wrap, and refrigerating until you’re ready to bake. Just add 2 to 3 extra minutes to the baking time since they’ll be cold.
To prevent sogginess issues, many home cooks find success with a sturdy hoagie roll or French bread that has a crispy crust and substantial crumb structure to hold all those juicy ingredients.
Betty’s solution is to use whatever Italian-style deli meats you prefer or have on hand. Turkey, mortadella, capicola, or even roast beef all work beautifully in these baked Italian sub sandwiches.

Baked Italian Sub Sandwiches
Ingredients
Equipment
Method
- Preheat your oven to 400°F (200°C) and prepare a baking dish with nonstick cooking spray to prevent sticking.
- Slice each sub roll lengthwise without cutting all the way through, leaving a hinge on one side so they open like a book. Lay them open in the prepared baking dish.
- Layer the deli meats inside each roll in this order: salami first, then pepperoni, and finally ham for the best flavor progression.
- Place provolone cheese slices directly on top of the meats so it melts down and around them during baking.
- Top each sandwich with shredded romaine lettuce and tomato slices. Sprinkle with dried oregano if desired for extra Italian flavor.
- Drizzle olive oil generously over the top of each sandwich—this creates that golden, crispy bakery-style crust.
- Bake for 10-12 minutes until the cheese is melted and bubbly and the bread turns golden brown.
- Let sandwiches rest for 2-3 minutes after removing from the oven so the cheese sets slightly, then transfer to plates and serve warm.