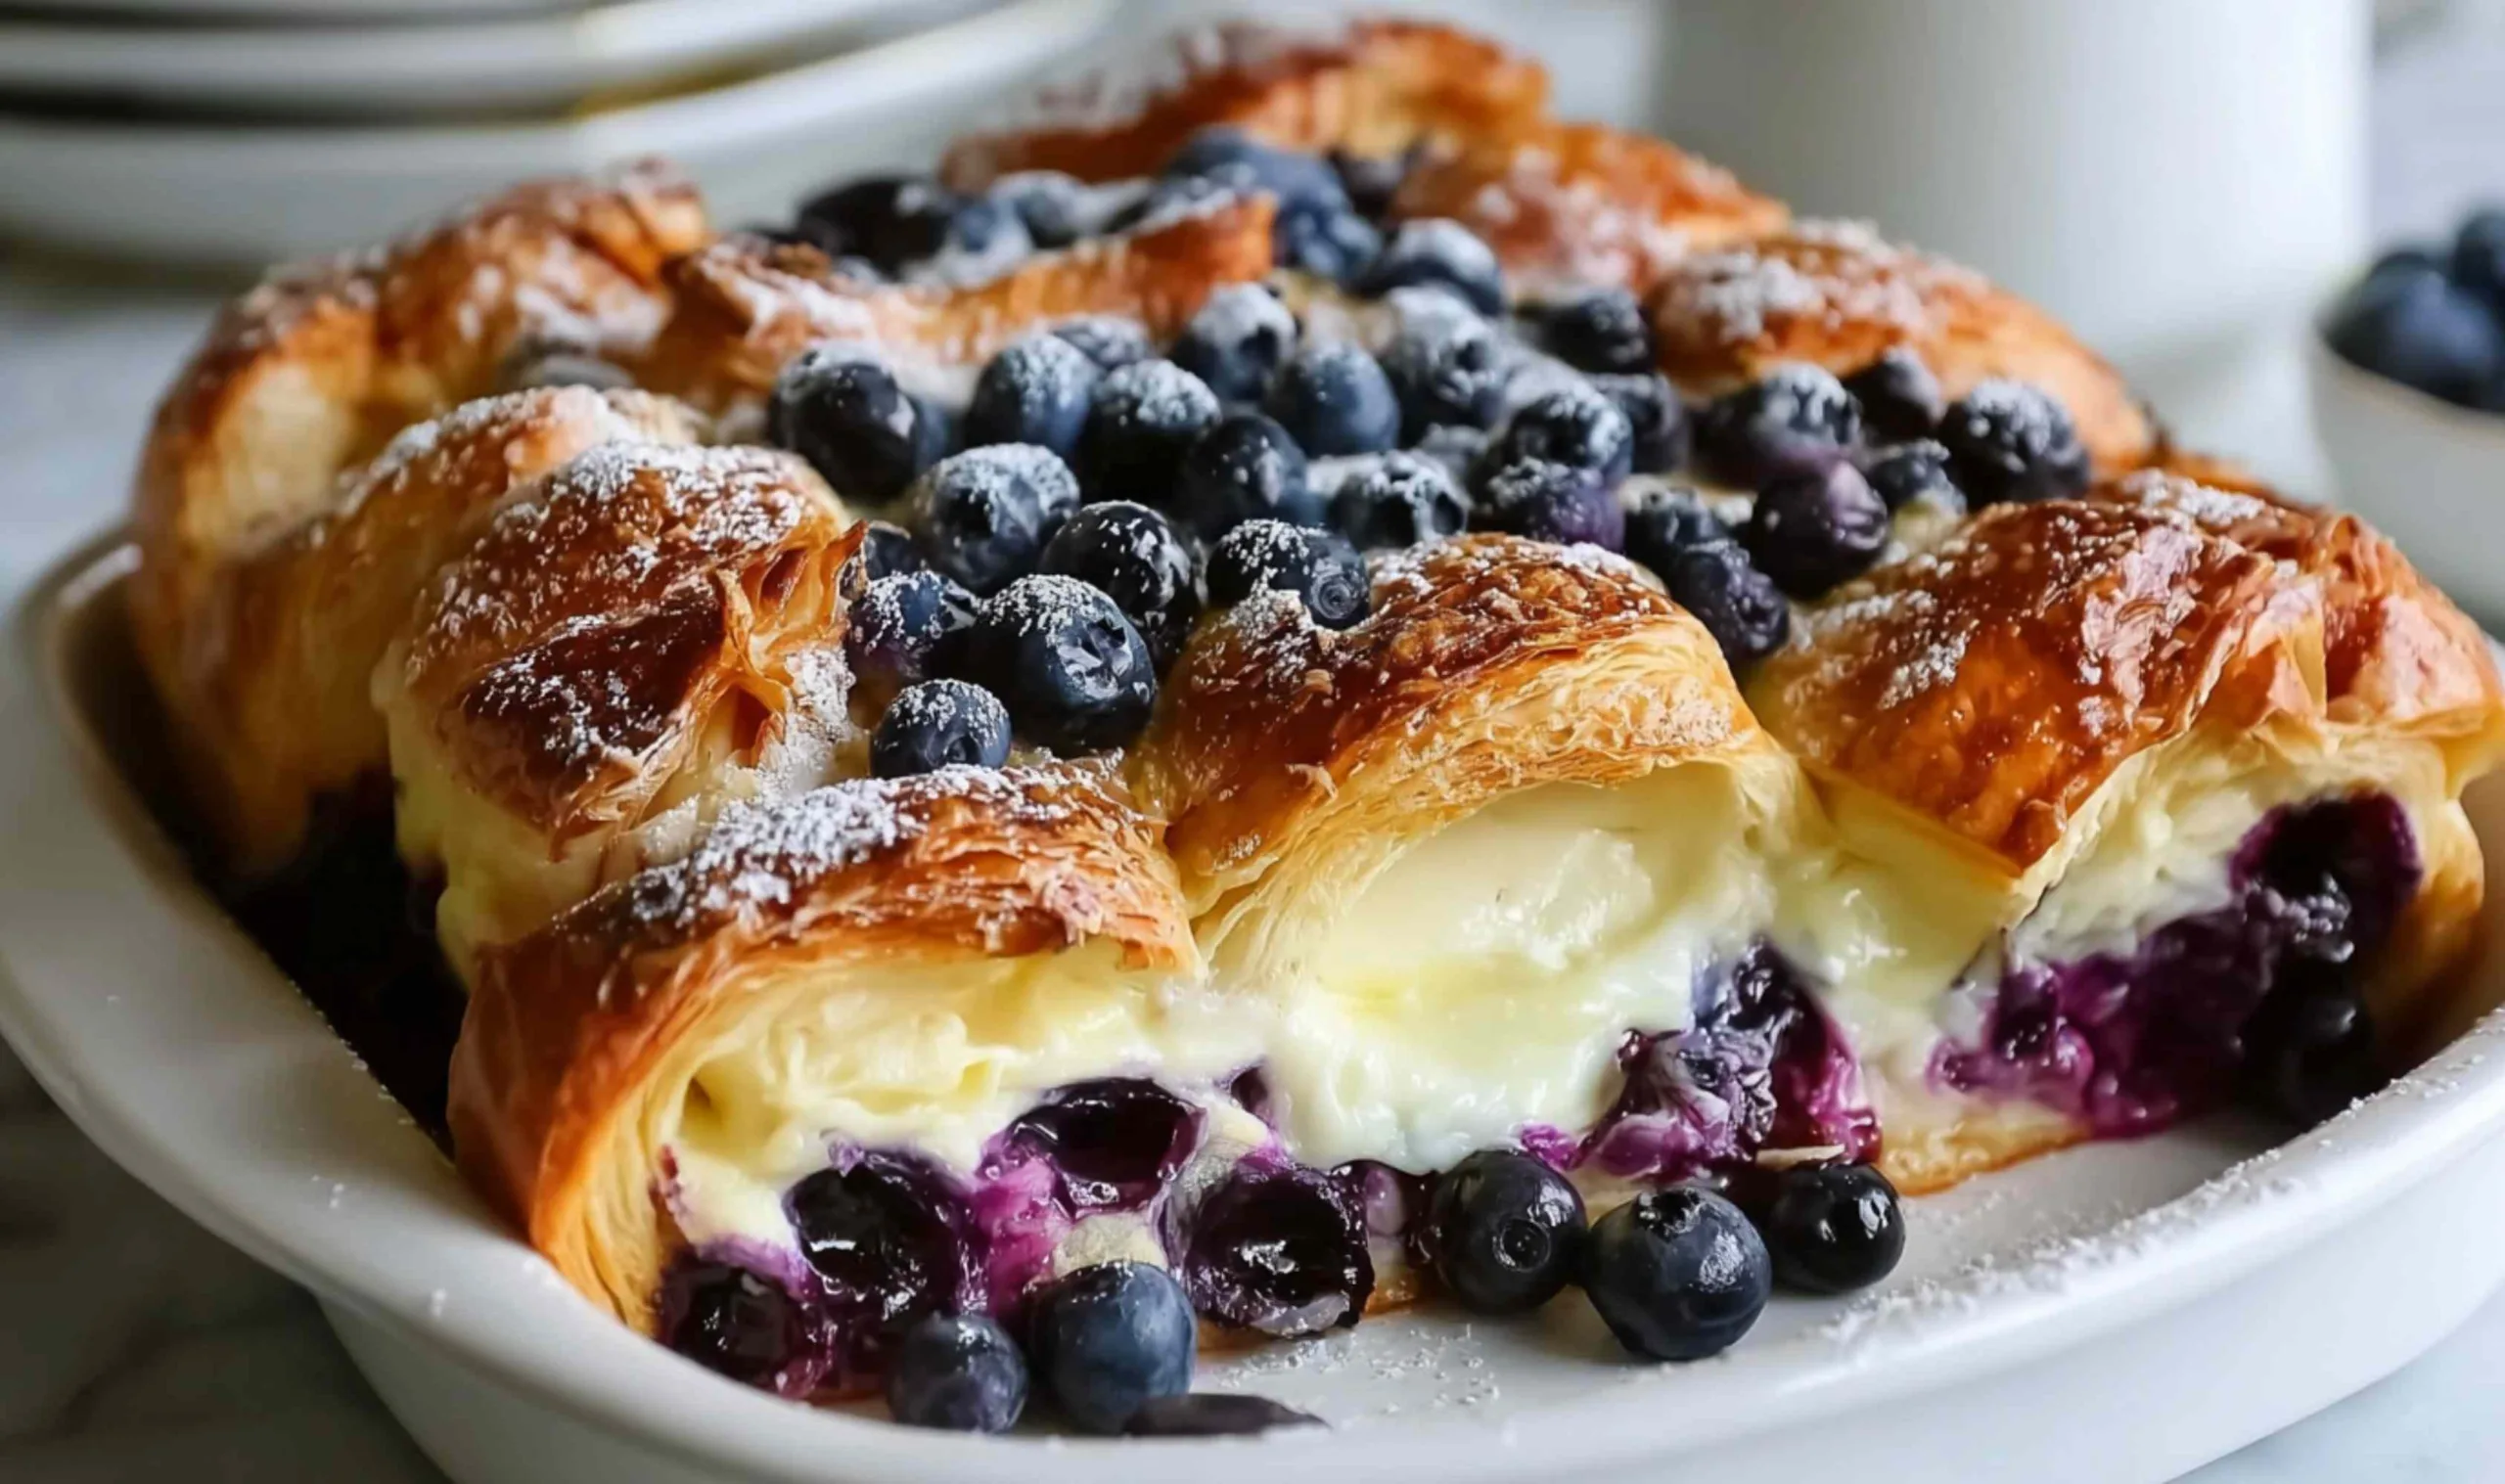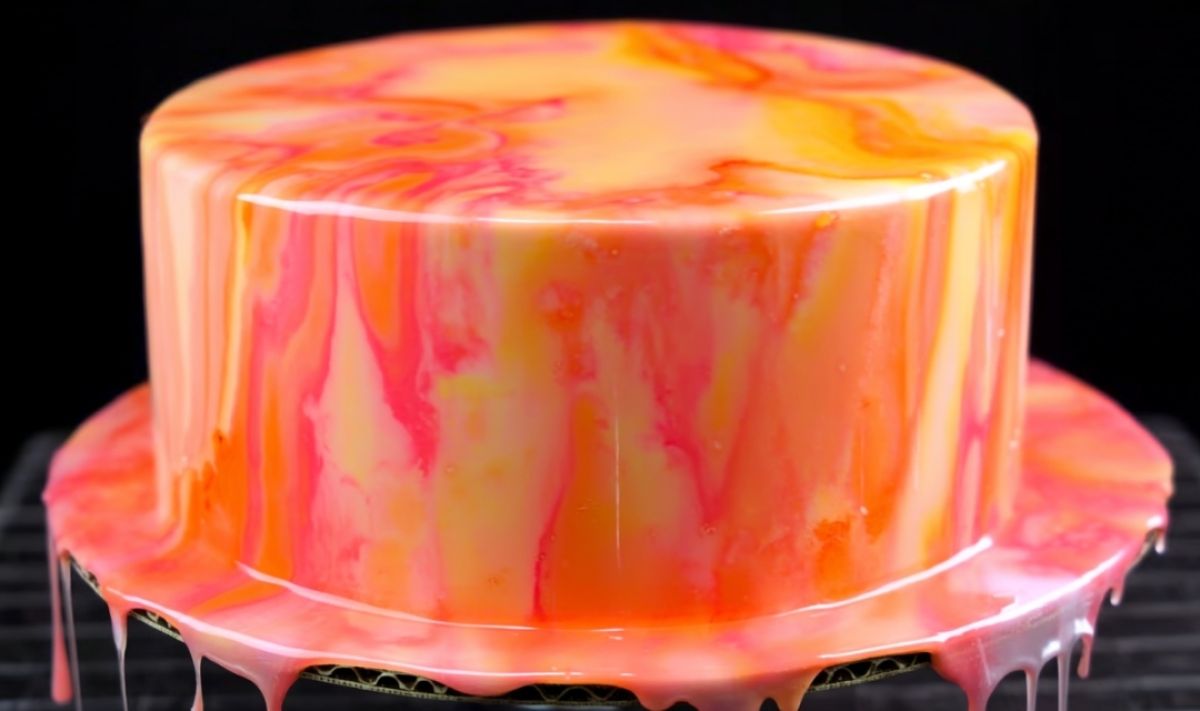
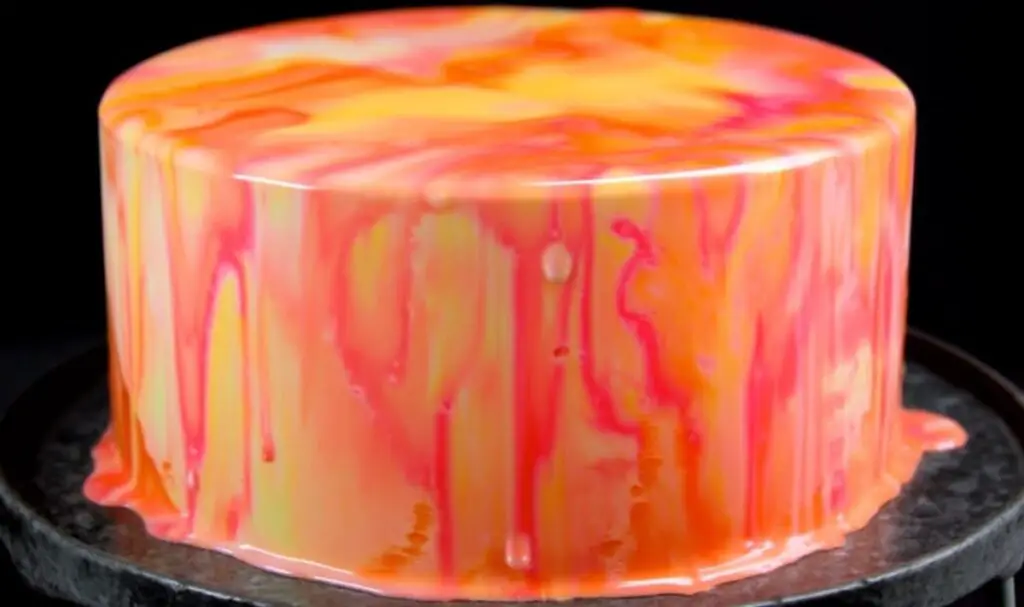
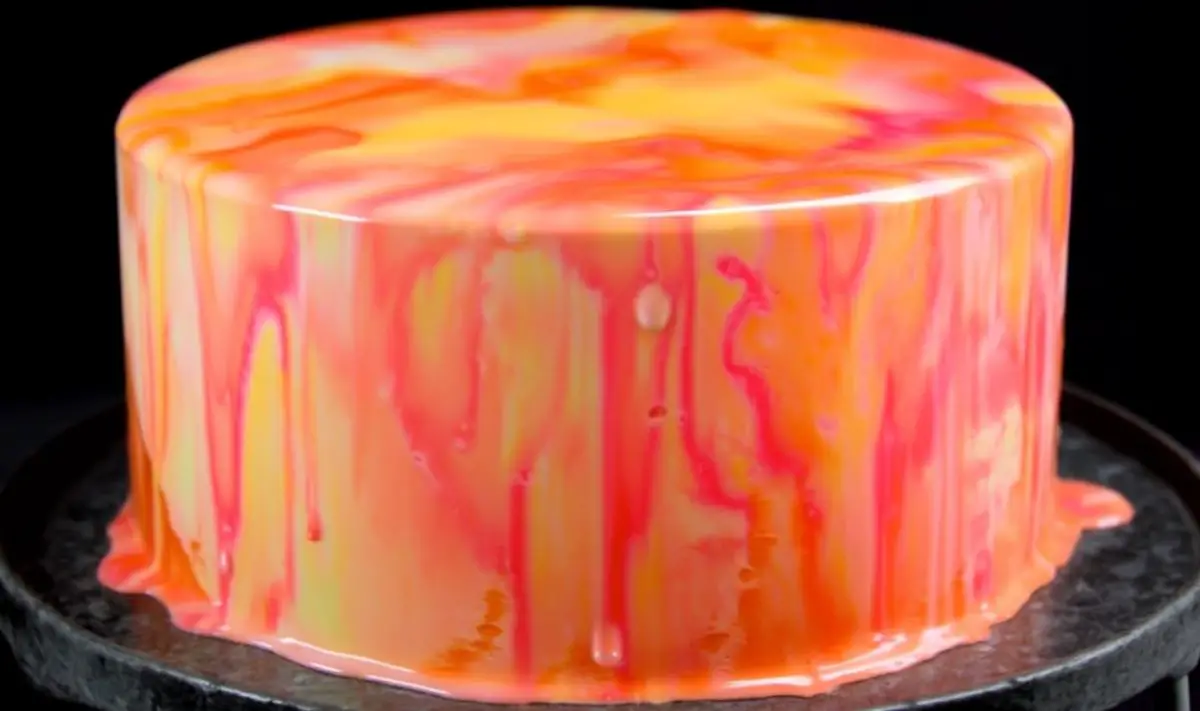
Easy mirror glaze recipe transforms ordinary cakes into show-stopping masterpieces using just five simple ingredients that you probably already have in your pantry. I’ve been perfecting this technique in my kitchen for years, and this version is far more forgiving than traditional recipes.

There’s nothing quite like the moment you pour that first stream of glossy mirror glaze over a perfectly chilled cake. I remember the first time I attempted mirror glaze—it was for my granddaughter’s birthday, and I was terrified it would be a disaster. Traditional recipes seemed so complicated with their precise temperatures and finicky gelatin ratios. That’s when I developed this foolproof version using white chocolate and sweetened condensed milk. The white chocolate not only masks any gelatin flavor but creates a more stable, forgiving glaze that sets beautifully every single time. Now, whenever I see that perfect mirror finish cascading down the sides of a cake, I can’t help but smile—it never gets old!
Let’s get cooking!
Why You’ll Love This Easy Mirror Glaze Recipe
This easy mirror glaze recipe has become my go-to for special occasions because it delivers professional-looking results without the stress. Unlike traditional mirror glazes that require precise timing and can easily go wrong, this white chocolate version is much more forgiving and actually tastes better too.
- Only requires 5 simple ingredients you can find at any grocery store
- Much easier temperature control than traditional gelatin-based glazes
- White chocolate base completely eliminates any unpleasant gelatin taste
- Can be made entirely in the microwave for convenience
- Creates stunning, Instagram-worthy cakes that look professionally made
- Works perfectly over buttercream frosting without melting it
- Can be made ahead of time and reheated when needed
This colorful mirror glaze recipe is more than just a decorative technique—it’s a confidence builder that transforms home bakers into cake artists.
Ingredient Note List
Powdered Unflavored Gelatin: This is what gives the glaze its glossy, mirror-like finish and helps it set properly on your cake.
Granulated Sugar: I always use regular white sugar because it dissolves easily and creates the perfect sweetness balance with the condensed milk.
Sweetened Condensed Milk: This ingredient makes all the difference—it adds richness and helps create a smoother, more stable glaze than traditional recipes.
Mini White Chocolate Chips: In my kitchen, I prefer mini chips because they melt more evenly in the microwave and blend seamlessly into the mixture.
Water: Room temperature water works best for blooming the gelatin and creating the sugar syrup base.
Gel Food Coloring: Make sure to use gel coloring only—liquid food coloring will thin out your glaze and ruin the consistency.
How to Cook Easy Mirror Glaze Recipe
Step 1. I usually start by blooming the gelatin in a small bowl with ¼ cup of water, letting it sit while I prepare the other ingredients.
Step 2. In a large heatproof bowl, I combine the sugar, ¾ cup water, and sweetened condensed milk, then microwave for 90 seconds on high power.
Step 3. My grandmother always taught me to stir thoroughly after heating—the sugar should be mostly dissolved, but don’t worry if you need an extra 10-20 seconds.
Step 4. I’ve found that whisking the bloomed gelatin into the hot mixture immediately ensures it dissolves completely without any lumps.
Step 5. For the white chocolate, I prefer melting it separately in 15-second intervals, stirring between each one until perfectly smooth.
Step 6. When combining the melted chocolate with the gelatin mixture, I whisk constantly to prevent any seizing—this step is crucial for that perfect glossy finish.
Step 7. I always strain the mixture through a fine mesh sieve because even tiny bits of unmelted chocolate will show up on your finished cake.
Step 8. My husband prefers when I divide the glaze into separate bowls first before adding colors—it gives you more control over the intensity of each shade.
Step 9. The most important step is waiting for the temperature to reach exactly 90°F—I use a digital thermometer and stir occasionally to prevent a skin from forming.
Step 10. When pouring, I start from the center and work outward in a steady circular motion, letting gravity do most of the work for even coverage.
How to Store & Reheat
I usually store any leftover glaze in airtight containers in the refrigerator, where it stays fresh for up to one week. Make sure the glaze cools completely before covering to prevent condensation from forming on top.
The finished glazed cake can be stored at room temperature if you’re serving it within a few hours. For longer storage, I recommend keeping it in the refrigerator for up to several days, but remember to remove it about 2 hours before serving so it comes to the perfect temperature.
For reheating leftover glaze, I gently warm it in the microwave using 15-20 second intervals, stirring between each heating until it reaches 90°F again. In my experience, this glaze reheats beautifully and can be used multiple times as long as you maintain the proper temperature.
Easy Mirror Glaze Recipe
Ingredients
Equipment
Method
- Bloom gelatin by sprinkling it over 1/4 cup water; let stand while preparing the glaze base.
- In a large heatproof bowl, combine sugar, 3/4 cup water, and sweetened condensed milk. Microwave 90 seconds on high; stir well. If sugar isn’t fully dissolved, heat in 10-second bursts, stirring until dissolved.
- Add the bloomed gelatin to the warm mixture and whisk until fully dissolved.
- In a separate bowl, melt white chocolate in 15-second microwave intervals, stirring between each, until smooth.
- Whisk melted white chocolate into the warm gelatin mixture until homogeneous. Strain through a fine mesh sieve to remove any unmelted bits.
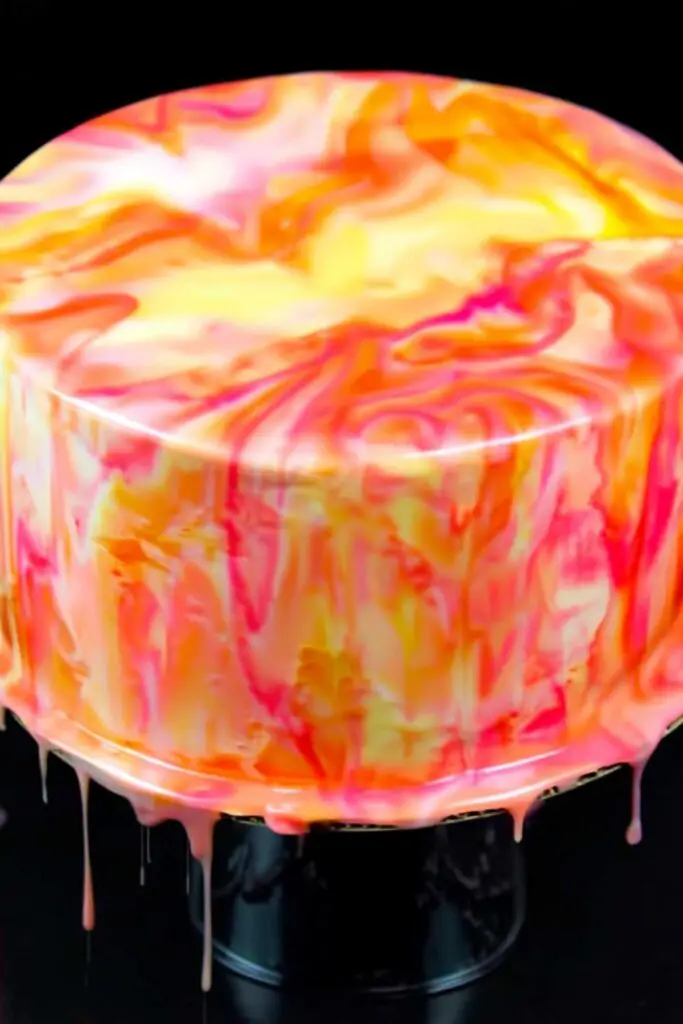
- Divide glaze into four bowls and color with gel food coloring.
- Stir occasionally to prevent a skin until the glaze cools to 90°F/32°C (just warm to the touch).
- Pour colored glazes back into one large bowl, alternating and drizzling colors together without overmixing.
- Place a thoroughly chilled, firm buttercream cake on a small support over a rimmed baking sheet.
- Pour glaze over the center, moving in a slow circular motion until fully covered. Let drip 10 minutes, then scrape excess from the board with an offset spatula. Allow to set.
Notes
What to Serve with Easy Mirror Glaze Recipe
Vanilla Layer Cake: The classic pairing that never fails—the neutral vanilla flavor lets the stunning mirror glaze be the star of the show.
Chocolate Cake: This creates a beautiful contrast between the dark cake layers and the bright, glossy glaze colors, similar to the rich layers in my Delicious Chocolate Mousse.
Fresh Berries: I often arrange fresh strawberries or raspberries around the base of the cake for a pop of natural color and freshness.
Whipped Cream: A dollop of freshly whipped cream on each slice adds a light, airy texture that complements the rich glaze perfectly.
Ice Cream: My family loves serving this with vanilla or strawberry ice cream—the cold temperature contrast works beautifully with the set glaze.
Edible Flowers: For special occasions, I like to garnish with edible flowers or gold leaf to make the presentation even more elegant, much like the vibrant design on my Rainbow Cake.
FAQs
This usually happens when the temperature is too hot when you pour it—I recommend waiting until it reaches exactly 90°F for the best mirror finish.
While possible, I strongly recommend using a digital thermometer for best results—the glaze should feel just slightly warm to the touch when ready to pour.
Make sure your cake is thoroughly chilled and the buttercream is firm to the touch—I usually freeze mine for 20 minutes or refrigerate for at least an hour before glazing.
Gently reheat it in 10-second intervals until it reaches the proper pouring consistency—it should flow smoothly off a spoon when ready.