Easy Rotisserie Chicken Enchiladas are my go-to when I need dinner on the table fast without sacrificing flavor. There’s something wonderfully practical about transforming a store-bought rotisserie chicken into a meal that tastes like you’ve been cooking all day.
I still remember the first time I made enchiladas using rotisserie chicken. It was a Tuesday evening, and I had just picked up my granddaughter from soccer practice. The kitchen was quiet except for the sound of shredding that tender chicken, and as I mixed it with tangy enchilada sauce and melted cheese, I realized I’d discovered something special. This wasn’t just a shortcut; it was a smart way to bring my family together over a meal that delivered all the comfort of traditional enchiladas without the fuss. The aroma of bubbling cheese and warm tortillas filled the farmhouse kitchen, just like Sunday suppers used to, but on a weeknight. Your kitchen’s about to smell incredible.
What Makes These Easy Rotisserie Chicken Enchiladas So Special
These enchiladas have become one of my most-requested recipes because they solve that eternal weeknight dilemma: delicious food, minimal effort. I’ve made these Easy Rotisserie Chicken Enchiladas countless times for family gatherings, potlucks, and those evenings when everyone’s hungry but time is short.
- Ready in just 40 minutes from start to finish, perfect for busy schedules
- Uses convenient rotisserie chicken so you skip the longest cooking step
- Freezer-friendly preparation means you can make a double batch and save one for later
- Simple ingredient list with items you likely have in your pantry
- Family-approved flavor that even picky eaters request again and again
- Flexible and forgiving recipe that adapts to whatever cheese or tortillas you have on hand
I’ve learned that the best weeknight recipes aren’t about complicated techniques. They’re about knowing which shortcuts actually improve your life without compromising taste.
Ingredient Spotlight
Rotisserie Chicken: This is your time-saving hero ingredient, providing perfectly seasoned, tender meat that shreds easily and brings instant flavor to the filling. I always choose chickens that are still warm from the store because they shred more easily and release wonderful aromatics.
Diced Tomatoes with Green Chilies: The Ro-Tel brand adds a subtle kick and tangy brightness that balances the richness of the cheese. In my kitchen, I prefer the original variety, but you can choose mild if your family is sensitive to spice.
Enchilada Sauce: Old El Paso enchilada sauce delivers consistent, authentic flavor without the work of making sauce from scratch. I’ve found that dividing the sauce between the filling and topping creates layers of flavor throughout the dish.
Shredded Cheese: Whether you choose sharp cheddar for bold flavor or Monterey Jack for creamy mildness, cheese is what makes these enchiladas irresistibly gooey. Betty’s tip: I always buy block cheese and shred it myself because it melts more smoothly than pre-shredded varieties.
Flour Tortillas: Large burrito-sized tortillas are easier to roll and less likely to tear than smaller versions. Through trial and error, I learned that letting them come to room temperature before rolling prevents cracking.
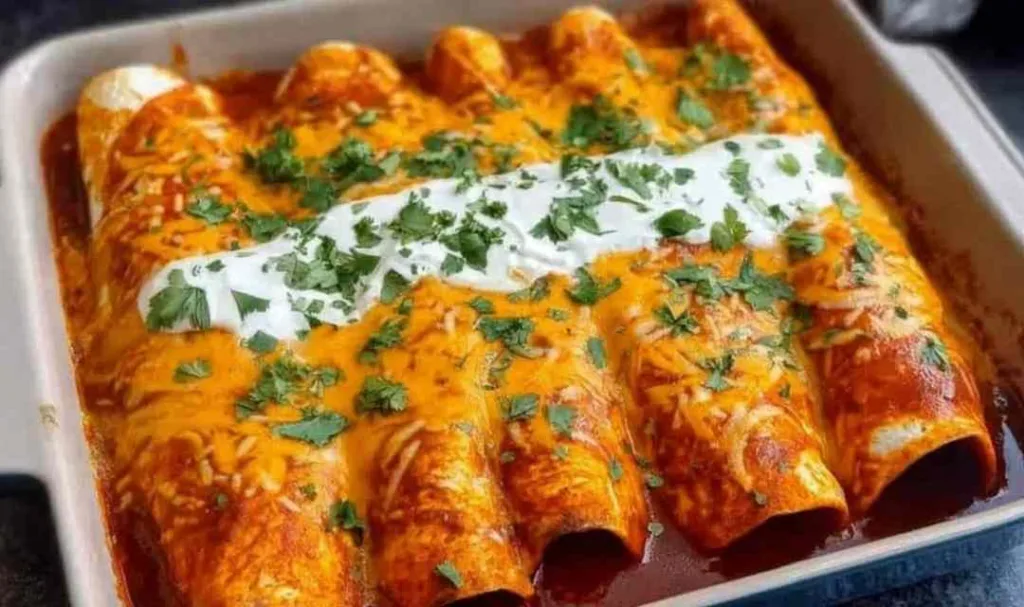
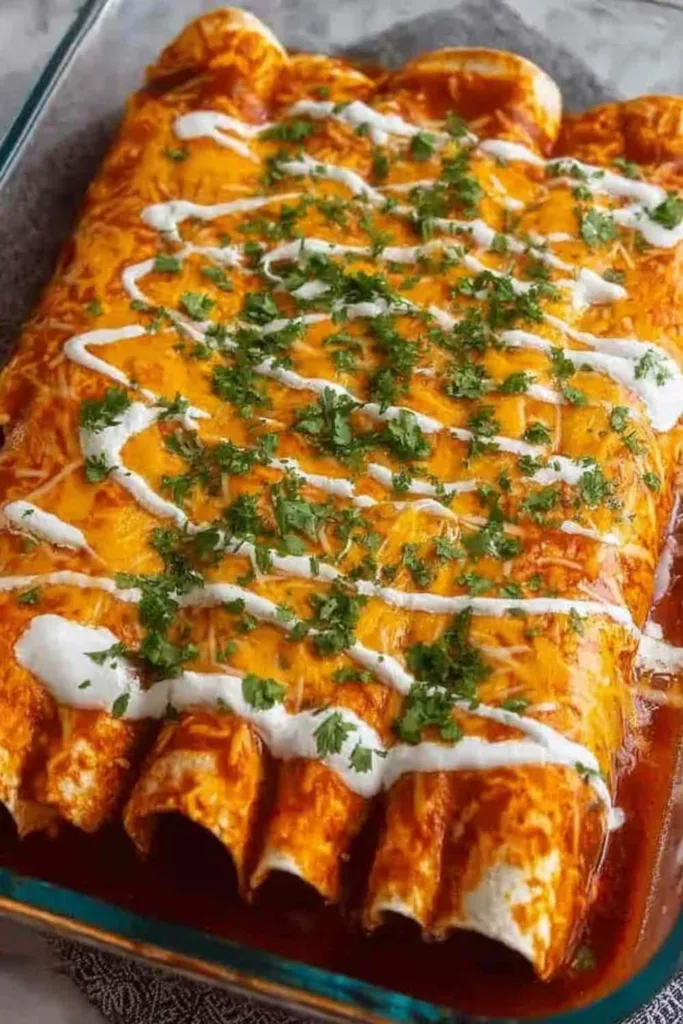
Fresh Cilantro: This bright herb adds a pop of freshness and color that makes the finished dish look restaurant-quality. My family prefers when I sprinkle it generously right before serving.
How to Make Easy Rotisserie Chicken Enchiladas
Step 1. Preheat your oven to 350°F so it’s ready when you need it. Betty always starts by getting the oven going first because it’s one less thing to remember when you’re in the middle of assembly.
Step 2. Shred the rotisserie chicken into bite-sized pieces, discarding the skin and bones. I’ve learned that using two forks makes this job incredibly quick, and the chicken should pull apart easily if it’s still slightly warm.
Step 3. In a large mixing bowl, combine the shredded chicken with the drained diced tomatoes with green chilies, half the enchilada sauce (about 5 oz), and three-quarters cup of shredded cheese. After years of making these Easy Rotisserie Chicken Enchiladas, I know this mixture should be moist but not soupy.
Step 4. Pour the remaining enchilada sauce into the bottom of your 9×13-inch baking dish and spread it evenly. Betty’s tip: this prevents the bottom tortillas from getting dry and creates an extra layer of saucy goodness.
Step 5. Lay one tortilla flat and spoon about one-third to one-half cup of the chicken mixture down the center. Through trial and error, I learned not to overfill them because less is more when it comes to easy rolling.
Step 6. Roll the tortilla tightly around the filling and place it seam-side down in the prepared baking dish. I’ve found that placing them snugly against each other prevents them from unrolling during baking.
Step 7. Repeat with the remaining tortillas and filling until the dish is full. The key I discovered is working efficiently because you’ll develop a rhythm after the first few.
Step 8. Sprinkle the remaining three-quarters cup of shredded cheese evenly over the top of the enchiladas. My family prefers when I cover them completely because there’s no such thing as too much melted cheese.
Step 9. Bake uncovered for 25 to 30 minutes until the cheese is melted, bubbly, and just starting to brown. Betty always checks at 25 minutes because ovens vary in temperature.
Step 10. Let the enchiladas rest for 5 minutes before serving, then garnish with fresh chopped cilantro. I typically use this resting time to set the table, and it also helps the enchiladas set so they’re easier to serve.
Keeping These Easy Rotisserie Chicken Enchiladas Fresh
I typically store leftover enchiladas in an airtight container in the refrigerator for 3 to 4 days. They actually taste even better the next day once the flavors have had time to meld together. Betty’s method is to cover the baking dish tightly with aluminum foil if you’re storing the whole pan, or transfer individual portions to meal prep containers for grab-and-go lunches.
These enchiladas freeze beautifully, which is why I often make a double batch. For the best results, I assemble the enchiladas completely but don’t bake them. Wrap the dish tightly in plastic wrap and then aluminum foil before freezing for up to 3 months. When you’re ready to enjoy them, thaw overnight in the refrigerator and bake as directed, adding an extra 5 to 10 minutes to the cooking time. Betty’s freezing method works well because the unbaked enchiladas maintain better texture than freezing already-cooked ones.
For the best texture, I reheat by covering portions with foil and warming in a 350°F oven for 15 to 20 minutes until heated through. You can also microwave individual servings for 2 to 3 minutes, though the oven method keeps the tortillas from getting rubbery. Many home cooks find success with adding a splash of extra enchilada sauce or a sprinkle of water before reheating to restore moisture.
Perfect Partners for Easy Rotisserie Chicken Enchiladas
- Mexican Rice or Cilantro Lime Rice: The fluffy, seasoned grains soak up any extra enchilada sauce on the plate and add a complementary flavor that rounds out the meal.
- Refried Beans or Black Beans: Creamy beans provide protein and a smooth texture contrast to the cheesy enchiladas, plus they’re traditional accompaniments that feel authentically Mexican-American.
- Simple Green Salad with Lime Vinaigrette: Fresh, crisp greens with a tangy dressing cut through the richness of the cheese and provide a refreshing balance to this hearty dish.
- Street Corn Chicken Rice Bowls: These bowls bring sweet corn and Mexican-inspired flavors that pair beautifully with enchiladas for a complete fiesta-style dinner spread.
- Tortilla Chips with Guacamole or Salsa: Crunchy chips and fresh dips keep everyone happy while you’re dishing up the enchiladas, and they add fun textural variety to the meal.
- Cheesy Tex-Mex Ground Beef Sweet Potato Skillet: For a heartier spread, this sweet potato skillet adds earthy sweetness and protein to complement the chicken enchiladas perfectly.
Looking for more Mexican-inspired weeknight dinners? Try our Chicken Enchilada Soup for a lighter option, or check out Ground Beef Enchiladas when you want to switch up the protein.
FAQs
I recommend using flour tortillas for this recipe because they’re more pliable and less likely to crack when rolling. If you prefer corn tortillas, warm them first in a dry skillet or microwave to make them more flexible.
To prevent this issue, make sure to drain the diced tomatoes well and don’t oversaturate the filling with sauce. Betty’s solution is to spread sauce on the bottom of the pan rather than mixing all of it into the filling.
Many home cooks find success with assembling the enchiladas completely, covering tightly with foil, and refrigerating for up to 24 hours before baking. Just add 5 to 10 extra minutes to the baking time if they’re going into the oven cold.

Easy Rotisserie Chicken Enchiladas
Ingredients
Equipment
Method
- Preheat oven to 350°F.
- Shred the rotisserie chicken into bite-sized pieces, discarding skin and bones. Place in a large mixing bowl.
- Add the drained diced tomatoes with green chilies, half of the enchilada sauce (about 5 oz), and three-quarters cup of shredded cheese to the bowl. Mix until well combined.
- Pour the remaining enchilada sauce into the bottom of a 9×13-inch baking dish and spread evenly.
- Lay one tortilla flat and spoon about one-third to one-half cup of the chicken mixture down the center.
- Roll the tortilla tightly around the filling and place seam-side down in the prepared baking dish.
- Repeat with remaining tortillas and filling, placing enchiladas snugly against each other in the dish.
- Sprinkle the remaining three-quarters cup of shredded cheese evenly over the top of all enchiladas.
- Bake uncovered for 25 to 30 minutes until cheese is melted, bubbly, and starting to brown.
- Let rest for 5 minutes, then garnish with fresh chopped cilantro before serving.