Homemade Bread Recipes
The Joy of Baking Bread at Home
Baking bread at home is a delightful experience that brings warmth and comfort to any kitchen. The aroma of fresh bread wafting through your home can instantly lift your spirits. Plus, there’s something incredibly satisfying about creating a loaf from scratch. Homemade bread recipes allow you to control the ingredients, ensuring that you know exactly what goes into your food.
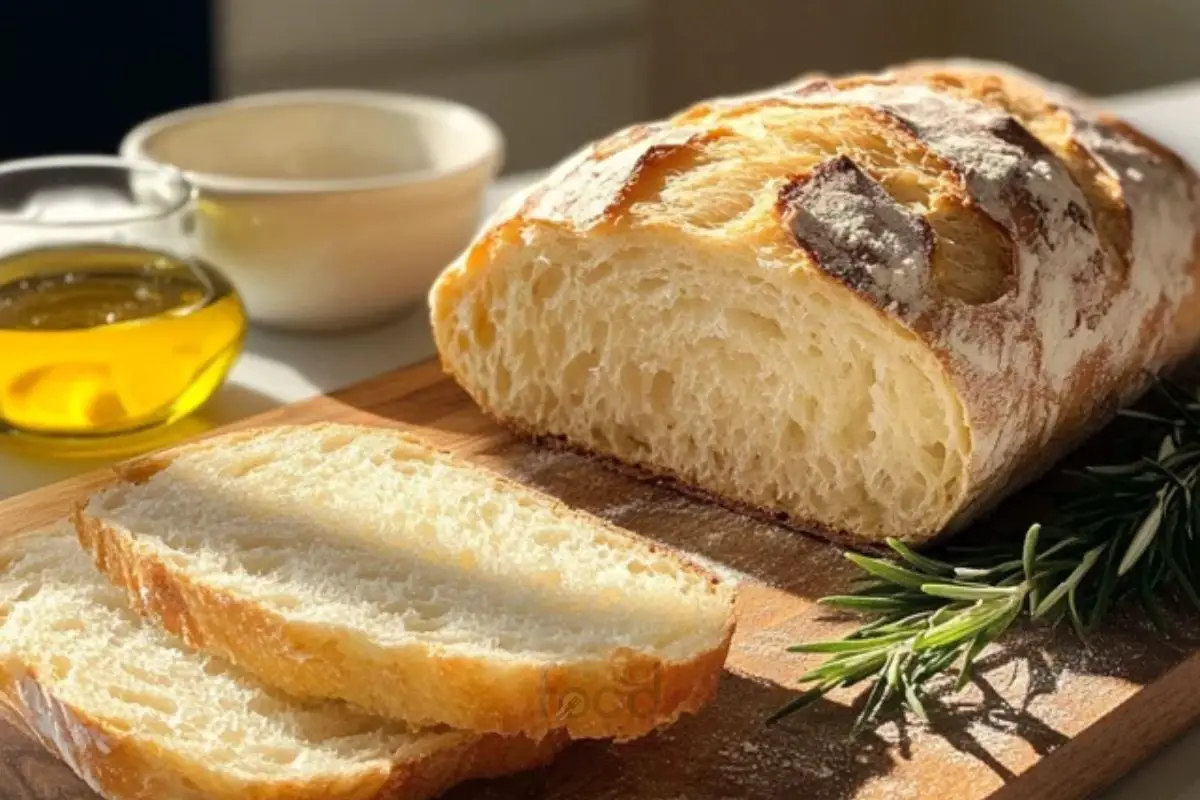
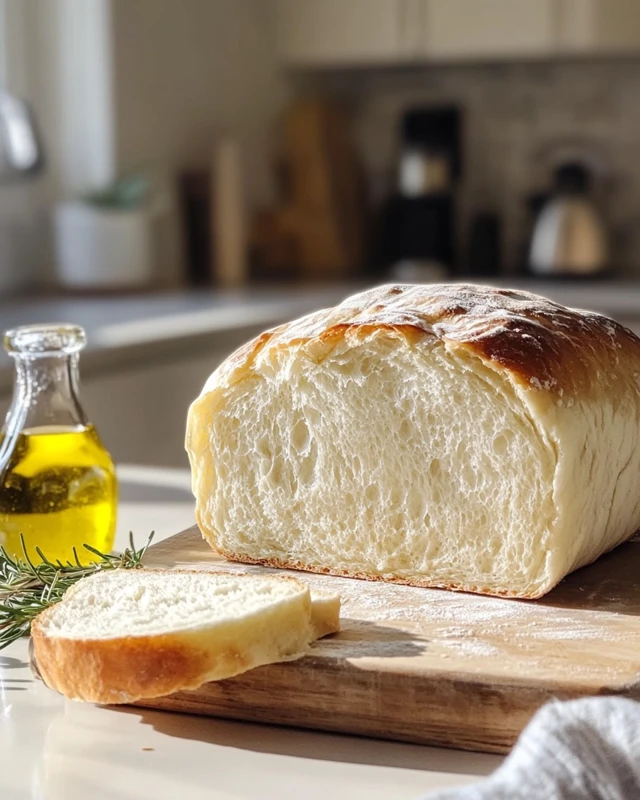
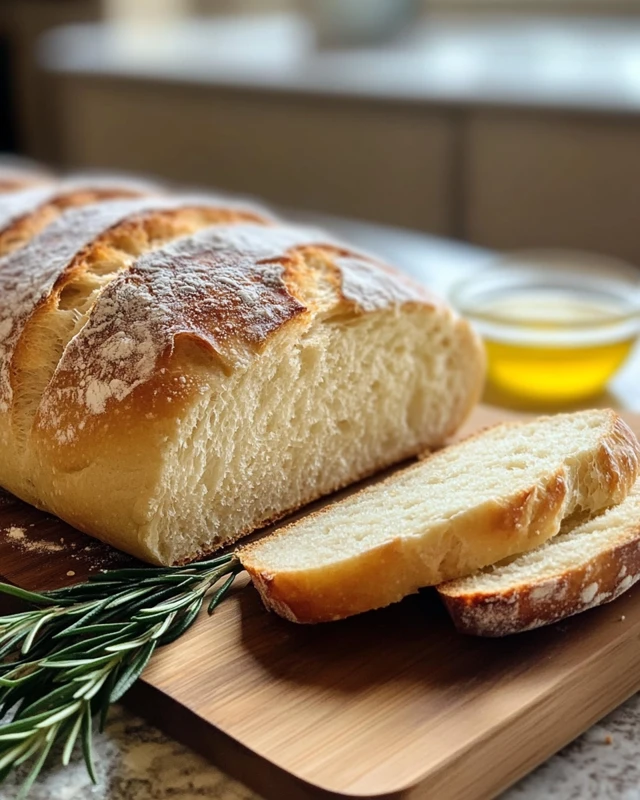
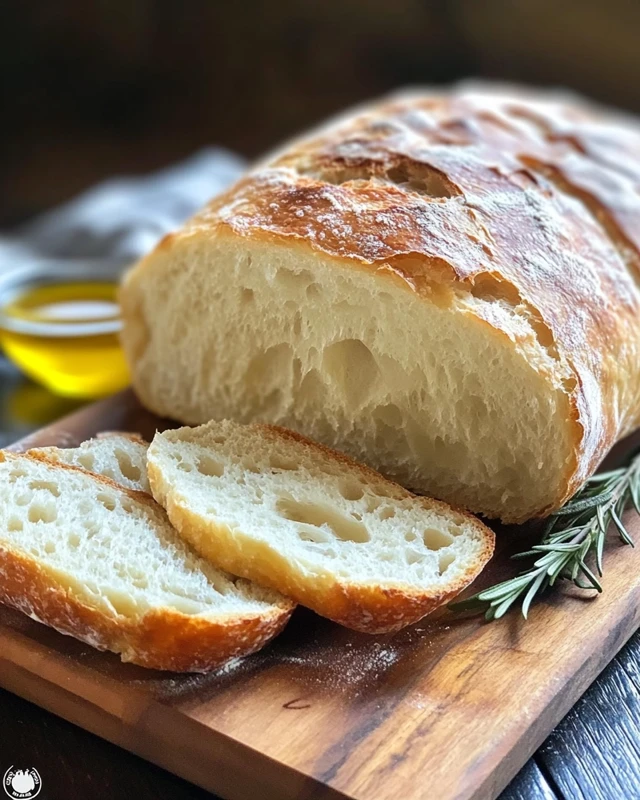
Imagine the joy of slicing into a warm loaf, the crust crackling under your knife, and the soft, fluffy interior waiting to be enjoyed. Whether you’re making a simple white bread or experimenting with whole grains, the process is both rewarding and therapeutic. It’s a chance to connect with your food and share it with loved ones.
Moreover, baking bread can be a fun activity for the whole family. Kids love to get involved, whether it’s mixing the dough or shaping the loaves. This hands-on experience not only teaches valuable skills but also creates lasting memories. As you knead the dough, you can share stories, laughter, and even a few kitchen mishaps!
In today’s fast-paced world, taking the time to bake bread can be a wonderful way to slow down and enjoy the moment. It’s a simple act that can bring joy and satisfaction. So, roll up your sleeves, gather your ingredients, and let’s dive into the wonderful world of homemade bread recipes!
Ingredients for Homemade Bread Recipes
Essential Ingredients for Basic Bread
To create a delicious loaf of homemade bread, you need a few essential ingredients. These ingredients work together to give your bread its structure, flavor, and texture. Here’s what you’ll need:
- All-Purpose Flour: This is the main ingredient. It provides the necessary gluten for the bread to rise and hold its shape.
- Instant Yeast: Yeast is what makes the bread rise. Instant yeast is convenient because it doesn’t need to be activated in water first.
- Salt: Salt enhances the flavor of the bread. It also helps control the fermentation process of the yeast.
- Sugar: Sugar adds a touch of sweetness and helps the yeast grow. It also contributes to the browning of the crust.
- Warm Water: Water is essential for hydrating the flour and activating the yeast. The right temperature (about 110°F) is crucial for optimal yeast activity.
These five ingredients are the backbone of any basic homemade bread recipe. With just these items, you can create a simple yet delightful loaf that will impress your family and friends.
Optional Ingredients for Flavor Variations
While the essential ingredients are key to making basic bread, you can also add optional ingredients to create unique flavors and textures. Here are some ideas:
- Olive Oil: Adding olive oil can make your bread softer and add a rich flavor. It’s especially great for Mediterranean-style breads.
- Herbs and Spices: Fresh or dried herbs like rosemary, thyme, or garlic powder can elevate the taste of your bread.
- Seeds and Nuts: Incorporating seeds like sesame, sunflower, or nuts can add crunch and nutrition to your loaf.
- Whole Wheat Flour: For a healthier option, you can substitute part of the all-purpose flour with whole wheat flour. This adds fiber and a nutty flavor.
- Sweeteners: Honey, maple syrup, or brown sugar can replace regular sugar for a different sweetness profile.
Feel free to experiment with these optional ingredients. They can transform your homemade bread into something truly special. The possibilities are endless, and each variation can bring a new taste to your table!
Step-by-Step Preparation of Homemade Bread Recipes
Step 1: Gather Your Ingredients
Before you start baking, it’s important to gather all your ingredients. This makes the process smoother and more enjoyable. Make sure you have:
- 4 cups all-purpose flour
- 2 teaspoons instant yeast
- 2 teaspoons salt
- 1 tablespoon sugar
- 1 1/2 cups warm water (about 110°F)
- 2 tablespoons olive oil (optional)
Having everything ready will help you focus on the fun part—baking!
Step 2: Mixing the Dough
Now it’s time to mix the dough. In a large mixing bowl, combine the flour, instant yeast, salt, and sugar. Stir these dry ingredients well. This ensures that the yeast and salt are evenly distributed. Next, gradually add the warm water. Use a wooden spoon or spatula to mix until a shaggy dough forms. If you’re using olive oil, add it at this stage for extra flavor.
Step 3: Kneading the Dough
Once your dough is mixed, it’s time to knead! Transfer the dough onto a lightly floured surface. Knead it for about 8-10 minutes. You want the dough to become smooth and elastic. If it feels too sticky, sprinkle a little more flour as needed. Kneading is a great workout for your hands and helps develop the gluten, which gives the bread its structure.
Step 4: First Rise
After kneading, place the dough in a lightly greased bowl. Cover it with a clean kitchen towel or plastic wrap. Let it rise in a warm place for about 1-2 hours. You’ll know it’s ready when it has doubled in size. This first rise is crucial for developing flavor and texture in your homemade bread.
Step 5: Shaping the Dough
Once the dough has risen, it’s time to shape it. Gently punch it down to release the air. Then, transfer it back to a floured surface. Shape the dough into a loaf or divide it into smaller portions for rolls. This is where you can get creative! You can make round rolls, baguettes, or even a braided loaf.
Step 6: Second Rise
Now that your dough is shaped, place it into a greased loaf pan or on a baking sheet lined with parchment paper. Cover it again and let it rise for another 30-45 minutes. This second rise allows the dough to puff up, making your bread light and airy.
Step 7: Preheating the Oven
While the dough is rising, preheat your oven to 375°F (190°C). This ensures that your bread will bake evenly and develop a beautiful golden crust. A hot oven is key to achieving that perfect loaf!
Step 8: Baking the Bread
Once the dough has risen, it’s time to bake! Place the dough in the preheated oven and bake for 25-30 minutes. You’ll know it’s done when the bread is golden brown and sounds hollow when tapped on the bottom. The smell will be irresistible!
Step 9: Cooling the Bread
After baking, remove the bread from the oven. Let it cool in the pan for about 10 minutes. Then, transfer it to a wire rack to cool completely before slicing. This cooling period helps the bread set and makes slicing easier. Enjoy the anticipation as you wait to taste your homemade creation!
Variations of Homemade Bread Recipes
Whole Wheat Bread Variations
Whole wheat bread is a nutritious alternative to traditional white bread. It’s packed with fiber and has a rich, nutty flavor. To make whole wheat bread, simply substitute part or all of the all-purpose flour with whole wheat flour. Here are some tips to enhance your whole wheat bread:
- Hydration: Whole wheat flour absorbs more water. You may need to increase the amount of warm water in your recipe by about 1/4 cup.
- Mixing Flours: For a lighter texture, try using a mix of all-purpose and whole wheat flour. A 50/50 ratio works well.
- Add Seeds: Incorporate seeds like flaxseed or chia seeds for added nutrition and crunch.
- Sweeteners: Adding honey or molasses can enhance the flavor and moisture of whole wheat bread.
These variations will give you a wholesome loaf that’s perfect for sandwiches or toast!
Gluten-Free Homemade Bread Recipes
For those with gluten sensitivities, gluten-free bread is a fantastic option. Making gluten-free bread requires special flour blends. Here’s how to create a delicious gluten-free loaf:
- Gluten-Free Flour Blend: Use a mix of gluten-free flours like almond flour, rice flour, and tapioca flour. Many stores sell pre-made gluten-free flour blends.
- Xanthan Gum: This ingredient helps mimic the elasticity of gluten. Add about 1 teaspoon per cup of gluten-free flour.
- Moisture: Gluten-free bread can be dry. Adding ingredients like yogurt, applesauce, or extra oil can help keep it moist.
- Longer Rising Time: Gluten-free dough may need a longer rising time. Be patient and let it rise until it’s puffy.
With these tips, you can enjoy a tasty gluten-free homemade bread that everyone will love!
Sweet Bread Variations
Sweet breads are a delightful treat that can be enjoyed for breakfast or dessert. They often include sugar, spices, and fruits. Here are some ideas for sweet bread variations:
- Cinnamon Raisin Bread: Add cinnamon and raisins to your dough for a warm, sweet flavor. Swirl in a cinnamon-sugar mixture before shaping.
- Banana Bread: Use ripe bananas in your dough for a moist and flavorful loaf. You can also add nuts or chocolate chips for extra texture.
- Chocolate Chip Bread: Fold in chocolate chips to your dough for a sweet, indulgent treat. This bread is perfect for dessert or a special breakfast.
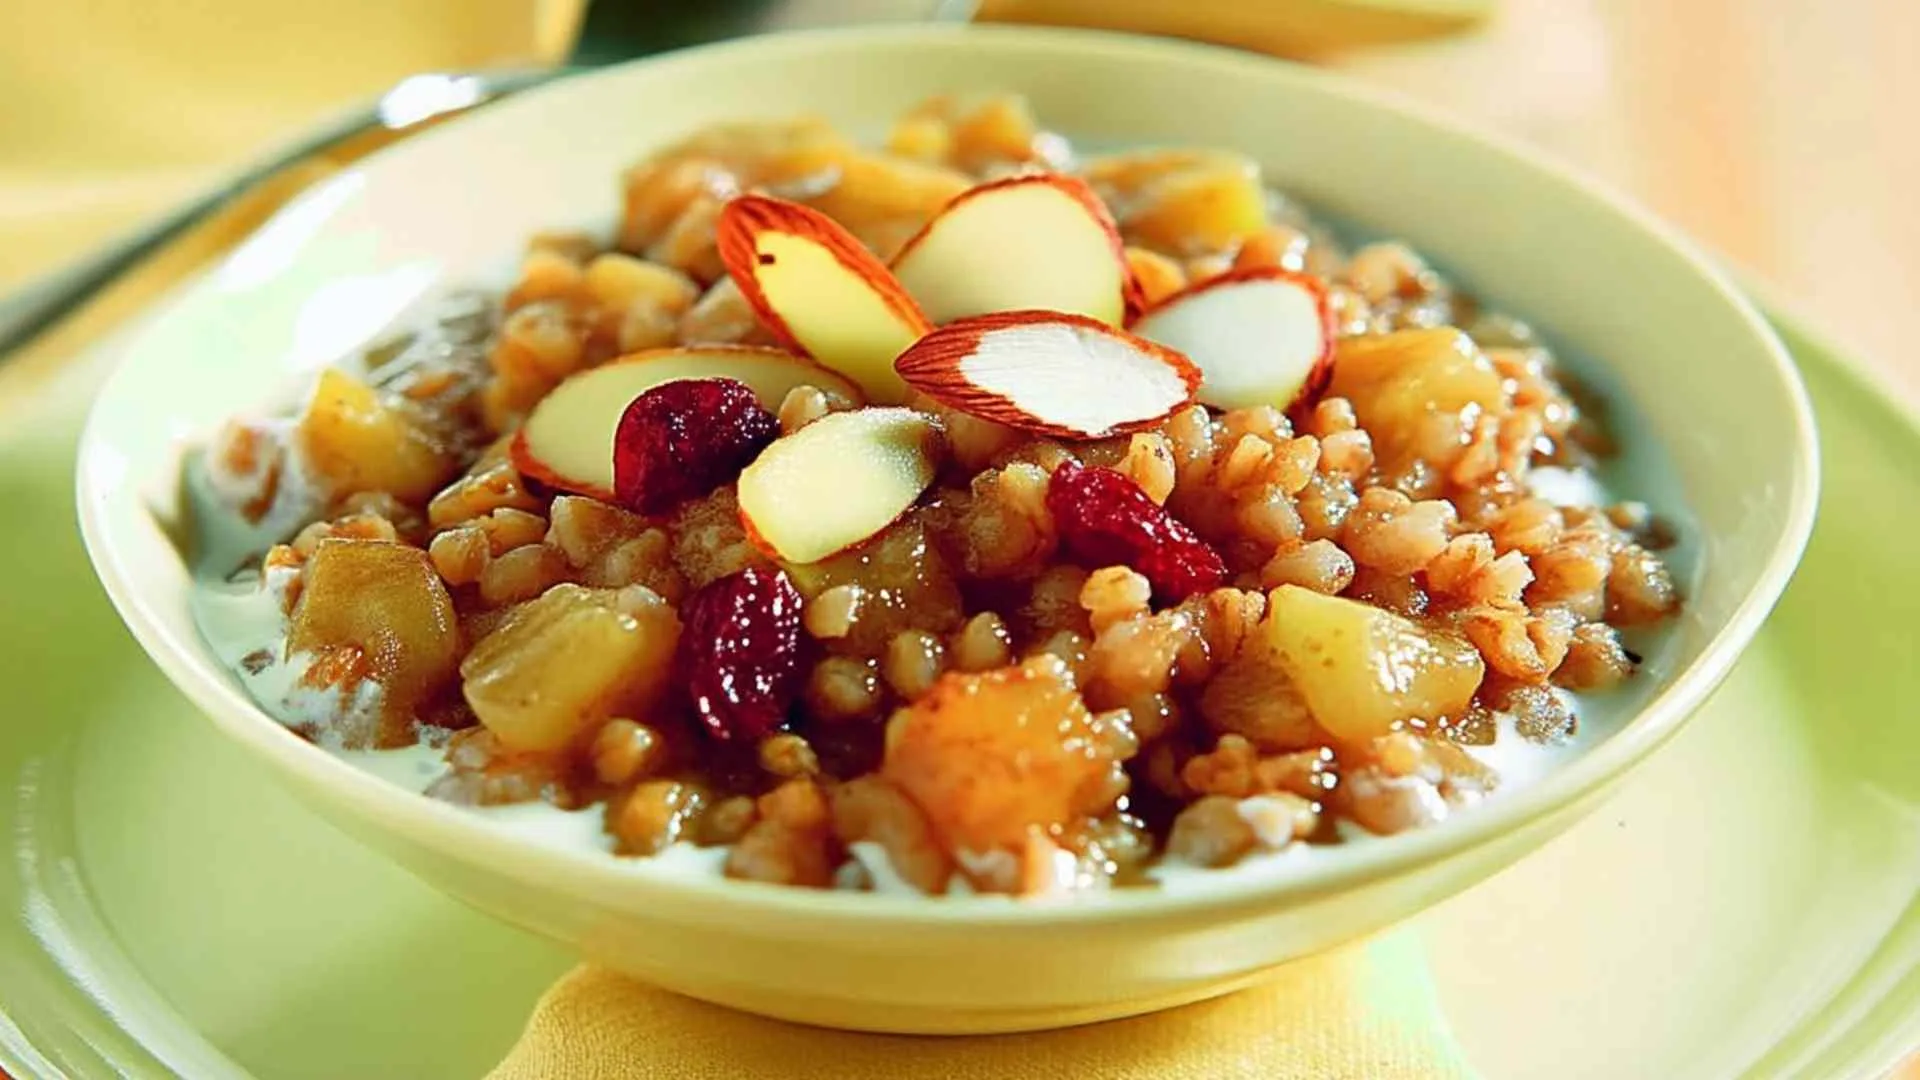
- Fruit-Infused Bread: Incorporate dried fruits like cranberries or apricots for a burst of flavor. You can also add zest from citrus fruits for a refreshing twist.
These sweet bread variations are sure to please your taste buds and make any meal feel special!
Cooking Note for Homemade Bread Recipes
Baking homemade bread is a delightful journey, but it does come with a few important notes to ensure your success. Here are some key points to keep in mind as you embark on your bread-making adventure:
- Ingredient Temperature: Always use warm water around 110°F. This temperature activates the yeast effectively, leading to a good rise. Too hot water can kill the yeast, while cold water may not activate it properly.
- Measuring Flour: When measuring flour, spoon it into your measuring cup and level it off with a knife. Avoid scooping directly from the bag, as this can pack the flour and lead to using too much.
- Kneading Technique: Kneading is essential for developing gluten. Use the heel of your hand to push the dough away from you, then fold it back over itself. Repeat this motion to achieve a smooth and elastic dough.
- Rising Environment: Yeast loves warmth! Find a cozy spot in your kitchen for the dough to rise. If your kitchen is cool, you can place the bowl in an oven that’s turned off but has the light on. This creates a warm environment for the dough.
- Don’t Rush the Process: Allow the dough to rise fully during both the first and second rises. Patience is key! Rushing can lead to dense bread that lacks the desired texture.
- Cooling Time: Let the bread cool completely before slicing. This helps the crumb set properly and prevents it from becoming gummy. The aroma will be tempting, but waiting is worth it!
By keeping these cooking notes in mind, you’ll be well on your way to creating delicious homemade bread. Each loaf will be a testament to your effort and care, bringing joy to your table!
Serving Suggestions for Homemade Bread Recipes
Pairing with Spreads and Dips
Homemade bread is not just a meal on its own; it’s a perfect companion for various spreads and dips. The warm, fresh bread can elevate any dish, making it even more enjoyable. Here are some delightful pairings to consider:
- Butter: A classic choice! Spread a pat of creamy butter on warm bread for a simple yet satisfying treat. You can also try flavored butters, like garlic or herb butter, for an extra kick.
- Jam or Jelly: Sweet spreads like strawberry jam or raspberry jelly add a fruity touch. They’re perfect for breakfast or a light snack.
- Hummus: This creamy dip made from chickpeas pairs wonderfully with bread. It’s healthy and adds a savory flavor that complements the bread’s texture.
- Cheese: Soft cheeses like cream cheese or goat cheese spread easily on bread. You can also enjoy it with slices of hard cheese like cheddar or gouda.
- Olive Oil and Balsamic Vinegar: For a Mediterranean twist, dip your bread in a mix of olive oil and balsamic vinegar. This combination is both flavorful and healthy.
These pairings can turn your homemade bread into a delightful appetizer or snack. Feel free to mix and match to find your favorite combinations!
Using Bread in Meals
Homemade bread can also play a starring role in your meals. Here are some creative ways to incorporate it into your dining experience:
- Sandwiches: Use your fresh bread to create delicious sandwiches. Whether it’s a classic turkey and cheese or a veggie delight, the bread adds a hearty touch.
- Toast: Toast slices of your homemade bread for breakfast. Top with avocado, poached eggs, or your favorite spreads for a nutritious start to your day.
- Croutons: Transform stale bread into croutons! Cut the bread into cubes, toss with olive oil and seasonings, then bake until crispy. They’re perfect for salads or soups.
- French Toast: Use your homemade bread to make a delightful French toast. Dip slices in a mixture of eggs and milk, then cook until golden brown. Serve with syrup or fresh fruit.
- Bruschetta: Top toasted slices of bread with diced tomatoes, basil, and a drizzle of olive oil for a fresh appetizer. This Italian classic is sure to impress!
With these serving suggestions, your homemade bread can shine in various ways. Whether enjoyed alone or as part of a meal, it’s sure to bring joy to your table!
Tips for Perfect Homemade Bread Recipes
Common Mistakes to Avoid
Baking homemade bread can be a rewarding experience, but it’s easy to make mistakes along the way. Here are some common pitfalls to watch out for:
- Using Cold Ingredients: Always use warm water and room temperature ingredients. Cold ingredients can slow down yeast activity, leading to a dense loaf.
- Not Measuring Accurately: Baking is a science! Use proper measuring cups and spoons. Too much flour can make your bread dry, while too little can lead to a sticky mess.
- Skipping the Kneading: Kneading is crucial for developing gluten. Don’t skip this step! It helps create the structure needed for a good rise.
- Rushing the Rising Time: Allow your dough to rise fully. If you rush this process, your bread may turn out flat and dense.
- Not Preheating the Oven: Always preheat your oven before baking. A hot oven is essential for achieving a nice crust and proper rise.
- Cutting Too Soon: Resist the urge to slice into your bread right after baking. Let it cool completely to set the crumb and avoid a gummy texture.
By avoiding these common mistakes, you’ll be on your way to baking perfect homemade bread every time. Remember, practice makes perfect, so don’t be discouraged if your first loaf isn’t flawless!
Storage Tips for Freshness
Once you’ve baked your delicious homemade bread, you’ll want to keep it fresh for as long as possible. Here are some effective storage tips:
- Cool Completely: Always let your bread cool completely on a wire rack before storing. This prevents moisture buildup, which can lead to mold.
- Wrap Properly: Wrap your bread in plastic wrap or aluminum foil. This helps keep it fresh and prevents it from drying out.
- Use a Bread Box: If you have one, a bread box is a great way to store your bread. It allows for airflow while keeping the bread protected.
- Freeze for Long-Term Storage: If you can’t finish your bread within a few days, consider freezing it. Slice the bread before freezing for easy access. Wrap it tightly in plastic wrap and place it in a freezer bag.
- Thawing: To thaw frozen bread, simply leave it at room temperature for a few hours or pop it in the toaster for a quick warm-up.
By following these storage tips, you can enjoy your homemade bread for days to come. Fresh bread is a treat, and with the right care, it can stay delicious and enjoyable!
Breakdown of Time for Homemade Bread Recipes
Prep Time
Preparing homemade bread is a straightforward process. The prep time for this delightful recipe is about 20 minutes. During this time, you will gather your ingredients, mix the dough, and knead it until it reaches the right consistency. This initial stage is crucial as it sets the foundation for your bread. So, take your time and enjoy the process!
Cooking Time
Once your dough has risen and is ready to bake, the cooking time is approximately 25-30 minutes. This is when the magic happens! Your bread will transform from a simple dough into a golden-brown loaf. The aroma that fills your kitchen during this time is simply irresistible. Make sure to keep an eye on it as it bakes to achieve that perfect crust!
Total Time
In total, the entire process of making homemade bread takes about 2 hours and 50 minutes. This includes the prep time, the two rising periods, and the baking time. While it may seem like a lengthy process, remember that much of this time is hands-off. You can use the rising periods to clean up, prepare other dishes, or simply relax. The reward of enjoying fresh, warm bread is well worth the wait!
Nutritional Information for Homemade Bread Recipes
Calories per Serving
When it comes to enjoying homemade bread, understanding its nutritional value is important. A typical serving of homemade bread, which is about one slice, contains approximately 80-100 calories. This can vary based on the specific ingredients used and any added flavors. For instance, if you add olive oil or sugar, the calorie count may increase slightly. However, homemade bread is generally a wholesome choice compared to store-bought options, which often contain preservatives and additives.
Protein Content
Protein is an essential nutrient, and homemade bread can contribute to your daily intake. Each slice of homemade bread typically contains around 2-4 grams of protein. The protein content can vary depending on the type of flour used. For example, using whole wheat flour can increase the protein level slightly. Including seeds or nuts in your bread can also boost its protein content, making it a more nutritious option.
Sodium Levels
Sodium is another important factor to consider in your diet. A slice of homemade bread usually contains about 150-200 milligrams of sodium. This amount can be adjusted by controlling the salt you add during the mixing process. If you’re watching your sodium intake, you can reduce the salt in your recipe without significantly affecting the bread’s texture. Just remember that salt does enhance flavor, so find a balance that works for you!
Overall, homemade bread can be a healthy addition to your meals. By knowing the nutritional information, you can enjoy your delicious creation while keeping track of your dietary needs. Happy baking!
FAQs about Homemade Bread Recipes
What is the best flour for homemade bread?
The best flour for homemade bread is all-purpose flour. It has a good balance of protein and gluten, which helps the bread rise and develop a nice texture. However, if you want a healthier option, whole wheat flour is also great. It adds more fiber and nutrients. You can even mix both flours for a delightful blend. Experimenting with different flours can lead to unique flavors and textures in your bread!
How do I know when my bread is done baking?
Knowing when your bread is done baking is key to achieving that perfect loaf. One simple method is to tap the bottom of the loaf. If it sounds hollow, it’s ready! Additionally, the bread should be golden brown on top. You can also use a thermometer; the internal temperature should reach about 190°F (88°C). With these tips, you’ll be able to tell when your homemade bread is perfectly baked!
Can I freeze homemade bread?
Yes, you can freeze homemade bread! Freezing is a great way to preserve your delicious creation for later. To freeze, slice the bread and wrap it tightly in plastic wrap or aluminum foil. Place it in a freezer bag to prevent freezer burn. When you’re ready to enjoy it, simply thaw it at room temperature or pop it in the toaster. This way, you can savor your homemade bread even weeks after baking!
How long does homemade bread last?
Homemade bread typically lasts about 3-5 days at room temperature when stored properly. To keep it fresh, wrap it in plastic wrap or store it in a bread box. If you want to extend its shelf life, consider freezing it. Frozen bread can last for up to 3 months. Just remember to let it cool completely before storing. With these tips, you can enjoy your homemade bread for days to come!
Conclusion on Homemade Bread Recipes
In conclusion, baking homemade bread is a rewarding and enjoyable experience that anyone can embrace. With just a few simple ingredients and some patience, you can create a delicious loaf that fills your home with warmth and delightful aromas. The process of making bread allows you to connect with your food, experiment with flavors, and share something special with your loved ones.
Whether you choose to stick with the classic recipe or explore variations like whole wheat, gluten-free, or sweet breads, the possibilities are endless. Each loaf you bake can be a unique creation, reflecting your personal taste and creativity. Plus, the joy of slicing into a freshly baked loaf is unmatched!
Remember, the key to perfect homemade bread lies in understanding the ingredients, following the steps carefully, and allowing the dough to rise properly. Don’t be afraid to make mistakes; they are part of the learning process. With practice, you’ll become more confident in your baking skills and may even develop your own signature bread recipe.
So, gather your ingredients, roll up your sleeves, and start your baking adventure today. Enjoy the process, savor the results, and share your homemade bread with family and friends. It’s not just about the bread; it’s about the love and joy that comes with creating something from scratch. Happy baking!

Homemade Bread
Ingredients
Equipment
Method
-
Gather all your ingredients to ensure a smooth baking process.
-
In a large mixing bowl, combine flour, instant yeast, salt, and sugar. Stir well to distribute evenly.
-
Gradually add warm water to the dry ingredients, mixing with a wooden spoon until a shaggy dough forms. If using, add olive oil at this stage.
-
Transfer the dough to a lightly floured surface and knead for about 8-10 minutes until smooth and elastic.
-
Place the kneaded dough in a lightly greased bowl, cover with a kitchen towel, and let it rise in a warm place for 1-2 hours until doubled in size.
-
Once risen, punch down the dough to release air, then shape it into a loaf or rolls.
-
Place the shaped dough into a greased loaf pan or on a baking sheet. Cover and let rise for another 30-45 minutes.
-
Preheat the oven to 375°F (190°C).
-
Bake the bread in the preheated oven for 25-30 minutes until golden brown and sounds hollow when tapped.
-
Remove the bread from the oven and let it cool in the pan for 10 minutes before transferring to a wire rack to cool completely.