Peri Peri Chicken Portuguese Style transforms simple chicken pieces into a fiery, flavor-packed meal that’ll have everyone asking for seconds. I discovered this recipe years ago when a neighbor from Lisbon shared her family’s marinade secret, and it’s been a staple at our summer cookouts ever since.
There’s something magical about watching chicken sizzle on the grill, that Peri Peri marinade caramelizing into those beautiful char marks while the aroma of garlic, paprika, and chili fills the backyard. My grandkids call it “Nonna’s fire chicken,” and honestly, I love seeing their eyes light up when they take that first spicy-sweet bite. The best part? This recipe uses ingredients you probably already have in your pantry, and the marinade does all the heavy lifting while you go about your day. Whether you’re firing up the grill for a weekend barbecue or roasting in the oven on a Tuesday night, this Portuguese-inspired dish brings bold, authentic flavors without any fuss. Time to get our aprons on.
What Makes This Peri Peri Chicken So Special
I’ve been making chicken recipes for nearly fifty years, but Peri Peri Chicken Portuguese Style holds a special place in my recipe box because it delivers restaurant-quality results with honest, straightforward cooking. The fiery marinade infuses every bite with layers of flavor that develop beautifully whether you’re grilling outdoors or roasting in your kitchen.
Here’s what makes this recipe worth trying:
- Uses pantry staples – olive oil, garlic, paprika, and lemon juice are ingredients most home cooks already have on hand
- Flexible cooking methods – grill it for smoky char, roast it for easy weeknight meals, or pan-sear when weather won’t cooperate
- Make-ahead friendly – the overnight marinade means dinner prep is practically done before you even start cooking
- Feeds a crowd – one whole chicken serves 4-6 people generously, perfect for family gatherings
- Adaptable heat level – easily adjust the spice to suit everyone from my mild-mannered husband to my heat-loving son
- Leftovers shine – this chicken tastes even better the next day in sandwiches, salads, or wraps
After making this dozens of times, I can promise you’ll love how the bright lemon juice balances the smoky paprika and that satisfying kick from the chili flakes. It’s become our go-to recipe when we want something exciting without complicated techniques.

Ingredient Spotlight
Whole Chicken, Cut Into Pieces: Using bone-in chicken pieces keeps the meat incredibly juicy during cooking, and I always ask my butcher to cut a whole chicken into 8 pieces for the best value and flavor.
Olive Oil: This creates the base of our marinade and helps the spices cling to the chicken while keeping everything moist during cooking. I prefer using regular olive oil rather than extra virgin since we’re cooking at high heat.
Fresh Garlic: Minced garlic cloves deliver that essential pungent, savory backbone to Peri Peri Chicken Portuguese Style, and I always use fresh rather than jarred for the brightest flavor.
Lemon Juice: Freshly squeezed lemon juice adds brightness and helps tenderize the chicken while balancing the heat. Betty’s tip is to roll your lemons on the counter before juicing to get every last drop.
Paprika: This provides the signature smoky-sweet flavor and that gorgeous red color we associate with Portuguese cooking. I use regular paprika, but smoked paprika adds an extra layer of depth if you have it.
Dried Oregano: The earthy, slightly bitter notes of oregano are traditional in Portuguese cuisine and complement the other spices beautifully.
Chili Flakes: These bring the heat that defines Peri Peri chicken, and in my kitchen, I start with the tablespoon called for, then add more to taste based on who’s joining us for dinner.
Salt and Pepper: Good-quality sea salt and freshly cracked black pepper enhance all the other flavors and help the marinade penetrate deep into the meat.
How to Make Peri Peri Chicken Portuguese Style
Step 1. I’ve learned that combining your marinade ingredients first ensures even distribution of flavors, so whisk together the olive oil, minced garlic, lemon juice, paprika, oregano, chili flakes, salt, and pepper in a bowl until everything is well blended.
Step 2. Betty always pierces her chicken pieces several times with a fork before marinating because it allows the Peri Peri marinade to penetrate deeper into the meat. Place your chicken in a large resealable bag and pour the marinade over, squeezing out excess air and massaging to coat every piece.
Step 3. The key I discovered is giving this at least 2 hours in the refrigerator, though overnight marinating delivers the boldest flavor – just flip the bag once or twice if you remember.
Step 4. After years of making this, I preheat my grill or oven to 400°F (medium-high heat) and let it come to full temperature before adding the chicken so you get those beautiful char marks and crispy skin.
Step 5. Remove the chicken from the marinade, letting excess drip off, then grill for 35-45 minutes or roast for 45-50 minutes, turning occasionally and basting with reserved marinade (only during the first half of cooking) until the internal temperature reaches 165°F in the thickest part.
Step 6. I’ve found that letting the chicken rest for 5 minutes before serving keeps all those flavorful juices locked inside instead of running onto your cutting board.
Step 7. Betty’s favorite touch is garnishing with fresh parsley or cilantro and extra lemon wedges because that pop of green and citrus makes the presentation shine and adds freshness to each bite.
Keeping This Peri Peri Chicken Fresh
I typically store leftover Peri Peri Chicken Portuguese Style in an airtight container in the refrigerator where it stays fresh for up to 3 days. The flavors actually deepen overnight, making those leftovers absolutely delicious for next-day lunches. Betty’s storage method works well because keeping the chicken pieces whole prevents them from drying out – just slice or shred right before eating.
For longer storage, this chicken freezes beautifully for up to 3 months. I let the cooked chicken cool completely, then wrap individual pieces in plastic wrap before placing them in a freezer-safe container or heavy-duty freezer bag. Through trial and error, I learned that removing as much air as possible prevents freezer burn and keeps the chicken tasting fresh. You can even freeze the raw marinated chicken, which makes for an incredibly convenient meal – just thaw in the refrigerator overnight and cook as directed.
For the best texture, I reheat by placing the chicken in a 350°F oven for 15-20 minutes until warmed through. This gentle reheating method keeps the meat moist and revives that crispy skin. The microwave works in a pinch – about 2 minutes on 50% power – but you’ll lose some of that delicious crispness. My family prefers when I slice cold leftovers into strips for sandwiches or salads rather than reheating, especially during summer months.

Perfect Partners for Peri Peri Chicken
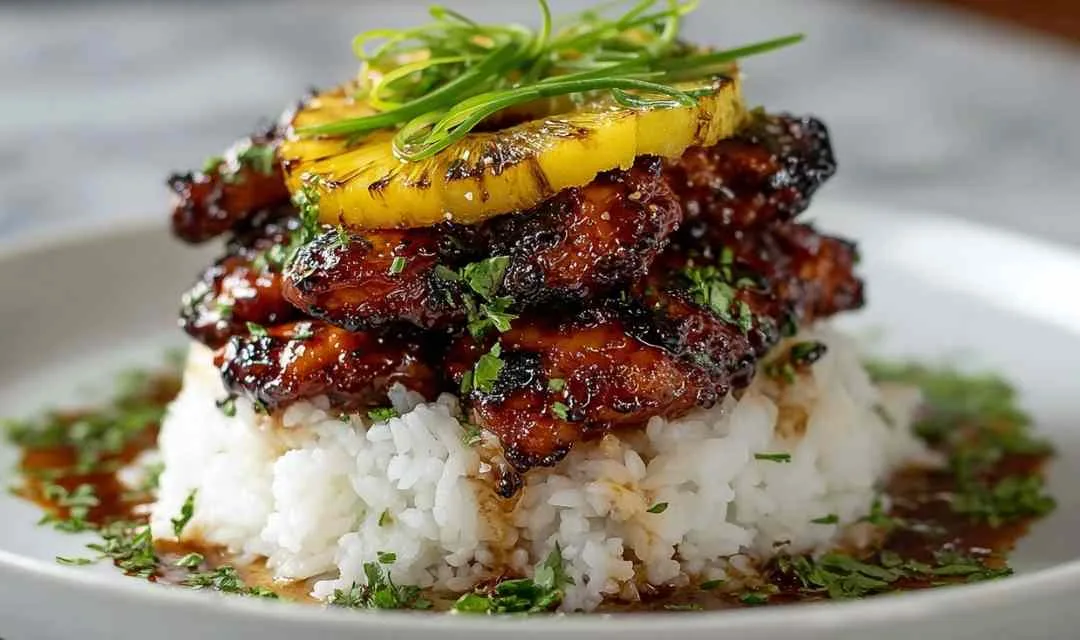
- Fluffy white rice or couscous – These mild grains soak up the spicy juices from the chicken and provide a cooling balance to the heat, making every bite perfect.
- Grilled vegetables – Zucchini, bell peppers, and red onions pick up smoky char that complements the Peri Peri flavors while adding color and nutrition to your plate. Try pairing with my Healthy Chicken Breast with Zucchini and Squash for vegetable inspiration.
- Simple green salad with lemon vinaigrette – The crisp lettuce and bright citrus dressing cut through the richness of the chicken and refresh your palate between bites.
- Creamy coleslaw – Betty’s favorite pairing because the cool, crunchy slaw provides textural contrast and helps tame the spice for those with more delicate palates.
- Roasted sweet potato wedges – The natural sweetness of roasted sweet potatoes creates a delightful contrast with the spicy chicken. If you love sweet potato pairings, check out my Sausage and Sweet Potatoes with Honey Garlic Sauce for another winning combination.
- Warm pita bread or crusty rolls – Perfect for sopping up every last drop of those flavorful pan juices, and you can even make wraps with leftover chicken the next day, similar to my Cheesy Garlic Chicken Wraps.
FAQs
I recommend boneless thighs or breasts work wonderfully with the Peri Peri marinade, though you’ll need to reduce the cooking time to about 25-30 minutes since they cook faster than bone-in pieces.
To prevent this from being too hot, start with just 1 teaspoon of chili flakes instead of the full tablespoon, and you can always pass extra hot sauce at the table for those who want more heat.
Many home cooks find success with marinating the chicken up to 24 hours in advance, and you can even cook it completely the day before – it reheats beautifully and saves precious time on busy evenings.

Peri Peri Chicken Portuguese Style
Ingredients
Equipment
Method
- Pierce chicken pieces several times with a fork. Place in a large resealable bag and pour marinade over chicken, ensuring all pieces are evenly coated. Refrigerate for at least 2 hours, preferably overnight.
- Preheat grill to medium-high heat (400°F) or preheat oven to 400°F.
- Remove chicken from marinade, letting excess drip off. Reserve some marinade for basting if desired.
- Grill chicken for 35-45 minutes, turning occasionally and basting with marinade during the first half of cooking only, until internal temperature reaches 165°F. If roasting, place on a wire rack over a baking sheet and roast for 45-50 minutes.
- Let chicken rest for 5 minutes before serving. Garnish with fresh herbs and lemon wedges.