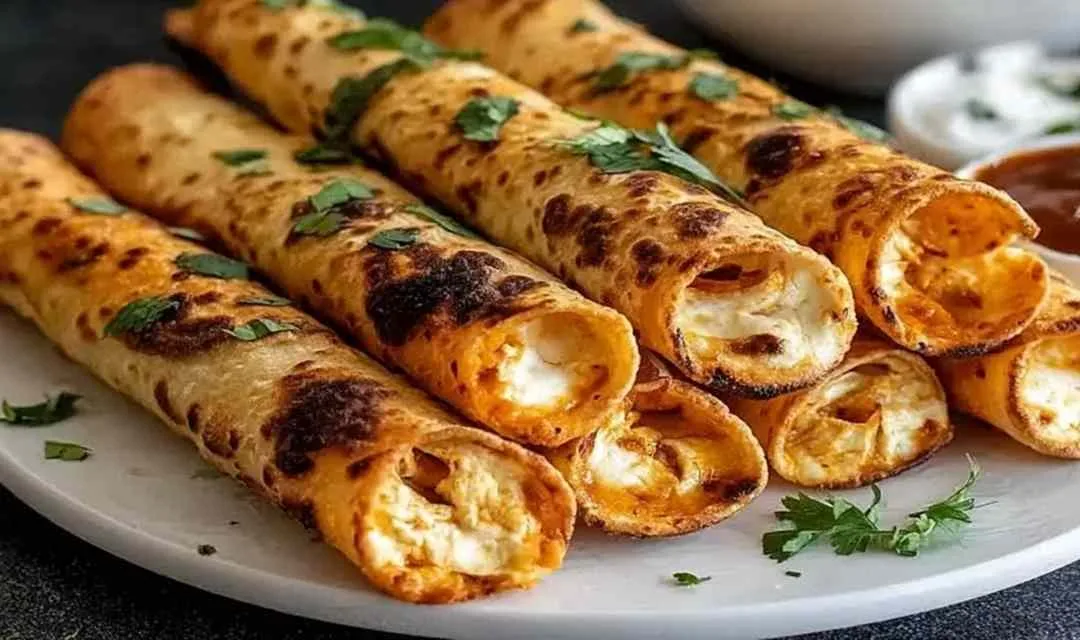
Crispy Chicken Taquitos are the answer to busy weeknights when you want something satisfying without the fuss. I’ve been making these golden rolled beauties for years, and they never disappoint – crispy on the outside, creamy and flavorful inside, with none of the mess of deep frying.
There’s something magical about the sound of a perfectly baked taquito – that gentle crackle when you bite through the golden shell into the warm, spiced chicken filling. I remember the first time I made these for a Sunday gathering at the farm. My grandkids were skeptical about “Mom’s new recipe,” but after one bite, they were reaching for seconds before I’d even finished plating the first batch. Now, every time they visit, they ask if we’re having “Nonna’s crunchy chicken rolls.” The secret? A creamy filling that stays moist during baking and just enough oil to get that restaurant-quality crispiness. Ready to fill your kitchen with that irresistible aroma?
What Makes These Crispy Chicken Taquitos So Special
These taquitos have earned their spot in my regular rotation, and for good reason. They’re the kind of recipe that works as hard as you do – quick enough for Tuesday dinner but impressive enough for game day appetizers.
What you’ll discover:
- Uses simple pantry staples and rotisserie chicken for minimal prep
- Comes together in just 35 minutes from start to finish
- Delivers perfectly crispy results without deep frying or complicated techniques
- Adapts easily to make-ahead needs with freezer-friendly assembly
- Creates that perfect combination of crunchy exterior and creamy, flavorful filling
- Works beautifully in the oven or air fryer
I’ve made these countless ways over the years, and I appreciate how forgiving they are. Forgot to take something out for dinner? Grab a rotisserie chicken. Need appetizers for unexpected guests? These can go from freezer to table in under 30 minutes.
Ingredient Spotlight
Cooked shredded chicken forms the hearty base of your filling, and I always choose rotisserie chicken for its convenience and built-in seasoning that adds extra depth.
Cream cheese creates that signature creamy texture that holds the filling together and keeps everything moist during baking – just remember to let it soften at room temperature for 30 minutes so it mixes smoothly.
Shredded cheddar or Mexican blend cheese adds a melty richness and helps bind the filling while contributing a savory flavor that complements the spices perfectly.
Salsa brings moisture and a tangy kick to the filling, and in my kitchen, I prefer medium heat to give the taquitos just enough personality without overwhelming younger eaters.
Garlic powder, chili powder, and cumin create that classic Mexican-inspired spice blend that makes these taste like you spent hours in the kitchen when you really didn’t.
Small flour or corn tortillas provide the crispy shell, and I’ve learned that 6-inch tortillas are the ideal size for easy rolling and perfect portion control – just warm them first to prevent cracking.
Cooking spray or olive oil is what transforms ordinary baked tortillas into golden, crispy shells with that satisfying crunch we’re after.
How to Make Crispy Chicken Taquitos
Step 1. I always start by preheating my oven to 425°F and lining a baking sheet with parchment paper – this temperature is the sweet spot for achieving crispy exteriors without drying out the filling.
Step 2. Betty’s tip: Mix your shredded chicken, softened cream cheese, shredded cheese, salsa, and all the spices in a large bowl with a fork until everything is well combined and creamy with no lumps – the mixture should hold together easily when scooped.
Step 3. I’ve found that warming tortillas in the microwave for 20-30 seconds wrapped in a damp paper towel makes them pliable and prevents cracking, and I work with just 2-3 at a time so they stay warm throughout rolling.
Step 4. Place 2-3 tablespoons of filling along one edge of each tortilla, leaving about half an inch from the edge, then roll tightly around the filling without tearing – snug rolls create the best texture.
Step 5. After years of making these, I learned to always place each taquito seam-side down on the baking sheet, then lightly brush the tops with oil or spray them with cooking spray for that golden finish.
Step 6. Bake for 15-20 minutes until they’re deeply golden brown and making that slight crackling sound – for extra crispiness, I broil them for 1-2 minutes at the end, watching closely so they don’t burn.
Step 7. The key I discovered is letting them cool for 3-4 minutes before serving because the filling stays extremely hot, and this brief rest helps the filling set up slightly for easier eating.
Keeping These Taquitos Fresh
I typically store assembled uncooked taquitos in an airtight container in the refrigerator for up to 24 hours before baking, which makes them perfect for meal prep. The cream cheese filling stays fresh and flavorful, and having them ready to pop in the oven on busy evenings is a game-changer.
Betty’s freezing method works beautifully with these Crispy Chicken Taquitos. I arrange the assembled, unbaked taquitos on a baking sheet, freeze them until solid (about 2 hours), then transfer them to a freezer bag where they’ll keep for up to 2 months. Label the bag with the date and baking instructions – your future self will thank you.
For the best texture, I reheat leftover baked taquitos in a 375°F oven for 8-10 minutes until warmed through and crispy again. The microwave works in a pinch, but you’ll lose that satisfying crunch. If baking from frozen, increase the temperature to 425°F and bake for 20-25 minutes without thawing – they come out just as crispy and delicious.
Perfect Partners for Crispy Chicken Taquitos
- Fresh guacamole or sliced avocado provides a cool, creamy contrast to the warm, crispy taquitos and adds healthy fats that balance the richness of the cheese filling.
- Mexican rice or cilantro-lime rice creates a complete meal and soaks up any extra sour cream or salsa – I love how the fluffy rice complements the crunchy texture.
- Simple black beans or refried beans add protein and fiber while keeping things authentically Mexican, and they’re easy to season with cumin and garlic powder.
- Crisp romaine lettuce salad with diced tomatoes and a lime vinaigrette cuts through the richness and adds a fresh, bright element to the plate.
- Corn salad or elote-style street corn brings sweetness and char that plays beautifully against the savory spiced chicken – it’s my family’s favorite pairing during summer months.
- Tortilla chips with fresh salsa rounds out an appetizer spread and gives guests something to munch on while the taquitos are baking.
Storage and Reheating Tips
Refrigerator Storage: Store assembled uncooked taquitos in an airtight container for up to 24 hours before baking. This makes them perfect for meal prep when you want dinner ready to go. The cream cheese filling holds up beautifully in the fridge without separating.
Freezing Guidelines: I’ve had great success freezing these for up to 2 months. Arrange unbaked taquitos on a baking sheet, freeze until solid, then transfer to a freezer bag. Label with the date and baking instructions. You can bake them straight from frozen at 425°F for 20-25 minutes without thawing.
Reheating Methods: For leftover baked taquitos, reheat in a 375°F oven for 8-10 minutes to restore that crispy texture. The microwave works in a pinch but won’t give you the same satisfying crunch. I always avoid microwaving when possible because the texture just isn’t the same..
Frequently Asked Questions
Yes, corn tortillas work well for crispy chicken taquitos. Warm them slightly longer (30 to 40 seconds) as they need more heat to become pliable. Corn tortillas provide a more authentic texture and are naturally gluten-free.
Tortillas crack when they’re too cold or not warmed enough. Make sure to microwave them in a damp paper towel for at least 20 to 30 seconds. Work quickly while they’re warm, and only prepare 2 to 3 at a time.
Yes, you can deep fry at 350°F for 2 to 3 minutes until golden brown. However, baking produces similarly crispy results with less oil and easier cleanup.

Crispy Chicken Taquitos
Ingredients
Equipment
Method
-
Preheat oven to 425°F (220°C) and line a baking sheet with parchment paper or lightly grease it.
-
In a large mixing bowl, combine shredded chicken, softened cream cheese, shredded cheese, salsa, garlic powder, chili powder, cumin, salt, and pepper. Mix with a fork until well combined and creamy.
-
Warm tortillas in the microwave for 20-30 seconds wrapped in a damp paper towel to make them pliable. Work with 2-3 tortillas at a time so they stay warm.
-
Place 2-3 tablespoons of filling along one edge of each tortilla, leaving about half an inch from the edge. Roll tightly around the filling.
-
Place each taquito seam-side down on the prepared baking sheet. Lightly brush tops with oil or spray with cooking spray.
-
Bake for 15-20 minutes until golden brown and crispy. For extra crispiness, broil for 1-2 minutes at the end, watching closely.
-
Let cool for 3-4 minutes before serving. Serve warm with sour cream, guacamole, or your favorite toppings.


