Heart-Shaped Ribbon Cake
Welcome to the delightful world of the Heart-Shaped Ribbon Cake! This cake is not just a treat for your taste buds; it’s a feast for the eyes too. With its vibrant colors and beautiful layers, it’s perfect for any occasion. Whether you’re celebrating a birthday, an anniversary, or simply want to brighten someone’s day, this cake is sure to impress.

What Makes Heart-Shaped Ribbon Cake Special?
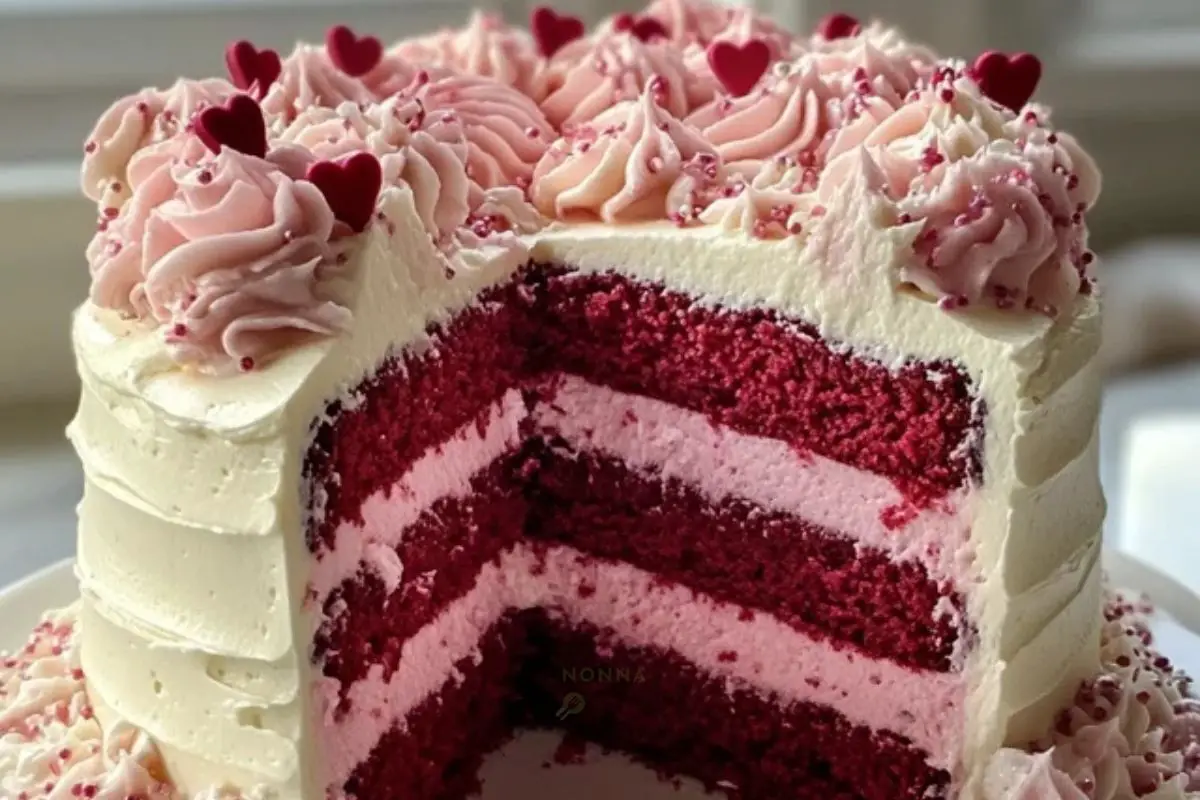
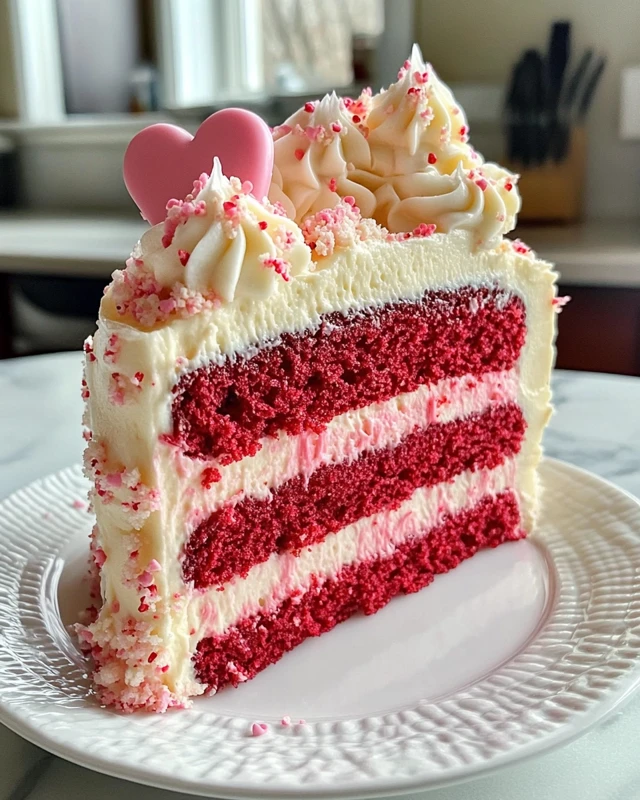
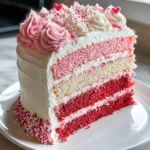
The Heart-Shaped Ribbon Cake stands out for several reasons. First, its unique ribbon effect creates a stunning visual appeal. The alternating colors of red, pink, and plain batter come together to form a lovely heart shape. This makes it a fantastic centerpiece for any celebration.
Moreover, the cake is incredibly versatile. You can customize the flavors and colors to suit your preferences. Want a chocolate twist? Just add cocoa powder! Prefer a citrusy flavor? Lemon zest can do the trick. The possibilities are endless!
Another special aspect is the frosting. The creamy, sweet frosting complements the cake perfectly, adding a rich texture that balances the lightness of the cake layers. Plus, you can decorate it however you like, making it a fun project for both kids and adults.
In summary, the Heart-Shaped Ribbon Cake is not just a dessert; it’s an experience. It brings joy, creativity, and deliciousness to any gathering. So, let’s dive into the ingredients and get started on this delightful treat!
Ingredients for Heart-Shaped Ribbon Cake
To create your very own Heart-Shaped Ribbon Cake, you’ll need a selection of simple yet essential ingredients. Each component plays a vital role in achieving that delightful taste and beautiful appearance. Here’s what you’ll need:
For the Cake:
- 2 cups all-purpose flour
- 1 ½ cups granulated sugar
- ½ cup unsalted butter, softened
- 1 cup milk
- 3 large eggs
- 2 teaspoons baking powder
- 1 teaspoon vanilla extract
- ½ teaspoon salt
- Food coloring (red and pink)
For the Frosting:
- 1 cup unsalted butter, softened
- 4 cups powdered sugar
- 2-3 tablespoons milk
- 1 teaspoon vanilla extract
- Food coloring (optional)
These ingredients are easy to find at your local grocery store. The all-purpose flour provides the structure, while the sugar adds sweetness. The butter gives the cake a rich flavor and moist texture. Eggs help bind everything together, and the baking powder ensures your cake rises beautifully.
Don’t forget the food coloring! It’s what makes your cake visually stunning. You can adjust the colors to match any theme or occasion. For the frosting, the combination of butter and powdered sugar creates a creamy, smooth texture that’s simply irresistible.
Now that you have your ingredients ready, you’re one step closer to baking this delightful Heart-Shaped Ribbon Cake. Let’s move on to the preparation steps!
Step-by-Step Preparation of Heart-Shaped Ribbon Cake
Now that you have all your ingredients ready, it’s time to dive into the fun part: preparing your Heart-Shaped Ribbon Cake! Follow these simple steps to create a delicious and visually stunning dessert that everyone will love.
Step 1: Preparing the Cake Batter
First, let’s get that cake batter ready. Start by preheating your oven to 350°F (175°C). This ensures your cake bakes evenly. While the oven heats up, grease and flour two 9-inch round cake pans. This step is crucial to prevent the cake from sticking.
Next, in a mixing bowl, whisk together the flour, baking powder, and salt. This helps to evenly distribute the baking powder, ensuring your cake rises perfectly. Set this mixture aside.
In a large mixing bowl, cream the softened butter and granulated sugar together until the mixture is light and fluffy. This usually takes about 3-5 minutes. Then, add the eggs one at a time, mixing well after each addition. Pour in the milk and vanilla extract, stirring until everything is well combined.
Finally, gradually add the dry ingredients to the wet mixture. Mix until just combined. Be careful not to overmix, as this can make your cake dense. Your batter should be smooth and ready for coloring!
Step 2: Baking the Cake Layers
Now it’s time to bake those beautiful layers! Start by dividing the cake batter into three bowls. Leave one bowl plain, then add red food coloring to the second bowl and pink food coloring to the third. Mix each bowl until you achieve your desired colors.
To create the ribbon effect, pour the plain batter into the center of one cake pan. Next, pour the pink batter around the plain batter, followed by the red batter. Repeat this process in the second cake pan. This layering technique is what gives the cake its stunning appearance.
Place the pans in the preheated oven and bake for 25-30 minutes. To check if they’re done, insert a toothpick into the center. If it comes out clean, your cakes are ready! Allow them to cool in the pans for about 10 minutes before transferring them to wire racks to cool completely.
Step 3: Creating the Ribbon Effect
Once your cake layers are completely cool, it’s time to create that eye-catching ribbon effect. Carefully level the tops of the cakes with a serrated knife if they have domed. This will help them stack evenly.
Now, take one layer and place it on your serving plate. Spread a generous layer of frosting on top. Then, place the second layer on top of the first. This will create a beautiful, tall cake that showcases the ribbon effect when sliced.
Step 4: Assembling the Heart-Shaped Ribbon Cake
With your layers stacked, it’s time to frost the outside of the cake. Use the remaining frosting to cover the top and sides. Make sure to smooth it out for a polished look. You can also use a spatula or a piping bag to create decorative swirls or patterns.
Feel free to get creative with your decorations! You can add sprinkles, edible glitter, or even fresh fruit on top. The Heart-Shaped Ribbon Cake is not just a treat; it’s a canvas for your creativity!
And there you have it! Your Heart-Shaped Ribbon Cake is ready to be enjoyed. It’s a delightful dessert that’s sure to impress at any gathering.
Variations of Heart-Shaped Ribbon Cake
The Heart-Shaped Ribbon Cake is a versatile dessert that can be customized in many ways. Whether you want to change the flavor or add unique decorations, there are plenty of options to explore. Let’s dive into some exciting variations that will make your cake even more special!
Flavor Variations for Heart-Shaped Ribbon Cake
While the classic Heart-Shaped Ribbon Cake is delicious, you can easily switch things up with different flavors. Here are some ideas:
- Chocolate Delight: Replace ½ cup of all-purpose flour with cocoa powder. This will give your cake a rich chocolate flavor. You can also add chocolate chips for extra indulgence!
- Lemon Zest: Add the zest of one lemon to the batter for a refreshing citrus twist. You can also replace some of the milk with lemon juice for a tangy flavor.
- Almond Essence: Substitute vanilla extract with almond extract. This will give your cake a lovely nutty flavor that pairs well with the frosting.
- Spice It Up: Add a teaspoon of cinnamon or nutmeg to the dry ingredients for a warm, spiced flavor. This is perfect for fall celebrations!
Feel free to mix and match these flavors to create your own unique version of the Heart-Shaped Ribbon Cake. The key is to have fun and experiment!
Decorating Ideas for Heart-Shaped Ribbon Cake
Once your cake is baked and frosted, it’s time to get creative with decorations! Here are some fun ideas to make your Heart-Shaped Ribbon Cake even more eye-catching:
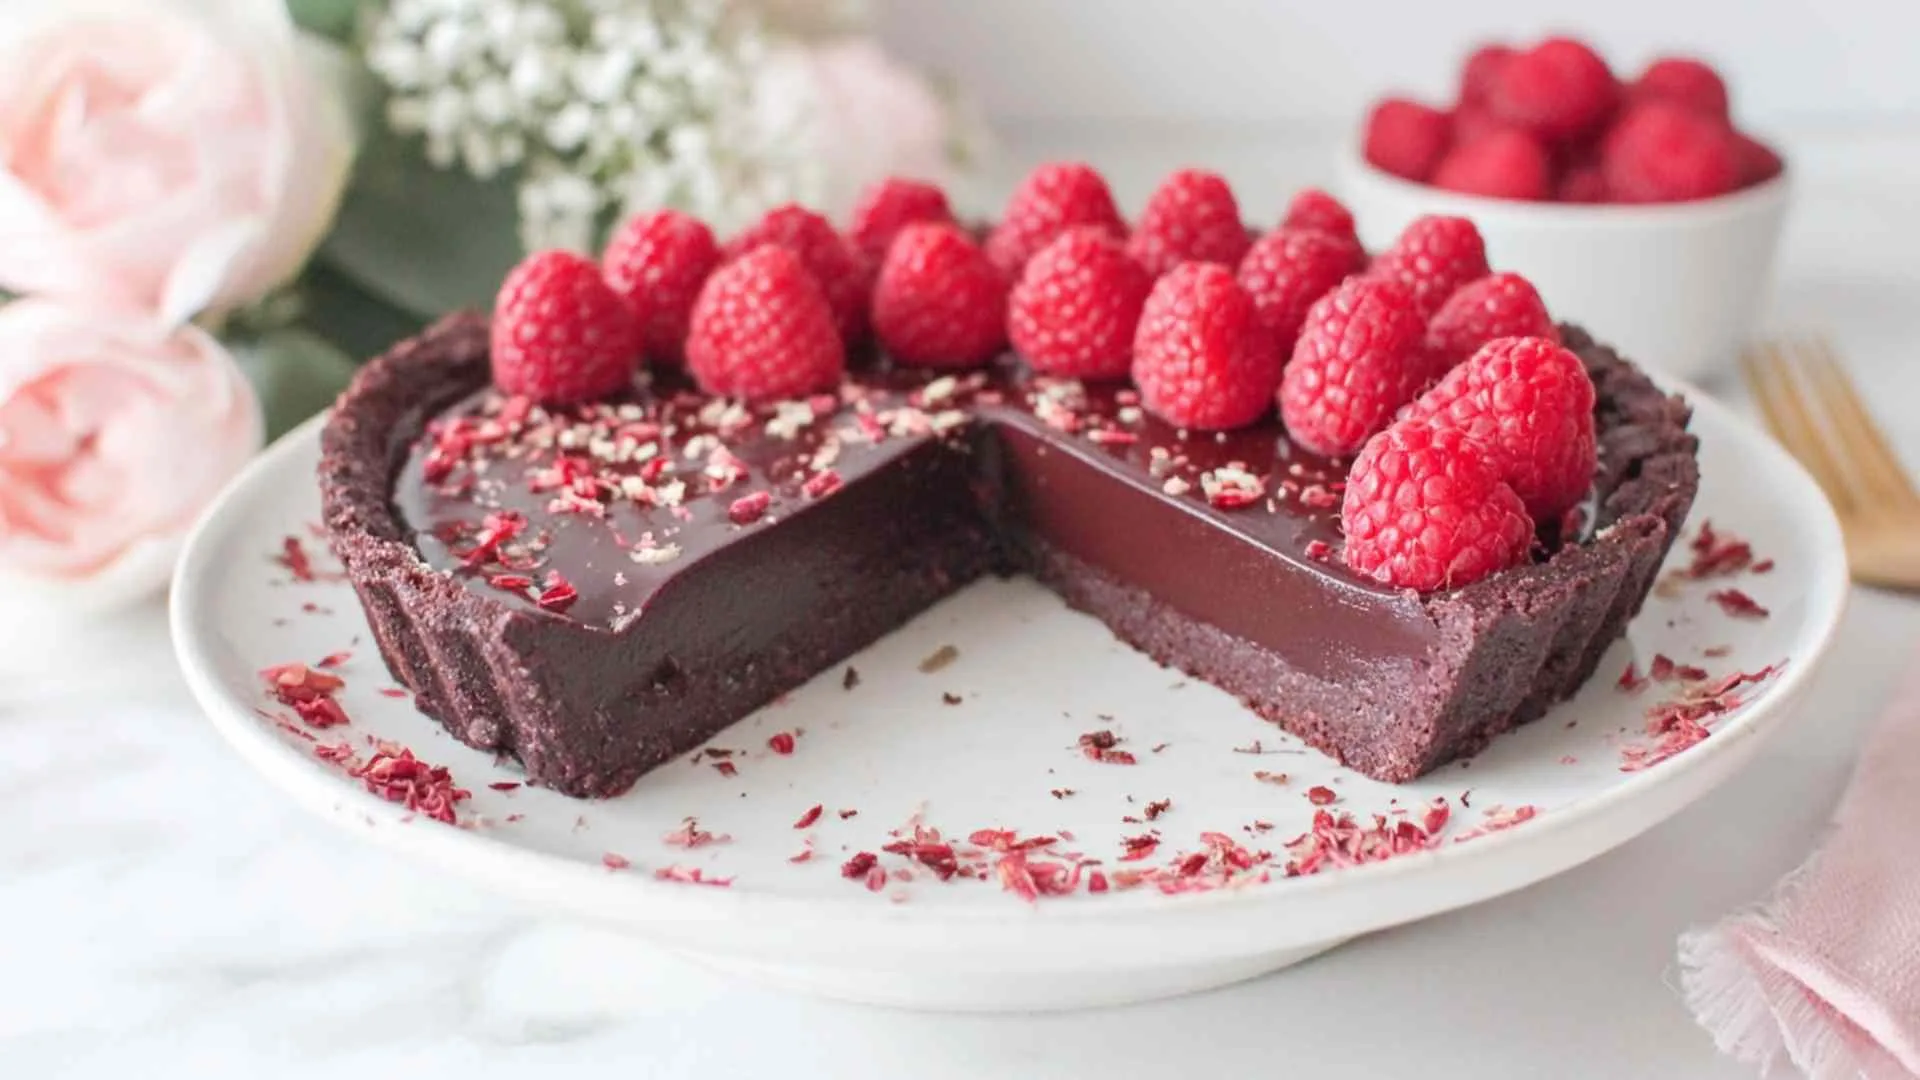
- Fresh Fruits: Top your cake with fresh strawberries, raspberries, or blueberries. They not only add color but also a burst of flavor!
- Edible Flowers: Decorate with edible flowers for a beautiful and elegant touch. They can make your cake look like a work of art.
- Chocolate Drizzle: Melt some chocolate and drizzle it over the top of the cake. This adds a delicious touch and makes it look fancy.
- Sprinkles Galore: Use colorful sprinkles to add a fun and festive vibe. You can match the colors to the occasion!
Remember, the decoration is where you can let your creativity shine. Whether you keep it simple or go all out, your Heart-Shaped Ribbon Cake will be a showstopper!
Cooking Note for Heart-Shaped Ribbon Cake
When it comes to baking the Heart-Shaped Ribbon Cake, a few important tips can help ensure your cake turns out perfectly. These notes will guide you through the process and help you avoid common pitfalls.
First, always measure your ingredients accurately. Baking is a science, and even a small mistake can affect the outcome. Use measuring cups and spoons for dry ingredients and a liquid measuring cup for liquids. This will help you achieve the right texture and flavor.
Next, make sure your butter is softened but not melted. Softened butter should be at room temperature, which allows it to cream well with sugar. This step is crucial for creating a light and fluffy cake. If your butter is too cold, it won’t mix properly, and if it’s melted, your batter will be too runny.
Another important note is to avoid overmixing the batter. Once you combine the wet and dry ingredients, mix until just combined. Overmixing can lead to a dense cake, which is not what you want for a light and airy Heart-Shaped Ribbon Cake.
When baking, keep an eye on the time. Ovens can vary, so start checking your cakes a few minutes before the recommended baking time. Insert a toothpick into the center of the cake; if it comes out clean or with a few crumbs, your cake is done. If it’s wet, give it a few more minutes.
Lastly, allow your cakes to cool completely before frosting. If you frost a warm cake, the frosting can melt and slide off. Patience is key here! Once cooled, you can level the tops for even stacking and create that beautiful ribbon effect.
By following these cooking notes, you’ll set yourself up for success in making a stunning and delicious Heart-Shaped Ribbon Cake. Happy baking!
Serving Suggestions for Heart-Shaped Ribbon Cake
Once your Heart-Shaped Ribbon Cake is beautifully assembled and decorated, it’s time to think about how to serve it. This delightful dessert is perfect for various occasions, and presenting it well can enhance the overall experience. Here are some serving suggestions to make your cake even more enjoyable!
First, consider the occasion. For a birthday party, slice the cake into generous pieces and serve them on colorful plates. You can add a scoop of vanilla ice cream on the side for a delightful contrast. The creamy ice cream pairs wonderfully with the sweet cake, making each bite a treat!
If you’re serving the cake at a romantic dinner or an anniversary celebration, try plating it elegantly. Use a cake server to cut neat slices and place them on fine china. A drizzle of chocolate sauce or a sprinkle of powdered sugar can elevate the presentation. You might also add a few fresh berries on the side for a pop of color.
For a casual gathering, consider serving the cake with a fun twist. Cut the cake into heart-shaped pieces using a cookie cutter. This adds a playful element and makes it even more fitting for celebrations like Valentine’s Day or a bridal shower. You can also serve it with whipped cream for an extra touch of sweetness.
Another great idea is to create a dessert buffet. Place the Heart-Shaped Ribbon Cake alongside other treats like cookies, brownies, and fruit tarts. This allows guests to choose their favorites and creates a festive atmosphere. Don’t forget to provide a variety of toppings, such as sprinkles, chocolate chips, and whipped cream, so everyone can customize their dessert!
Tips for Perfecting Your Heart-Shaped Ribbon Cake
Creating the perfect Heart-Shaped Ribbon Cake is all about attention to detail and a little bit of practice. Here are some handy tips to help you achieve a stunning and delicious cake every time you bake!
First, always use room temperature ingredients. This includes your butter, eggs, and milk. When these ingredients are at room temperature, they mix together more easily, resulting in a smoother batter. This can make a big difference in the texture of your cake.
Next, consider using a kitchen scale for measuring your ingredients. This ensures accuracy, especially with flour. Too much flour can lead to a dry cake, while too little can make it too dense. Weighing your ingredients can help you achieve the perfect balance.
When it comes to mixing, remember to mix gently. After adding the dry ingredients to the wet mixture, fold them together instead of stirring vigorously. This helps to keep the batter light and airy, which is essential for a fluffy cake.
Another tip is to use high-quality food coloring. This can enhance the vibrancy of your cake layers. Gel food coloring is often more concentrated than liquid coloring, so you’ll need less to achieve the same bright colors. This can also prevent your batter from becoming too runny.
For the baking process, rotate your cake pans halfway through baking. Ovens can have hot spots, and rotating the pans helps ensure even baking. This way, you won’t end up with one side of the cake being darker than the other.
Once your cakes are baked, let them cool in the pans for a few minutes before transferring them to wire racks. This helps them set and makes it easier to remove them without breaking. Always allow the cakes to cool completely before frosting to prevent melting.
Lastly, don’t be afraid to experiment with flavors and decorations! The Heart-Shaped Ribbon Cake is a canvas for your creativity. Try different flavor combinations or unique toppings to make it your own. The more you practice, the more confident you’ll become in your baking skills.
Breakdown of Time for Heart-Shaped Ribbon Cake
Understanding the time required for each step in making the Heart-Shaped Ribbon Cake can help you plan better. Here’s a detailed breakdown of the time you’ll need for preparation, cooking, and the total time involved in creating this delightful dessert.
Prep Time
The prep time for the Heart-Shaped Ribbon Cake is approximately 30 minutes. During this time, you will gather all your ingredients, measure them accurately, and prepare the cake batter. This includes mixing the dry and wet ingredients, coloring the batter, and preparing the cake pans. Taking your time during this step ensures that everything is ready for baking.
Cooking Time
Once your batter is ready, the cooking time is about 25-30 minutes. This is the time it takes for the cake layers to bake in the preheated oven. It’s essential to keep an eye on the cakes as they bake. You can check for doneness by inserting a toothpick into the center. If it comes out clean, your cakes are ready to cool!
Total Time
In total, you can expect to spend about 1 hour on the Heart-Shaped Ribbon Cake. This includes both the prep and cooking times. After baking, you’ll need to allow the cakes to cool completely before frosting, which can take an additional 30 minutes to an hour. So, if you plan to serve the cake right after baking, make sure to account for this cooling time!
By breaking down the time needed for each step, you can better manage your baking schedule. This way, you can enjoy the process and create a beautiful Heart-Shaped Ribbon Cake without feeling rushed. Happy baking!
Nutritional Information for Heart-Shaped Ribbon Cake
Understanding the nutritional content of your Heart-Shaped Ribbon Cake can help you enjoy it in moderation. While this cake is a delightful treat, it’s good to know what you’re indulging in. Here’s a breakdown of the key nutritional components of this delicious dessert.
Calories in Heart-Shaped Ribbon Cake
One slice of Heart-Shaped Ribbon Cake, which is about 1/10th of the entire cake, contains approximately 350-400 calories. This number can vary based on the specific ingredients used and the size of the slice. The calories mainly come from the sugar, butter, and flour, which contribute to the cake’s rich flavor and texture. Enjoying a slice as part of a balanced diet can be a delightful way to celebrate special occasions!
Protein Content in Heart-Shaped Ribbon Cake
Each slice of Heart-Shaped Ribbon Cake provides around 3-4 grams of protein. The protein mainly comes from the eggs and milk used in the recipe. While this isn’t a high-protein dessert, it does contribute to your daily intake. Pairing a slice with a glass of milk can boost the protein content and make for a satisfying treat!
Sodium Levels in Heart-Shaped Ribbon Cake
The sodium content in a slice of Heart-Shaped Ribbon Cake is approximately 200-250 milligrams. This amount comes from the salt added to the batter and the butter used in both the cake and frosting. While this is a moderate level of sodium, it’s always a good idea to be mindful of your overall sodium intake, especially if you’re watching your diet.
In summary, while the Heart-Shaped Ribbon Cake is a sweet indulgence, it’s important to enjoy it in moderation. Knowing the nutritional information can help you make informed choices while still enjoying this delightful dessert. Happy baking and enjoy every bite!

FAQs About Heart-Shaped Ribbon Cake
Can I make Heart-Shaped Ribbon Cake ahead of time?
Absolutely! You can prepare the Heart-Shaped Ribbon Cake ahead of time. In fact, baking the cake a day in advance can enhance its flavor. Just make sure to let the cake layers cool completely before wrapping them in plastic wrap. This keeps them fresh. You can frost the cake the day you plan to serve it. This way, the frosting stays nice and fluffy!
What is the best way to store Heart-Shaped Ribbon Cake?
To store your Heart-Shaped Ribbon Cake, place it in an airtight container. If you don’t have one, you can cover it tightly with plastic wrap. This helps keep the cake moist and fresh. Store it at room temperature for up to three days. If you want to keep it longer, you can refrigerate it, but be aware that refrigeration may dry it out a bit. Just remember to bring it back to room temperature before serving for the best taste!
Can I use different types of flour for Heart-Shaped Ribbon Cake?
Yes, you can experiment with different types of flour! While all-purpose flour is the best choice for a light and fluffy cake, you can try using cake flour for an even softer texture. If you want to use whole wheat flour, it’s possible, but the cake may be denser. Just remember to adjust the liquid slightly, as whole wheat flour absorbs more moisture. Always keep an eye on the texture of your batter!
How can I make Heart-Shaped Ribbon Cake gluten-free?
Making a gluten-free Heart-Shaped Ribbon Cake is easy! Simply substitute the all-purpose flour with a gluten-free flour blend. Look for a blend that includes xanthan gum, as this helps mimic the texture of regular flour. You can also use almond flour or coconut flour, but you may need to adjust the liquid in the recipe. Always check the packaging for specific instructions. Enjoy your gluten-free baking adventure!
Conclusion on Heart-Shaped Ribbon Cake
In conclusion, the Heart-Shaped Ribbon Cake is more than just a dessert; it’s a celebration of creativity and love. With its vibrant colors and delightful flavors, this cake is perfect for any occasion, from birthdays to anniversaries. The process of making it is not only enjoyable but also allows you to express your artistic side through baking.
As you’ve seen, the Heart-Shaped Ribbon Cake is versatile. You can easily customize it with different flavors and decorations to suit your taste and the theme of your event. Whether you choose to stick with the classic recipe or experiment with new ideas, the result will always be a stunning centerpiece that brings joy to your table.
Remember, baking is all about having fun and sharing delicious moments with loved ones. So, gather your ingredients, invite your friends or family to join in, and create your very own Heart-Shaped Ribbon Cake. Enjoy the process, savor each bite, and make wonderful memories along the way!
Happy baking, and may your Heart-Shaped Ribbon Cake bring smiles and sweetness to every occasion! ❤️🎂💖
Heart-Shaped Ribbon Cake
Ingredients
Equipment
Method
-
Preheat your oven to 350°F (175°C) and grease and flour two 9-inch round cake pans.
-
In a mixing bowl, whisk together flour, baking powder, and salt. Set aside.
-
In a large mixing bowl, cream the softened butter and granulated sugar until light and fluffy, about 3-5 minutes.
-
Add eggs one at a time, mixing well after each addition. Stir in milk and vanilla extract until combined.
-
Gradually add the dry ingredients to the wet mixture, mixing until just combined.
-
Divide the batter into three bowls. Leave one bowl plain, color the second with red food coloring, and the third with pink food coloring.
-
Bake for 25-30 minutes or until a toothpick inserted in the center comes out clean. Allow to cool in pans for 10 minutes before transferring to wire racks to cool completely.
-
Once cooled, level the tops of the cakes if domed. Place one layer on a serving plate and spread frosting on top.
-
Add the second layer on top and frost the top and sides of the cake with the remaining frosting.
-
Decorate as desired with sprinkles, fresh fruit, or edible flowers.