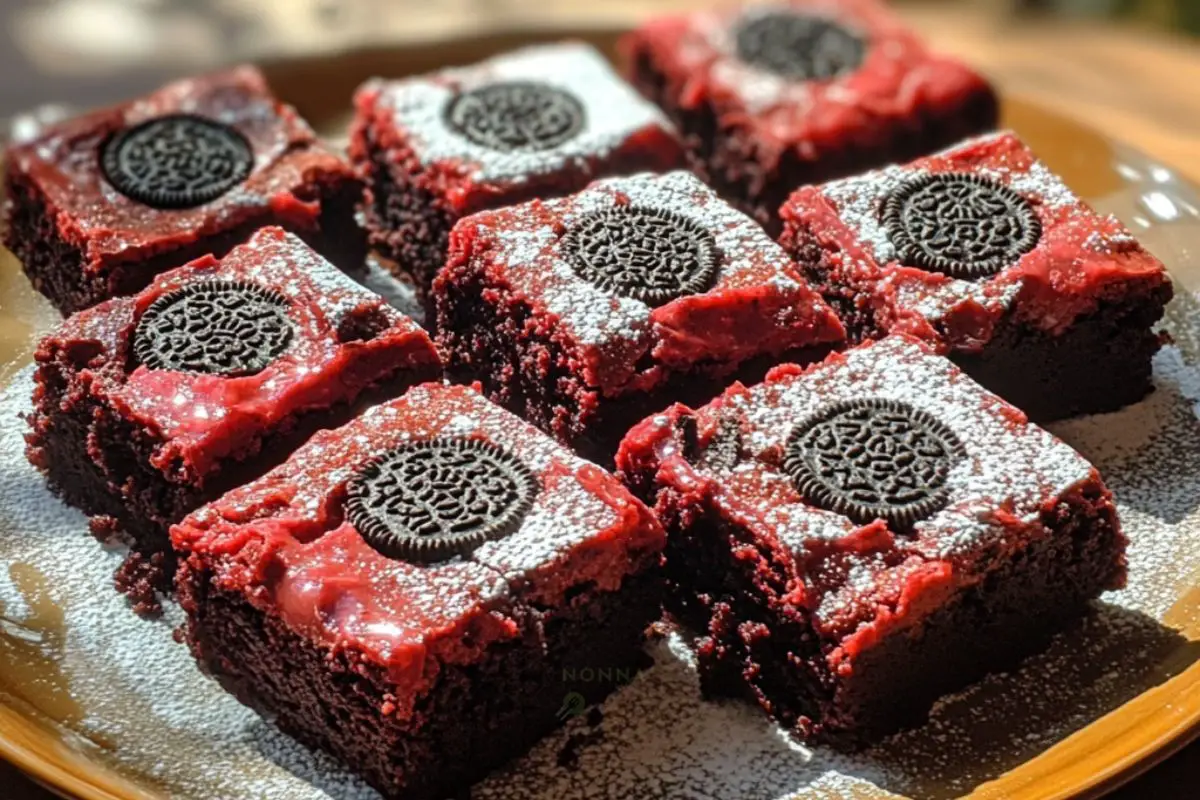
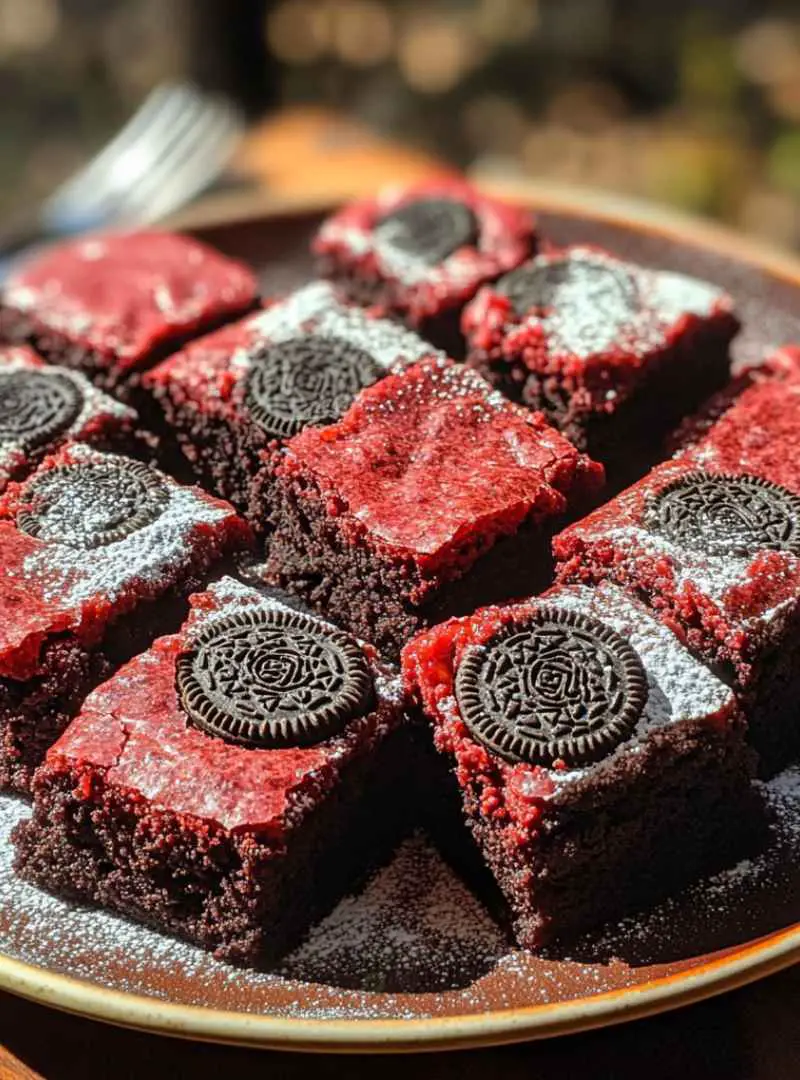
Red Velvet Oreo Brownies
Are you ready to dive into a world of deliciousness? Red Velvet Oreo Brownies are not just any dessert; they are a delightful fusion of rich flavors and textures. Imagine biting into a soft, fudgy brownie that bursts with the classic taste of red velvet, complemented by the crunch of OREO cookies. This treat is perfect for any occasion, whether it’s a birthday party, a holiday gathering, or simply a cozy night in. Let’s explore what makes these brownies so special!
What Makes Red Velvet Oreo Brownies Special?
What sets Red Velvet Oreo Brownies apart from regular brownies? First, the vibrant red color makes them visually stunning. This eye-catching hue comes from the red food coloring, which is a signature of red velvet desserts. Next, the combination of cocoa powder and buttermilk gives these brownies a unique flavor profile. The buttermilk adds a slight tanginess, balancing the sweetness perfectly.
Moreover, the addition of crushed OREO cookies introduces a delightful crunch. Each bite offers a mix of soft brownie and crunchy cookie, creating a satisfying texture contrast. This combination of flavors and textures makes Red Velvet Oreo Brownies a standout dessert that everyone will love!
The Perfect Treat for Any Occasion
Red Velvet Oreo Brownies are incredibly versatile. They can be served at various events, from casual get-togethers to formal celebrations. Their rich flavor and beautiful appearance make them a hit at birthday parties, holiday feasts, and even potlucks. Plus, they are easy to make, so you can whip them up quickly when you need a sweet treat.
Whether you’re celebrating a special occasion or just want to indulge yourself, these brownies are the perfect choice. They are sure to impress your friends and family, leaving them asking for seconds. So, let’s get started on making these delightful Red Velvet Oreo Brownies!
Ingredients for Red Velvet Oreo Brownies
To create the mouthwatering Red Velvet Oreo Brownies, you’ll need a few simple ingredients. Each component plays a vital role in achieving that rich flavor and delightful texture. Here’s what you’ll need:
- 1 cup unsalted butter, melted
- 2 cups granulated sugar
- 4 large eggs
- 1 teaspoon vanilla extract
- 2 cups all-purpose flour
- 1/2 cup cocoa powder
- 1 teaspoon baking powder
- 1/2 teaspoon salt
- 1 cup buttermilk
- 1 cup red food coloring
- 1 package OREO cookies (about 14 cookies), crushed
These ingredients come together to create a rich, fudgy brownie base that is both sweet and slightly tangy. The melted butter adds moisture, while the granulated sugar ensures a delightful sweetness. Eggs provide structure, and the combination of flour and cocoa powder gives the brownies their signature texture.
Buttermilk is essential for that classic red velvet flavor, and the red food coloring gives these brownies their stunning appearance. Finally, the crushed OREO cookies add a fun twist, making each bite a delightful surprise. Gather these ingredients, and you’re ready to embark on your baking adventure!
Step-by-Step Preparation of Red Velvet Oreo Brownies
Now that you have all your ingredients ready, it’s time to dive into the fun part: making the Red Velvet Oreo Brownies! Follow these simple steps to create a delicious treat that will impress everyone.
Step 1: Prepare the Brownie Batter
Preheat the Oven
First things first, preheat your oven to 350°F (175°C). This step is crucial as it ensures your brownies bake evenly. While the oven heats up, you can prepare your baking pan. Grease a 9×13 inch baking pan and line it with parchment paper. This will make it easy to lift the brownies out later.
Mix Wet Ingredients
In a large mixing bowl, combine the melted butter and granulated sugar. Use a whisk to mix them together until they are well combined. Next, add the eggs one at a time, mixing well after each addition. This helps to incorporate air into the batter, making your brownies light and fluffy. Finally, stir in the vanilla extract for that extra flavor boost!
Combine Dry Ingredients
In a separate bowl, whisk together the flour, cocoa powder, baking powder, and salt. This step is important because it ensures that the dry ingredients are evenly distributed. Gradually add this dry mixture to the wet ingredients, alternating with the buttermilk. Mix until just combined, being careful not to overmix. Overmixing can lead to tough brownies, and we want them to be soft and fudgy!
Add Color to the Batter
Now comes the fun part! Stir in the red food coloring until the batter is evenly colored. The vibrant red hue is what makes these brownies so special. Make sure to mix well so that the color is consistent throughout the batter. You’ll be amazed at how beautiful the mixture looks!
Step 2: Add OREOs and Bake
Fold in OREOs
Once your batter is ready, it’s time to add the star ingredient: OREO cookies! Gently fold the crushed OREOs into the brownie batter. This will give your brownies that delightful crunch and a burst of chocolatey flavor. Make sure the OREOs are evenly distributed throughout the batter for the best results.
Bake the Brownies
Pour the brownie batter into the prepared baking pan and spread it out evenly. Place the pan in the preheated oven and bake for 30-35 minutes. To check if they are done, insert a toothpick into the center. If it comes out with a few moist crumbs, your brownies are ready! Be careful not to overbake, as this can dry them out.
Step 3: Cool and Serve
Cooling Process
After baking, allow the brownies to cool in the pan for about 15 minutes. This helps them set and makes them easier to remove. Once they have cooled slightly, lift them out of the pan using the parchment paper. Place them on a wire rack to cool completely. This step is important because it prevents the brownies from becoming soggy.
Cutting and Serving the Brownies
Once the brownies are completely cool, it’s time to cut them into squares. Use a sharp knife for clean edges. Serve them as they are, or add a scoop of ice cream on top for an extra treat! Enjoy your delicious Red Velvet Oreo Brownies with friends and family!
Variations of Red Velvet Oreo Brownies
If you love the idea of Red Velvet Oreo Brownies but want to switch things up, you’re in luck! There are plenty of fun variations you can try. These tweaks can cater to different dietary needs or simply add a new twist to this classic treat. Let’s explore a couple of exciting options!
Gluten-Free Option
For those who need a gluten-free dessert, you can easily adapt the recipe. Simply replace the all-purpose flour with a gluten-free flour blend. Make sure to choose a blend that works well for baking. Many brands offer a 1:1 ratio, which means you can use the same amount as the original recipe calls for. This way, you can enjoy the rich flavors of Red Velvet Oreo Brownies without worrying about gluten!
Additionally, check that your OREO cookies are gluten-free. Some brands offer gluten-free cookies that can be used in this recipe. This small change allows everyone to indulge in these delicious brownies, making them a perfect treat for gatherings!
Adding Nuts or Other Mix-Ins
If you’re a fan of nuts, consider adding chopped walnuts or pecans to your brownie batter. Nuts add a delightful crunch and a nutty flavor that pairs beautifully with the sweetness of the brownies. Just fold in about 1 cup of your favorite nuts along with the crushed OREOs for a tasty twist.
Alternatively, you can experiment with other mix-ins. Try adding chocolate chips for an extra chocolatey experience or even some white chocolate chips for a fun contrast. Dried fruits like cherries or cranberries can also add a unique flavor and texture. The possibilities are endless, so feel free to get creative!
Cooking Note for Red Velvet Oreo Brownies
When it comes to baking, a few key tips can make all the difference in achieving the perfect Red Velvet Oreo Brownies. Understanding the nuances of your ingredients and baking process will help you create a delicious treat every time. Here are some important cooking notes to keep in mind:
First, always use room temperature ingredients. This includes eggs and buttermilk. Room temperature ingredients mix more easily, resulting in a smoother batter. If you forget to take them out ahead of time, you can quickly warm the eggs by placing them in a bowl of warm water for about 10 minutes. For buttermilk, simply let it sit out for a bit before using.
Next, be mindful of your oven temperature. Ovens can vary, so it’s a good idea to use an oven thermometer to ensure accuracy. If your oven runs hot, your brownies may bake faster than expected. Conversely, if it runs cool, they may take longer. Keep an eye on them during the last few minutes of baking to avoid overcooking.
Additionally, don’t skip the cooling process! Allowing the brownies to cool in the pan for a short time before transferring them to a wire rack is crucial. This helps them set properly and makes cutting easier. If you cut them too soon, they may crumble or fall apart.
Lastly, remember that the texture of your brownies can change based on how you store them. For the best results, keep them in an airtight container at room temperature. This will help maintain their fudgy texture. If you want to keep them longer, consider freezing them. Just wrap them tightly in plastic wrap and place them in a freezer-safe container. When you’re ready to enjoy, simply thaw them at room temperature.
By following these cooking notes, you’ll be well on your way to creating the most delightful Red Velvet Oreo Brownies that everyone will love!
Serving Suggestions for Red Velvet Oreo Brownies
Once you’ve baked your delicious Red Velvet Oreo Brownies, it’s time to think about how to serve them. Presentation and pairing can elevate your dessert experience. Here are some delightful serving suggestions to make your brownies even more enjoyable!
Pairing with Ice Cream
One of the best ways to enjoy Red Velvet Oreo Brownies is by pairing them with ice cream. The creamy texture of ice cream complements the rich, fudgy brownies perfectly. Vanilla ice cream is a classic choice, as its subtle flavor allows the brownie’s taste to shine. However, you can also try other flavors like cream cheese, chocolate, or even red velvet ice cream for a fun twist!
To serve, place a warm brownie on a plate and add a generous scoop of your chosen ice cream on top. Drizzle with chocolate or caramel sauce for an extra touch of sweetness. You can also sprinkle some crushed OREO cookies on top for added crunch and visual appeal. This combination is sure to impress your guests and make for a delightful dessert experience!
Presentation Ideas
Presentation is key when serving desserts. To make your Red Velvet Oreo Brownies look as good as they taste, consider these simple yet effective ideas:
- Use a Decorative Plate: Serve your brownies on a beautiful plate or platter. A white plate can make the vibrant red color pop, while a colorful one can add a fun touch.
- Garnish with Fresh Berries: Add a few fresh raspberries or strawberries on the side. Their bright color and tartness will contrast nicely with the sweetness of the brownies.
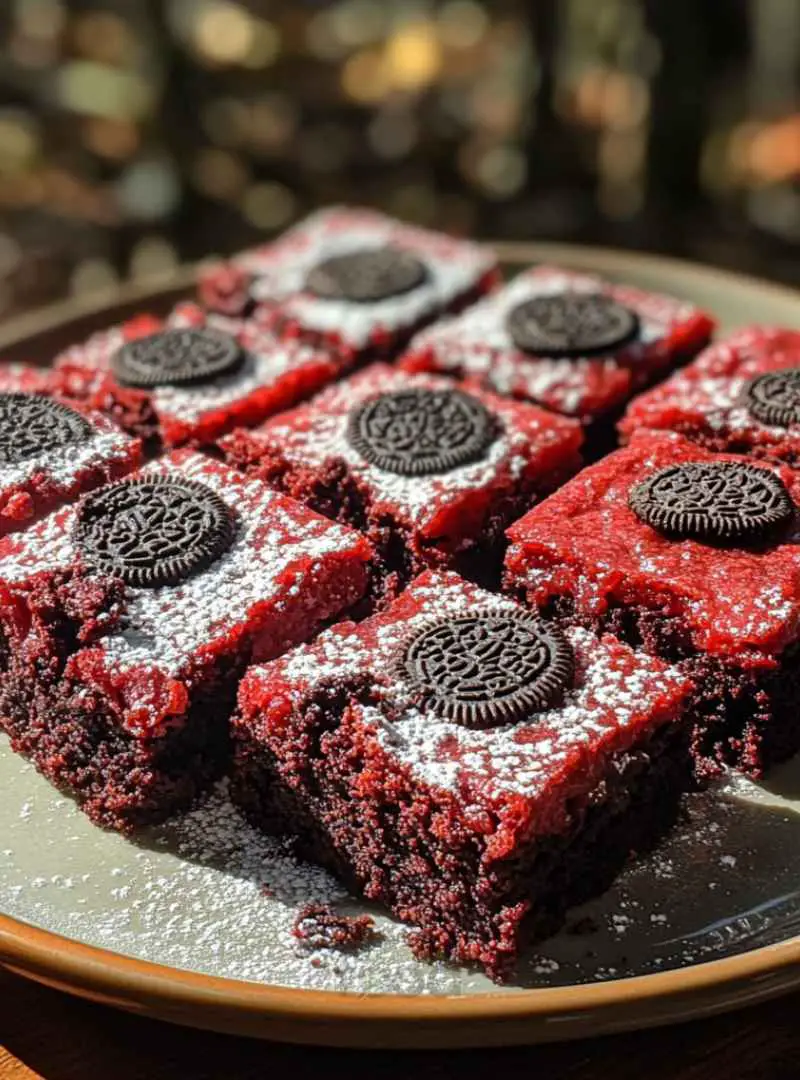
- Dust with Powdered Sugar: For an elegant touch, lightly dust the brownies with powdered sugar before serving. This adds a beautiful finish and a hint of sweetness.
- Serve with Whipped Cream: A dollop of whipped cream on top of the brownie can add a light and airy element to the dessert. You can even pipe it for a more decorative look!
By incorporating these serving suggestions, you can turn your Red Velvet Oreo Brownies into a stunning dessert that will delight both the eyes and the taste buds. Enjoy your baking adventure and the delicious results!
Tips for Perfect Red Velvet Oreo Brownies
Creating the perfect Red Velvet Oreo Brownies is all about attention to detail. With a few helpful tips, you can avoid common pitfalls and ensure your brownies turn out delicious every time. Let’s explore some common mistakes to avoid and storage tips to keep your brownies fresh!
Common Mistakes to Avoid
Even the best bakers can make mistakes. Here are some common errors to watch out for:
- Overmixing the Batter: Mixing too much can lead to tough brownies. Mix until just combined for a soft, fudgy texture.
- Not Measuring Ingredients Accurately: Baking is a science! Use measuring cups and spoons for precise amounts. Too much flour can dry out your brownies.
- Skipping the Cooling Time: Cutting brownies too soon can result in a messy, crumbly treat. Allow them to cool completely for clean cuts.
- Using Cold Ingredients: Cold eggs or buttermilk can affect the batter’s consistency. Always use room temperature ingredients for the best results.
- Not Checking Oven Temperature: Ovens can vary in temperature. Use an oven thermometer to ensure your brownies bake perfectly.
By avoiding these common mistakes, you’ll be on your way to baking the best Red Velvet Oreo Brownies ever!
Storage Tips
Proper storage is key to keeping your brownies fresh and delicious. Here are some tips to help you store your Red Velvet Oreo Brownies:
- Room Temperature: Store brownies in an airtight container at room temperature for up to 3 days. This keeps them soft and fudgy.
- Refrigeration: If you want to keep them longer, you can refrigerate them for up to a week. Just make sure they are in an airtight container to prevent drying out.
- Freezing: For longer storage, freeze brownies. Wrap them tightly in plastic wrap and place them in a freezer-safe container. They can last up to 3 months in the freezer.
- Thawing: When ready to enjoy, thaw brownies at room temperature for a few hours. You can also warm them in the microwave for a few seconds for that fresh-baked taste!
By following these storage tips, you can enjoy your Red Velvet Oreo Brownies for days to come!
Breakdown of Time for Red Velvet Oreo Brownies
Understanding the time it takes to make Red Velvet Oreo Brownies can help you plan your baking session better. Here’s a simple breakdown of the time involved in preparing and cooking these delightful treats.
Prep Time
The prep time for Red Velvet Oreo Brownies is approximately 15 minutes. This includes gathering your ingredients, measuring them out, and mixing the batter. It’s a quick and enjoyable process that gets you one step closer to indulging in these delicious brownies!
Cooking Time
Once your batter is ready, the cooking time is about 30-35 minutes. During this time, the brownies will bake to perfection in the oven. Keep an eye on them, especially in the last few minutes, to ensure they don’t overbake. You want them to be soft and fudgy, with just a few moist crumbs on the toothpick when tested.
Total Time
In total, you can expect to spend around 50 minutes from start to finish. This includes both the prep and cooking times. After baking, don’t forget to allow some time for cooling before cutting into squares. The wait will be worth it when you take that first bite of your Red Velvet Oreo Brownies!
Nutritional Information for Red Velvet Oreo Brownies
Understanding the nutritional content of your Red Velvet Oreo Brownies can help you enjoy them in moderation. While these brownies are a delightful treat, it’s essential to be aware of what you’re consuming. Here’s a breakdown of the calories and macronutrients, along with sodium content, to give you a clearer picture.
Calories and Macronutrients
Each serving of Red Velvet Oreo Brownies (approximately one square) contains about 250 calories. This number can vary slightly based on the specific ingredients used and portion sizes. Here’s a general overview of the macronutrients per serving:
- Calories: 250
- Protein: 3g
- Fat: 12g
- Carbohydrates: 36g
- Sugar: 25g
- Fiber: 1g
The brownies are rich in carbohydrates, primarily from the sugar and flour. The fat content comes mainly from the butter and eggs, contributing to the brownies’ moist and fudgy texture. While they are not a health food, enjoying them as an occasional treat can fit into a balanced diet.
Sodium Content
In terms of sodium, each brownie contains approximately 150mg. This amount is relatively moderate, especially considering that the recommended daily sodium intake for adults is about 2,300mg. However, if you are watching your sodium intake, it’s good to keep this in mind.
Overall, while Red Velvet Oreo Brownies are a delicious indulgence, being aware of their nutritional information can help you enjoy them responsibly. Remember, moderation is key when it comes to sweet treats!
FAQs about Red Velvet Oreo Brownies
Can I make Red Velvet Oreo Brownies ahead of time?
Absolutely! You can prepare Red Velvet Oreo Brownies ahead of time. In fact, they often taste even better the next day as the flavors meld together. To do this, simply bake the brownies, allow them to cool completely, and then store them in an airtight container. They can be kept at room temperature for up to three days. If you want to make them even earlier, consider freezing them. Just wrap them tightly in plastic wrap and place them in a freezer-safe container. When you’re ready to enjoy, thaw them at room temperature or warm them slightly in the microwave.
How do I store leftover brownies?
Storing leftover Red Velvet Oreo Brownies is easy! Keep them in an airtight container at room temperature for up to three days. This will help maintain their soft and fudgy texture. If you want to keep them longer, you can refrigerate them for up to a week. Just make sure they are in a sealed container to prevent them from drying out. For even longer storage, freeze the brownies. They can last up to three months in the freezer. When you’re ready to enjoy, simply thaw them at room temperature or warm them in the microwave for a few seconds.
Can I use different types of cookies in this recipe?
Yes, you can definitely experiment with different types of cookies! While OREO cookies add a delightful chocolatey crunch, you can substitute them with other cookies if you prefer. For example, try using chocolate chip cookies for a classic twist or even peanut butter cookies for a unique flavor combination. Just make sure the cookies you choose complement the rich taste of the red velvet brownies. Feel free to get creative and find your favorite combination!
What can I substitute for buttermilk?
If you don’t have buttermilk on hand, don’t worry! There are several easy substitutes you can use. One common method is to mix one cup of milk with one tablespoon of white vinegar or lemon juice. Let it sit for about five minutes until it thickens slightly. This will mimic the tangy flavor of buttermilk. Alternatively, you can use plain yogurt or sour cream, thinning it with a little milk to achieve the right consistency. These substitutes will work well in your Red Velvet Oreo Brownies, ensuring they remain delicious!
Conclusion: Enjoying Your Red Velvet Oreo Brownies
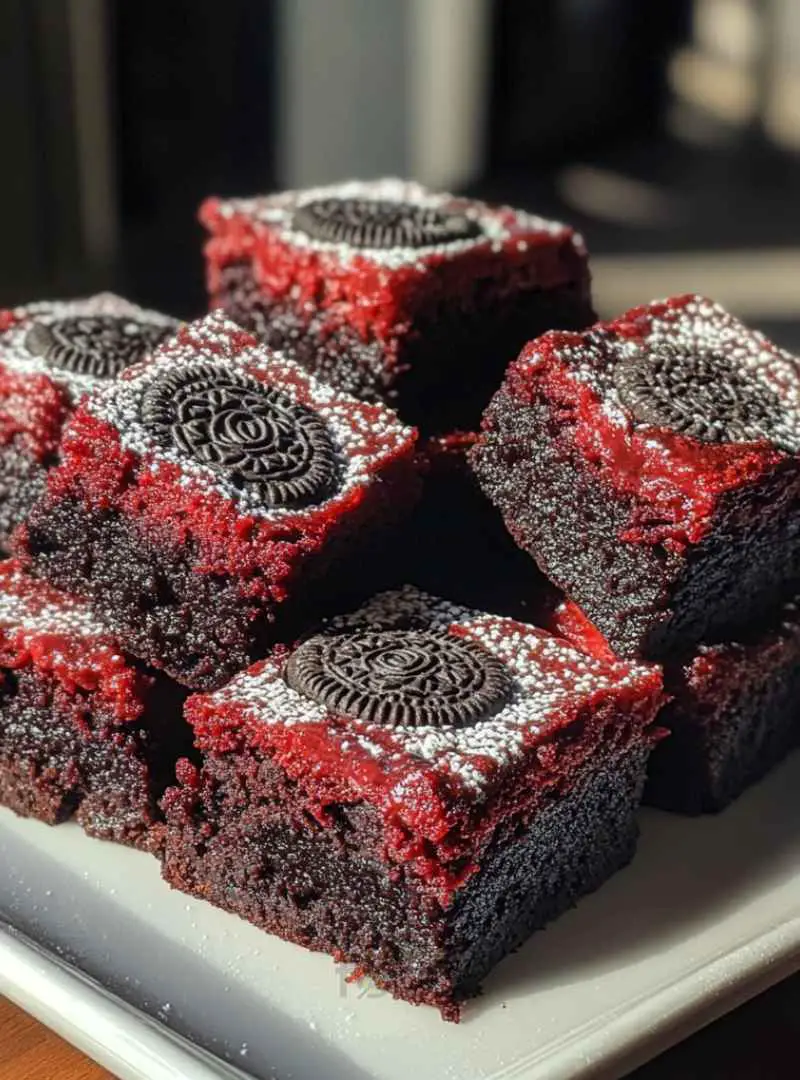
In conclusion, Red Velvet Oreo Brownies are a delightful treat that combines the best of both worlds: the rich, velvety flavor of red velvet and the crunchy goodness of OREO cookies. Whether you’re baking for a special occasion or simply treating yourself, these brownies are sure to impress. Their vibrant color and unique taste make them a standout dessert that everyone will love.
As you enjoy your freshly baked Red Velvet Oreo Brownies, remember to savor each bite. The soft, fudgy texture paired with the delightful crunch of OREOs creates a perfect harmony of flavors. You can serve them warm with a scoop of ice cream or present them beautifully on a decorative plate. No matter how you choose to enjoy them, these brownies are bound to bring smiles to your friends and family.
So, gather your ingredients, follow the steps, and indulge in the deliciousness of Red Velvet Oreo Brownies. Happy baking, and may your kitchen be filled with the sweet aroma of this delightful dessert!
Red Velvet Oreo Brownies
Ingredients
Equipment
Method
-
Preheat your oven to 350°F (175°C) and grease a 9x13 inch baking pan, lining it with parchment paper.
-
In a large mixing bowl, combine melted butter and granulated sugar. Whisk until well combined.
-
Add eggs one at a time, mixing well after each addition. Stir in vanilla extract.
-
In a separate bowl, whisk together flour, cocoa powder, baking powder, and salt. Gradually add this dry mixture to the wet ingredients, alternating with buttermilk.
-
Stir in red food coloring until the batter is evenly colored.
-
Gently fold in the crushed OREO cookies until evenly distributed.
-
Pour the batter into the prepared baking pan and spread it out evenly.
-
Bake for 30-35 minutes, or until a toothpick inserted into the center comes out with a few moist crumbs.
-
Allow the brownies to cool in the pan for about 15 minutes, then lift them out using the parchment paper and place on a wire rack to cool completely.
-
Once cooled, cut into squares and serve. Enjoy with ice cream if desired!