I stumbled upon this Black Velvet Cake recipe last winter when I was craving something rich and chocolatey but wanted to try something beyond the traditional red velvet. The deep, intense chocolate flavor with that perfect hint of crimson creates a stunning dessert that’s become my go-to for special occasions—just like our Moist Homemade Chocolate Cake, which is another must-try for chocolate lovers.
The Story Behind My Black Velvet Cake
I first made this Black Velvet Cake for my daughter’s birthday celebration last year, when she specifically requested “something chocolate, but fancy.” After testing several recipes, this version with its velvety texture and rich cream cheese frosting became an instant family favorite. The contrast between the dark, moist cake layers and the creamy white frosting creates a striking presentation that always draws gasps when I bring it to the table.
My husband, who normally passes on dessert to save room for seconds at dinner, ate two slices that night and asked if we could “please save the leftovers instead of sharing them with the guests.” That’s when I knew this recipe was special! There’s something magical about the way the boiling water intensifies the chocolate flavor while keeping the crumb incredibly tender and moist.
The slight tanginess from the buttermilk and cream cheese frosting balances the sweetness perfectly, much like the contrast in our Strawberry Cream Cheese Pie. Every time I make this cake now, I’m reminded of the joy on my daughter’s face when she saw it for the first time. Ready to create your own memorable dessert moment?
Why You’ll Love This Luxurious Black Velvet Cake
The first time I served this Black Velvet Cake at a family gathering, my sister-in-law immediately asked for the recipe before she’d even finished her first bite. This twist on traditional chocolate cake has become my signature dessert for special occasions because it strikes that perfect balance between impressive and achievable.
- Incredibly moist texture that stays tender for days – I’ve found the boiling water technique is the secret to preventing that dreaded dry chocolate cake
- Rich, complex chocolate flavor that’s more sophisticated than ordinary chocolate cake – perfect for chocolate lovers who want something special
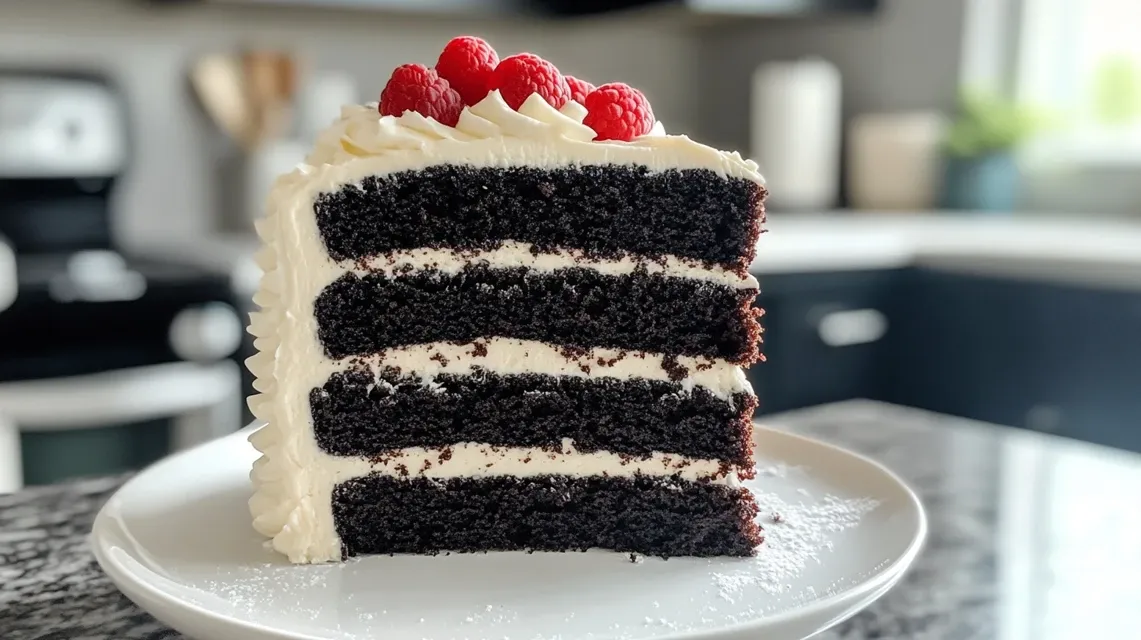
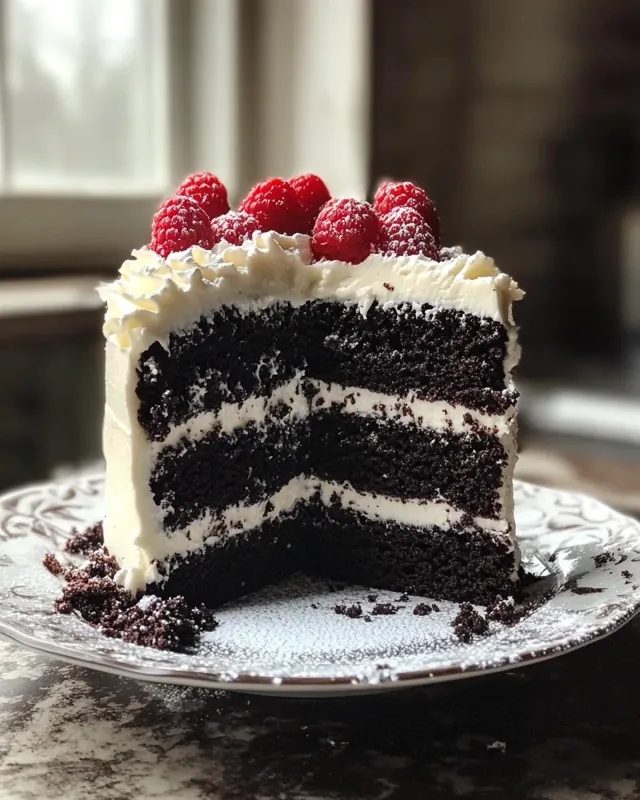
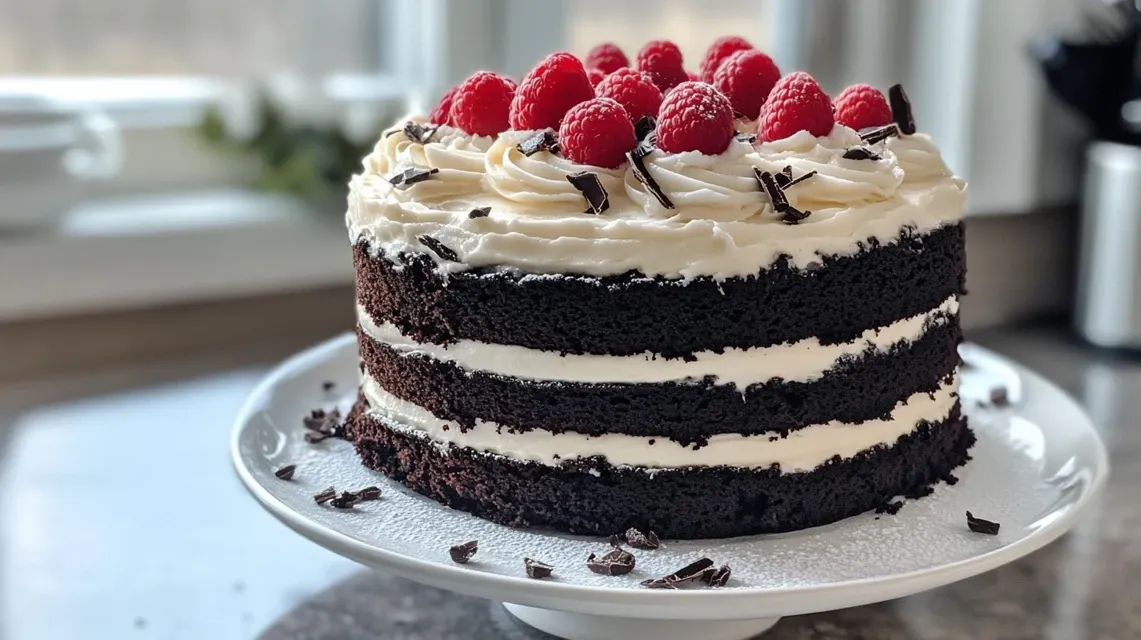
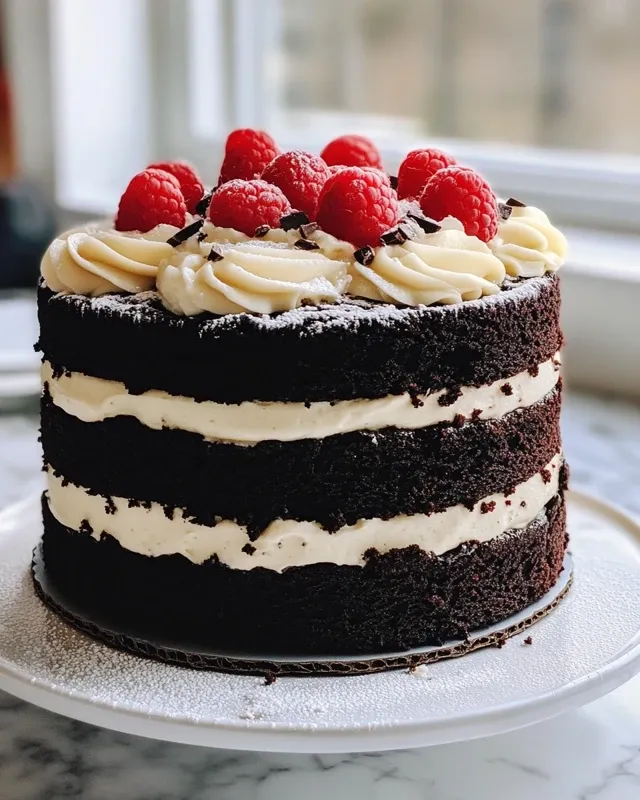
- Show-stopping appearance with minimal effort – the stark contrast between dark cake and white frosting creates a dramatic presentation
- Make-ahead friendly for stress-free entertaining – I often bake the layers a day in advance
- Versatile for any occasion from birthday celebrations to holiday gatherings – I’ve served this at everything from casual family dinners to more formal events
- Perfect balance of sweetness with the tangy cream cheese frosting cutting through the richness of the cake
In my kitchen, this Black Velvet Cake has earned its place as THE chocolate cake recipe – the one friends and family specifically request when celebrations roll around.
Ingredient Notes
All-Purpose Flour: I always use unbleached all-purpose flour for this recipe, as it provides the perfect structure while still allowing the cake to maintain its tender crumb.
Granulated Sugar: The full amount might seem like a lot, but I’ve found it’s necessary to balance the intense cocoa flavor and create that perfect velvet texture.
Unsweetened Cocoa Powder: I recommend using a high-quality Dutch-processed cocoa for this Black Velvet Cake. In my kitchen, I’ve noticed it provides a deeper, more complex chocolate flavor than natural cocoa.
Buttermilk: The tangy flavor and acidity in buttermilk creates a more tender crumb and adds depth to the chocolate flavor. If you don’t have buttermilk on hand, I often make my own by adding a tablespoon of lemon juice to regular milk.
Vegetable Oil: Using oil instead of butter keeps this cake incredibly moist, even days after baking. I’ve tried substituting with melted butter, but the texture is never quite as velvety.
Boiling Water: This unusual ingredient is actually the secret to intensifying the chocolate flavor. I discovered that adding boiling water to cocoa “blooms” the cocoa particles, releasing more flavor compounds.
Red Food Coloring: I use just enough to give the cake that subtle crimson undertone without overpowering the deep chocolate color. The effect is more sophisticated than a traditional red velvet cake.
Cream Cheese: For the frosting, I always let my cream cheese come fully to room temperature. I’ve learned that even slightly cold cream cheese can create lumps in the frosting that are impossible to smooth out later.
Unsalted Butter: Using unsalted butter in the frosting gives me complete control over the final flavor. Sometimes I add just a tiny pinch of salt to enhance the overall taste.
How to Make Black Velvet Cake
Step 1. I always start by preheating my oven to exactly 350°F and taking the time to properly prepare my cake pans. After years of baking, I’ve learned that a thin coating of shortening followed by a dusting of cocoa powder (instead of flour) prevents any white residue on the dark cake.
Step 2. When sifting the dry ingredients together, I use a whisk to make sure everything is well distributed. My grandmother always said proper sifting is the secret to a cake with even texture, and after making this recipe dozens of times, I can confirm she was right.
Step 3. I’ve found that mixing the wet ingredients in a separate bowl first results in a smoother batter. The first time I made this cake, I rushed and added ingredients directly to the dry mix, which created small flour pockets throughout the cake.
Step 4. When combining the wet and dry ingredients, I always use a gentle hand and stop mixing as soon as they’re incorporated. Over-mixing has been my downfall in the past, resulting in a tougher cake texture that lacks that signature velvet quality.
Step 5. The boiling water addition is my favorite part of this recipe. I pour it in slowly while gently stirring, and you can actually see the batter transform – becoming glossier and more fragrant as the hot water blooms the cocoa.
Step 6. For even layers, I use a kitchen scale to divide the batter precisely between the pans. In my early baking days, I eyeballed it and always ended up with one thicker layer that baked differently than the other.
How to Store & Reheat
I usually store this Black Velvet Cake under a cake dome at room temperature for up to 24 hours if we’re planning to finish it quickly. The cream cheese frosting holds up surprisingly well, and I’ve found the flavor is actually best when the cake isn’t cold.
For longer storage, I cover any cut sections with plastic wrap and refrigerate the cake for up to 5 days. In my experience, letting refrigerated slices sit at room temperature for about 30 minutes before serving brings back that perfect moist texture and allows the flavors to fully bloom again.
If you’d like to make this cake ahead of time, I often bake the layers up to 2 days in advance, wrap them tightly in plastic wrap once completely cooled, and store them at room temperature. The unfrosted cake layers actually become even more moist and flavorful after a day of resting. I typically frost the cake the day I plan to serve it for the freshest presentation.
Freezing works beautifully for this recipe too. I wrap individual slices tightly in plastic wrap followed by aluminum foil, where they keep beautifully for up to 3 months. My daughter often requests I save a slice this way for when she visits next.
What to Serve with Black Velvet Cake
Fresh Berries: I love serving this cake with a side of mixed berries – particularly raspberries or strawberries, or even alongside our Chocolate Raspberry Layer Cake for a berry-chocolate duo. The bright, tart flavor creates a beautiful contrast with the rich chocolate, and the pop of red against the black and white cake is visually stunning.
Vanilla Bean Ice Cream: When I’m serving this cake for a special occasion, I often add a small scoop of high-quality vanilla ice cream on the side. The cold creaminess against the room-temperature cake creates a delightful temperature contrast that my guests always appreciate.
Strong Coffee: In my house, this cake is almost always accompanied by a cup of freshly brewed coffee. The slight bitterness of the coffee enhances the chocolate flavors in the cake – my husband says they’re “made for each other.”
Raspberry Sauce: For an elegant dinner party presentation, I sometimes drizzle a simple raspberry sauce on the plate before adding the cake slice. The sweet-tart flavor cuts through the richness and adds a beautiful pop of color.
Whipped Cream: When I want something simpler than ice cream but still creamy, lightly sweetened whipped cream with a touch of vanilla makes the perfect accompaniment. My grandchildren particularly love this combination and always ask for “extra clouds” on their cake.
FAQs
Can I make this cake without the red food coloring?
Absolutely! I’ve made this cake many times without the food coloring when I’ve run out, and it’s still delicious – you’ll just have a classic chocolate cake instead of the subtle black velvet effect.
Why did my cake sink in the middle?
This usually happens when the oven door is opened too early in the baking process. I never open my oven door until at least 25 minutes have passed to prevent the temperature drop that causes sinking.
Can I substitute sour cream for the buttermilk?
Yes! I’ve used sour cream thinned with a little milk when I didn’t have buttermilk on hand, and the cake turned out just as moist with a slightly different but equally delicious tang.
How far in advance can I make this cake?
I often bake the layers up to 2 days ahead and freeze them, then thaw and frost the day of serving. The complete frosted cake tastes best within 3 days of assembly.
Can I turn this recipe into cupcakes?
Definitely! I make Black Velvet cupcakes frequently for school events. Fill cupcake liners about 2/3 full and bake for approximately 18-20 minutes at the same temperature.
Why is my cream cheese frosting runny?
This typically happens when the ingredients are too warm. I’ve learned to stop beating if the frosting seems too soft and refrigerate it for 15-20 minutes before continuing to beat to the perfect consistency.
Elegant Black Velvet Cake
Ingredients
Equipment
Method
- Preheat your oven to 350°F (175°C). Grease and flour two 9-inch round cake pans.
- In a large mixing bowl, sift together the flour, sugar, cocoa powder, baking powder, baking soda, and salt.
- In another bowl, whisk together the eggs, buttermilk, vegetable oil, and vanilla extract until well combined.
- Gradually add the wet ingredients to the dry ingredients, mixing until just combined. Carefully stir in the boiling water and red food coloring until the batter is smooth.
- Divide the batter evenly between the prepared cake pans.
- Bake in the preheated oven for 30-35 minutes, or until a toothpick inserted into the center comes out clean.
- Allow the cakes to cool in the pans for 10 minutes before transferring them to wire racks to cool completely.
- In a mixing bowl, beat the softened cream cheese and butter together until creamy and smooth.
- Gradually add the powdered sugar and vanilla extract, mixing until well combined. If the frosting is too thick, add heavy cream one tablespoon at a time until the desired consistency is reached.
- Once the cakes are completely cool, place one layer on a serving plate. Spread a generous amount of cream cheese frosting on top.
- Place the second cake layer on top and frost the top and sides of the cake with the remaining cream cheese frosting.
Notes