The Blue Vintage Cake is not just a dessert; it’s a delightful experience that brings joy to any occasion. With its stunning blue hue and rich flavor, this cake is perfect for birthdays, weddings, or even a simple family gathering. The combination of fluffy cake layers and creamy frosting creates a treat that is both visually appealing and delicious. Whether you’re a seasoned baker or a novice in the kitchen, this recipe is easy to follow and guarantees a show-stopping result.
What Makes Blue Vintage Cake Special?
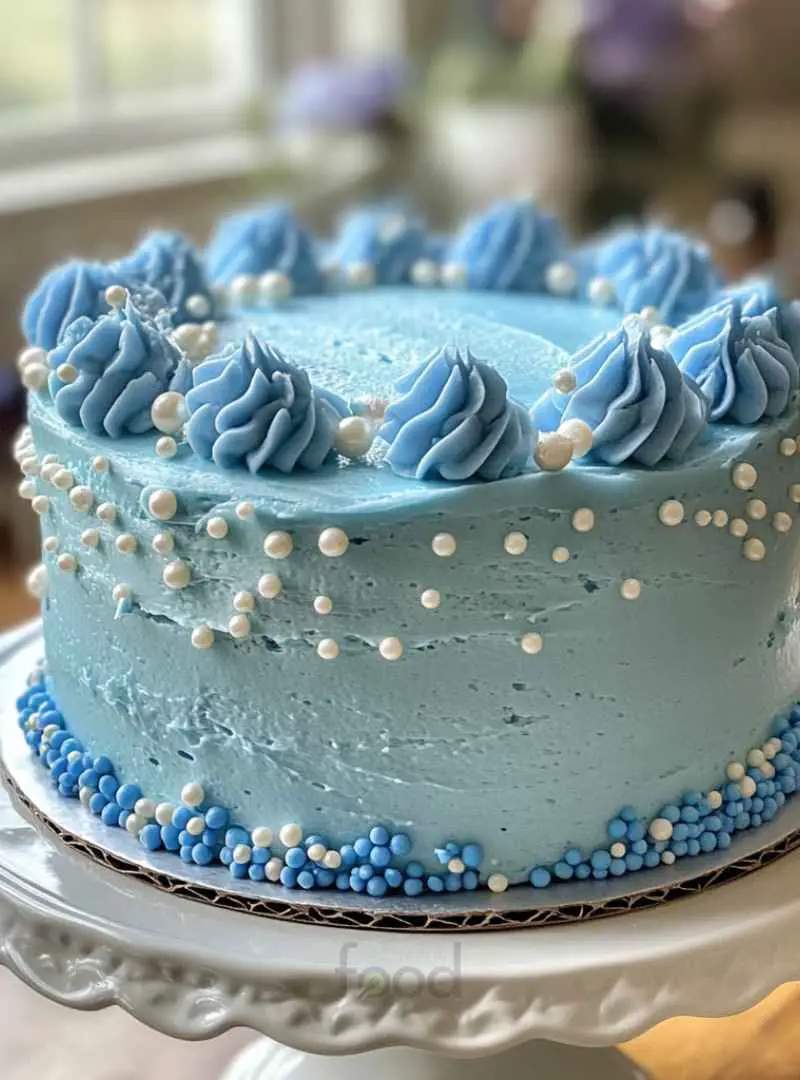
What sets the Blue Vintage Cake apart is its unique color and flavor profile. The vibrant blue color adds a whimsical touch, making it a favorite for themed parties and celebrations. The cake itself is moist and tender, thanks to the careful balance of ingredients. Each bite is a delightful blend of sweetness and creaminess, enhanced by the rich vanilla flavor. Additionally, the use of edible pearls or sprinkles for decoration gives it a charming vintage look that is sure to impress your guests.
Moreover, the versatility of the Blue Vintage Cake allows for various adaptations. You can easily modify the flavors or colors to suit your preferences. This cake not only satisfies your sweet tooth but also serves as a beautiful centerpiece for any event. So, let’s dive into the ingredients and preparation steps to create this stunning dessert!
Ingredients for Blue Vintage Cake
To create the delightful Blue Vintage Cake, you’ll need a selection of essential ingredients. Each component plays a vital role in achieving the perfect texture and flavor. Let’s break down what you’ll need for both the cake and the frosting.
Essential Ingredients for the Cake
All-Purpose Flour: 2 1/2 cups provide the structure for the cake.
Baking Powder: 2 1/2 teaspoons help the cake rise and become fluffy.
Salt: 1/2 teaspoon enhances the overall flavor.
Unsalted Butter: 1 cup, softened, adds richness and moisture.
Granulated Sugar: 2 cups sweeten the cake and contribute to its texture.
Large Eggs: 4 eggs bind the ingredients and add moisture.
Vanilla Extract: 1 teaspoon infuses a lovely flavor.
Whole Milk: 1 cup keeps the batter moist and tender.
Blue Food Coloring: Use as needed to achieve your desired shade of blue.
Key Ingredients for the Frosting
Unsalted Butter: 1 cup, softened, is the base for a creamy frosting.
Powdered Sugar: 4 cups provide sweetness and a smooth texture.
Whole Milk: 1/4 cup helps achieve the right consistency.
Vanilla Extract: 1 teaspoon adds a delicious flavor to the frosting.
Blue Food Coloring: Use as needed to match the cake’s color.
Edible Pearls or Sprinkles: For decoration, adding a vintage touch.
With these ingredients on hand, you’re ready to embark on your baking adventure. The combination of these elements will ensure your Blue Vintage Cake is not only beautiful but also incredibly tasty!
Step-by-Step Preparation of Blue Vintage Cake
Now that you have gathered all the ingredients, it’s time to dive into the step-by-step preparation of your Blue Vintage Cake. Follow these instructions carefully to create a cake that is not only delicious but also visually stunning.
Step 1: Prepare the Cake
Preheat the Oven
First things first, preheat your oven to 350°F (175°C). This ensures that your cake bakes evenly. While the oven heats up, you can prepare your cake pans.
Mix Dry Ingredients
In a medium bowl, whisk together 2 1/2 cups of all-purpose flour, 2 1/2 teaspoons of baking powder, and 1/2 teaspoon of salt. This mixture is essential for the cake’s structure. Set it aside for now.
Cream Butter and Sugar
In a large mixing bowl, take 1 cup of softened unsalted butter and 2 cups of granulated sugar. Beat them together until the mixture is light and fluffy. This process usually takes about 3-4 minutes. The fluffiness is key to a tender cake!
Add Eggs and Vanilla
Next, add 4 large eggs to the butter and sugar mixture, one at a time. Make sure to mix well after each addition. Then, stir in 1 teaspoon of vanilla extract for that lovely flavor.
Combine Mixtures
Now, it’s time to combine the dry ingredients with the wet mixture. Gradually add the flour mixture to the butter mixture, alternating with 1 cup of whole milk. Start and end with the dry ingredients. Mix until just combined; over-mixing can make the cake dense.
Add Color to the Batter
Finally, add blue food coloring to the batter. Mix until you achieve your desired shade of blue. Remember, you can always add more, but it’s hard to take it out once it’s in!
Step 2: Bake the Cake
Divide the Batter
Once your batter is ready, evenly divide it between the two prepared 9-inch round cake pans. This ensures that both layers bake evenly.
Bake the Cake
Place the pans in the preheated oven and bake for 25-30 minutes. To check if they are done, insert a toothpick into the center. If it comes out clean, your cakes are ready!
Cool the Cakes
After baking, remove the cakes from the oven. Let them cool in the pans for about 10 minutes. Then, transfer them to a wire rack to cool completely. This step is crucial; frosting a warm cake can lead to a melty mess!
Step 3: Make the Frosting
Beat the Butter
While the cakes are cooling, you can prepare the frosting. In a large mixing bowl, beat 1 cup of softened unsalted butter until it’s creamy and smooth.
Add Sugar and Milk
Gradually add 4 cups of powdered sugar and 1/4 cup of whole milk to the butter. Mix until the frosting is smooth and fluffy. Stir in 1 teaspoon of vanilla extract for added flavor.
Color the Frosting
Just like the cake, you can add blue food coloring to the frosting. Mix until you reach your desired shade. This will help create a cohesive look for your Blue Vintage Cake!
Step 4: Assemble and Decorate the Blue Vintage Cake
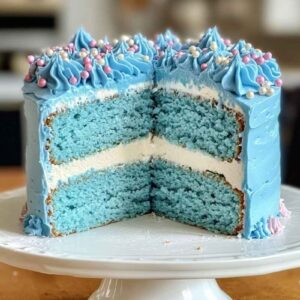
Frost the Cake Layers
Once the cakes are completely cool, place one layer on a serving plate. Spread a generous layer of frosting on top. Then, carefully place the second layer on top of the frosted layer.
Frost the Top and Sides
Use the remaining frosting to cover the top and sides of the cake. Make sure to smooth it out for a beautiful finish. You can use a spatula or a knife for this step.
Decorate with Edible Pearls or Sprinkles
To add a vintage touch, finish your cake with edible pearls or sprinkles. This not only enhances the look but also adds a fun texture. Your Blue Vintage Cake is now ready to impress!
Variation of Blue Vintage Cake
The Blue Vintage Cake is a delightful treat that can be easily customized to suit different tastes and dietary needs. Whether you want to experiment with flavors or make adjustments for specific diets, there are plenty of options to explore. Let’s take a look at some alternative flavors and colors, as well as dietary modifications you can make.
Alternative Flavors and Colors
While the classic Blue Vintage Cake is a showstopper, you can switch things up with different flavors and colors. Here are some ideas:
Chocolate Blue Vintage Cake: Replace 1 cup of flour with 1 cup of cocoa powder for a rich chocolate flavor. Add blue food coloring to the batter for that signature hue.
Lemon Blue Vintage Cake: Incorporate the zest of 1 lemon and replace the vanilla extract with lemon extract. This adds a refreshing citrus twist.
Red Velvet Blue Vintage Cake: Use red food coloring instead of blue for a classic red velvet cake. Pair it with cream cheese frosting for a delicious contrast.
Rainbow Vintage Cake: Divide the batter into multiple bowls and color each with different shades. Layer them for a vibrant, multi-colored cake.
These variations not only change the flavor but also keep the cake visually appealing. Feel free to mix and match to create your own unique version of the Blue Vintage Cake!
Dietary Modifications
For those with dietary restrictions, the Blue Vintage Cake can be adapted to fit various needs. Here are some modifications you can consider:
Gluten-Free: Substitute all-purpose flour with a gluten-free flour blend. Ensure that the baking powder is also gluten-free.
Dairy-Free: Use dairy-free butter and almond or coconut milk instead of whole milk. This keeps the cake moist and delicious.
Egg-Free: Replace each egg with 1/4 cup of unsweetened applesauce or a flax egg (1 tablespoon of ground flaxseed mixed with 2.5 tablespoons of water).
Reduced Sugar: Use a sugar substitute or reduce the amount of granulated sugar in the recipe. Just be sure to adjust the liquid ingredients accordingly.
These dietary modifications allow everyone to enjoy the Blue Vintage Cake, regardless of their dietary preferences. With a little creativity, you can make this cake accessible to all!
Cooking Note for Blue Vintage Cake
When baking the Blue Vintage Cake, a few cooking notes can help ensure your cake turns out perfectly every time. These tips will guide you through the process and help you avoid common pitfalls.
First, always measure your ingredients accurately. Baking is a science, and even a small deviation can affect the outcome. Use measuring cups and spoons for dry ingredients and a liquid measuring cup for wet ingredients. This precision will help you achieve the right texture and flavor.
Next, make sure your butter is softened but not melted. Softened butter should be at room temperature, allowing it to cream well with the sugar. This step is crucial for creating a light and fluffy cake. If you forget to take the butter out in advance, you can cut it into small pieces and let it sit for about 15 minutes.
Additionally, avoid over-mixing the batter once you add the flour. Over-mixing can lead to a dense cake. Mix just until the ingredients are combined, and you’ll be rewarded with a light and airy texture.
Lastly, keep an eye on your cakes while they bake. Ovens can vary in temperature, so start checking for doneness a few minutes before the recommended baking time. A toothpick inserted into the center should come out clean or with a few moist crumbs attached.
By following these cooking notes, you’ll set yourself up for success in creating a stunning Blue Vintage Cake that is sure to impress your family and friends!
Serving Suggestions for Blue Vintage Cake
The Blue Vintage Cake is not just a treat; it’s a centerpiece that can elevate any gathering. Knowing when and how to serve this delightful cake can make your occasion even more special. Let’s explore some ideal occasions for serving this cake and the best beverages to pair with it.
Ideal Occasions for Serving
This charming cake is perfect for a variety of celebrations. Here are some occasions where the Blue Vintage Cake can shine:
Birthday Parties: The vibrant blue color makes it a fantastic choice for birthday celebrations, especially for children and those who love a whimsical touch.
Weddings: The elegant look of the Blue Vintage Cake fits beautifully into wedding themes, particularly for beach or vintage-style weddings.
Baby Showers: This cake is a lovely option for baby showers, especially if you know the baby’s gender. Blue is a classic choice for boys!
Anniversaries: Celebrate love with this stunning cake at anniversary parties, adding a sweet touch to the festivities.
Family Gatherings: Whether it’s a holiday or a simple get-together, the Blue Vintage Cake is sure to impress family and friends.
Each of these occasions provides a wonderful opportunity to showcase your baking skills and delight your guests with a delicious dessert.
Pairing with Beverages
To enhance the experience of enjoying your Blue Vintage Cake, consider pairing it with the right beverages. Here are some delightful options:
Tea: A warm cup of chamomile or Earl Grey tea complements the sweetness of the cake beautifully.
Coffee: Brewed coffee, whether hot or iced, pairs well with the rich flavors of the cake.
Milk: A classic choice, a glass of cold milk balances the sweetness and adds a comforting touch.
Lemonade: For a refreshing twist, serve the cake with a glass of homemade lemonade, especially during warm weather.
Sparkling Water: A bubbly drink can cleanse the palate and enhance the cake’s flavors without overpowering them.
By choosing the right occasion and beverage, you can create a memorable experience around your Blue Vintage Cake. Enjoy the delightful flavors and the joy it brings to your celebrations!
Tips for Perfecting Your Blue Vintage Cake
Creating the perfect Blue Vintage Cake is an art that can be mastered with a few helpful tips. Whether you’re a beginner or an experienced baker, knowing what to watch out for can make all the difference. Here are some common mistakes to avoid and storage tips to keep your cake fresh and delicious.
Common Mistakes to Avoid
Even the best bakers can make mistakes. Here are some common pitfalls to watch out for:
Not Prepping the Pans: Always grease and flour your cake pans. This prevents the cake from sticking and ensures a smooth release.
Using Cold Ingredients: Make sure your butter and eggs are at room temperature. Cold ingredients can lead to a dense cake.
Over-Mixing the Batter: Once you add the flour, mix just until combined. Over-mixing can make the cake tough.
Skipping the Cooling Time: Allow the cakes to cool completely before frosting. Frosting a warm cake can cause the frosting to melt and slide off.
Not Measuring Ingredients Accurately: Baking is precise. Use measuring cups and spoons to ensure accuracy for the best results.
By avoiding these common mistakes, you’ll be on your way to baking a beautiful and delicious Blue Vintage Cake!
Storage Tips
To keep your Blue Vintage Cake fresh and tasty, proper storage is key. Here are some tips to help you:
Room Temperature: If you plan to eat the cake within a few days, store it in an airtight container at room temperature. This keeps it moist and flavorful.
Refrigeration: For longer storage, place the cake in the fridge. Cover it with plastic wrap or store it in an airtight container to prevent it from drying out.
Freezing: If you want to save the cake for later, you can freeze it. Wrap each layer tightly in plastic wrap and then in aluminum foil. It can last up to three months in the freezer.
Thawing: To thaw a frozen cake, place it in the refrigerator overnight. This helps maintain its texture and flavor.
By following these storage tips, you can enjoy your Blue Vintage Cake for days to come, keeping it as delightful as the day it was baked!
Breakdown of Time for Blue Vintage Cake
Understanding the time required for each step in making the Blue Vintage Cake can help you plan your baking session effectively. Here’s a detailed breakdown of the time you’ll need for preparation, cooking, and the total time involved in creating this delightful dessert.
Prep Time
The prep time for the Blue Vintage Cake is approximately 30 minutes. This includes gathering all your ingredients, measuring them accurately, and preparing the cake batter. During this time, you’ll also preheat your oven and prepare your cake pans. It’s essential to have everything ready before you start baking to ensure a smooth process.
Cooking Time
The cooking time for the Blue Vintage Cake is about 30 minutes. This is the time it takes for the cakes to bake in the oven. Keep an eye on them as they bake, checking for doneness with a toothpick. If it comes out clean, your cakes are ready to be removed from the oven!
Total Time
In total, you’ll need about 1 hour to make the Blue Vintage Cake from start to finish. This includes both the prep and cooking times. Once the cakes are baked and cooled, you can spend a little extra time decorating them to your liking. The total time makes it a manageable project for any baker, whether you’re preparing for a special occasion or just treating yourself!
Nutritional Information for Blue Vintage Cake
Understanding the nutritional content of your Blue Vintage Cake can help you enjoy it mindfully. While this cake is a delightful treat, it’s good to know what you’re indulging in. Below, we’ll break down the calories, macronutrients, and sodium content to give you a clearer picture of this delicious dessert.
Calories and Macronutrients
Each slice of Blue Vintage Cake (assuming 12 servings) contains approximately:
Calories: 350 calories
Carbohydrates: 50 grams
Protein: 3 grams
Fat: 15 grams
Sugar: 30 grams
These values can vary based on the specific ingredients used and portion sizes. The cake is rich in carbohydrates due to the flour and sugar, providing a quick energy boost. The fat content mainly comes from the butter, which adds to the cake’s moistness and flavor. While it’s a sweet treat, moderation is key to enjoying it as part of a balanced diet.
Sodium Content
The sodium content in a slice of Blue Vintage Cake is approximately:
Sodium: 200 milligrams
This sodium level is relatively moderate, primarily coming from the baking powder and salt used in the recipe. For those monitoring their sodium intake, it’s always a good idea to be aware of the total amount consumed throughout the day. Enjoying a slice of this cake occasionally can fit into a healthy lifestyle.
By keeping these nutritional facts in mind, you can savor your Blue Vintage Cake while being conscious of your dietary choices. Remember, it’s all about balance and enjoying the sweet moments in life!
FAQs about Blue Vintage Cake
Can I use different colors for the Blue Vintage Cake?
Absolutely! While the Blue Vintage Cake is known for its stunning blue hue, you can easily switch it up. Feel free to use any food coloring that suits your theme or preference. For instance, pink or lavender can create a lovely pastel cake, while vibrant red or green can add a fun twist. The choice is yours, and it allows for creativity in your baking!
How do I store leftover Blue Vintage Cake?
Storing leftover Blue Vintage Cake is simple! If you plan to eat it within a few days, keep it in an airtight container at room temperature. This helps maintain its moisture and flavor. For longer storage, place the cake in the refrigerator, ensuring it’s covered to prevent drying out. If you want to save it for later, you can freeze the cake. Just wrap each layer tightly in plastic wrap and then in aluminum foil. It can last up to three months in the freezer!
Can I make Blue Vintage Cake ahead of time?
Yes, you can make the Blue Vintage Cake ahead of time! You can bake the cake layers a day or two in advance. Just make sure to cool them completely before wrapping them in plastic wrap and storing them in the fridge. You can also prepare the frosting ahead of time and keep it in the refrigerator. When you’re ready to serve, simply frost the cake and enjoy!
What are some decoration ideas for Blue Vintage Cake?
Decorating your Blue Vintage Cake can be a fun and creative process! Here are some ideas to inspire you:
Edible Pearls: Use edible pearls or silver dragees for a classic vintage look.
Fresh Flowers: Decorate with fresh flowers that complement the blue color, like white or yellow blooms.
Fruit Toppings: Add fresh berries or slices of fruit for a pop of color and freshness.
Whipped Cream: Pipe whipped cream around the edges for a soft, elegant finish.
Chocolate Shavings: Sprinkle chocolate shavings on top for a rich contrast.
These decoration ideas can enhance the visual appeal of your Blue Vintage Cake, making it even more delightful for your guests!
Conclusion on Blue Vintage Cake
Final Thoughts on Making and Enjoying Blue Vintage Cake
In conclusion, the Blue Vintage Cake is more than just a dessert; it’s a celebration of creativity and flavor. This delightful cake, with its stunning blue color and rich taste, is perfect for any occasion. Whether you’re baking for a birthday, wedding, or simply to enjoy with family, this cake is sure to impress.
Making the Blue Vintage Cake is a rewarding experience. From gathering the ingredients to frosting the final layer, each step is filled with joy and anticipation. Remember to follow the tips and variations provided to customize your cake to your liking. The possibilities are endless, and you can make it uniquely yours!
As you serve this beautiful cake, take a moment to appreciate the smiles it brings to your loved ones. The combination of flavors and the charming presentation will create lasting memories. So, gather your ingredients, roll up your sleeves, and embark on this delightful baking adventure. Enjoy every slice of your Blue Vintage Cake, and share the joy it brings with those around you!
Blue Vintage Cake
A delightful cake with a stunning blue hue and rich flavor, perfect for any occasion.