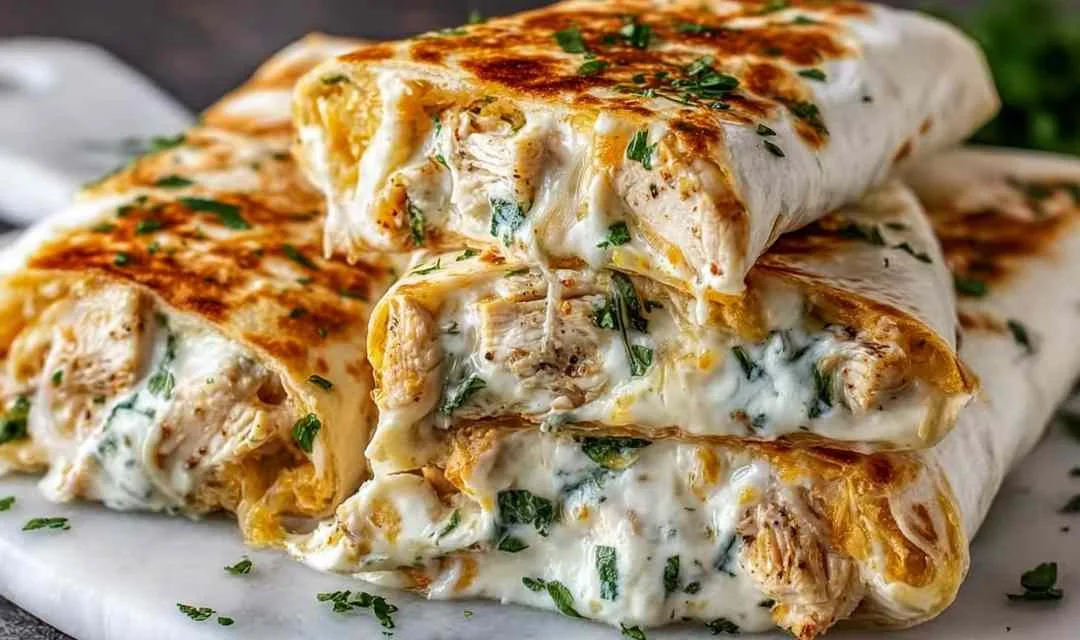
Cheesy Garlic Chicken Wraps bring together tender chicken, melted cheese, and bold garlic flavor in a crispy tortilla that’s ready faster than takeout. After years of making quick dinners for my three kids on busy school nights, I’ve learned that the best recipes are the ones you can pull together without a fuss, and this one never disappoints.
There’s something magical about the moment those wraps hit the hot skillet. The butter sizzles, the tortilla turns golden, and suddenly my kitchen smells just like those Sunday gatherings at Grandma’s farm, except this meal comes together in twenty minutes instead of all afternoon. I still remember the first time I made these for my family. My youngest was running late to soccer practice, my middle child needed help with homework, and dinner felt impossible. I tossed together leftover chicken with whatever cheese I had in the fridge, rolled it in tortillas, and toasted them crispy. The kids devoured them before practice, and they’ve been asking for “Mom’s cheese wraps” ever since. That’s exactly the kind of recipe I love sharing, the ones that save your evening and make everyone happy. Time to get your skillet ready!
What Makes This Chicken Wrap Recipe So Special
Growing up in the Midwest, I learned that the best weeknight dinners don’t require fancy ingredients or complicated techniques, they just need to taste incredible and fit into real life. These cheesy garlic chicken wraps embody that philosophy perfectly, combining the comfort of melted cheese with the satisfaction of a handheld meal.
What makes these wraps stand out in my recipe box:
- Uses ingredients you likely have on hand, leftover chicken, basic pantry spices, and cheese from your refrigerator create restaurant-quality results
- Comes together in just 20 minutes, perfect for those evenings when everyone’s hungry and time is short
- Delivers consistently crispy, golden results, the garlic butter brush technique ensures perfect texture every single time
- Adapts easily to whatever you have available, swap cheeses, add vegetables, or use rotisserie chicken without missing a beat
- Creates that irresistible combination of creamy filling and crispy exterior that keeps everyone coming back for seconds
I’ve made these wraps hundreds of times over the years, and they’ve never let me down, whether I’m feeding my own family or hosting friends for casual game night.

Ingredient Spotlight
Cooked chicken forms the protein base of these wraps, and I always choose rotisserie chicken when I’m short on time since it’s already seasoned and incredibly moist.
Garlic powder delivers consistent, mellow garlic flavor throughout the filling without the risk of burning fresh garlic during the quick cooking time.
Mozzarella cheese melts beautifully and creates those satisfying cheese pulls when you bite into the wrap.
Cheddar cheese adds sharp, tangy flavor that balances the mild mozzarella and brings depth to every bite.
Cream cheese acts as the creamy binder that holds everything together while adding richness to the filling.
Mayonnaise contributes moisture and helps create that smooth, cohesive texture that makes the filling spreadable.
Fresh parsley brightens the rich, cheesy filling with a pop of color and fresh flavor, though dried parsley works perfectly fine when fresh isn’t available.
Melted butter with minced garlic brushed on the outside creates that golden, crispy shell and infuses each bite with incredible aroma.
Large flour tortillas provide the sturdy wrapper needed to hold all that cheesy filling without tearing during the folding and toasting process.
How to Make Cheesy Garlic Chicken Wraps
Step 1. I’ve learned that combining all your filling ingredients in one bowl before you start assembling saves time and ensures every wrap tastes exactly the same, mix the chicken, both cheeses, cream cheese, mayonnaise, garlic powder, onion powder, salt, pepper, and parsley until everything’s creamy and well combined.
Step 2. Betty always lays out all her tortillas on a clean counter before filling them, which makes assembly faster, spoon one-quarter of the chicken mixture into the center of each tortilla, adding spinach, lettuce, or tomatoes if you’re using them.
Step 3. After years of making wraps, I discovered the key is folding the sides in first, then rolling tightly from the bottom to create a secure package that won’t fall apart in the skillet.
Step 4. The garlic butter brush is what transforms these from good to incredible, mix your melted butter with minced fresh garlic and brush it generously over the entire outside of each wrap.
Step 5. I’ve found that placing the wraps seam-side down first in a medium-heat skillet helps seal them shut while creating that perfect golden crust, cook for 2 to 3 minutes per side until they’re crispy and the cheese inside is completely melted.
Step 6. Betty’s tip: Let the wraps rest for about a minute after cooking before slicing them in half, which allows the cheese to set slightly and prevents it from oozing out everywhere.
Step 7. Through trial and error, I learned that serving these wraps immediately while they’re still warm and crispy makes all the difference, pair them with ranch dressing or garlic aioli for dipping.
Keeping This Chicken Wrap Fresh
I typically store leftover Cheesy Garlic Chicken Wraps in an airtight container in the refrigerator for up to 3 days. The wraps will soften once refrigerated, but they still taste delicious. Betty always wraps each one individually in plastic wrap or parchment paper before placing them in the container, which prevents them from sticking together and makes grabbing a quick lunch easier.
For freezing, these wraps hold up surprisingly well for up to 2 months. I wrap each wrap tightly in aluminum foil, then place them all in a freezer-safe bag with the air pressed out. Betty’s freezing method works well because the foil protects against freezer burn while making individual wraps easy to grab. When you’re ready to eat one, thaw it overnight in the refrigerator.
For the best texture, I reheat these wraps in a skillet over medium heat for about 3 to 4 minutes per side until the outside crisps up again and the filling is heated through. You can also use the oven at 350°F for 10 to 12 minutes, which works great when reheating multiple wraps at once. The microwave will heat them quickly (60 to 90 seconds), but you’ll lose that crispy exterior, though they’ll still taste wonderful if you’re in a hurry.
Perfect Partners for Cheesy Garlic Chicken Wraps
- Simple garden salad with fresh, crisp vegetables and light vinaigrette cuts through the richness of the cheesy wraps while adding color and nutrition to your plate.
- Sweet potato fries bring natural sweetness and crispy texture that create a delightful contrast with the savory, garlicky wraps, and my family requests this pairing constantly.
- Tomato soup offers something deeply comforting about dunking these crispy wraps into warm, tangy tomato soup, especially on chilly evenings.
- Coleslaw with its cool, crunchy texture and tangy dressing balances the warm, melted cheese perfectly and adds a refreshing element to the meal.
- Roasted vegetables like seasoned roasted broccoli, bell peppers, or zucchini bring healthy variety to the table and complement the garlic flavors beautifully.
- Street corn chicken rice bowls pair wonderfully with these wraps when you want to create a complete Mexican-inspired feast.
FAQs
I recommend using good melting cheeses like Monterey Jack, Colby, or even pepper jack for a spicy kick, just avoid hard cheeses like Parmesan as the main cheese since they don’t create that gooey texture we’re looking for.
To prevent this issue, make sure your tortillas are at room temperature and slightly warm them in the microwave for 10 to 15 seconds if they’re cold from the refrigerator, this makes them much more pliable.
Many home cooks find success with assembling the wraps up to 4 hours ahead, covering them tightly with plastic wrap, and refrigerating until ready to cook, just brush with the garlic butter right before toasting.
Cheesy Garlic Chicken Wraps
Ingredients
Equipment
Method
- In a mixing bowl, combine cooked chicken, garlic powder, onion powder, salt, pepper, mozzarella cheese, cheddar cheese, softened cream cheese, mayonnaise, and parsley. Mix until creamy and well combined.
- Place tortillas on a flat surface. Spoon one-quarter of the filling into the center of each tortilla. Add optional vegetables like spinach, lettuce, or tomatoes if desired.
- Fold the sides of each tortilla inward, then roll tightly from the bottom to form secure wraps.
- In a small bowl, mix melted butter with minced garlic. Brush the outside of each wrap generously with the garlic butter mixture.
- Heat a skillet over medium heat. Place wraps seam-side down and toast for 2 to 3 minutes per side until golden and crisp, and the cheese is melted inside.
- Remove from heat and let rest for 1 minute. Slice each wrap in half and serve warm with ranch dressing or garlic aioli for dipping.