Easter Cookies
Easter is a time of joy, celebration, and delicious treats. One of the most delightful ways to celebrate this holiday is by baking Easter cookies. These sweet, colorful cookies not only taste great but also bring a festive spirit to your gatherings. Whether you’re hosting a family brunch or attending a potluck, Easter cookies are sure to be a hit!
The Significance of Easter Cookies
Easter cookies hold a special place in many cultures. They symbolize new beginnings and the arrival of spring. Traditionally, families come together to bake and decorate cookies, creating lasting memories. The act of baking can be a fun activity for kids and adults alike, fostering creativity and teamwork. Plus, the vibrant colors and fun shapes of Easter cookies make them a perfect treat for the holiday.
Why You Should Make Easter Cookies This Year
This year, consider making Easter cookies to add a personal touch to your celebrations. Not only are they easy to prepare, but they also allow for endless customization. You can choose your favorite flavors, shapes, and decorations. Imagine the joy on your loved ones’ faces when they see a plate full of beautifully decorated cookies! Plus, baking together can strengthen family bonds and create cherished memories. So, roll up your sleeves and get ready to whip up some delightful Easter cookies!
Ingredients for Easter Cookies
To create the perfect batch of Easter cookies, you need to gather a few essential ingredients. Each component plays a vital role in achieving that delightful taste and texture. Let’s take a closer look at what you’ll need.
Essential Ingredients for Perfect Easter Cookies
- All-Purpose Flour: This is the base of your cookies. It gives them structure and helps them hold their shape.
- Baking Soda and Baking Powder: These leavening agents help your cookies rise and become fluffy.
- Unsalted Butter: Softened butter adds richness and flavor. It also helps create a tender texture.
- White Sugar: This sweetener not only adds sweetness but also contributes to the cookies’ crisp edges.
- Egg: Eggs bind the ingredients together and add moisture, making your cookies soft and chewy.
- Vanilla and Almond Extracts: These extracts enhance the flavor, giving your cookies a delightful aroma.
- Salt: A pinch of salt balances the sweetness and enhances the overall flavor of the cookies.
Optional Ingredients for Customizing Your Easter Cookies
While the essential ingredients are crucial, you can also add some optional ingredients to make your cookies even more special. Here are a few ideas:
- Colored Sugar or Sprinkles: Use these for decoration to make your cookies festive and fun!
- Chocolate Chips: Add a handful of chocolate chips for a sweet surprise in every bite.
- Nuts: Chopped nuts like walnuts or pecans can add a nice crunch and flavor.
- Food Coloring: If you want to create colorful dough, a few drops of food coloring can do the trick.
- Frosting: Consider topping your cookies with icing for an extra layer of sweetness and decoration.
With these ingredients, you’re well on your way to baking delicious cookies that everyone will love!
Step-by-Step Preparation of Easter Cookies
Now that you have gathered all your ingredients, it’s time to dive into the fun part: preparing your cookies! Follow these simple steps to create a delightful batch that will impress everyone.
Step 1: Prepare the Dough for Easter Cookies
Preheat the Oven for Baking
First things first, preheat your oven to 375°F (190°C). This ensures that your cookies bake evenly and come out perfectly golden. While the oven heats up, you can start mixing your ingredients.
Mixing Dry Ingredients for Easter Cookies
In a small bowl, combine 2 3/4 cups of all-purpose flour, 1 teaspoon of baking soda, and 1/2 teaspoon of baking powder. Stir these dry ingredients together until they are well mixed. This step is important as it helps distribute the leavening agents evenly throughout the flour.
Creaming Butter and Sugar
In a large bowl, take 1 cup of softened unsalted butter and 1 1/2 cups of white sugar. Use a mixer to cream them together until the mixture is smooth and fluffy. This process incorporates air into the butter, making your cookies light and tender.
Adding Egg and Flavor Extracts
Next, beat in 1 egg, along with 1 teaspoon of vanilla extract and 3/4 teaspoon of almond extract. Mix until everything is well combined. The extracts will add a wonderful aroma and flavor to your cookies.
Combining Mixtures for Easter Cookies
Now, gradually blend the dry ingredients into the creamed mixture. Mix until everything is fully incorporated. Be careful not to overmix, as this can make your cookies tough. Once the dough is ready, it should be soft and slightly sticky.
Step 2: Shape and Decorate Your Easter Cookies
Forming the Cookie Dough Balls
Using a rounded teaspoon, scoop out portions of dough and roll them into balls. Place these dough balls onto ungreased cookie sheets, leaving some space between each one. This allows them to spread while baking.
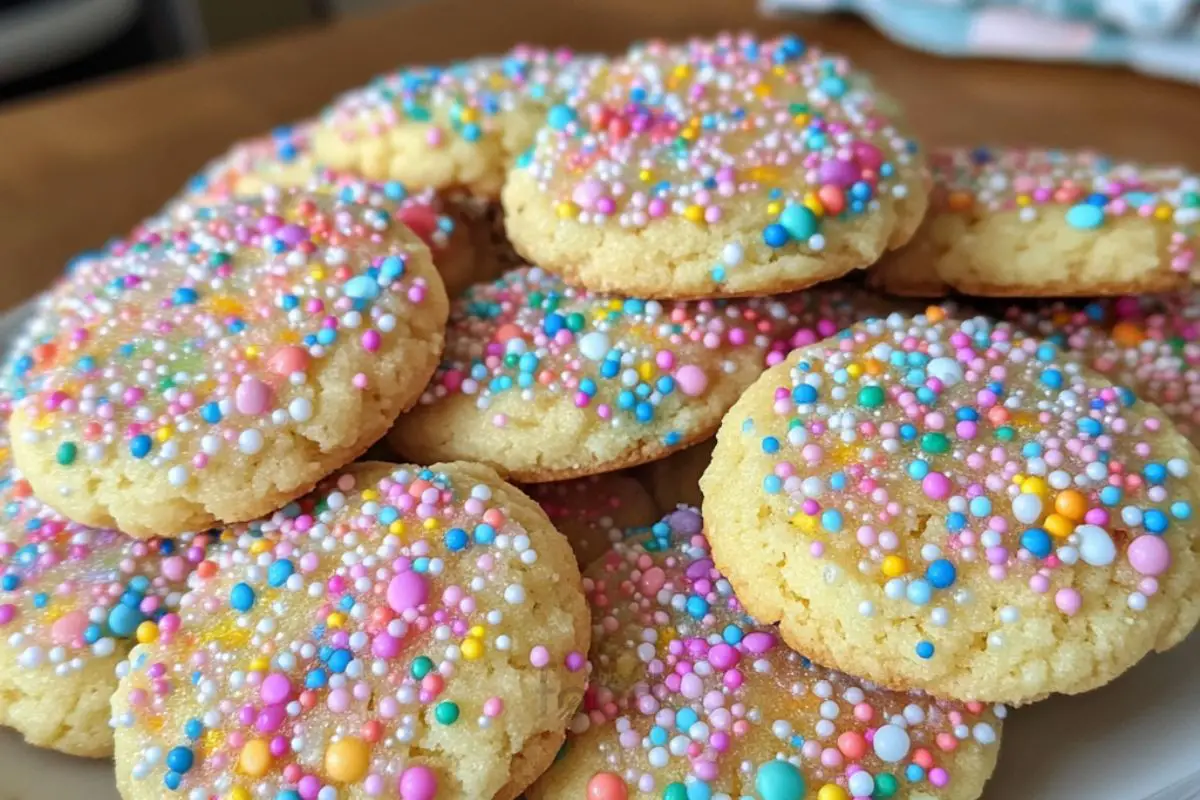
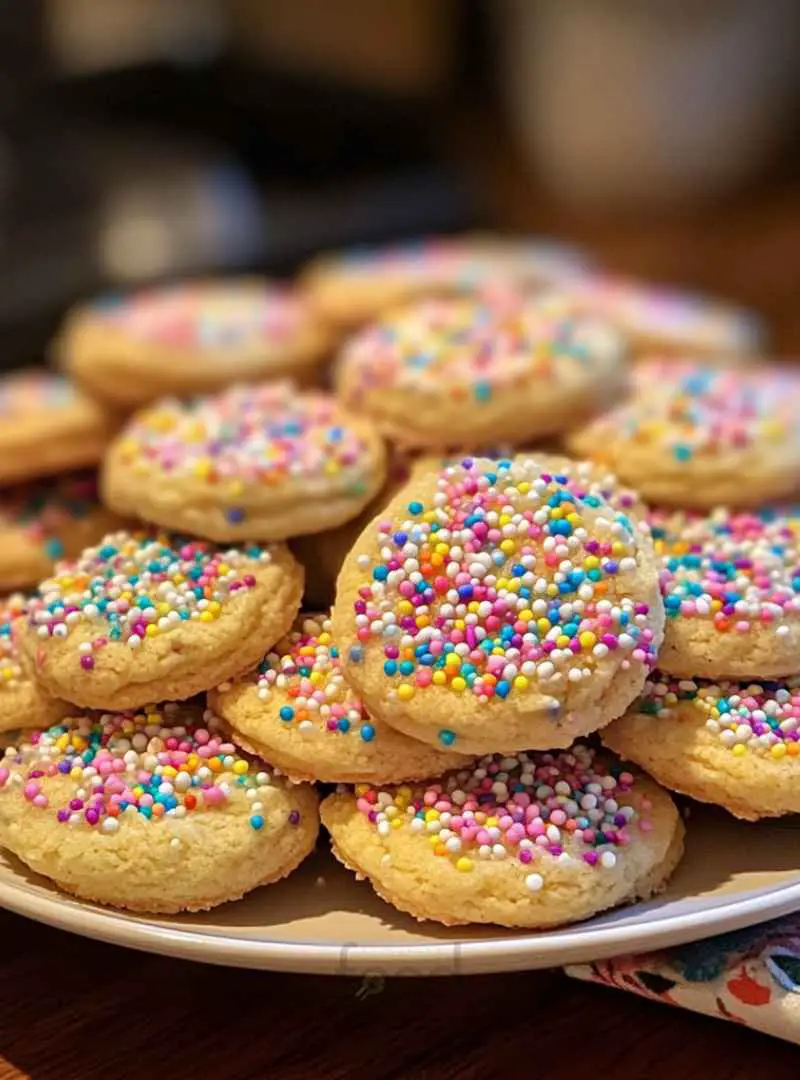
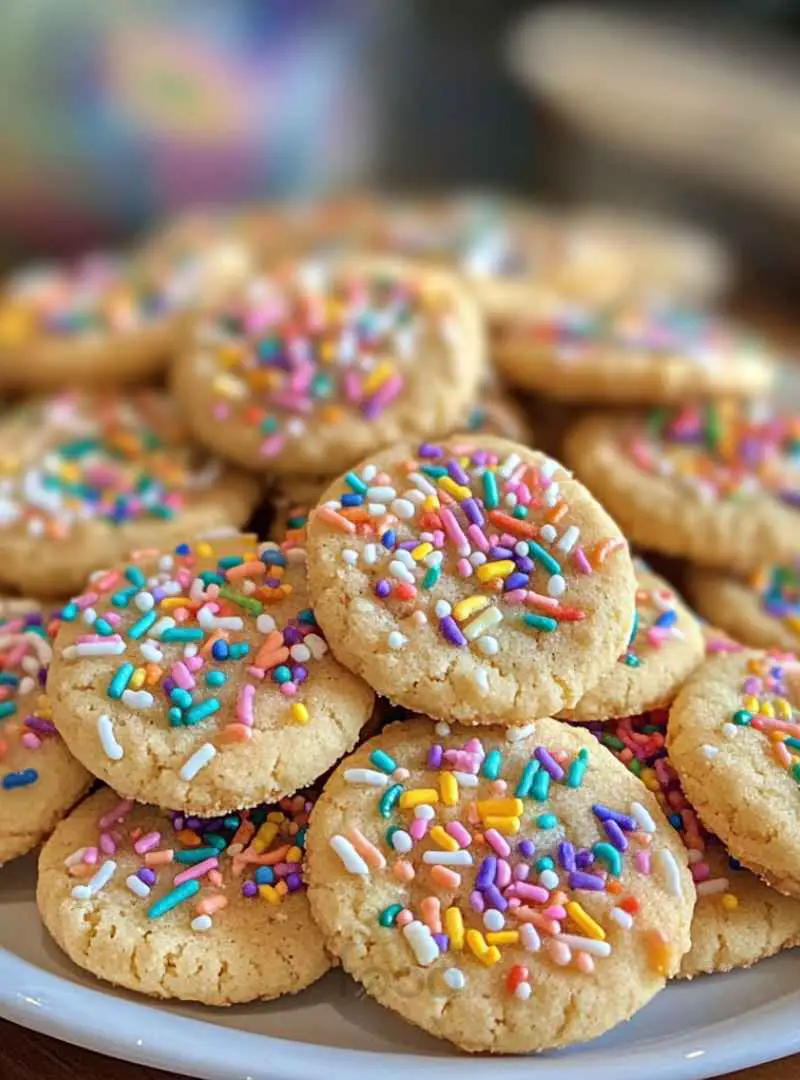
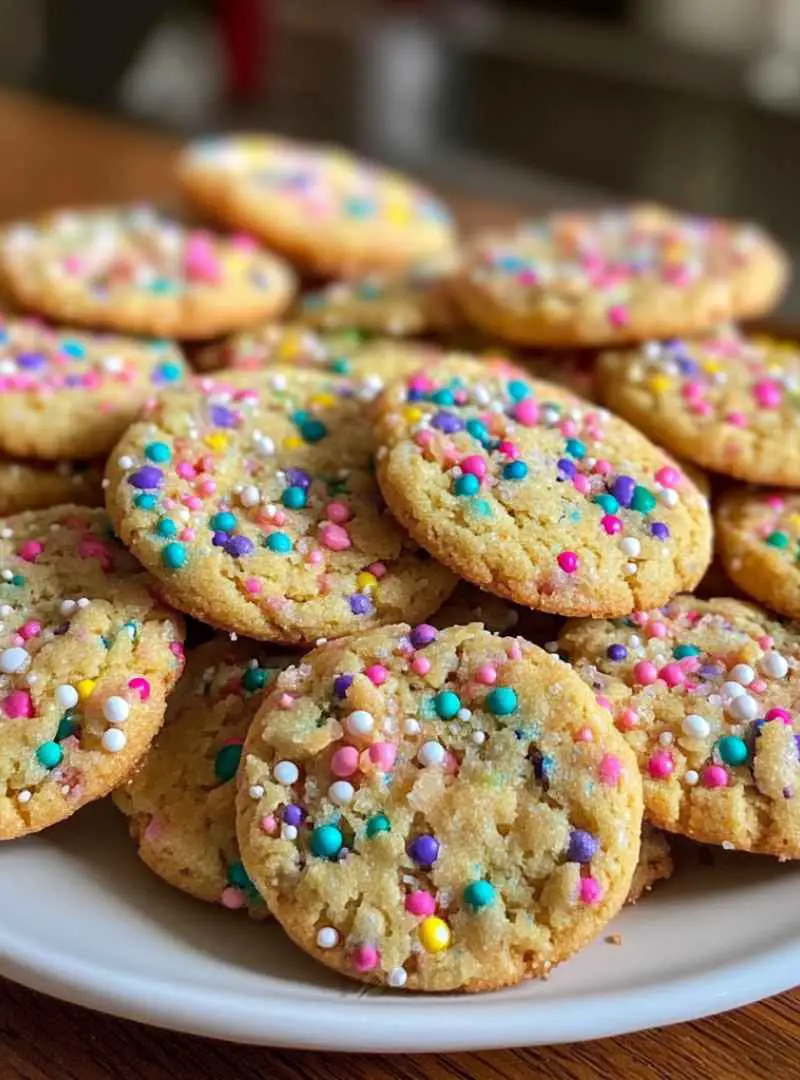
Flattening and Decorating with Colored Sugar
To give your cookies a nice shape, use the bottom of a glass to gently flatten each ball. After flattening, sprinkle colored sugar or sprinkles on top of each cookie. This adds a festive touch and makes them look extra special!
Step 3: Bake Your Easter Cookies
Baking Time and Temperature
Place your cookie sheets in the preheated oven and bake for 8 to 10 minutes. Keep an eye on them! You want them to be golden around the edges but still soft in the center.
Cooling Your Easter Cookies
Once baked, remove the cookies from the oven and let them cool on the baking sheet for a few minutes. This helps them set. After that, transfer them to wire racks to cool completely. Enjoy the delightful aroma filling your kitchen!
With these steps, you’re well on your way to creating delicious cookies that will surely brighten up your holiday celebrations!
Variation of Easter Cookies
While traditional Easter cookies are delightful, adding a twist can make them even more exciting! Here are some creative ideas to elevate your cookie game this holiday season.
Creative Twists on Traditional Easter Cookies
Why not try something new with your Easter cookies? Here are a few fun variations:
- Chocolate-Dipped Cookies: After baking, dip half of each cookie in melted chocolate. This adds a rich flavor and a beautiful finish.
- Fruit-Flavored Cookies: Incorporate lemon or orange zest into the dough for a refreshing citrus twist. You can also add dried fruits like cranberries or apricots for extra sweetness.
- Nutty Easter Cookies: Mix in chopped nuts like almonds or pecans for a crunchy texture. This adds a delightful contrast to the soft cookie base.
- Layered Cookies: Create a layered effect by using different colored doughs. Roll out the dough, layer them, and then cut out shapes for a stunning visual appeal.
- Stuffed Cookies: Add a surprise filling! Place a small piece of chocolate or a dollop of jam in the center of the dough before baking. This will create a gooey center that everyone will love.
Gluten-Free and Vegan Options for Easter Cookies
For those with dietary restrictions, there are plenty of ways to enjoy cookies without compromising on taste. Here are some options:
- Gluten-Free Cookies: Substitute all-purpose flour with a gluten-free flour blend. Make sure it contains xanthan gum for the best texture. You can also use almond flour for a nutty flavor.
- Vegan Cookies: Replace the egg with a flaxseed meal or applesauce. Use vegan butter or coconut oil instead of regular butter. This way, you can enjoy delicious cookies that fit a vegan lifestyle.
- Nut-Free Options: If you need to avoid nuts, simply omit them from the recipe. You can still enjoy flavorful cookies by adding extra vanilla or almond extract.
With these variations, you can create Easter cookies that cater to everyone’s tastes and dietary needs. So, get creative and have fun experimenting in the kitchen!
Cooking Note for Easter Cookies
When it comes to baking cookies, achieving the perfect texture is key. The right texture can make your cookies soft, chewy, and utterly delightful. Here are some helpful tips to ensure your cookies turn out just right!
Tips for Achieving the Best Texture in Easter Cookies
- Use Room Temperature Ingredients: Make sure your butter and egg are at room temperature. This helps them blend smoothly, creating a uniform dough.
- Don’t Overmix: Once you combine the dry ingredients with the wet mixture, mix just until incorporated. Overmixing can lead to tough cookies.
- Chill the Dough: If you have time, chill the dough for about 30 minutes before baking. This helps the cookies maintain their shape and enhances the flavor.
- Watch the Baking Time: Keep a close eye on your cookies as they bake. Remove them from the oven when they are golden around the edges but still soft in the center. They will continue to firm up as they cool.
- Store Properly: To keep your cookies fresh, store them in an airtight container. This helps maintain their soft texture and prevents them from becoming stale.
By following these tips, you can create Easter cookies that are not only delicious but also have the perfect texture. Enjoy the process and the delightful results!
Serving Suggestions for Easter Cookies
Once your delightful cookies are baked and cooled, it’s time to think about how to serve them. Presentation can elevate your cookies from simple treats to festive highlights of your holiday gathering. Here are some creative ideas to showcase your Easter cookies beautifully.
How to Present Your Easter Cookies
Creating an appealing display for your Easter cookies can make them even more inviting. Here are some tips:
- Use Colorful Platters: Choose vibrant platters or trays that match the Easter theme. Pastel colors or floral designs can enhance the festive feel.
- Stack and Layer: Arrange cookies in layers on a cake stand. This adds height and visual interest to your display.
- Garnish with Fresh Flowers: Place some fresh flowers around the cookies for a beautiful touch. Just make sure they are safe and non-toxic.
- Cookie Jars: Fill clear jars with your cookies. This not only looks charming but also keeps them fresh for guests to enjoy.
- Personalized Tags: Attach small tags with messages or names to each cookie. This adds a personal touch and makes them feel special.
With these presentation ideas, your Easter cookies will surely catch the eye and delight your guests!
Pairing Easter Cookies with Beverages
To enhance the enjoyment of your cookies, consider pairing them with delicious beverages. Here are some great options:
- Milk: A classic choice! The creaminess of milk complements the sweetness of cookies perfectly.
- Tea: Herbal or floral teas, like chamomile or hibiscus, can provide a refreshing contrast to the cookies’ sweetness.
- Coffee: A light roast coffee can balance the flavors of your cookies, especially if they are chocolatey or nutty.
- Lemonade: For a fun twist, serve your cookies with a glass of lemonade. The tartness pairs well with sweet treats.
- Fruit Juices: Fresh fruit juices, like orange or apple, can add a burst of flavor that complements the cookies beautifully.
By thoughtfully pairing your Easter cookies with beverages, you can create a delightful experience for your guests. Enjoy the festive spirit and the delicious treats!
Tips for Making the Best Easter Cookies
Making Easter cookies can be a fun and rewarding experience. However, there are a few common pitfalls that can affect the outcome of your cookies. By being aware of these mistakes and following some simple storage tips, you can ensure your cookies turn out perfectly every time!
Common Mistakes to Avoid When Making Easter Cookies
- Using Cold Ingredients: One of the biggest mistakes is using cold butter or eggs. Always let them come to room temperature. This helps create a smooth dough and ensures even baking.
- Not Measuring Ingredients Accurately: Baking is a science! Use measuring cups and spoons for accuracy. Too much flour can make your cookies dry, while too little can lead to spreading.
- Overmixing the Dough: Mixing too much can develop gluten, making your cookies tough. Mix just until the ingredients are combined for a tender texture.
- Skipping the Chilling Step: If your dough is too warm, it can spread too much while baking. Chilling the dough for at least 30 minutes can help maintain the shape of your cookies.
- Not Preheating the Oven: Always preheat your oven before baking. This ensures that your cookies bake evenly and achieve that perfect golden color.
Storage Tips for Fresh Easter Cookies
Once your cookies are baked and cooled, proper storage is key to keeping them fresh and delicious. Here are some helpful tips:
- Use Airtight Containers: Store your cookies in airtight containers to keep them soft and prevent them from going stale. Glass jars or plastic containers work well.
- Separate Layers with Parchment Paper: If you stack your cookies, place parchment paper between layers. This prevents them from sticking together and maintains their shape.
- Keep in a Cool, Dry Place: Store your cookies in a cool, dry area away from direct sunlight. This helps preserve their freshness.
- Freeze for Longer Storage: If you want to keep your cookies for an extended period, consider freezing them. Place them in a freezer-safe container or bag, and they can last for up to three months.
- Thawing Cookies: When ready to enjoy frozen cookies, let them thaw at room temperature. This helps them regain their original texture.
By avoiding common mistakes and following these storage tips, you can enjoy your Easter cookies at their best. Happy baking!
Breakdown of Time for Easter Cookies
When planning to bake Easter cookies, it’s essential to know how much time you’ll need. This way, you can organize your baking session efficiently. Here’s a breakdown of the time required for each step in the process.
Prep Time for Easter Cookies
The prep time for making cookies is approximately 15 minutes. During this time, you will gather your ingredients, mix the dry and wet components, and prepare the dough. This step is quick and allows you to get right into the fun of baking!
Cooking Time for Easter Cookies
The cooking time for your Easter cookies is about 10 minutes. Once your dough is shaped and decorated, you’ll bake them in a preheated oven at 375°F (190°C). Keep an eye on them to ensure they turn golden but remain soft in the center.
Total Time for Making Easter Cookies
In total, you can expect to spend around 25 minutes from start to finish. This includes both the prep and cooking times. With just a little bit of time, you can create a delightful batch of Easter cookies that will bring joy to your holiday celebrations!
Nutritional Information for Easter Cookies
Understanding the nutritional content of your cookies can help you enjoy them in moderation. While these cookies are a delightful treat, it’s essential to be aware of their calorie count and macronutrients. Here’s a closer look at what you can expect from a typical serving of Easter cookies.
Calories and Macronutrients in Easter Cookies
On average, one Easter cookie contains approximately 100 calories. This can vary based on the size and any additional ingredients you may add. Here’s a breakdown of the macronutrients:
- Calories: 100 per cookie
- Carbohydrates: 15 grams
- Protein: 1 gram
- Fat: 4.5 grams
- Sugar: 6 grams
- Fiber: 0.5 grams
These cookies are primarily made up of carbohydrates and sugars, which provide quick energy. The fat content comes mainly from the butter, contributing to the cookies’ rich flavor and texture. While they are not a significant source of protein or fiber, they can still be enjoyed as part of a balanced diet.
Health Considerations for Enjoying Easter Cookies
When indulging in Easter cookies, moderation is key. Here are some health considerations to keep in mind:
- Portion Control: Enjoying one or two cookies can satisfy your sweet tooth without overindulging. Consider sharing with family and friends to keep portions in check.
- Balance with Nutrient-Dense Foods: Pair your cookies with healthier options, like fresh fruit or nuts, to create a more balanced snack.
- Mindful Eating: Take the time to savor each bite. This can enhance your enjoyment and help you feel satisfied with less.
- Consider Dietary Needs: If you have specific dietary restrictions, explore gluten-free or vegan options to ensure everyone can enjoy these festive treats.
By being mindful of the nutritional content and enjoying Easter cookies in moderation, you can indulge in these delightful treats while maintaining a balanced diet. Happy baking and enjoy your Easter cookies!
FAQs About Easter Cookies
What are the best decorations for Easter Cookies?
Decorating Easter cookies is a fun and creative part of the baking process! Some of the best decorations include:
- Colored Sugar: Sprinkle colored sugar on top of your cookies for a festive look.
- Royal Icing: Use royal icing to create intricate designs or to outline shapes. You can even pipe flowers or Easter-themed images!
- Sprinkles: Add sprinkles in various shapes and colors to make your cookies pop.
- Chocolate Drizzle: Drizzle melted chocolate over the cookies for a delicious and decorative touch.
- Edible Glitter: For a sparkling effect, sprinkle some edible glitter on top of your cookies.
Feel free to mix and match these decorations to create beautiful and unique Easter cookies that everyone will love!
Can I freeze Easter Cookies?
Yes, you can freeze Easter cookies! Freezing is a great way to preserve their freshness. Here’s how to do it:
- Cool Completely: Make sure your cookies are completely cooled before freezing.
- Use Airtight Containers: Place the cookies in an airtight container or a freezer-safe bag. This prevents freezer burn.
- Layer with Parchment Paper: If stacking cookies, place parchment paper between layers to avoid sticking.
- Label and Date: Don’t forget to label your container with the date. Cookies can be frozen for up to three months.
When you’re ready to enjoy them, simply thaw the cookies at room temperature. They’ll taste just as fresh as the day you baked them!
How long do Easter Cookies last?
When stored properly, Easter cookies can last for about one week at room temperature. Here are some tips to keep them fresh:
- Airtight Containers: Store cookies in airtight containers to maintain their softness.
- Cool, Dry Place: Keep them in a cool, dry area away from direct sunlight.
- Freezing for Longevity: If you want to keep them longer, consider freezing them as mentioned earlier.
By following these storage tips, you can enjoy your cookies for days to come!
What variations can I make to the Easter Cookies recipe?
There are countless ways to customize your cookies! Here are some fun variations to try:
- Flavor Variations: Experiment with different extracts like lemon or coconut for a unique flavor.
- Shape Options: Use cookie cutters to create fun shapes like bunnies, eggs, or flowers.
- Stuffed Cookies: Add a filling like chocolate or jam in the center for a delightful surprise.
- Nut-Free Options: Omit nuts or substitute with seeds for a nut-free version.
- Frosting Toppings: Top your cookies with frosting for an extra layer of sweetness and decoration.
Feel free to get creative and make these Easter cookies your own!
Conclusion: Enjoying Your Easter Cookies
As the holiday approaches, the excitement of baking Easter cookies can fill your home with warmth and joy. These delightful treats not only satisfy your sweet tooth but also create lasting memories with family and friends. Whether you stick to the classic recipe or explore creative variations, the process of making Easter cookies is a wonderful way to celebrate the season.
Final Thoughts on Making Easter Cookies for the Holiday
In conclusion, Easter cookies are more than just a tasty treat; they are a symbol of togetherness and celebration. The act of baking together can strengthen family bonds and spark creativity in the kitchen. Remember to enjoy the process, from mixing the dough to decorating each cookie with love.
As you gather around the table to share your beautifully decorated Easter cookies, take a moment to appreciate the joy they bring. Whether you’re enjoying them with a glass of milk or sharing them with loved ones, these cookies are sure to add sweetness to your holiday festivities. So, roll up your sleeves, gather your ingredients, and get ready to create some delightful Easter cookies that everyone will cherish!

Easter Cookies
Ingredients
Equipment
Method
-
Preheat the oven to 375°F (190°C).
-
In a small bowl, mix together the flour, baking soda, and baking powder. Set aside.
-
In a large mixing bowl, cream together the softened butter and sugar until smooth and fluffy.
-
Add the egg, vanilla extract, and almond extract to the butter mixture and beat until combined.
-
Gradually add the dry ingredients to the wet ingredients, stirring gently until fully combined.
-
Scoop out portions of dough and roll them into balls, placing them on ungreased cookie sheets.
-
Flatten each dough ball with the bottom of a glass and sprinkle with colored sugar or sprinkles.
-
Bake in the preheated oven for 8 to 10 minutes, until the edges are golden brown.
-
Let the cookies cool on the baking sheet for a few minutes before transferring them to wire racks to cool completely.