Red chicken enchiladas are one of those weeknight dinners that feel like a treat without requiring much effort at all. I have been making a version of this dish for over twenty years, and what I keep coming back to is how six simple ingredients can fill a whole kitchen with that deep, smoky red sauce smell that stops everyone in the house mid-step. Nonna Betty always said the best recipes are the ones that feel completely natural to make, and this one has become exactly that for me.
The first time I made red chicken enchiladas from scratch, I was living in a small apartment and trying to figure out how to stretch a rotisserie chicken into something that felt special. I remember warming the sauce in a little skillet, dipping each corn tortilla, and thinking this was far too simple to taste as good as it smelled. I was wrong. My family cleaned the pan that night and asked when I was making it again before they even finished chewing. Since then this recipe has shown up at potlucks, sick-day dinners, make-ahead freezer stashes, and Sunday family gatherings. It belongs in every rotation because it genuinely delivers every single time. Your kitchen is about to smell incredible, so let’s get started.

Why This Recipe Belongs in Your Weeknight Rotation
Betty has been feeding big families for decades, and a recipe earns its place on the rotation by being reliable above all else. These easy chicken enchiladas with red sauce hit every mark she looks for: fast enough for a school night, crowd-pleasing enough for company, and forgiving enough that even a distracted cook gets a good result.
- Only 6 core ingredients, all easy to find at any grocery store
- Ready from fridge to table in under 45 minutes
- Kid-friendly flavors with no complicated prep
- Great for meal prep because you can assemble the whole pan the night before
- Freezer friendly for up to 3 months
- Packs 38 grams of protein per serving
Whether you are feeding a crowd on Friday night or tucking a pan into the freezer for a busy week ahead, these red chicken enchiladas deliver that warm, reliable comfort without demanding much from you at all.
If you love how easy this comes together, you will want to bookmark these Easy Rotisserie Chicken Enchiladas too, a 40-minute version built around the same shortcut chicken that makes weeknight cooking so simple.
Key Players in This Recipe
Great enchiladas do not need exotic ingredients. They need the right combination of everyday staples used with a little care. Here is what goes into this dish and why each ingredient matters.
Shredded chicken is the heart of any good red chicken enchiladas recipe. I always reach for rotisserie chicken when time is short because it is already tender, lightly seasoned, and ready to pull apart in minutes. Poached chicken breast also works beautifully and gives you more control over the sodium level.
Mozzarella and Colby Jack together create the cheese combination Betty tested her way to over many batches. Mozzarella delivers that stretchy, satisfying pull while Colby Jack adds a mild buttery richness that rounds out the filling. Block cheese shredded at home melts more smoothly than pre-shredded bags because there is no added starch to interfere.
Sour cream stirred into the filling is the step that keeps the chicken mixture creamy and moist inside the tortilla even after 25 minutes in the oven. Plain full-fat Greek yogurt can substitute, though the flavor will shift slightly tangier.
Taco seasoning does all the flavor work with just two tablespoons. I have made my own homemade blend for years and prefer it for a more rounded, less salty result. A good store-bought packet works perfectly on a busy night.
Corn tortillas are non-negotiable for me. They are sturdier than flour tortillas, they hold their shape through baking, and they carry that earthy flavor that makes baked enchiladas with red sauce taste authentic rather than generic. The 6-inch size fills and rolls perfectly. If yours run smaller, simply reduce the fill amount to about 1/4 cup per tortilla and snug them together tightly in the pan.
Mild red enchilada sauce from a 28 oz can does all the heavy lifting on flavor. Warming it before dipping is a step I never skip because cold sauce will not soften the tortilla properly, and a stiff tortilla cracks the moment you try to roll it.
How to Make Red Chicken Enchiladas
After years of making this dish, the method has come down to six clean steps. Work through them in order and you will pull a bubbling, golden pan from the oven in about 40 minutes.
Step 1 – Heat the oven. Preheat to 375 degrees F with a rack in the center position. The center rack gives the most even heat so the cheese melts properly without burning on top before the sauce bubbles through.
Step 2 – Mix the filling. In a large bowl, combine the shredded chicken, 1 1/2 cups of the mozzarella, 1 1/2 cups of the Colby Jack, the sour cream, and the taco seasoning. Mix until everything is well incorporated. Betty always mixes the filling first so the rolling process moves quickly with no back-and-forth.
Step 3 – Soften the tortillas. Wrap all 10 corn tortillas in a damp paper towel or tea towel and microwave for 1 minute. Through trial and error I learned this is the single most important step for preventing cracks. A split tortilla loses filling into the sauce before the pan even reaches the table.
Step 4 – Dip, fill, and roll. Warm the enchilada sauce in a small skillet over medium-low heat. Working with one tortilla at a time, dip it in the warm sauce until lightly coated on both sides. Scoop 1/3 cup of filling into the center, roll the tortilla tightly, and place it seam-side down in the 9×13 baking dish. Repeat with all remaining tortillas and filling. Press them snugly together so they support each other during baking.
Step 5 – Top with sauce and cheese. Pour the remaining enchilada sauce evenly over the top of all the enchiladas. Sprinkle with the remaining mozzarella and Colby Jack. Do not hold back on the cheese layer.
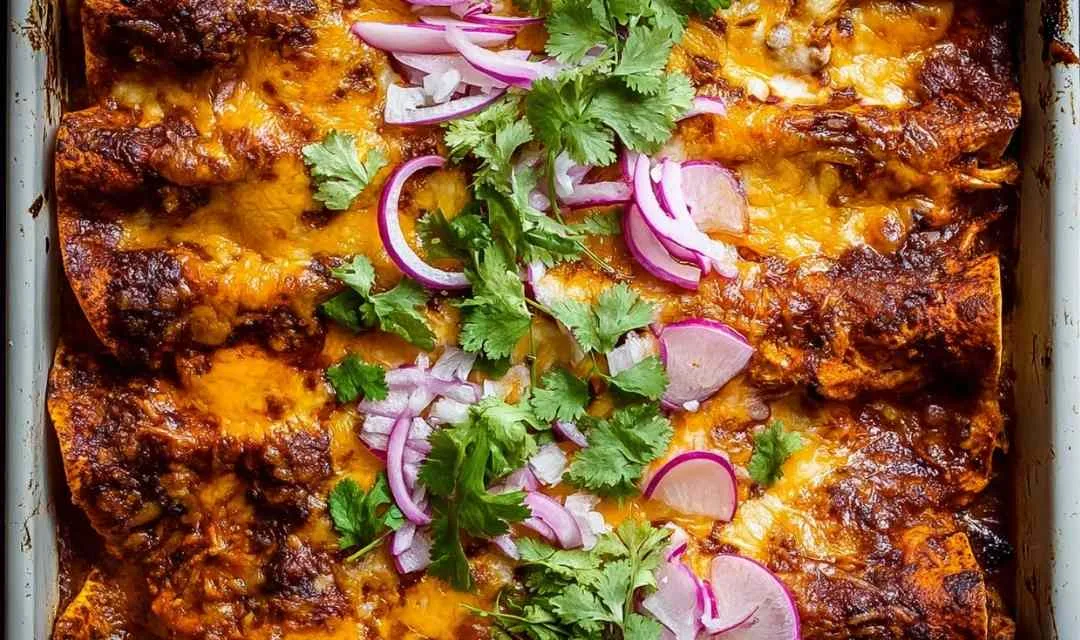
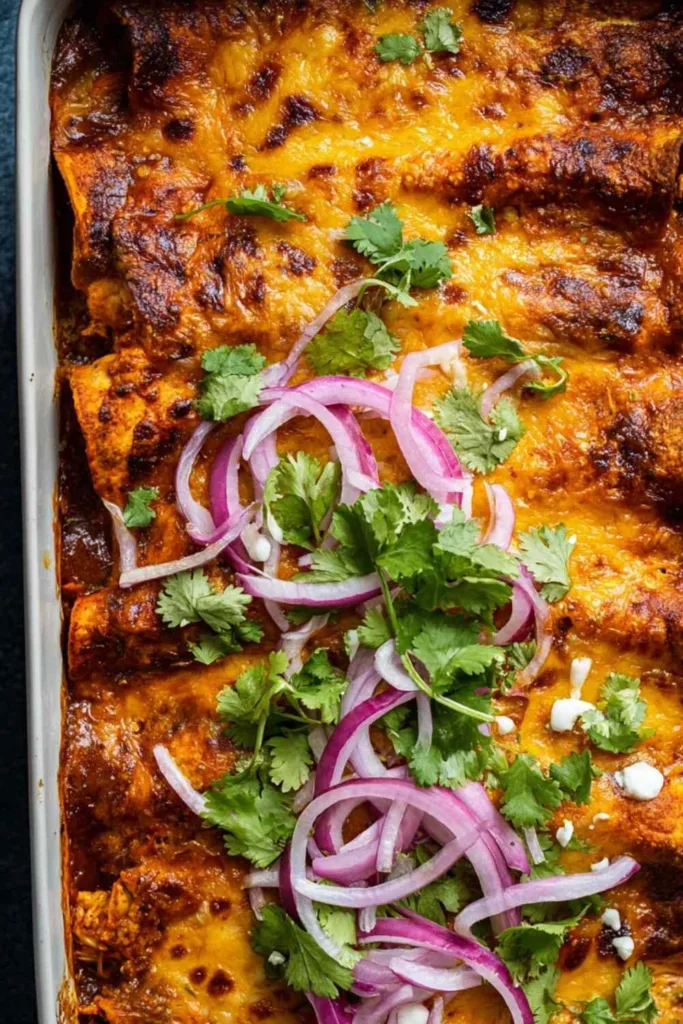
Step 6 – Bake, rest, and serve. Bake for 25 minutes, or until the sauce is visibly bubbling around the edges and the cheese is fully melted with light golden spots. Let the pan rest for 5 minutes before serving. This rest time lets everything settle so the enchiladas hold together cleanly on the plate. Scatter fresh cilantro and thin red onion slices on top before serving if using.
Betty’s best tips for perfect results:
- Never skip the warm sauce dip. Cold sauce will not soften the tortilla enough to prevent cracking.
- Mix all the filling before you start rolling so every enchilada has even flavor throughout.
- Freshly grated block cheese melts more smoothly than pre-shredded. Both work, but fresh is noticeably better.
- For more heat, stir diced serrano peppers into the filling. For more substance, add a drained can of black beans.
Keeping These Enchiladas Fresh
One of the reasons Betty makes red chicken enchiladas so reliably is that leftovers are genuinely excellent. The sauce soaks a little deeper into the tortillas overnight, and by day two the texture is actually even better than fresh out of the oven.
Store the baked pan tightly covered in the refrigerator for up to 4 days. Reheat individual portions in the microwave in 90-second intervals, or cover the whole dish with foil and warm it in a 350 degree oven until heated through. Covering with foil during reheating traps steam and keeps the tortillas from drying out.
For freezing, Betty’s tested approach is to freeze the enchiladas before baking rather than after. Assemble the pan completely, wrap it tightly in plastic wrap and then a layer of foil, and freeze for up to 3 months. To bake from frozen, preheat the oven to 350 degrees F, keep the foil on, and bake until the internal temperature reaches 165 degrees F. Budget at least 45 to 55 minutes since you are starting from frozen.
For a make-ahead option, assemble the full pan up to 24 hours in advance, cover tightly, and refrigerate. Pull it from the fridge about 20 minutes before baking to take the chill off, then bake as directed at 375 degrees F for 25 minutes.
What to Serve with Red Chicken Enchiladas
These Tex-Mex style enchiladas are a satisfying meal on their own, but a couple of well-chosen sides turn the plate into something really complete. Betty’s table almost always includes at least two of these alongside the pan.
- Restaurant-style Mexican rice is the natural partner here. Fluffy, lightly tomato-seasoned rice soaks up the extra red sauce on the plate and gives you that authentic Tex-Mex feel.
- Pinto beans or black beans add earthy creaminess and extra fiber to balance the richness of the cheese filling. Either variety works beautifully alongside red chicken enchiladas.
- A bowl of fresh guacamole cuts right through the richness of the baked cheese with cool, bright creaminess. The contrast in temperature and texture makes every bite better.
- Chips and salsa set on the table while the enchiladas finish baking keep everyone happy and the kitchen peaceful.
- A simple shredded cabbage slaw dressed with lime juice and cilantro adds crunch and a refreshing acidity that lifts the whole meal.
Looking for a lighter chicken dinner on the nights you want something similar but without the cheese? These Healthy Chicken Taco Bowls hit the same Tex-Mex flavor notes with 38g of protein and come together in just 20 minutes.
FAQs
Corn tortillas are strongly recommended because they are sturdier, hold their shape through baking, and give that authentic Tex-Mex flavor. Flour tortillas tend to become very soft and almost gummy once they absorb the sauce.
A store-bought rotisserie chicken is the most convenient option and produces excellent results because it is already tender and lightly seasoned. Poached chicken breast also works well and gives you more control over sodium.
Two steps together prevent cracking: microwave the tortillas wrapped in a damp towel for one minute before rolling, and dip each one in warm enchilada sauce just before filling. Both steps are necessary for reliably pliable tortillas.

Red Chicken Enchiladas
Ingredients
Equipment
Method
-
Preheat the oven to 375 degrees F with a rack in the center position.
-
In a large bowl, combine the shredded chicken, 1 1/2 cups of the mozzarella, 1 1/2 cups of the Colby Jack, the sour cream, and the taco seasoning. Mix until fully incorporated.
-
Wrap the tortillas in a damp paper towel or tea towel and microwave for 1 minute to soften and prevent cracking.
-
Warm the enchilada sauce in a small skillet over medium-low heat. Working one at a time, dip each tortilla in the warm sauce until lightly coated on both sides. Scoop 1/3 cup of filling into the center, roll the tortilla tightly, and place it seam-side down in the 9×13 baking dish. Repeat with remaining tortillas and filling, pressing them snugly together.
-
Pour the remaining enchilada sauce evenly over all the enchiladas. Sprinkle with the remaining mozzarella and remaining Colby Jack.
-
Bake for 25 minutes, or until the sauce is bubbling around the edges and the cheese is fully melted. Let rest 5 minutes before serving. Top with cilantro and sliced red onion if using.


