
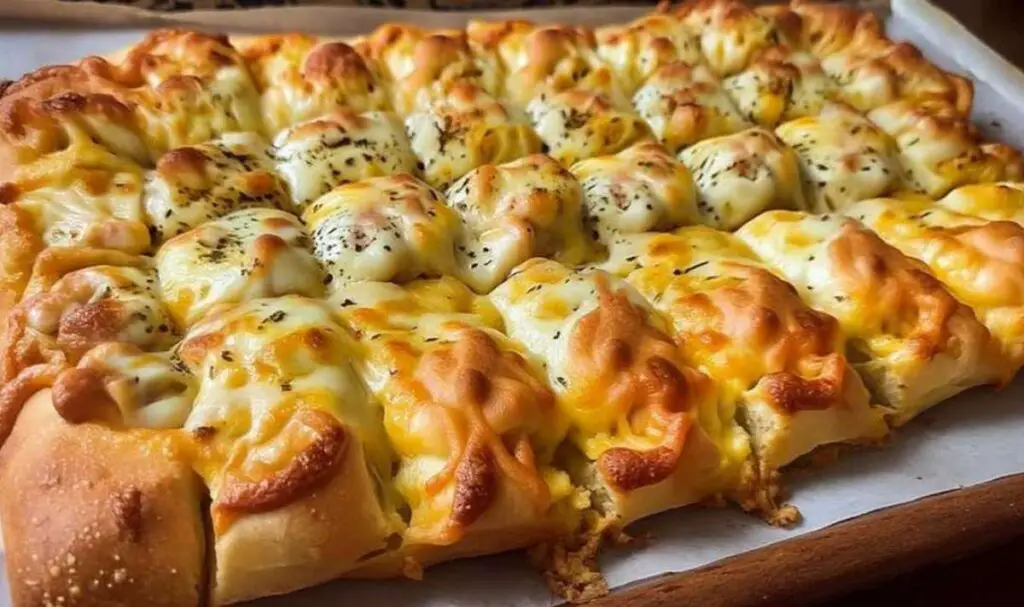
Cheesy Garlic Breadsticks are the ultimate comfort food side that transforms any ordinary dinner into something special. These golden, buttery breadsticks with melted cheese on top take just 20 minutes to make and pair perfectly with pasta, soup, or your favorite family meal.

Last Sunday, I was preparing dinner for my three kids when I realized I needed something quick to go alongside our spaghetti night. That’s when I remembered my grandmother’s simple breadstick recipe that she used to make on busy weeknights. The smell of garlic butter and melted cheese baking in the oven instantly brought back memories of those cozy family dinners where everyone gathered around the table. These cheesy garlic breadsticks have that same magic – they bring people together and make even the simplest meal feel like a celebration, just like my pancakes and bacon breakfast that turns ordinary mornings into something special. The best part is how incredibly easy they are to make, using just a few pantry staples and some store-bought dough. Let’s get cooking!
Why You’ll Love This Cheesy Garlic Breadsticks Recipe
Growing up in my grandmother’s farmhouse kitchen, I learned that the best side dishes are the ones that make everyone stop talking and reach for seconds. These cheesy garlic breadsticks have that exact effect – they’re inspired by the classic Italian-American restaurant breadsticks but made simple enough for busy weeknight dinners.
- Quick and simple preparation ready in about 20 minutes from start to finish
- Uses convenient store-bought pizza dough that you can find at any grocery store
- Perfectly balanced flavors with buttery garlic and gooey melted mozzarella cheese
- Customizable recipe that works with different cheese varieties and herb combinations
- Ideal for sharing at family gatherings, potlucks, or game night with friends
- Versatile side dish that complements everything from chicken marinade dinners to comfort food meals
This recipe delivers consistently delicious results every single time, making it perfect for both beginner cooks and experienced home chefs looking for a reliable crowd-pleaser.
Ingredient Note List
Pizza Dough: I always recommend letting store-bought dough come to room temperature for easier stretching, which helps create those perfectly tender breadsticks with crispy edges.
Butter: Using real butter instead of margarine gives these breadsticks their rich, golden flavor and helps create that irresistible aroma while baking.
Fresh Garlic: Freshly minced garlic provides the most robust flavor, though garlic powder works well when you’re short on time or prep.
Mozzarella Cheese: Shredded mozzarella melts beautifully and creates those satisfying cheese pulls that make these cheesy garlic breadsticks so appealing.
Parmesan Cheese: This optional addition adds a sharp, nutty flavor that elevates the overall taste and creates a lovely golden-brown finish.
Italian Seasoning: A blend of dried herbs brings complexity to the garlic butter, similar to how I use salad supreme seasoning to enhance flavors, and makes your kitchen smell absolutely amazing while baking.
Fresh Parsley: This bright herb adds a pop of color and fresh flavor that balances the richness of the butter and cheese perfectly.
How to Cook Cheesy Garlic Breadsticks
Step 1. I usually start by preheating my oven to 400°F because having a properly heated oven ensures the breadsticks get crispy on the outside while staying tender inside.
Step 2. My grandmother always told me to let dough rest at room temperature, so I remove the pizza dough from the fridge about 15-20 minutes before using to make stretching much easier.
Step 3. I’ve found that rolling the dough on a lightly floured surface to about ¼ inch thickness gives the perfect balance of crispy edges and soft center.
Step 4. In my kitchen, I always mix the melted butter with minced garlic and Italian seasoning in a small bowl first – this ensures every bite has that perfect garlic flavor.
Step 5. Using a pastry brush, I coat the entire surface of the dough with the garlic butter mixture, making sure to get all the edges for maximum flavor.
Step 6. My family prefers when I distribute the mozzarella cheese evenly across the surface, leaving small gaps so the breadsticks bake properly without getting soggy.
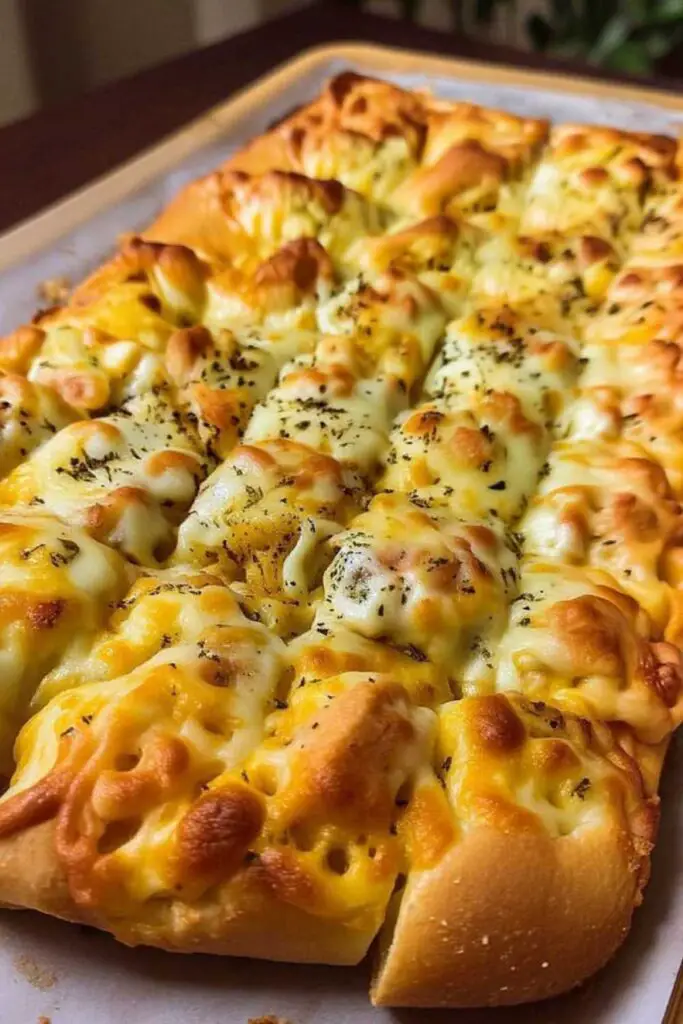
Step 7. I usually bake these cheesy garlic breadsticks for 10-12 minutes, watching for golden edges and bubbly cheese as my visual cues for doneness.
Step 8. After removing from the oven, I let them rest for just 1-2 minutes before cutting – this prevents the cheese from sliding off while still serving them nice and hot.
How to Store & Reheat
I usually store any leftover breadsticks in an airtight container in the refrigerator, where they stay fresh for up to 3 days. Make sure they cool completely before storing to prevent condensation from making them soggy.
For longer storage, I recommend wrapping individual portions in aluminum foil and placing them in a freezer-safe bag. They freeze well for up to 2 months and make a convenient side dish when you need something quick, perfect for serving alongside slow cooker sloppy joes or other easy weeknight dinners.
For best results, I like to reheat these cheesy garlic breadsticks in the oven at 375°F for about 5-7 minutes until the cheese is melty again. You can also use the microwave for 30-45 seconds, though the oven method keeps them crispier and more like fresh-baked.
Cheesy Garlic Breadsticks
Ingredients
Equipment
Method
-
Preheat oven to 400°F (200°C). Let dough rest at room temperature 15–20 minutes, then roll into a rectangle ¼–½ inch thick on a floured surface.
-
Transfer dough to a lightly greased or parchment-lined baking sheet.
-
Mix melted butter with garlic, oregano, salt, and pepper. Brush evenly over dough.
-
Sprinkle mozzarella and Parmesan evenly over dough.
-
Bake 10–12 minutes until cheese is melted and bubbly, edges golden, and underside lightly browned.
-
Rest 1–2 minutes, then slice into 1-inch breadsticks. Garnish with parsley if desired.
Notes
What to Serve With Cheesy Garlic Breadsticks
Tortellini Pasta: The rich, cheesy flavors in marinara or alfredo tortellini create the perfect Italian comfort food combination with these buttery breadsticks.
Greek Yogurt Chicken: This tender, flavorful chicken provides a protein-rich main course that pairs beautifully with the crispy, cheesy breadsticks for a well-balanced meal.
Hidden Valley Ranch Dip: The cool, creamy ranch dip makes an excellent contrast to the warm, garlicky breadsticks and adds an extra layer of indulgence for dipping.
Creamy Tomato Soup: In my experience, the crispy texture of breadsticks provides the ideal contrast to smooth, warm soup – it’s pure comfort food magic that reminds me of childhood dinners.
BBQ Chicken Sliders: These hearty sliders complement the breadsticks perfectly for casual gatherings, game nights, or when you want to create a fun, finger-food feast.
Steak and Shrimp Stir Fry: The savory, protein-packed stir fry makes these breadsticks an excellent side for soaking up the delicious sauce and adding carb satisfaction to the meal.
FAQs
Each breadstick contains approximately 120-150 calories depending on the thickness and amount of cheese used, making them a reasonable indulgence when enjoyed as part of a balanced meal.
While these breadsticks are a treat food rather than a health food, they do provide protein from the cheese – for healthier options, try pairing them with my roasted veggie chickpea bowls for a more nutritious complete meal.
I recommend using store-bought pizza dough or biscuit dough as convenient alternatives – both work wonderfully and eliminate the need for yeast preparation time.
To avoid soggy breadsticks, make sure your oven is fully preheated, don’t overload with cheese, and ensure the dough is at room temperature before baking for the crispiest results.


