If you have never made a chicken rissoles recipe before, today is the day that changes. I still remember the first Tuesday night I made these with nothing more than a pound of ground chicken, a lonely zucchini, and a block of cheddar that needed using up. The moment I cracked open that first golden patty and found those little pockets of melted cheese inside, I knew this one was going straight into the permanent rotation.
Back on the farm, my grandmother had a gift for turning the simplest things into something worth gathering around. The smell of something sizzling in a cast-iron skillet, the satisfying thud of a patty hitting a hot pan, the way the kids would wander in from the other room asking what smelled so good. These chicken rissoles carry all of that. Whether you serve them as a sit-down dinner or pile them on a platter for game night, your kitchen is about to smell absolutely wonderful. Time to get cooking!

Why This Chicken Rissoles Recipe Belongs in Your Recipe Box
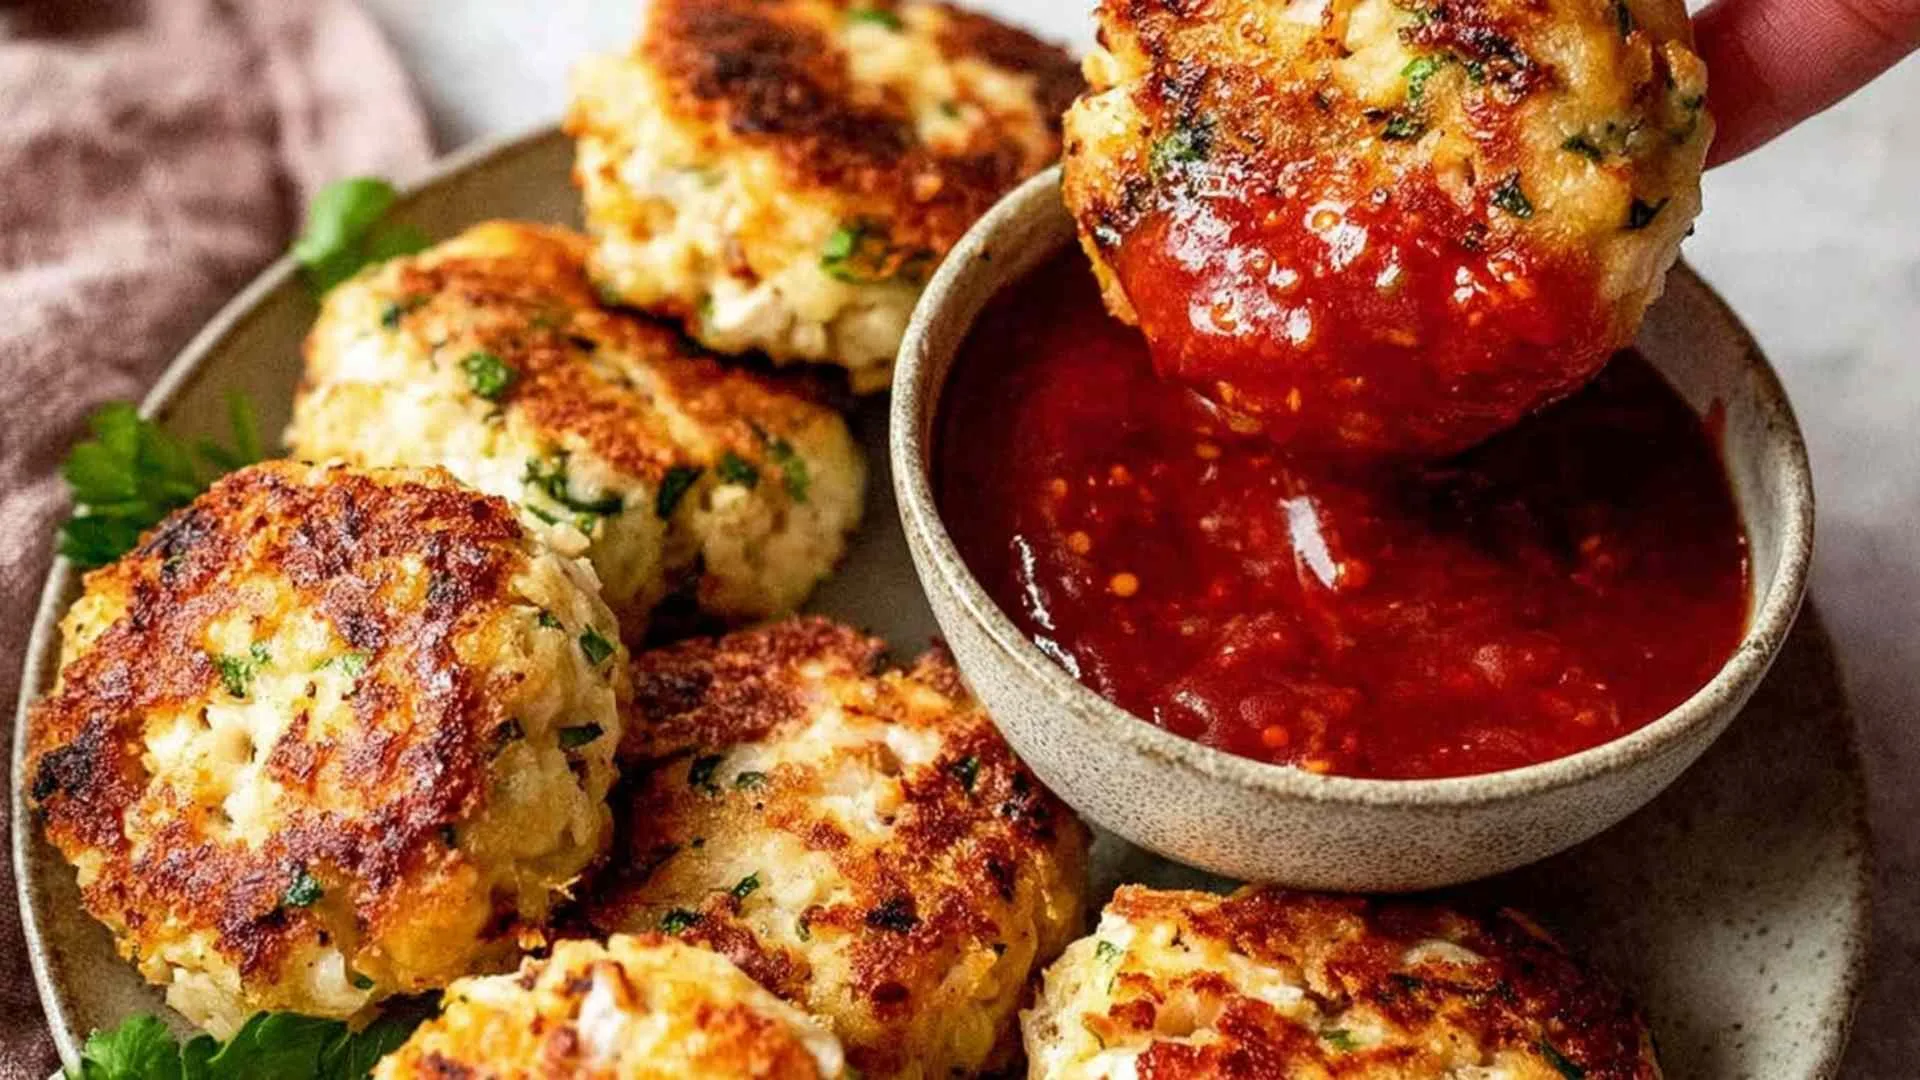
Ground chicken is one of those underappreciated proteins. It is lean, affordable, and takes on flavor beautifully when you know what to pair it with. The trick is keeping it moist, and that is exactly what this recipe does with shredded cheese, grated vegetables, and just enough panko to hold everything together without drying it out.
Here is what makes this chicken rissoles recipe a weeknight standby:
- Oozy cheese pockets in every single patty
- Hidden vegetables that kids eat without complaint
- Ready in 35 minutes start to finish
- No special equipment required
- Works as a plated dinner, stuffed into burger buns, or served as party finger food
- Every ingredient is easy to find at any grocery store
Key Players in This Recipe
Ground chicken is the heart of these rissoles. Fresh is always better than previously frozen when you can get it, since it holds together more reliably and has a cleaner flavor. Before you mix anything, drain off any liquid pooled in the package. Wet chicken mince is the number one reason patties fall apart.
Panko breadcrumbs give these rissoles their soft, light interior texture. I prefer panko over regular breadcrumbs every time in this recipe. The difference is noticeable. Find it in the Asian aisle of most supermarkets, or swap in 2/3 cup of regular breadcrumbs if that is what you have. Gluten-free breadcrumbs work just as well.
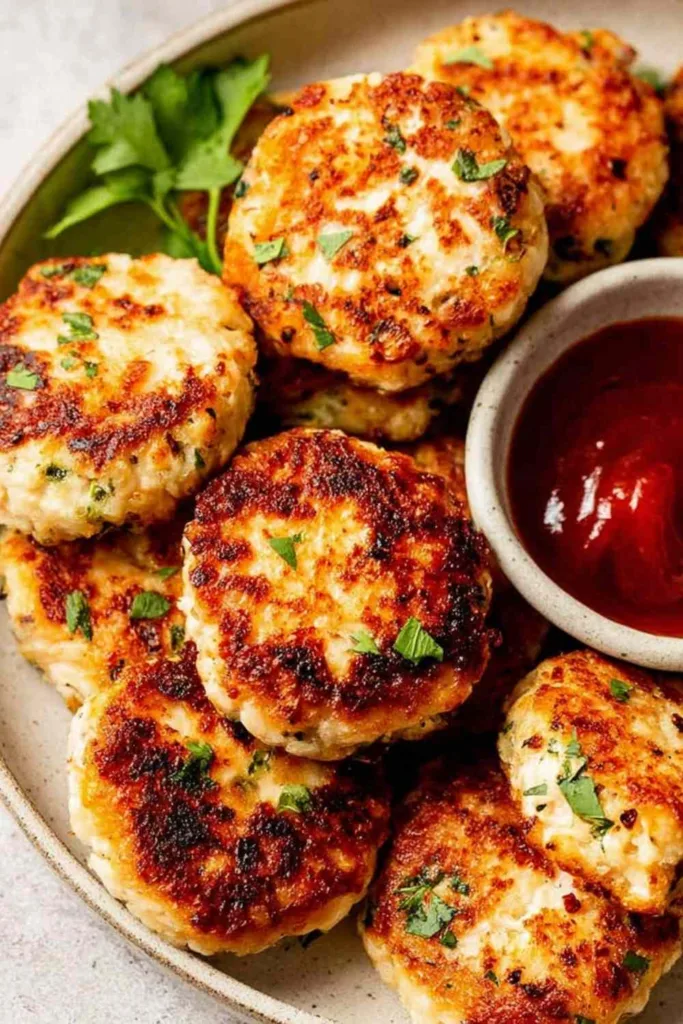
Shredded Colby cheese is the secret weapon in this chicken rissoles recipe. Because ground chicken is so lean, the cheese provides both moisture and flavor that would otherwise be missing. Choose a cheese that melts into strings: Colby, cheddar, Monterey Jack, gouda, and provolone are all excellent choices.
Grated carrot and zucchini keep the patties moist from the inside out while sneaking some vegetables into the meal. Hold each vegetable nearly perpendicular to the box grater to produce short, fine strands rather than long strings. Short strands integrate into the mixture much better and help the patties hold their shape.
One large egg is all you need for binding. Two eggs will dry out the mixture noticeably, so resist the urge to add another even if the mixture feels loose. Extra panko is the better fix for a wet mixture.
Kosher salt and black pepper are simple but essential. Ground chicken needs seasoning to come alive, so do not skip the salt.
How to Make Chicken Rissoles Step by Step
Step 1. Preheat your oven to 210 degrees F (100 degrees C) and set a wire rack over a baking tray. Keeping cooked rissoles warm on a rack prevents the bottoms from going soggy while you finish cooking the remaining batches. Betty always sets this up first so nothing gets cold waiting.
Step 2. Grate the carrot and zucchini using the large holes of a box grater. Hold each one perpendicular to the grater surface for short, even shreds that mix cleanly into the patty mixture.
Step 3. Combine ground chicken, grated carrot, grated zucchini, egg, shredded cheese, panko breadcrumbs, parsley, salt, and pepper in a large bowl. Mix with a wooden spoon until everything is fully combined. The mixture will be sticky, which is exactly what you want.
Step 4. Wet your hands thoroughly with cold water before shaping each patty. This one step makes all the difference between a relaxed shaping process and a sticky mess. Scoop just under 1/4 cup of mixture per patty and shape into a round about 2.4 inches wide and half an inch thick.
Step 5. Heat one tablespoon of canola oil in a large non-stick skillet over medium-high heat. Add 5 to 6 rissoles at a time without crowding the pan. Crowded patties steam instead of sear, and you lose that golden crust entirely.
Step 6. Cook 3 to 4 minutes per side until each patty is deeply golden. I have learned from too many batches that impatience here costs you the crust. Let the pan do its work before flipping.
Step 7. Transfer each cooked batch to the wire rack in your warm oven. Add more oil to the pan as needed between batches and continue until all rissoles are cooked.
Step 8. Serve immediately with ketchup on the side.
What to Serve With Chicken Rissoles
These golden patties are easy to build a full meal around. A few of Betty’s favorite pairings:
- Creamy Scalloped Potatoes – Rich, tender, and the ultimate comfort side that turns rissoles into a proper Sunday dinner
- Garlic Herb Chicken Carrot Plate – If you want a full veggie-forward plate alongside, roasted carrots add natural sweetness that balances the savory cheese in the patties
- Crispy Garlic Parmesan Brussels Sprouts – The slight bitterness of roasted Brussels sprouts cuts right through the richness of the cheese filling
- Easy Honey Glazed Carrots and Green Beans – A bright, lightly sweet side that rounds out the plate without competing with the rissoles
- Parmesan Garlic Artisan Bread – Slice it thick and use it to scoop up any melted cheese that escapes the patties
- Sweet and Spicy Pickle Slaw – Pile it on top of a rissole inside a bun for an instant chicken burger with crunch and tang
Keeping Your Chicken Rissoles Fresh
Leftover chicken rissoles store well in an airtight container in the refrigerator for up to 3 days. Let them cool completely before sealing the container. Sealing them while still warm traps steam and turns the crust soft by the next morning. For reheating, a skillet over medium heat for 2 to 3 minutes per side brings back the golden crust far better than a microwave. A toaster oven at 350 degrees F for about 8 minutes also works well.
For freezing, layer cooked rissoles between sheets of parchment paper inside a zip-lock freezer bag and store for up to 2 months. Thaw overnight in the refrigerator before reheating. I will be honest with you: they do lose a little juiciness after freezing simply because ground chicken is a lean meat. They are still perfectly good, but fresh-cooked is always the better experience. If meal prep is the goal, I recommend making a double batch and refrigerating for the week rather than freezing.
FAQs
Yes. Shape the raw patties up to 24 hours ahead and store them covered in the refrigerator. Cook straight from the fridge and add about one extra minute per side.
The most common cause is too much moisture in the ground chicken. Drain any liquid from the package before mixing, and if the mixture still feels loose, add extra panko one tablespoon at a time until it holds its shape.
You can. Spray the patties generously with olive oil spray and bake at 430 degrees F (220 degrees C) for 15 to 18 minutes, flipping halfway through. Pan-frying gives a much deeper golden crust, but baking is a practical option when cooking for a larger group.

Chicken Rissoles (Chicken Patties)
Ingredients
Equipment
Method
-
Preheat oven to 210 degrees F (100 degrees C). Place a wire rack over a baking tray to keep cooked rissoles warm and crispy between batches.
-
Add ground chicken, grated carrot, grated zucchini, egg, shredded cheese, panko breadcrumbs, parsley, salt, and pepper to a large bowl. Mix with a wooden spoon until fully combined.
-
Wet your hands with cold water to prevent sticking. Scoop just under 1/4 cup of mixture per patty and shape into a round approximately 2.4 inches wide and 1/2 inch thick.
-
Heat 1 tablespoon canola oil in a large non-stick skillet over medium-high heat. Cook 5 to 6 rissoles at a time without crowding the pan, 3 to 4 minutes per side, until deeply golden.
-
Transfer cooked rissoles to the wire rack in the warm oven. Add more oil to the skillet as needed and cook remaining rissoles.
-
Serve immediately with ketchup for dipping.


