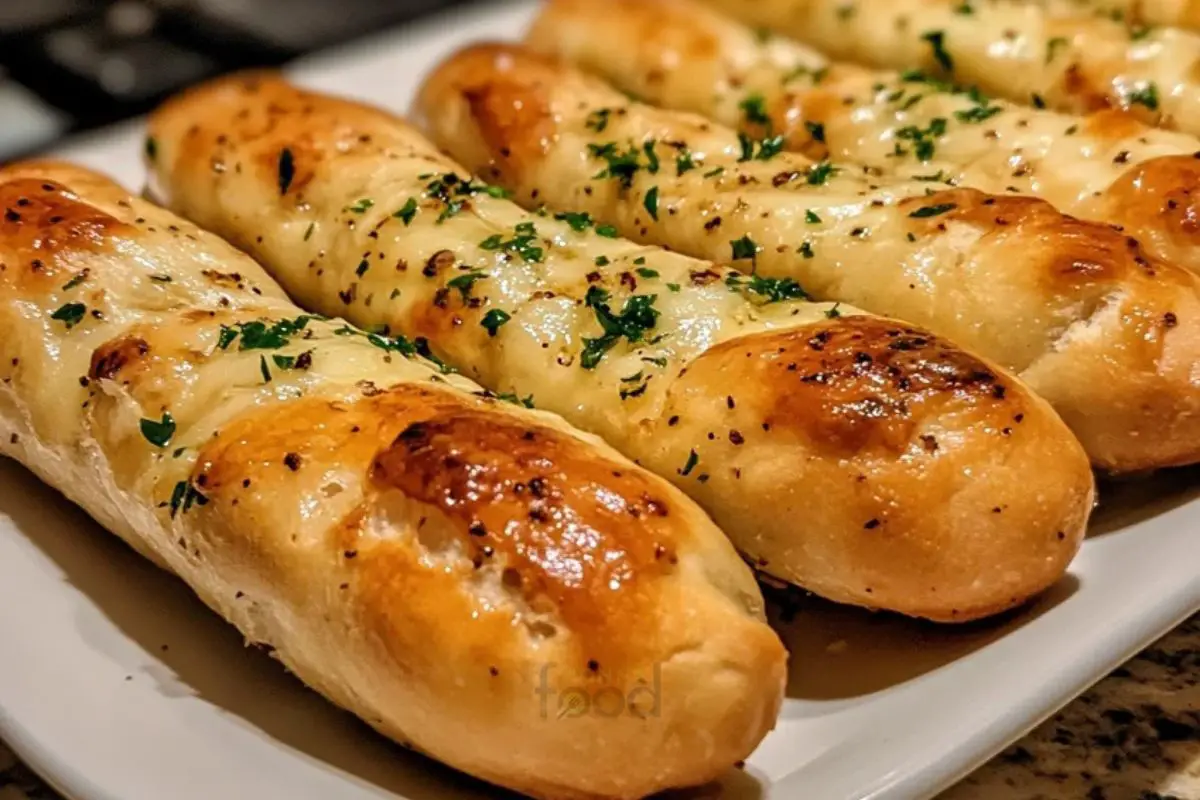
Garlic Breadsticks Recipe
Garlic breadsticks are a delightful treat that can elevate any meal. Their warm, buttery flavor combined with the aromatic essence of garlic makes them irresistible. Whether you’re enjoying a cozy family dinner or hosting a festive gathering, these breadsticks are sure to impress your guests. Plus, they are easy to make, which is a bonus for busy cooks!
What Makes Garlic Breadsticks Special?
What sets garlic breadsticks apart is their unique blend of flavors and textures. The crispy exterior gives way to a soft, chewy inside, creating a perfect contrast. The garlic and herbs infuse the breadsticks with a savory taste that complements a variety of dishes. Additionally, the aroma of freshly baked garlic breadsticks wafting through your kitchen is simply mouthwatering!
Moreover, garlic is known for its health benefits. It can boost your immune system and add a punch of flavor without extra calories. This makes garlic breadsticks not just a tasty side, but also a nutritious one. When you serve these breadsticks, you’re not just offering a side dish; you’re providing a delicious experience that everyone will love.
The Perfect Side Dish for Any Meal
Garlic breadsticks are incredibly versatile. They pair wonderfully with pasta, soups, salads, and even grilled meats. Imagine enjoying a warm bowl of spaghetti with a side of garlic breadsticks. The combination is simply divine! They also make a great addition to pizza nights or as a snack during movie marathons.
Whether you’re preparing a casual weeknight dinner or a special occasion feast, garlic breadsticks fit right in. Their delightful taste and appealing presentation make them a favorite among both kids and adults. So, let’s dive into the ingredients and preparation of this scrumptious garlic breadsticks recipe!
Ingredients for Garlic Breadsticks Recipe
To create the perfect garlic breadsticks, you’ll need a few simple ingredients. Each component plays a vital role in achieving that delightful flavor and texture. Here’s what you’ll need:
- 2 cups all-purpose flour: This is the base of your breadsticks, providing structure and chewiness.
- 1 tablespoon sugar: A touch of sweetness helps to balance the flavors and aids in browning.
- 1 teaspoon salt: Salt enhances the overall taste and is essential for flavor.
- 1 packet (2 1/4 teaspoons) active dry yeast: This is what makes your breadsticks rise and become fluffy.
- 3/4 cup warm water (about 110°F): Warm water activates the yeast, helping the dough to rise.
- 2 tablespoons olive oil: Olive oil adds moisture and richness to the dough.
- 2 tablespoons unsalted butter, melted: This will be used for brushing on the breadsticks, adding flavor and a golden finish.
- 3 cloves garlic, minced: Fresh garlic is the star ingredient, giving the breadsticks their signature taste.
- 1 teaspoon dried Italian herbs: A mix of oregano, basil, or your favorite herbs adds an aromatic touch.
- Fresh parsley, chopped: This is for garnish, adding a pop of color and freshness.
Gather these ingredients, and you’ll be well on your way to making delicious garlic breadsticks. Each item contributes to the overall flavor, making your breadsticks a delightful addition to any meal!
Step-by-Step Preparation of Garlic Breadsticks Recipe
Now that you have all your ingredients ready, it’s time to dive into the step-by-step preparation of your garlic breadsticks. This process is simple and fun, making it a great activity for the whole family. Let’s get started!
Step 1: Preparing the Dough
First, we need to prepare the dough. This is the foundation of your garlic breadsticks. Start by activating the yeast. In a small bowl, combine the warm water and sugar. Then, sprinkle the yeast over the top. Let it sit for about 5-10 minutes. You’ll know it’s ready when it becomes frothy.
While the yeast is activating, take a large mixing bowl and whisk together the all-purpose flour and salt. This step ensures that the salt is evenly distributed throughout the flour. Once the yeast is frothy, add it to the flour mixture along with the olive oil. Mix everything together until a dough forms. It should be slightly sticky but manageable.
Step 2: Shaping the Breadsticks
Next, it’s time to knead the dough. Transfer it to a floured surface and knead for about 5-7 minutes. You want the dough to be smooth and elastic. This step is crucial for developing the right texture.
After kneading, place the dough in a greased bowl. Cover it with a clean cloth and let it rise in a warm place for about 1 hour. You’ll know it’s ready when it has doubled in size. Once risen, punch down the dough to release any air bubbles. Now, divide the dough into 12 equal pieces. Roll each piece into a long stick, about 6-8 inches in length. Place them on a baking sheet lined with parchment paper.
Step 3: Baking the Garlic Breadsticks
Before baking, we need to prepare the garlic butter topping. In a small bowl, mix the melted butter, minced garlic, and dried Italian herbs. Brush this mixture generously over the shaped breadsticks. This will infuse them with flavor as they bake.
Now, let the shaped breadsticks rise for an additional 20-30 minutes. This second rise helps them become fluffy and light. While they are rising, preheat your oven to 375°F (190°C). Once the breadsticks have risen, it’s time to bake them. Place the baking sheet in the oven and bake for 12-15 minutes. You want them to be golden brown and delicious!
Step 4: Adding the Garlic Butter Topping
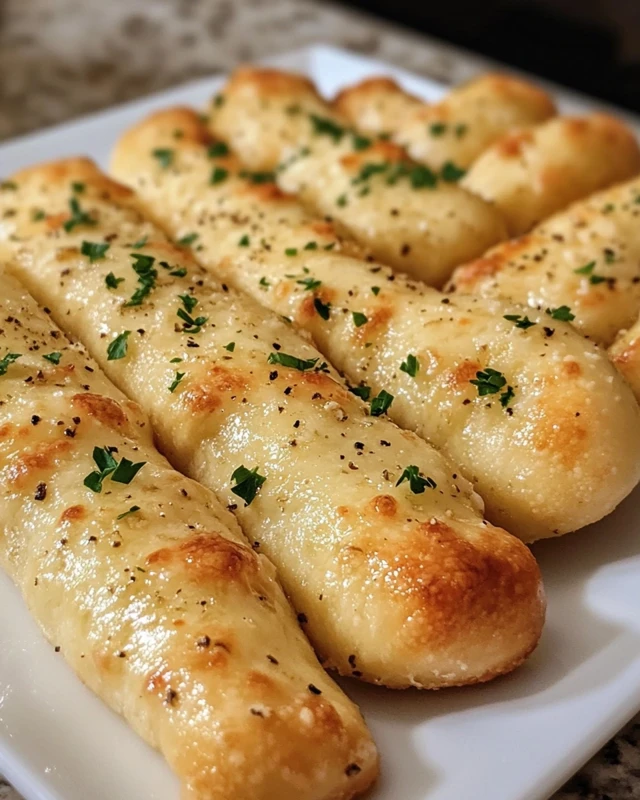
When the breadsticks are done baking, remove them from the oven. Brush any remaining garlic butter over the top for an extra burst of flavor. Finally, sprinkle with chopped fresh parsley for a touch of color and freshness. Your garlic breadsticks are now ready to be served!
These steps are straightforward, making it easy for anyone to create delicious garlic breadsticks at home. Enjoy the process and the delightful aroma that fills your kitchen!

Variation of Garlic Breadsticks Recipe
While the classic garlic breadsticks are delicious on their own, there are many fun variations you can try. These twists add unique flavors and textures, making your garlic breadsticks even more exciting. Let’s explore two popular variations: cheesy garlic breadsticks and herb-infused garlic breadsticks.
Cheesy Garlic Breadsticks Variation
If you love cheese, this variation is perfect for you! To make cheesy garlic breadsticks, simply add your favorite cheese to the dough or sprinkle it on top before baking. Here’s how to do it:
- Choose Your Cheese: Mozzarella is a great choice for its meltiness, but you can also use cheddar or parmesan for a sharper flavor.
- Incorporate Cheese into the Dough: After kneading the dough, fold in 1 cup of shredded cheese. This will give your breadsticks a cheesy flavor throughout.
- Top with More Cheese: Before baking, sprinkle additional cheese on top of the breadsticks along with the garlic butter mixture. This will create a delicious cheesy crust.
Once baked, you’ll have gooey, cheesy garlic breadsticks that are sure to be a hit at your table!
Herb-Infused Garlic Breadsticks Variation
For those who enjoy a burst of herbal flavor, the herb-infused garlic breadsticks variation is a fantastic option. By adding fresh or dried herbs, you can elevate the taste of your breadsticks. Here’s how to make them:
- Choose Your Herbs: Fresh herbs like rosemary, thyme, or chives work wonderfully. You can also use dried herbs if fresh ones aren’t available.
- Add Herbs to the Dough: Mix 1-2 tablespoons of finely chopped fresh herbs or 1 teaspoon of dried herbs into the flour mixture before adding the yeast. This will infuse the dough with flavor.
- Herb Butter Topping: For the garlic butter topping, mix in additional herbs along with the garlic. This will enhance the aroma and taste of the breadsticks.
These herb-infused garlic breadsticks will not only taste amazing but will also fill your kitchen with a delightful fragrance!
Feel free to experiment with these variations or create your own. The possibilities are endless, and each version of garlic breadsticks can bring something special to your meal!
Cooking Note for Garlic Breadsticks Recipe
When making garlic breadsticks, a few cooking notes can help ensure your breadsticks turn out perfectly every time. These tips will guide you through the process and enhance your baking experience.
First, pay attention to the temperature of your ingredients. Using warm water is crucial for activating the yeast. If the water is too hot, it can kill the yeast, preventing your dough from rising. Aim for a temperature around 110°F, which is warm to the touch but not scalding.
Next, kneading the dough is an essential step. Kneading develops gluten, which gives the breadsticks their chewy texture. If you find the dough too sticky, sprinkle a little more flour on your work surface. However, be careful not to add too much flour, as this can make the breadsticks dense.
Another important note is to allow the dough to rise in a warm, draft-free area. If your kitchen is cool, you can create a warm environment by turning on your oven for a few minutes, then turning it off and placing the dough inside. Cover the bowl with a clean cloth to keep the warmth in.
When shaping the breadsticks, try to keep them uniform in size. This ensures they bake evenly. If you prefer thicker breadsticks, feel free to adjust the size, but remember that baking time may vary.
Lastly, don’t skip the second rise! This step is vital for achieving fluffy breadsticks. Allowing them to rise again after shaping gives them that light and airy texture we all love.
By following these cooking notes, you’ll be well on your way to creating delicious garlic breadsticks that are sure to impress your family and friends!
Serving Suggestions for Garlic Breadsticks Recipe
Garlic breadsticks are not just a side dish; they can enhance your entire meal experience. Their delightful flavor and texture make them a versatile addition to various dishes. Here are some fantastic serving suggestions to elevate your garlic breadsticks!
Pairing with Dips and Sauces
One of the best ways to enjoy garlic breadsticks is by pairing them with delicious dips and sauces. Here are a few ideas:
- Marinara Sauce: This classic tomato-based sauce is a perfect match. The tangy flavor complements the garlic perfectly, making each bite a delight.
- Alfredo Sauce: For a creamy option, try serving your breadsticks with Alfredo sauce. The rich, buttery flavor pairs wonderfully with the garlic.
- Pesto: A fresh basil pesto adds a burst of flavor. The herbal notes enhance the garlic, creating a delicious combination.
- Cheese Dip: Melted cheese dip is another fantastic option. The gooey texture and cheesy flavor make for a comforting treat.
Feel free to get creative! You can mix and match different dips to find your favorite combination. Dipping your garlic breadsticks into these sauces adds an extra layer of flavor that everyone will love.
Serving with Main Dishes
Garlic breadsticks also make a wonderful accompaniment to many main dishes. Here are some ideas for meals that pair beautifully with your garlic breadsticks:
- Pasta Dishes: Whether it’s spaghetti, fettuccine, or lasagna, garlic breadsticks are a classic side. They soak up the sauce and add a delightful crunch.
- Soups: Serve your breadsticks alongside hearty soups like minestrone or tomato basil. They are perfect for dipping and add a satisfying texture.
- Salads: A fresh salad with garlic breadsticks makes for a light yet filling meal. The breadsticks add a nice contrast to the crispness of the salad.
- Grilled Meats: Pair your garlic breadsticks with grilled chicken, steak, or fish. The savory flavors of the meat complement the garlic perfectly.
These serving suggestions will help you create a well-rounded meal that everyone will enjoy. Garlic breadsticks are not just a side; they are a delightful addition that enhances the overall dining experience!
Tips for Perfect Garlic Breadsticks Recipe
Creating the perfect garlic breadsticks is an art that can be mastered with a few helpful tips. By avoiding common mistakes and knowing how to store leftovers, you can ensure that your breadsticks are always a hit. Let’s explore some essential tips for making your garlic breadsticks truly exceptional!
Common Mistakes to Avoid
Even the best cooks can make mistakes. Here are some common pitfalls to watch out for when making garlic breadsticks:
- Using Cold Water: Always use warm water to activate the yeast. Cold water can prevent the yeast from working properly, leading to dense breadsticks.
- Skipping the Kneading: Kneading is crucial for developing gluten. If you skip this step, your breadsticks may turn out flat and tough.
- Not Allowing Enough Rise Time: Be patient! Allowing the dough to rise properly is key to achieving fluffy breadsticks. Don’t rush this step.
- Overbaking: Keep an eye on your breadsticks while they bake. Overbaking can lead to dry, hard breadsticks. Aim for a golden brown color.
- Skipping the Garlic Butter: The garlic butter topping is what makes these breadsticks special. Don’t skip this step; it adds flavor and moisture!
By avoiding these common mistakes, you’ll be well on your way to making perfect garlic breadsticks every time!
Storing Leftover Garlic Breadsticks
If you happen to have leftover garlic breadsticks, storing them properly will help maintain their deliciousness. Here’s how to do it:
- Cool Completely: Allow the breadsticks to cool completely before storing. This prevents moisture buildup, which can make them soggy.
- Wrap Tightly: Wrap the breadsticks in plastic wrap or aluminum foil. This keeps them fresh and prevents them from drying out.
- Store in an Airtight Container: For added protection, place the wrapped breadsticks in an airtight container. This will help maintain their texture.
- Refrigerate or Freeze: You can store them in the refrigerator for up to 3 days. For longer storage, freeze them for up to 3 months. Just make sure to label the container!
- Reheat Before Serving: To enjoy your leftover breadsticks, reheat them in the oven at 350°F (175°C) for about 5-10 minutes. This will restore their warmth and crispiness.
By following these storage tips, you can enjoy your garlic breadsticks even after the meal is over. They make a great snack or side dish for another day!
Breakdown of Time for Garlic Breadsticks Recipe
Understanding the time required for each step in the garlic breadsticks recipe can help you plan your cooking better. Here’s a detailed breakdown of the time involved in making these delicious treats!
Prep Time
The prep time for garlic breadsticks is quite manageable. You’ll spend about 15 minutes gathering your ingredients and preparing the dough. This includes mixing the dry ingredients, activating the yeast, and kneading the dough. It’s a quick and straightforward process that anyone can handle!
Cooking Time
Once your dough has risen, the cooking time is approximately 15 minutes. This includes the time it takes to bake the breadsticks until they are golden brown and delicious. While the breadsticks are baking, you can prepare any dips or main dishes you plan to serve with them!
Total Time
In total, you’ll need about 2 hours to make garlic breadsticks from start to finish. This includes the prep time, the first rise of the dough, the second rise after shaping, and the baking time. While it may seem like a long process, most of this time is hands-off, allowing you to focus on other tasks in the kitchen.
With this breakdown, you can easily fit making garlic breadsticks into your meal planning. They are worth the time and effort, providing a delightful addition to any meal!
Nutritional Information for Garlic Breadsticks Recipe
Understanding the nutritional value of your garlic breadsticks can help you enjoy them guilt-free. These delightful treats not only taste great but also offer some health benefits, especially due to the garlic. Let’s break down the calories and macronutrients, as well as explore the health benefits of garlic.
Calories and Macronutrients
Each serving of garlic breadsticks (1 stick) contains approximately:
- Calories: 120
- Carbohydrates: 20g
- Protein: 3g
- Fat: 4g
- Saturated Fat: 2g
- Fiber: 1g
- Sodium: 200mg
These values can vary based on the specific ingredients used and portion sizes. However, garlic breadsticks are generally a moderate-calorie option that can fit into a balanced diet. They provide a good source of carbohydrates for energy, along with some protein and healthy fats from the olive oil and butter.
Health Benefits of Garlic
Garlic is not just a flavorful ingredient; it also boasts numerous health benefits. Here are some reasons to love garlic:
- Boosts Immunity: Garlic is known for its immune-boosting properties. It can help your body fight off infections and illnesses.
- Heart Health: Regular consumption of garlic may lower blood pressure and cholesterol levels, promoting heart health.
- Anti-Inflammatory: Garlic contains antioxidants that can reduce inflammation in the body, which is beneficial for overall health.
- Rich in Nutrients: Garlic is low in calories but high in vitamins and minerals, including vitamin C, vitamin B6, and manganese.
Incorporating garlic into your diet, especially through delicious recipes like garlic breadsticks, can enhance your meals while providing health benefits. So, enjoy your garlic breadsticks knowing they are not only tasty but also good for you!
FAQs about Garlic Breadsticks Recipe
Can I make Garlic Breadsticks ahead of time?
Absolutely! You can prepare garlic breadsticks ahead of time, making them a convenient option for busy days. To do this, follow the recipe up to the point of shaping the breadsticks. After shaping, you can cover them with plastic wrap and refrigerate for up to 24 hours. When you’re ready to bake, simply let them sit at room temperature for about 30 minutes before baking. This allows them to rise slightly before going into the oven, ensuring they turn out fluffy and delicious!
How do I store leftover Garlic Breadsticks?
If you have leftover garlic breadsticks, storing them properly is key to keeping them fresh. First, let the breadsticks cool completely. Then, wrap them tightly in plastic wrap or aluminum foil. For added protection, place the wrapped breadsticks in an airtight container. You can store them in the refrigerator for up to 3 days. If you want to keep them longer, consider freezing them. Just make sure to label the container with the date!
Can I freeze Garlic Breadsticks?
Yes, you can freeze garlic breadsticks! Freezing is a great way to preserve their freshness. To freeze, wrap the cooled breadsticks tightly in plastic wrap, then place them in a freezer-safe bag or container. They can be frozen for up to 3 months. When you’re ready to enjoy them, simply remove the desired amount from the freezer and reheat them in the oven at 350°F (175°C) for about 10-15 minutes. This will restore their warmth and crispiness, making them just as delightful as when they were freshly baked!
Conclusion on Garlic Breadsticks Recipe
In conclusion, garlic breadsticks are a delightful addition to any meal. Their warm, buttery flavor combined with the aromatic essence of garlic makes them a favorite among many. Whether you’re serving them alongside pasta, soups, or grilled meats, these breadsticks elevate your dining experience. Plus, they are easy to make, allowing even novice cooks to impress their family and friends.
By following the simple steps outlined in this garlic breadsticks recipe, you can create a batch of delicious breadsticks that are sure to please. Remember to experiment with variations, such as cheesy or herb-infused options, to keep things exciting. With a few tips and tricks, you can avoid common mistakes and ensure your breadsticks turn out perfectly every time.
Don’t forget to pair your garlic breadsticks with tasty dips and sauces, or serve them alongside your favorite main dishes. The versatility of garlic breadsticks makes them a wonderful side for any occasion, from casual weeknight dinners to festive gatherings.
So, gather your ingredients, roll up your sleeves, and get ready to enjoy the delightful aroma of freshly baked garlic breadsticks wafting through your kitchen. With this recipe in hand, you’re well on your way to creating a beloved dish that will have everyone coming back for more!
Garlic Breadsticks
Ingredients
Equipment
Method
- In a small bowl, combine warm water and sugar. Sprinkle yeast over the top and let it sit for 5-10 minutes until frothy.
- In a large mixing bowl, whisk together flour and salt. Once the yeast is frothy, add it to the flour mixture along with olive oil. Mix until a slightly sticky dough forms.
- Transfer the dough to a floured surface and knead for about 5-7 minutes until smooth and elastic. Place in a greased bowl, cover with a cloth, and let rise in a warm place for about 1 hour until doubled in size.
- Punch down the dough, divide it into 12 equal pieces, and roll each piece into a stick about 6-8 inches long. Place on a baking sheet lined with parchment paper.
- In a small bowl, mix melted butter, minced garlic, and dried Italian herbs. Brush this mixture over the shaped breadsticks.
- Let the breadsticks rise for an additional 20-30 minutes. Preheat the oven to 375°F (190°C).
- Bake the breadsticks for 12-15 minutes until golden brown. Remove from the oven and brush with any remaining garlic butter.
- Sprinkle with chopped fresh parsley before serving.