Sugar-Free Protein Pudding Recipe
What is Sugar-Free Protein Pudding?
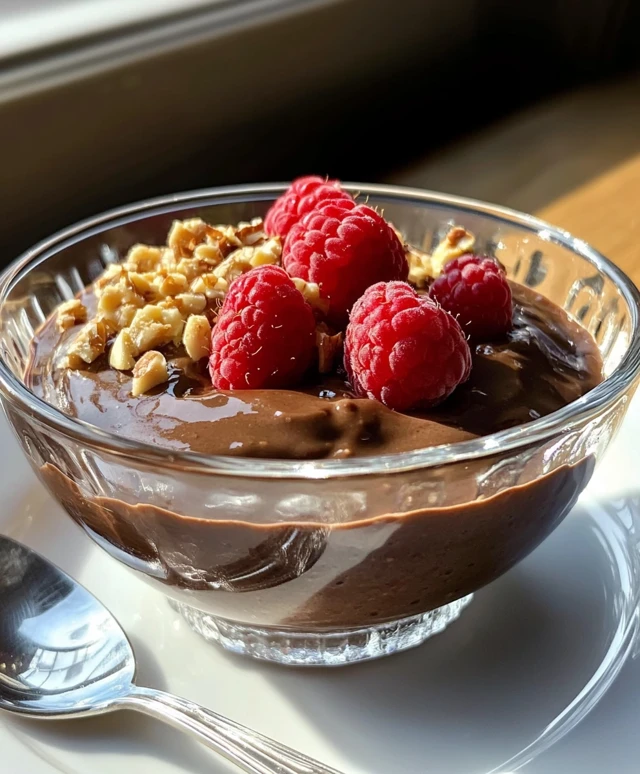
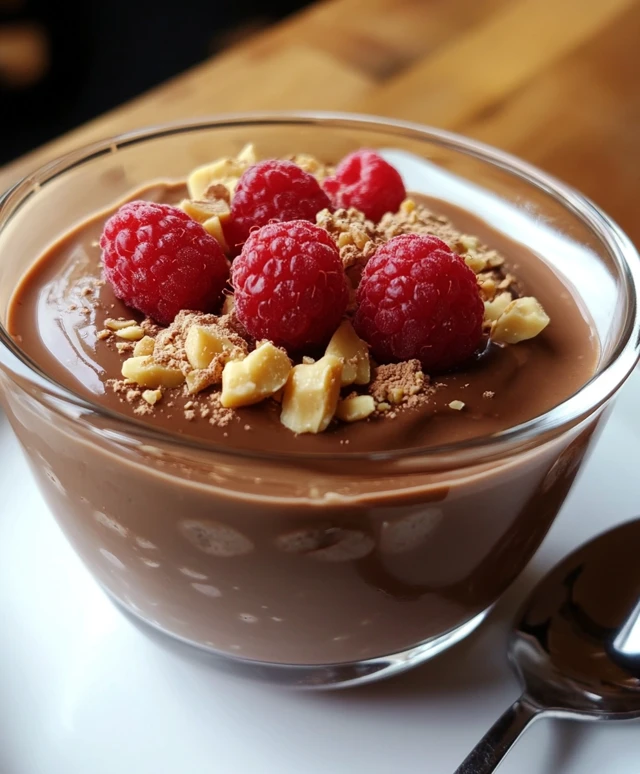
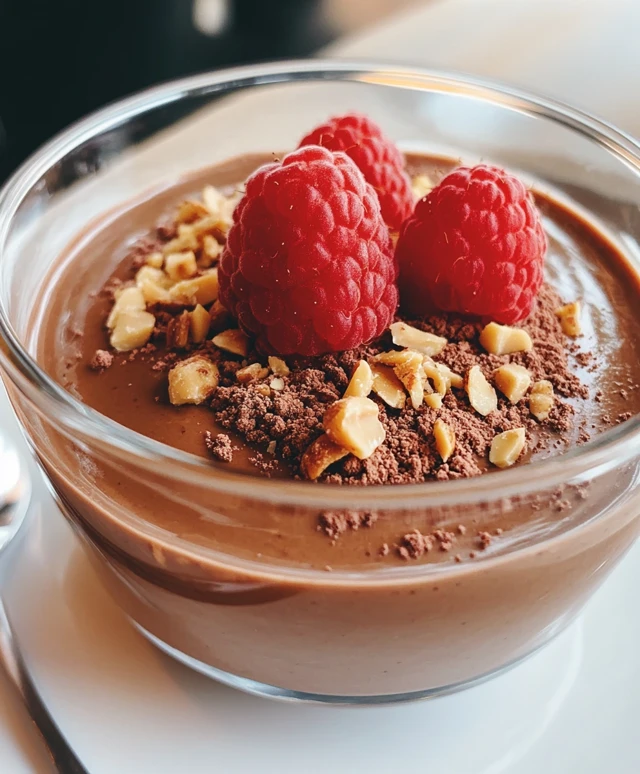
Sugar-Free Protein Pudding is a delightful dessert that combines the rich flavors of chocolate or vanilla with the nutritional benefits of protein. This pudding is made without added sugars, making it a healthier option for those who want to satisfy their sweet tooth without the guilt. It’s creamy, smooth, and can be enjoyed by anyone, whether you’re on a diet or just looking for a tasty treat. With simple ingredients like almond milk, protein powder, and chia seeds, this pudding is not only easy to make but also packed with nutrients.
Benefits of Making Sugar-Free Protein Pudding
There are numerous benefits to making Sugar-Free Protein Pudding at home. First, it’s a fantastic way to increase your protein intake, which is essential for muscle repair and overall health. Additionally, this pudding is low in calories and free from refined sugars, making it a smart choice for those watching their weight. The use of chia seeds adds fiber, which aids digestion and keeps you feeling full longer.
Moreover, preparing this pudding allows you to control the ingredients, ensuring that you avoid any unwanted additives or preservatives. You can customize the flavor to your liking, whether you prefer chocolate, vanilla, or even fruity variations. Lastly, it’s a quick and easy recipe that can be made in just a few minutes, making it perfect for busy lifestyles.
Ingredients for Sugar-Free Protein Pudding Recipe
To create your delicious Sugar-Free Protein Pudding, you’ll need a few simple ingredients. Each component plays a vital role in achieving the perfect texture and flavor. Here’s what you’ll need:
- 2 cups unsweetened almond milk: This serves as the base of your pudding, providing a creamy texture without added sugars.
- 1/2 cup protein powder: Choose either vanilla or chocolate flavor to enhance the taste. This ingredient boosts the protein content significantly.
- 1/4 cup unsweetened cocoa powder: If you opt for chocolate protein powder, you can skip this. Otherwise, it adds a rich chocolate flavor.
- 1 tablespoon chia seeds: These tiny seeds are packed with nutrients and help thicken the pudding while adding fiber.
- 1 teaspoon vanilla extract: This adds a lovely aroma and flavor to your pudding, making it even more enjoyable.
- 1/4 teaspoon salt: A pinch of salt enhances the overall flavor, balancing the sweetness.
- Sweetener of choice: Use stevia, erythritol, or any other sweetener you prefer. Adjust the amount based on your taste.
With these ingredients, you’re well on your way to making a delightful and healthy dessert. Each item contributes to the overall taste and texture, ensuring that your Sugar-Free Protein Pudding is both satisfying and nutritious. Now that you have everything ready, let’s move on to the preparation steps!
Step-by-Step Preparation of Sugar-Free Protein Pudding Recipe
Step 1: Gather Your Ingredients
Before you start making your Sugar-Free Protein Pudding, it’s essential to gather all your ingredients. This will make the process smoother and more enjoyable. Make sure you have:
- Unsweetened almond milk
- Protein powder (vanilla or chocolate)
- Unsweetened cocoa powder (if needed)
- Chia seeds
- Vanilla extract
- Salt
- Your choice of sweetener
Having everything ready will help you stay organized and focused. Plus, it’s always nice to see all your ingredients laid out before you start cooking!
Step 2: Mix the Dry Ingredients
Now that you have your ingredients ready, it’s time to mix the dry ones. In a mixing bowl, combine the protein powder, unsweetened cocoa powder (if you’re using it), chia seeds, and salt. Whisk these ingredients together until they are well blended. This step is crucial as it ensures that the flavors are evenly distributed throughout the pudding.
Step 3: Combine Wet Ingredients
Next, it’s time to add the wet ingredients. Gradually pour in the unsweetened almond milk and vanilla extract into the bowl with the dry mixture. As you pour, whisk continuously. This will help prevent any lumps from forming, resulting in a smooth and creamy pudding. Keep whisking until the mixture is completely combined and has a velvety texture.
Step 4: Blend the Mixture
After combining the wet and dry ingredients, it’s time to sweeten your pudding. Add your preferred sweetener to the mixture. Remember, you can adjust the amount based on your taste preference. Whisk again to ensure the sweetener is fully incorporated. This step is where you can make the pudding truly your own!
Step 5: Chill the Pudding
Once your mixture is well blended, it’s time to chill. Transfer the pudding mixture into individual serving cups or a large bowl. Cover it with plastic wrap or a lid to keep it fresh. Place it in the refrigerator for at least 2 hours. This chilling time allows the pudding to thicken to your desired consistency. The longer it chills, the creamier it becomes!
After the chilling period, your Sugar-Free Protein Pudding will be ready to enjoy. Just give it a good stir before serving, and you’re all set!
Variations of Sugar-Free Protein Pudding Recipe
Flavor Variations
One of the best things about the Sugar-Free Protein Pudding is its versatility. You can easily switch up the flavors to keep things exciting! Here are some delicious flavor variations to try:
- Chocolate Mint: Add a few drops of peppermint extract to your chocolate pudding for a refreshing twist.
- Vanilla Almond: Use almond extract instead of vanilla for a nutty flavor that pairs beautifully with the pudding.
- Berry Bliss: Blend in some pureed strawberries or blueberries for a fruity flavor. You can also top the pudding with fresh berries.
- Coconut Delight: Mix in unsweetened shredded coconut for a tropical flair. This adds texture and a hint of sweetness.
- Mocha Madness: Combine chocolate protein powder with a teaspoon of instant coffee for a rich mocha flavor.
Feel free to experiment with different extracts and mix-ins. The possibilities are endless, and you can create a new favorite flavor every time!
Ingredient Substitutions
If you’re missing an ingredient or want to make adjustments, don’t worry! Here are some easy substitutions you can make:
- Milk Alternatives: If you don’t have almond milk, you can use coconut milk, soy milk, or oat milk. Each will give a unique flavor and texture.
- Protein Powder: You can use any flavor of protein powder you like. Just remember that flavors will change the overall taste of the pudding.
- Chia Seeds: If you don’t have chia seeds, you can substitute with ground flaxseeds. They also help thicken the pudding.
- Sweeteners: If you prefer natural sweeteners, honey or maple syrup can be used. Just keep in mind that these options contain sugar.
- Cocoa Powder: For a lighter flavor, you can use carob powder instead of cocoa powder.
These substitutions allow you to customize your Sugar-Free Protein Pudding to fit your dietary needs and preferences. Enjoy creating your perfect pudding!
Cooking Note for Sugar-Free Protein Pudding Recipe
When making your Sugar-Free Protein Pudding, there are a few cooking notes to keep in mind. These tips will help you achieve the best results and ensure your pudding turns out perfectly every time.
First, always use high-quality protein powder. The flavor and texture of your pudding depend significantly on the protein powder you choose. Opt for a brand that you enjoy, as this will enhance the overall taste of your dessert.
Next, be mindful of the consistency. If you prefer a thicker pudding, you can add a bit more chia seeds. They absorb liquid and help thicken the mixture. On the other hand, if you find your pudding too thick, simply stir in a little more almond milk until you reach your desired consistency.
Additionally, remember to whisk thoroughly. This step is crucial for preventing lumps. A smooth pudding is much more enjoyable to eat. If you notice any lumps after mixing, you can use a blender to achieve a silky texture.
Lastly, don’t rush the chilling process. Allowing the pudding to chill for at least two hours is essential for it to set properly. If you can wait longer, the flavors will meld beautifully, making your dessert even more delicious.
By following these cooking notes, you’ll create a delightful Sugar-Free Protein Pudding that’s not only tasty but also a healthy treat. Enjoy the process and have fun experimenting with flavors and textures!
Serving Suggestions for Sugar-Free Protein Pudding Recipe
Once your Sugar-Free Protein Pudding is chilled and ready to serve, the fun really begins! There are countless ways to enjoy this delicious treat. Here are some serving suggestions to elevate your pudding experience:
- Fresh Fruit Toppings: Add a burst of flavor by topping your pudding with fresh fruits. Berries like strawberries, blueberries, or raspberries not only enhance the taste but also add a pop of color.
- Nutty Crunch: Sprinkle some chopped nuts, such as almonds, walnuts, or pecans, on top for a delightful crunch. This adds healthy fats and makes your pudding even more satisfying.
- Whipped Cream: For a touch of indulgence, add a dollop of sugar-free whipped cream. This creamy addition complements the pudding perfectly and makes it feel like a special dessert.
- Chocolate Drizzle: Drizzle some sugar-free chocolate syrup over the top for an extra chocolatey treat. This simple addition can take your pudding to the next level!
- Granola Layer: Create a parfait by layering your pudding with granola. This adds texture and makes for a filling breakfast or snack option.
- Spices and Extracts: Experiment with spices like cinnamon or nutmeg sprinkled on top. A dash of these spices can enhance the flavor profile and add warmth to your dessert.
Feel free to mix and match these suggestions to create your perfect serving. The versatility of Sugar-Free Protein Pudding means you can enjoy it in many ways, whether as a snack, dessert, or even breakfast. Get creative and have fun with your toppings!
Tips for Perfecting Your Sugar-Free Protein Pudding Recipe
Creating the perfect Sugar-Free Protein Pudding is all about attention to detail. With a few helpful tips, you can elevate your pudding to new heights. Here are some suggestions to ensure your pudding turns out delicious every time:
First, always measure your ingredients accurately. Using the right amounts of each ingredient is crucial for achieving the desired texture and flavor. A kitchen scale can be handy for precise measurements, especially for the protein powder and cocoa powder.
Next, consider the temperature of your almond milk. Using cold almond milk can help the pudding thicken faster. If you prefer, you can warm it slightly before mixing, but be sure it’s not too hot, as this can affect the chia seeds’ ability to thicken the pudding.
Another tip is to let the pudding sit for a few minutes after mixing before refrigerating. This allows the chia seeds to absorb some liquid and start the thickening process. You’ll notice a creamier texture once it’s fully chilled.
Don’t forget to taste your mixture before chilling. This is your chance to adjust the sweetness or flavor. If you feel it needs more sweetness, add a little more sweetener. If you want a stronger flavor, consider adding a splash more vanilla extract or cocoa powder.
Lastly, experiment with different toppings and mix-ins. Adding a variety of textures and flavors can make your pudding even more enjoyable. Try incorporating different fruits, nuts, or even a sprinkle of granola for added crunch.
By following these tips, you’ll be well on your way to mastering the art of Sugar-Free Protein Pudding. Enjoy the process and savor the delicious results!
Breakdown of Time for Sugar-Free Protein Pudding Recipe
Prep Time
The prep time for your Sugar-Free Protein Pudding is quick and easy! You’ll need about 10 minutes to gather your ingredients and mix everything together. This includes measuring out the almond milk, protein powder, and other components. It’s a simple process that anyone can manage, even on a busy day. So, in just a few minutes, you can have your pudding mixture ready to chill!
Chill Time
After mixing, the pudding needs some time to chill. You should refrigerate it for at least 2 hours. This chilling period is crucial as it allows the pudding to thicken and develop its creamy texture. If you can wait longer, that’s even better! The flavors will meld beautifully, making your dessert even more delicious. So, while it takes a bit of patience, the wait is definitely worth it!
Total Time
In total, you’re looking at about 2 hours and 10 minutes from start to finish. This includes the 10 minutes of prep time and the 2 hours of chill time. With such a short active cooking time, you can easily fit this recipe into your day. Plus, you’ll have a healthy and tasty treat waiting for you when you’re ready to enjoy it!
Nutritional Information for Sugar-Free Protein Pudding Recipe
Calories
When it comes to enjoying a dessert, calories are often a concern. Fortunately, the Sugar-Free Protein Pudding is a guilt-free option! Each serving contains approximately 120 calories. This makes it a great choice for those looking to indulge without overdoing it. The low-calorie count allows you to enjoy this treat while staying within your daily limits.
Protein Content
One of the standout features of this pudding is its high protein content. Each serving provides around 15 grams of protein, depending on the protein powder used. This makes it an excellent post-workout snack or a filling dessert. The protein helps with muscle recovery and keeps you feeling satisfied longer. So, not only is it delicious, but it also supports your health goals!
Sodium Levels
Keeping an eye on sodium intake is important for overall health. The Sugar-Free Protein Pudding is low in sodium, with each serving containing about 150 milligrams. This is a reasonable amount, especially considering the creamy and flavorful nature of the pudding. It’s a great option for those who are watching their sodium levels while still wanting to enjoy a tasty dessert.
Overall, the nutritional profile of the Sugar-Free Protein Pudding makes it a smart choice for anyone looking to enjoy a healthy treat. With low calories, high protein, and minimal sodium, you can feel good about indulging in this delicious dessert!
FAQs about Sugar-Free Protein Pudding Recipe
Can I use different protein powders in the Sugar-Free Protein Pudding Recipe?
Absolutely! You can use various protein powders in your Sugar-Free Protein Pudding. Whether you prefer whey, casein, or plant-based options like pea or hemp protein, feel free to experiment. Just keep in mind that different protein powders may alter the flavor and texture slightly. For the best results, choose a protein powder that you enjoy, as it will enhance the overall taste of your pudding.
How long can I store Sugar-Free Protein Pudding?
Your Sugar-Free Protein Pudding can be stored in the refrigerator for up to 5 days. Make sure to keep it in an airtight container to maintain freshness. If you notice any changes in texture or smell, it’s best to discard it. This pudding is perfect for meal prep, allowing you to enjoy a healthy dessert throughout the week!
Is Sugar-Free Protein Pudding suitable for meal prep?
Yes, Sugar-Free Protein Pudding is an excellent option for meal prep! It’s easy to make in batches and can be portioned into individual servings. Just prepare the pudding, chill it, and store it in the fridge. This way, you’ll have a quick and nutritious snack or dessert ready whenever you need it. It’s a great way to stay on track with your healthy eating goals!
Can I make Sugar-Free Protein Pudding vegan?
Yes, you can easily make Sugar-Free Protein Pudding vegan! Simply use plant-based protein powder and substitute almond milk with any other non-dairy milk, such as coconut, soy, or oat milk. Additionally, ensure that your sweetener is vegan-friendly. With these adjustments, you’ll have a delicious vegan dessert that everyone can enjoy!
Conclusion on Sugar-Free Protein Pudding Recipe
In conclusion, the Sugar-Free Protein Pudding is a fantastic dessert that combines health and taste in one delightful treat. With its simple ingredients and easy preparation, it’s perfect for anyone looking to indulge without the guilt. Whether you’re a fitness enthusiast or just someone who enjoys a sweet snack, this pudding fits the bill.
Not only is it low in calories, but it also packs a punch with its high protein content. This makes it an excellent choice for post-workout recovery or a satisfying dessert after a meal. Plus, the versatility of flavors and toppings allows you to customize it to your liking, ensuring that you never get bored.
By following the tips and variations provided, you can create a Sugar-Free Protein Pudding that suits your taste and dietary needs. Remember, the key to a great pudding lies in the quality of your ingredients and the love you put into making it. So, gather your ingredients, get creative, and enjoy this healthy treat!
With its creamy texture and rich flavors, the Sugar-Free Protein Pudding is sure to become a favorite in your household. So why wait? Start making your own today and savor the deliciousness of this guilt-free dessert!
Sugar-Free Protein Pudding
Ingredients
Equipment
Method
-
Gather all your ingredients to ensure a smooth preparation process.
-
In a mixing bowl, combine the protein powder, cocoa powder (if using), chia seeds, and salt. Whisk until well blended.
-
Gradually pour in the almond milk and vanilla extract while whisking continuously to prevent lumps.
-
Add your preferred sweetener to the mixture and whisk again until fully incorporated.
-
Transfer the pudding mixture into individual serving cups or a large bowl. Cover with plastic wrap or a lid.
-
Refrigerate for at least 2 hours to allow the pudding to thicken.
-
Stir the pudding before serving and enjoy your healthy dessert!